Page 2 of 3 FirstFirst 123 LastLast
Results 16 to 30 of 41

Thread: Humidor Build

  1. #16
    Join Date
    Mar 2015
    Location
    South central Kansas
    Posts
    290
    Thanks for the post. A nice humidor is on my long list at the moment. Someday!

    Here's a question for any of you humidor experts, though. Why even use a veneer? Why not just make the casework out of whatever wood you like, line it with cedar, and call it good?

    The Diamond Crown humidor I currently have is made of Spanish cedar with a rosewood veneer. Perhaps the use of Spanish cedar for the casework rather that just a lining is supposed to give better performance but I don't know. And rosewood is too expensive to use for the casework I imagine. But if you intended to use walnut or something relatively affordable and accessible then wouldn't the humidor be far more durable and easier to build if you just made all the casework out of your chosen wood and no veneer?
    Last edited by Matthew Hutchinson477; 04-02-2016 at 7:56 PM.

  2. #17
    Join Date
    Aug 2013
    Location
    Princeton, NJ
    Posts
    7,295
    Blog Entries
    7
    Excellent question! Now there is a good reason for using a veneer on the top. When you lock in wood (surrounded by long grain on all sides) the wood cannot expand and contract without something giving (either the case will break or the panel), even with woods that behave well that is a bad practice. A humidor is one situation where you want the box to be sealed, so having a box without floating panels is going to offer a better seal than one with floating panels.

    Spanish cedar is a porous wood that is one of the reasons why it works so well to line a humidor, however being a porous wood it will have air passing through it easier than a tight grained wood with a finish. You will often see humidor manufacturers using spanish cedar for the case as well, but almost everyone I have seen has been veneered on the outside of that case and typically lacquered as well.

    So the spanish cedar is available to do what it does best, and it does so while contained inside of a more tightly sealed box.

    Manufactured humidors are often made with veneers, one of the reasons is reliability. Veneer over stable substrate is a whole lot more consistently reliable than solid wood, if you are making your humidors in France and shipping them anywhere and everywhere than they need to be reliable. They're also working with tight tolerances and MDF behaves better than solid woods. The next reason is that they can acquire very high quality wood in veneer form without hinderance, a top humidor maker is turning out hundreds and thousands of humidors, offering a solid macassar ebony or indian rosewood humidor would be nearly impossible and incredibly expensive., without much if anything gained as far as the consumer is concerned.

    To manufacture a humidor like the one being built here, with joinery and what will be a French polish, it would retail at the top end of the range in order to be profitable.
    Last edited by Brian Holcombe; 04-03-2016 at 8:23 AM.
    Bumbling forward into the unknown.

  3. #18
    Join Date
    Jan 2007
    Location
    West Simsbury, CT
    Posts
    384
    Hi Brian, beautiful, clean work, thanks for sharing all this. Curious, what is that small ryoba that you are using?

    Thanks again.
    Kevin

  4. #19
    Join Date
    Aug 2013
    Location
    Princeton, NJ
    Posts
    7,295
    Blog Entries
    7
    Thanks Kevin! The ryoba is from Mitsukawa, it's the replaceable blade shirogane model.
    Bumbling forward into the unknown.

  5. #20
    Join Date
    Jan 2007
    Location
    West Simsbury, CT
    Posts
    384
    Quote Originally Posted by Brian Holcombe View Post
    Thanks Kevin! The ryoba is from Mitsukawa, it's the replaceable blade shirogane model.
    Thanks, Brian, after I asked I saw you had a comment in your blog post. I appreciate you getting back, looks like a nice size saw to try.

    Keep up your great work!

    Kevin

  6. #21
    Join Date
    Aug 2013
    Location
    Princeton, NJ
    Posts
    7,295
    Blog Entries
    7
    Anytime! Btw I bought that saw in three sizes, 195, 240, 295 to cover all of the joinery I do.
    Bumbling forward into the unknown.

  7. #22
    Join Date
    Jan 2007
    Location
    West Simsbury, CT
    Posts
    384
    Well, I just ordered the 195 size...looking forward to working with it...thanks again, Brian!

  8. #23
    Join Date
    Jan 2013
    Location
    Jasper, GA
    Posts
    34
    Brian,

    I noticed on your blog photos that there were shavings on the carpet. I was appalled, but will assume your iRobot vac was taking a break. I don't show photos of your shop to the LOML as she might expect me to sweep mine more often.

    Your work is inspiring! I enjoy the blog and have learned much from your posts.

    Thanks,

    Wayne

  9. #24
    Join Date
    Aug 2013
    Location
    Princeton, NJ
    Posts
    7,295
    Blog Entries
    7
    Kevin, that's probably the best one to have for a majority of small furniture/box work, it'll do well for you, enjoy it!

    Hah, thanks Wayne! Glad that you are enjoying!
    Bumbling forward into the unknown.

  10. #25
    Join Date
    Mar 2014
    Location
    Peters Creek, Alaska
    Posts
    412
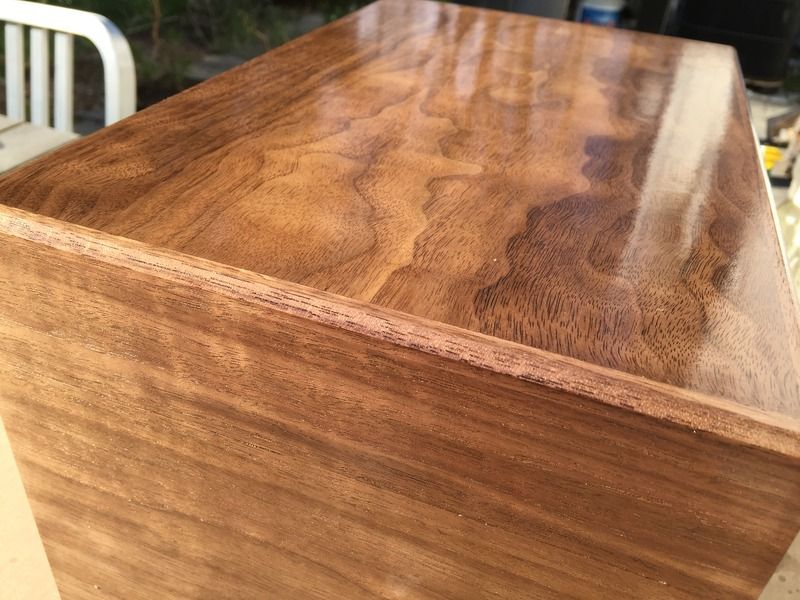
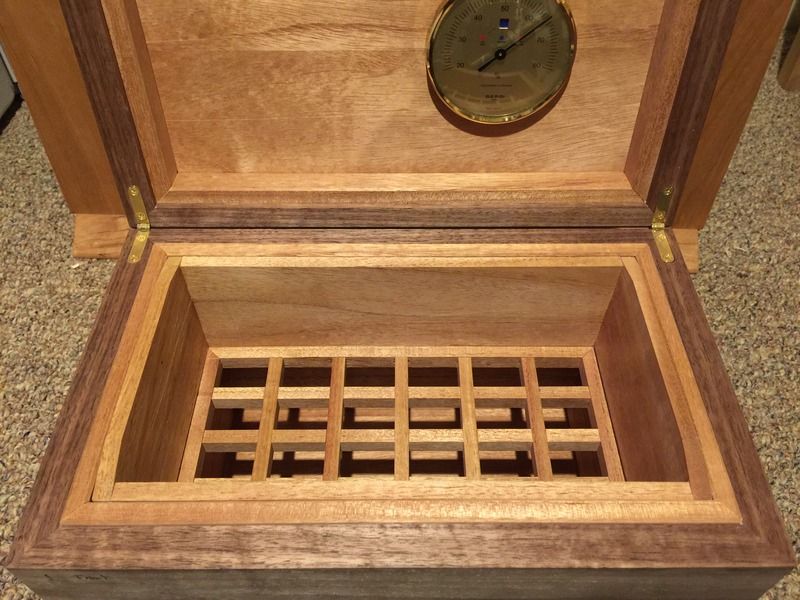
    That is lovely work indeed, Brian. At first, it looked a bit deep for my preference but then thought if there were a ledge to hold the first tray off of the bottom, the space would accommodate the humidification beads that I use.

    I've had a hand full of nice Davidoffs but they never really clicked for me. I'm a fan of Padron, Fuente, LFD, and several others.
    Brett
    Peters Creek, Alaska

    Man is a tool-using animal. Nowhere do you find him without tools; without tools he is nothing, with tools he is all. — Thomas Carlyle (1795-1881)

  11. #26
    Join Date
    Aug 2013
    Location
    Princeton, NJ
    Posts
    7,295
    Blog Entries
    7
    Thanks Brett! Sometimes I kick myself with off-the-cuff dimensions. I typically work with golden ratio, so I settled on these dimensions wanting to take full advantage of the stock I had on hand. So far, with two rows available and a space between them it's starting to look like it will work out well.

    I'm probably on the opposite side of the spectrum, I typically like mild-medium cigars, but break from that occasionally.
    Bumbling forward into the unknown.

  12. #27
    Join Date
    Aug 2013
    Location
    Princeton, NJ
    Posts
    7,295
    Blog Entries
    7
    I'll have the next post ready this weekend, but here is a teaser

    Bumbling forward into the unknown.

  13. #28
    Join Date
    Aug 2013
    Location
    Princeton, NJ
    Posts
    7,295
    Blog Entries
    7
    The continuation of my humidor build is now ready. In this post I am completing the interior woodwork which includes the tray that divides the bottom into two sections. Hope you will read and comment.

    https://brianholcombewoodworkerblog....terior-part-2/


    Bumbling forward into the unknown.

  14. #29
    Join Date
    Aug 2010
    Location
    USA
    Posts
    5,582
    Very very nice work Brian. I find your detail work truly fascinating. You must have great eyesight! Me, I wish I could see my own work as clearly as I can see the detail in yours. I have a question for you: Where did you learn how to do all this? I suspect you went to a school for example or otherwise learned from a master. Its very inspiring but beyond my talents.

  15. #30
    Join Date
    Aug 2013
    Location
    Princeton, NJ
    Posts
    7,295
    Blog Entries
    7
    Thanks Pat! I have no formal training, I just self study and I'm lucky enough to be able to bend the ears of many willing teachers.

    I was slso lucky enough to be taught how to approach new challenges and unfamiliar territory by a machinist who I worked for in college.
    Bumbling forward into the unknown.

Posting Permissions

  • You may not post new threads
  • You may not post replies
  • You may not post attachments
  • You may not edit your posts
  •