Page 1 of 2 12 LastLast
Results 1 to 15 of 20

Thread: Sole Flattening Report to the Teachers

  1. #1
    Join Date
    Sep 2007
    Location
    Greenville, SC
    Posts
    136

    Sole Flattening Report to the Teachers

    No 4 sole.jpg

    Further progress towards actually using these planes.

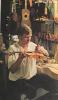
    This is my attempt at flattening this Stanley Bailey No 4 sole. Flattened on a piece of glass with 150 grit cloth belt. I marked out the problem areas. Am I finished? More to do? BTW the sides are nice and square. This may be my shooting board plane.

    I really appreciate the opportunity to ask experienced craftsman.

    Thanks for the help.

    Dan

  2. #2
    Join Date
    Feb 2004
    Location
    Perth, Australia
    Posts
    9,491
    Hi Dan

    The section to the side of the toe is OK to leave. However the section at the heel needs ideally to be coplanar with the mouth and toe (- otherwise you have effectively a shorter plane). Of course, you could try it as is and see how it works as a smoother - the important area around the mouth and toe is done. As a shooter, you have done enough.

    Regards from Perth

    Derek

  3. #3
    Join Date
    Jan 2009
    Location
    Williamsburg,Va.
    Posts
    12,402
    It appears that you have actually flattened the outside edges of the rear end of the plane,leaving a dip in the center. If this is true,I don't see why the plane would not function as a full length plane. If you are planing the EDGES of a board,of course,then you would really need to keep working on the sole until all the low areas are sanded away.

    The closer you get to 100%,the harder the going is,because you are having to remove so much more metal.

  4. #4
    Join Date
    Sep 2007
    Location
    Greenville, SC
    Posts
    136
    Yes, the heel outside edges are ok. I'm also working on a No 5 so that may be my go to for edges.

  5. #5
    Dont put too much trust in the pattern of shiny metal left behind by the sandpaper. Use a straight edge to check it against a bright light, lengthwise, across and diagonals. That said, the actual flatness required for a plane to work is not too extreme, just that it not be concave.

  6. #6
    Could you post a picture of your flat glass setup?

    Your posting this thread motivates me to work on converting my antique shop Corsair #4 into a scrub plain. The sole of it needs flatening like your doing now.

    THanks!

  7. #7
    Join Date
    Jan 2013
    Location
    Temecula,CA
    Posts
    442
    Ethan, I thought I'd offer you a little advice about your #4 that you plan to convert to a scrub. If thicknessing is all you have planed for it, it need only look flat. I wouldn't even put it to sandpaper. If you have other planes that you might want to rehab, I recommend calling a local glass shop and asking for a piece of float glass. I paid 15 bucks or so.

  8. #8
    Join Date
    Dec 2015
    Location
    Dublin, CA
    Posts
    4,119
    Quote Originally Posted by bridger berdel View Post
    Dont put too much trust in the pattern of shiny metal left behind by the sandpaper. Use a straight edge to check it against a bright light, lengthwise, across and diagonals. That said, the actual flatness required for a plane to work is not too extreme, just that it not be concave.
    Putting numbers to this: #150 corresponds to a nominal abrasive particle size of 100 microns, with a fair number up to 200 microns or so depending on the grading system (FEPA, CAMI, and "micron" all have different tolerances). 200 microns is about 5/1000", so you could have pretty significant flatness variation and still "see scratches" even if the paper is perfectly flat.

    As Bridger says, don't trust the scratch pattern. Use a good straightedge.

    With experience you can learn to tell when one area is being abraded less than others from the scratch pattern alone, for example by periodically changing lapping direction and seeing how long it takes to work out the scratches from the previous direction.

  9. #9
    Join Date
    Jun 2010
    Location
    twomiles from the "peak of Ohio
    Posts
    12,165
    Another, easier way....take a black sharpie, make a series of lines across the sole. Sand until they are gone.

    As long as the plane is assembled, with the iron retracted back up out of the way. You want the body of the plane to be in the same tension as it will be in use.

    IF the vise allows you to hold a fully assembled plane, with the sole uppermost, you can use the longest, widest, straightest mill file to "sand" the entire sole.

  10. #10
    Join Date
    Dec 2015
    Location
    Dublin, CA
    Posts
    4,119
    Quote Originally Posted by steven c newman View Post
    Another, easier way....take a black sharpie, make a series of lines across the sole. Sand until they are gone.
    As Warren pointed out in another thread a week or so back, the "Sharpie method" is fallible. Grain variation can cause most of the sharpie to be abraded away before the surface is fully true, and of course it doesn't work at all if your sandpaper isn't completely flat.

    If you want to know if something is flat then directly measure its flatness, period. Indirect measures such as scratch patterns and sharpies all have edge cases where they fail.

  11. #11
    Join Date
    Sep 2007
    Location
    Greenville, SC
    Posts
    136

    Reply re glass setup

    Ethan, here you go. Cost $15, 12 X 19 X 3/8 glass. Cloth backed sanding belt.
    DanIMG_2386.jpg

  12. #12
    Quote Originally Posted by Mike Cherry View Post
    If you have other planes that you might want to rehab, I recommend calling a local glass shop and asking for a piece of float glass. I paid 15 bucks or so.
    I suggest bringing a straight edge. I got a 1/4 inch thick piece of what was said to be "float glass" from a local shop, and it was only after struggling with a few chisel backs that I figured out that neither side was anywhere near flat. My wild guess is that the woman I dealt with had no idea what float glass was.

  13. #13
    Join Date
    Dec 2015
    Location
    Dublin, CA
    Posts
    4,119
    Quote Originally Posted by Lenore Epstein View Post
    I suggest bringing a straight edge. I got a 1/4 inch thick piece of what was said to be "float glass" from a local shop, and it was only after struggling with a few chisel backs that I figured out that neither side was anywhere near flat. My wild guess is that the woman I dealt with had no idea what float glass was.
    Most likely they sold you *tempered* float glass. If you don't specify a lot of places will assume you want it tempered, and that tends to warp it a bit esp in thinner pieces.

    My understanding is that most sheet glass on the market these days is in fact float glass.
    Last edited by Patrick Chase; 04-28-2016 at 10:57 PM.

  14. #14
    Join Date
    May 2007
    Location
    Newburgh, Indiana
    Posts
    918
    Quote Originally Posted by Patrick Chase View Post
    Most likely they sold you *tempered* float glass. If you don't specify a lot of places will assume you want it tempered, and that tends to warp it a bit esp in thinner pieces.

    My understanding is that most sheet glass on the market these days is in fact float glass.
    Patrick, You are correct. I was in the glass tempering industry for over 30 years.
    During the tempering process, the glass is heated to 1200 to 1400 degrees, which is visually red hot. In this state it is quite flexible and bendable, but not yet liquid, so it can deform during the rapid cooling process, especially if the cooling air is not distributed on both sides of the glass equally. So it can deform during tempering. Untempered float glass is your best bet, since it is drawn out of the tank onto a bath of molten tin. Tin is heavier than glass, so the glass literally floats on top of the tin creating a very even, flat and smooth sheet of glass.

    Sheet glass however, is vertically drawn out of a tank and usually has visual inclusions and is not nearly as flat as float glass. I don't think sheet glass is made anymore, with the last plant, PPG, in Mt. Zion, Illinois, closing their sheet glass tanks a decade or so ago.

    Probably more than you wanted or needed to know, but I thought I would chime in. Bob
    Life's too short to use old sandpaper.

  15. #15
    Thanks, Patrick & Bob, my mystery is finally solved. Timely, too, as I need another piece of something to play with flattening methods (the approx. 6x22 stone I have is going to be servicing plane soles for a while yet), and it'll be easier to go to a glass shop knowing exactly what I'm looking for than to spend an hour digging through scraps of counter and tile.

Posting Permissions

  • You may not post new threads
  • You may not post replies
  • You may not post attachments
  • You may not edit your posts
  •