Page 2 of 6 FirstFirst 123456 LastLast
Results 16 to 30 of 85

Thread: White Oak Trestle Desk Journal

  1. #16
    Join Date
    Jan 2013
    Location
    Temecula,CA
    Posts
    442

    Update #2 We have a foot!

    I'd like to start this update by saying that I appreciate the feedback from the community here. I have put off posting my work here for several reasons (mostly laziness) but reading the comments and such have really motivated me to get in the shop and get some work done. So if any of you are out there struggling with the decision to post a build, do it!

    So anyway, on to the update. As promised, I havent got a lot of time to work on this bad boy but I did finish the first foot. I wont bore you guys with photos of the second foot in progress, but I will say that after gaining some wisdom from the first foot and having a better idea of how this wood works it will be done in half the time. As a result, I am nearing completion on the second foot. This has pretty much been my woodworking journey up to this point. I try something new, and it goes faster and better each subsequent time (usually).

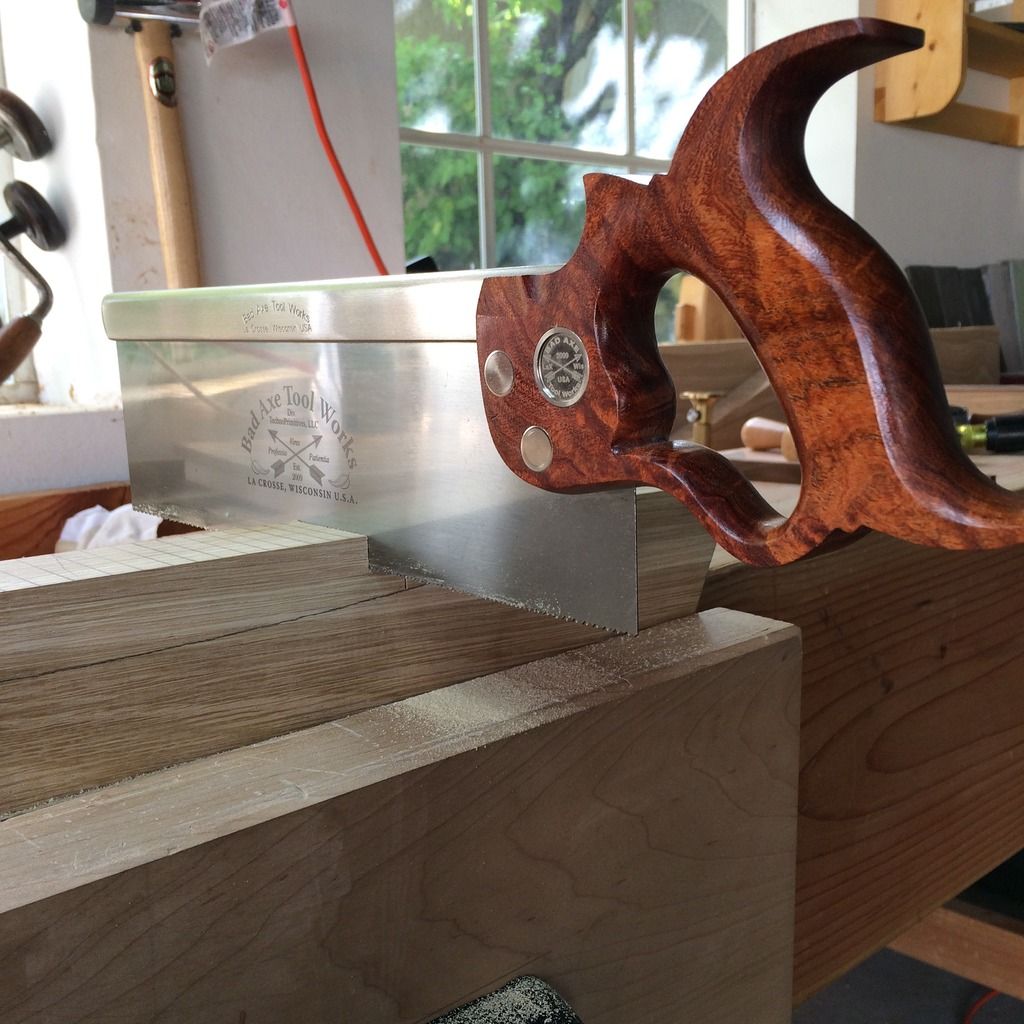
    Started out by getting everything to size. This is the 16 inch tenon saw that I promised Id show earlier to Zuye. Love this saw man, absolutely awesome.


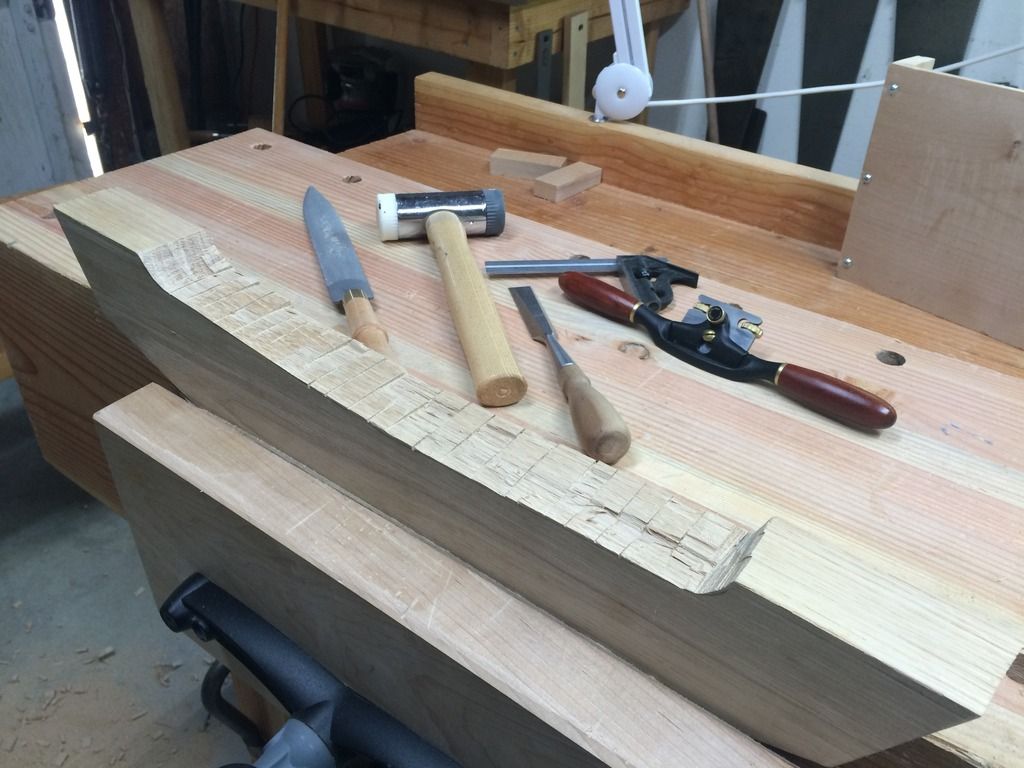
    The tools used to shape the arch in the foot. I used my chisel to split the waste out carefully. On the second foot, I will probably try Prashun's recommendation of using a screwdriver to remove the waste. Ill probably cut the kerfs closer together to make it easier.


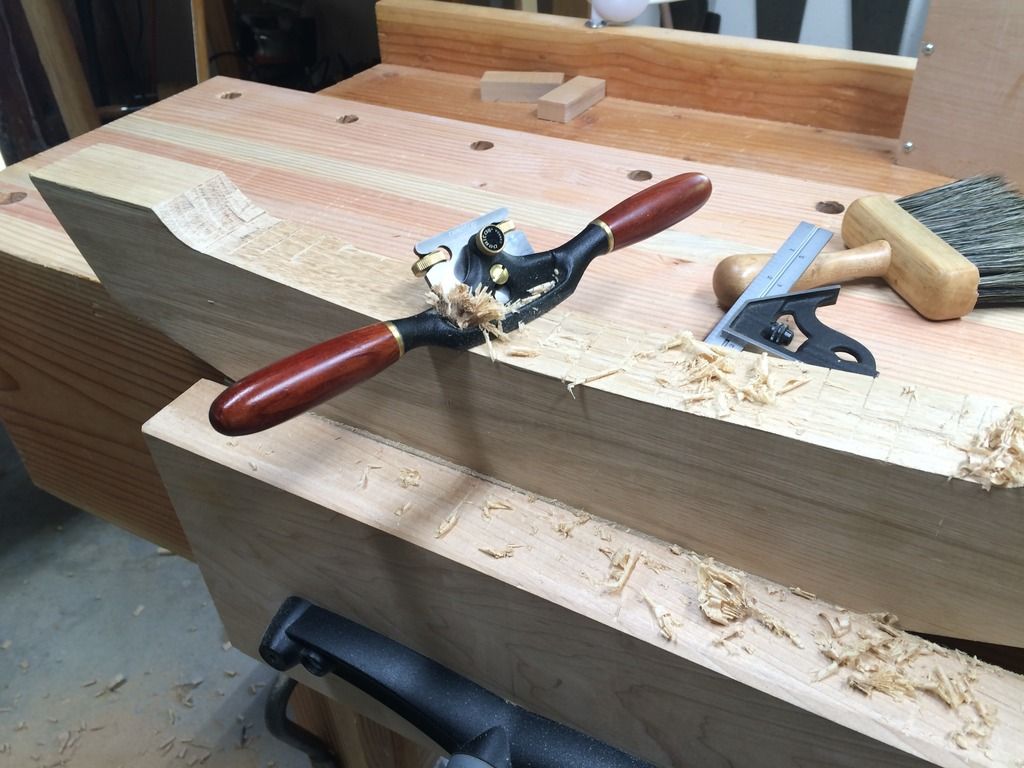
    Getting close to removing the saw marks. I realized, as Brian said earlier, that white oak does test sharpness. I had to spend some time on the stones with this blade before I could work the oak with relatively little effort. Time well spent for certain.


    Behold, a foot!


    I gotta pick up the lumber for the top this weekend. The desk is to be roughly 60 x 28 or so. If I got three 10"wide boards that should do the trick. I am considering spending the extra coin for quartersawn because I am concerned about movement. The top will be secured to the legs by way of wooden buttons to help with movement. If I dont go quartersawn, what is the best way to join the top with regards to grain direction? I have read that you want to alternate the pith side of the boards adjacent to each other in order to cancel any cupping. For flatsawn wood anyways. What has worked well for you guys out there?
    Last edited by Mike Cherry; 05-05-2016 at 8:56 AM.

  2. #17
    Join Date
    Jan 2013
    Location
    Temecula,CA
    Posts
    442
    Quote Originally Posted by Brian Holcombe View Post
    I was thinking something like the Woodjoy saw, the turbo cut blade is too big for small curves but cuts larger curves in a hurry. Bow saws are much like other saws in that you need a few sizes to do your full range of cabinet work.

    Frankly I might approach this differently, but it's a bit riskier so I didn't recommend it. Since we're on the topic I'll bring it up. Kerf it like you are doing, then heavy knife marks at your stop line. Then take the chisel, bevel down (bevel toward the good side) and chop the waste out. It's a splitting action so it's quick. The risk on something like white oak is that it'll blast off an important part of your piece.

    Splitting and sawing are fast, splitting is faster in many cases. The last resort is chopping out where you have to shear across the grain.
    Yea bevel down was how I removed most of the waste. I too would warn anyone considering that to pay close attention to the grain because it could split further than you wanted. It seems like a risk/reward situation but since I didnt have a bowsaw or other tool better designed I opted for the chisel. Did I mention the chisel is my favorite tool? Its funny how many operations can be done with a chisel. I'm still learning to use a chisel, but the more I do the more it rewards me. It might be the most versatile tool in the shop!

  3. #18
    Looks amazing!

    Nice, clean work!

    I would pony up for the QS for the top if you can afford it. The boards match easier this way, it looks better IMHO, you get all that fleck on top, and it's stable to boot.

    If you have to do flatsawn, then IMHO, orient in this priority: 1) visual harmony on the top, 2) ease of smoothing, 3) visual harmony on the edge

  4. #19
    Join Date
    Jan 2013
    Location
    Temecula,CA
    Posts
    442
    Quote Originally Posted by Prashun Patel View Post
    Looks amazing!

    Nice, clean work!

    I would pony up for the QS for the top if you can afford it. The boards match easier this way, it looks better IMHO, you get all that fleck on top, and it's stable to boot.

    If you have to do flatsawn, then IMHO, orient in this priority: 1) visual harmony on the top, 2) ease of smoothing, 3) visual harmony on the edge
    Yea I hear you, I think the fleck would look awesome. Would it be weird, from a design standpoint to have that fleck in the top and not the base of the desk? My thinking is it would draw more attention to the top, which would be a good thing I suppose.

  5. #20
    For some maybe it's an issue. For me, not. My office desk is QSWO on the top. However you orient the base grain, unless you wrap it, the flatsawn sides will contrast with the QS edges. I think your orientation of the feet is good, because your qs grain will run up the edge of the foot and up the edge of the leg; the front faces of those components should have harmonized grain IMHO, since they are in the same line as looking at them from the front. The side view presents the leg and foot at perpendicular orientation, so the flatsawn faces look better here; they're harder to line up.

    Go QS on the top; you won't regret it.

  6. #21
    Join Date
    Aug 2013
    Location
    Princeton, NJ
    Posts
    7,294
    Blog Entries
    7
    I agree with Prashun, and the foot is looking sharp!
    Bumbling forward into the unknown.

  7. #22
    Join Date
    Jan 2013
    Location
    Temecula,CA
    Posts
    442
    Quote Originally Posted by Brian Holcombe View Post
    I agree with Prashun, and the foot is looking sharp!
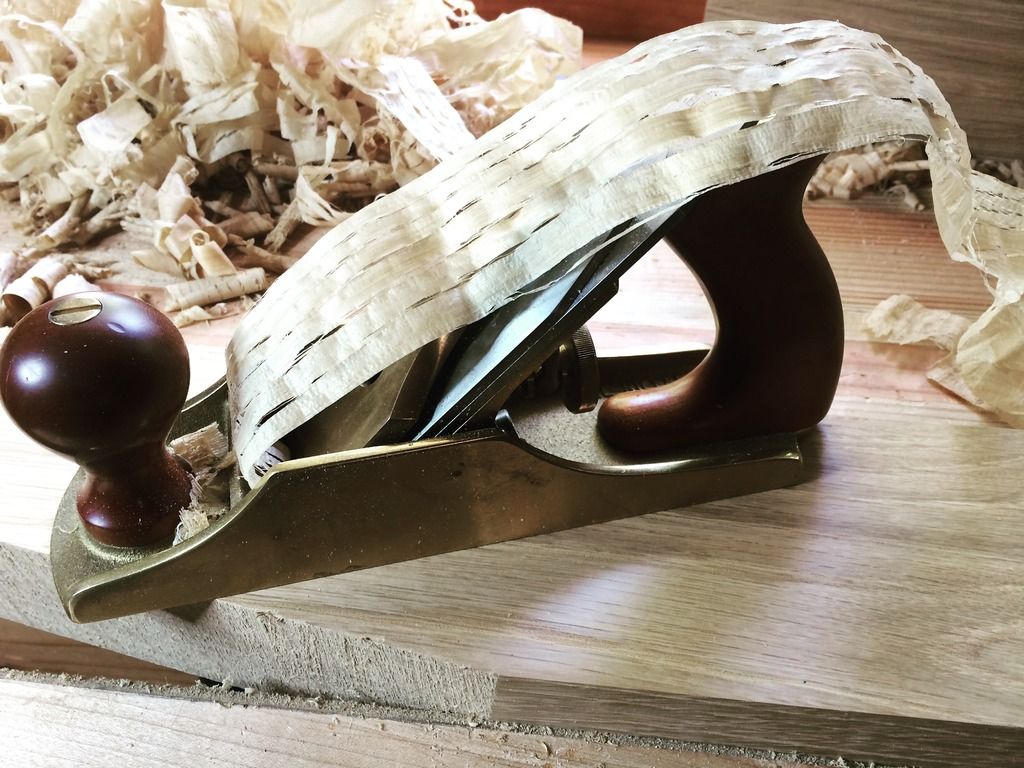
    Thank you sir! The shavings coming out of the plane as I smoothed the beveled cuts were beautiful. I'll snap some pics when I smooth the other foot.

  8. #23
    Join Date
    Sep 2008
    Location
    N. Idaho
    Posts
    1,621
    Great project for a great occasion. Thanks for posting and will look forward to following along. I also think QS is the way to go and won't be an issue with the legs.

    Best,
    C
    "You can observe a lot just by watching."
    --Yogi Berra

  9. #24
    Quote Originally Posted by Brian Holcombe View Post
    Mike, you can use a turning saw or bow saw to knock out that waste as well.

    I credit white oak for having taught me how to sharpen.
    I work with white oak often and sharpen often....

  10. #25
    Join Date
    Jan 2013
    Location
    Temecula,CA
    Posts
    442
    Quote Originally Posted by Christopher Charles View Post
    Great project for a great occasion. Thanks for posting and will look forward to following along. I also think QS is the way to go and won't be an issue with the legs.

    Best,
    C
    thanks For the interest Christopher. I actually have a 4/4 piece of QS white oak that I have been envisioning as the top and I'm sold. Of course money influences everything and it will depend heavily if I can get swing the extra cost for the stock or not.

    Quote Originally Posted by Chris Hachet View Post
    I work with white oak often and sharpen often....
    Totally know what you mean but so far I'm really enjoying this. I feel really accomplished that I've been able to work this wood so far with the ease and confidence that sharp tools provide. I know I have some room for growth in the sharpening department, but the fact that this is one of those pieces of wood that test ones sharpening ability proves to me that I'm on the right path.

  11. #26
    Join Date
    Jul 2014
    Location
    Edmond, Oklahoma
    Posts
    1,750
    Mike,

    Nice work so far. Like the rest, I am looking forward to the rest of the build as you get time to work on it. Also, thank you for the service your wife gave to the country.

    I have never used white oak to my memory, but the grain looks like it will look awesome!

    Stew

  12. #27
    Join Date
    Jun 2012
    Location
    Lubbock, Tx
    Posts
    1,490
    Following and thank you both for you service!

  13. #28
    Join Date
    Jan 2013
    Location
    Temecula,CA
    Posts
    442

    Little progress update...

    Well, I got some pretty pictures mostly for you guys this time. This white oak is a great challenge to work and Im enjoying every minute of it. I was able to work at this in chunks here and there for this update so what you see here is really a culmination of a couple 1-2 hour sessions with the upper and lower feet. Ive been hard at work to locate some quarter sawn white oak that I feel will be suitable for the top. I want 6/4 but it seems 5/4 might have to work. The other issue that I had to learn how trees are quartersawn in order to understand why its difficult to find ~ 10" board widths. That might make it easier to glue up but I think Im gonna have more boards in this panel. I hope to do four boards at 7" or so wide. That would give me the roughly 28" or so top I want. I did find some 6/4 in San Diego which is about an hour south of me. I will be heading there in a couple weeks if all goes to plan.


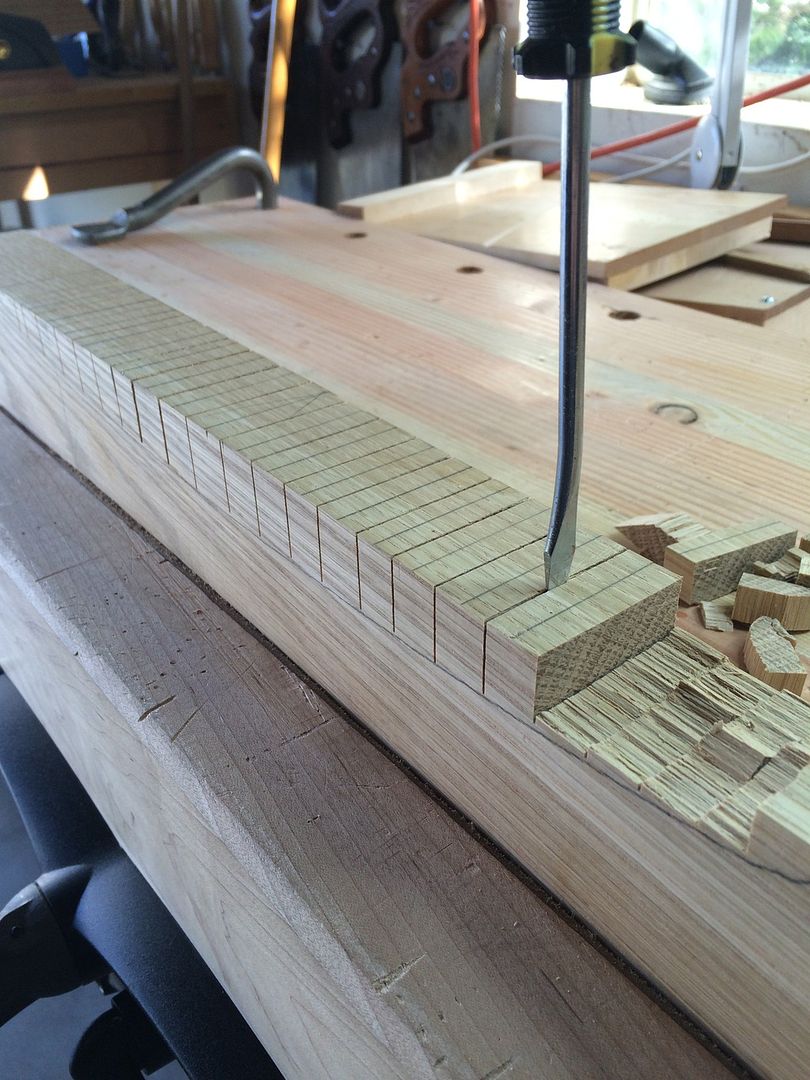
    So Im starting the roughing out of the arch in the foot here. I decided to use Prashun's suggestion and use a screwdriver to break the waste out. This worked quite well.


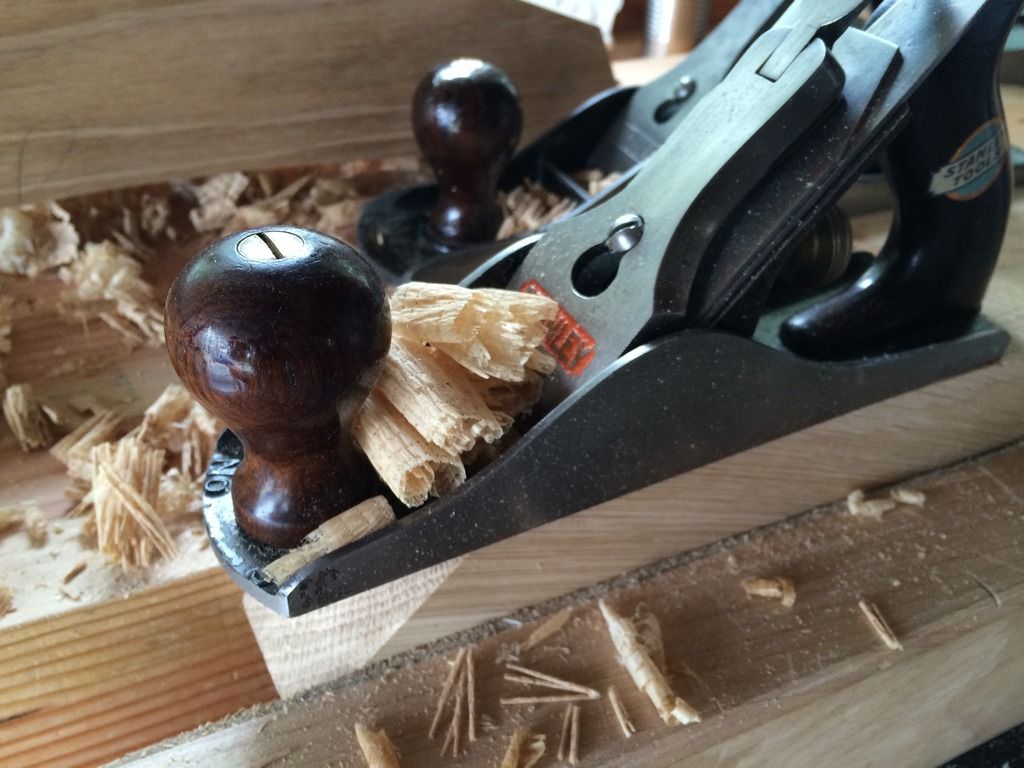
    I cleaned things up, as before, with a 10" 9 grain Auriou rasp and a LV spokeshave. I did make use of a card scraper here and there as well. One thing I didnt take a photo of was how I did the curves of the arch. On the first foot, I tried rather unsuccessfully, to cut it with a coping saw. Coping saws dont like 8/4 white oak. On the second foot I decided to just use a chisel bevel down and smooth that cut out with the rasp. I think if I were to do this again, I would like to try a bowsaw out for this cut. Not only this cut, but the entire arch in the bottom feet. That would have sped things up I think.


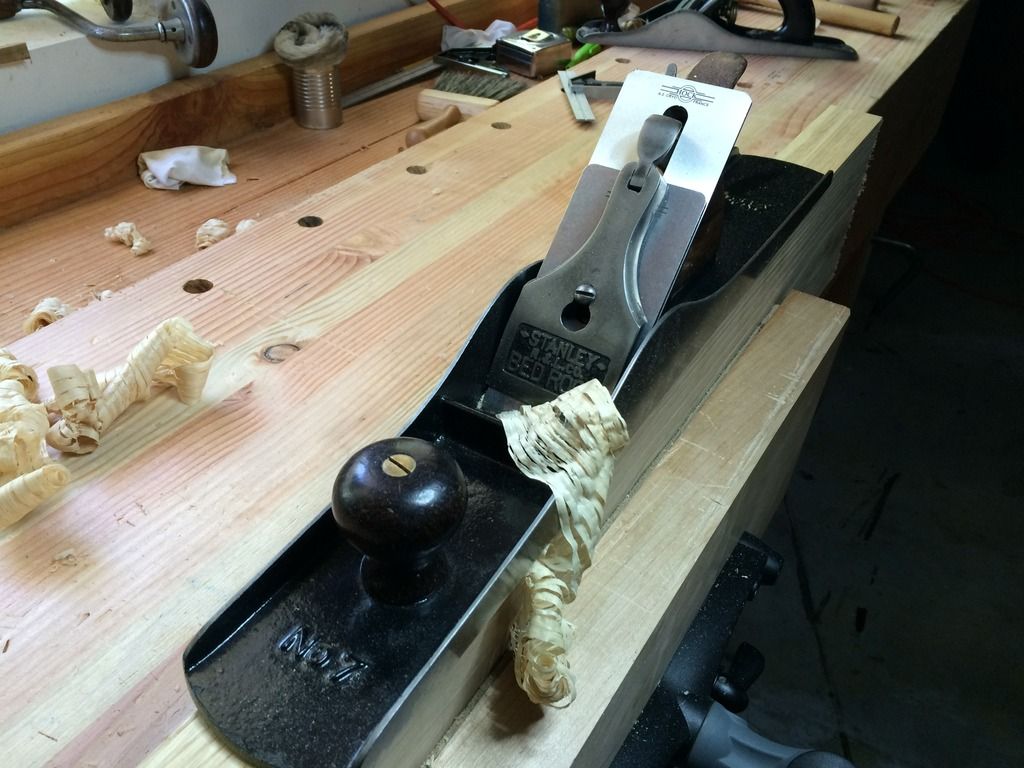
    This is my Bedrock roundside #7 that was worked over by TablesawTom a couple years ago. Here Im flattening the portion of the upper leg that will be married to the desktop.


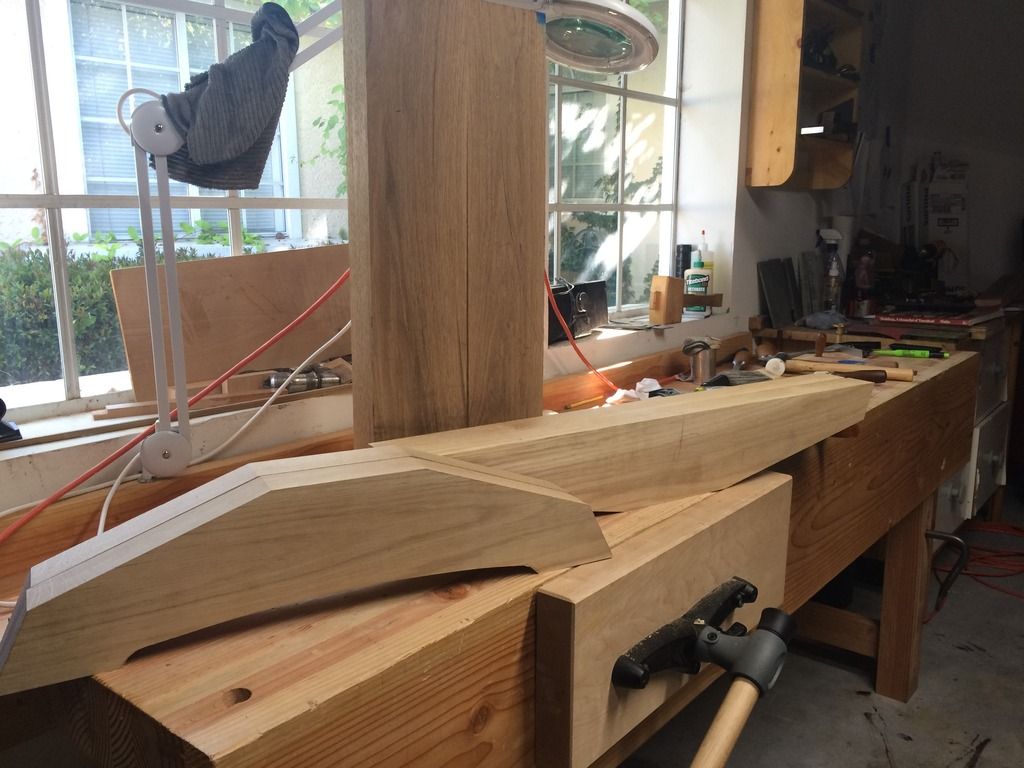
    Heres an image depicting the parts needed for the legs. The vertical pieces that need joining to the upper and lower feet have yet to be milled, but I expect that will go fast as there are no bevels to cut like the feet had. Im getting myself mentally prepared for the leg joinery. The plan is to do twin mortise and tenons. This is a joint I have never done before but I am looking forward to greatly.

    Thats all I got for now. As usual, if you have any ideas or suggestions regarding this project I'd love to hear em'. Thanks for looking guys and gals!

  14. #29
    Join Date
    Mar 2015
    Location
    Virginia
    Posts
    1,211
    Looks like it is coming along nicely Mike.

  15. #30
    Join Date
    Aug 2013
    Location
    Princeton, NJ
    Posts
    7,294
    Blog Entries
    7
    Coming along nicely!
    Bumbling forward into the unknown.

Posting Permissions

  • You may not post new threads
  • You may not post replies
  • You may not post attachments
  • You may not edit your posts
  •