Page 1 of 2 12 LastLast
Results 1 to 15 of 17

Thread: Creeker's Weekend Accomplishments

  1. #1
    Join Date
    Jul 2012
    Location
    Mercer Island
    Posts
    185

    Creeker's Weekend Accomplishments

    Hi All:

    I can't believe I'm starting this thread and it's Sunday afternoon Pacific time.

    My wife wanted to hang some masks in a stairwell. I figured that was an opportunity to over-think a solution while putting it off for a couple of weeks. It's probably been done before - and better - but here's what I came up with. Reconfigurable, can hang up to 20 items, easy to swap around. Kind of like a picture rail but for hanging.

    I used a cut off piece of teak that otherwise wasn't going to be used - combination of sap and heart wood made it hard to use elsewhere but I think it works here.

    Slots every 2", dimpled on top using DP for consistent cut. Started with stripping speaker wire to get copper wire, but that was amazingly time consuming biting off an inch at a time so I went with HD picture wire. I'd still like to color it, but wife liked it bright - guess who prevailed.

    image1.JPG

    image2.jpg
    Last edited by Keith Pleas; 05-22-2016 at 6:04 PM.

  2. #2
    Join Date
    Mar 2006
    Location
    Eastern Oregon
    Posts
    367
    Went to a few yard sales Friday. Had an old (1947?) 8" tilt top Wards saw given to me. Went a street over and bought a rather nice older Unisaw for $250. Got home, told the wife I acquired two table saws for an average price of $125. She didn't buy it! Suppose after 63 years of marriage she is catching on to me?
    Dick

  3. #3
    I dont know if I can call three months of planning followed by three months of building a weekend accomplishment, but I'll give it a try.

    This weekend my workbench top finally met up with its base.

    The project is not quite done, still need to build some drawers and doors and build my leg vise but it is now functional.

    160521-005.jpg 160521-013.jpg 160521-015.jpg

    I put in some temporary drawers to make it useful for the time being.
    160521-019.jpg

    The joint assembly I am most proud of; I wanted a joint that would be mechanically locked into place while also held in with glue.
    The board with the tenon is set into a dado on the bottom side of the bench top.
    The tenon fits into a mortise on the walnut ends, and the walnut ends fit over a tongue on the end of the bench top.
    The skirts fit over a tongue on the length of the bench while the dovetails lock into the walnut.
    This was a stressful glue-up.

    160403-008.jpg 160403-012.jpg 160403-013.jpg

  4. #4
    Join Date
    Jun 2014
    Location
    SE Ohio
    Posts
    144
    Worked Saturday, my supposed day off, again. Got home and worked on putting ball joints/idler arm and shocks on the son's Blazer.

    Finished that up today. I did buy a wonderful time saving tool: An air hammer. It took the heads off of rivets in about 5 seconds. Drove out the rivet body just as fast. The pickle fork heads for it popped out the tie rod ends and ball joints with aplomb. I should have invested in air tools years ago.

    On a sort of WW note my dirt guy brought another twenty tons or so of dirt. Another 100 tons and I will have a flat spot for future woodshop/man cave/place to hide from SHMBO.
    Oh, the dirt has a lot of old bricks we picked out. The wife wants to use them for another flower bed.

  5. #5
    Join Date
    May 2013
    Location
    Northern Virginia
    Posts
    1,370
    Blog Entries
    3
    I feel like I was productive.

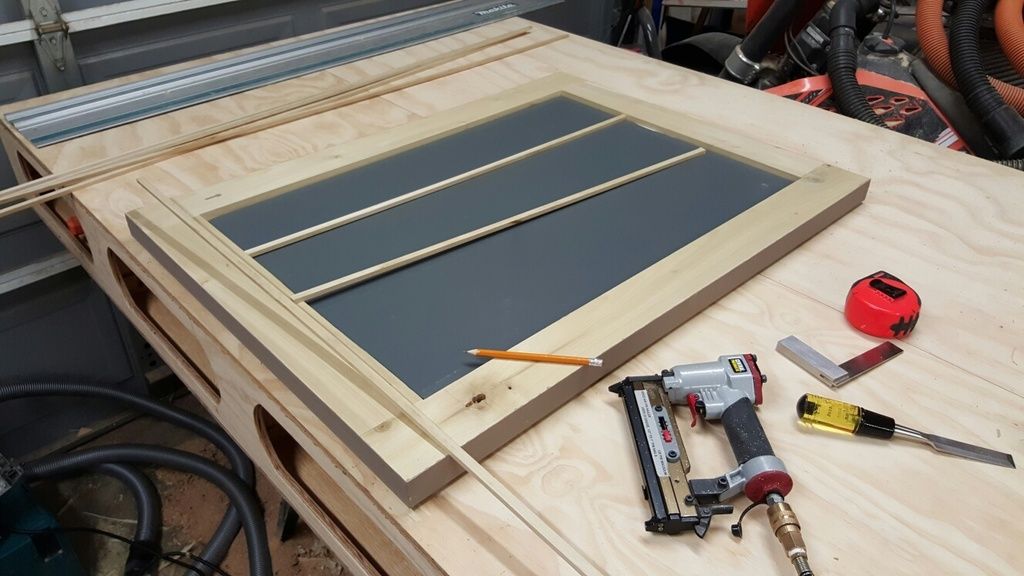
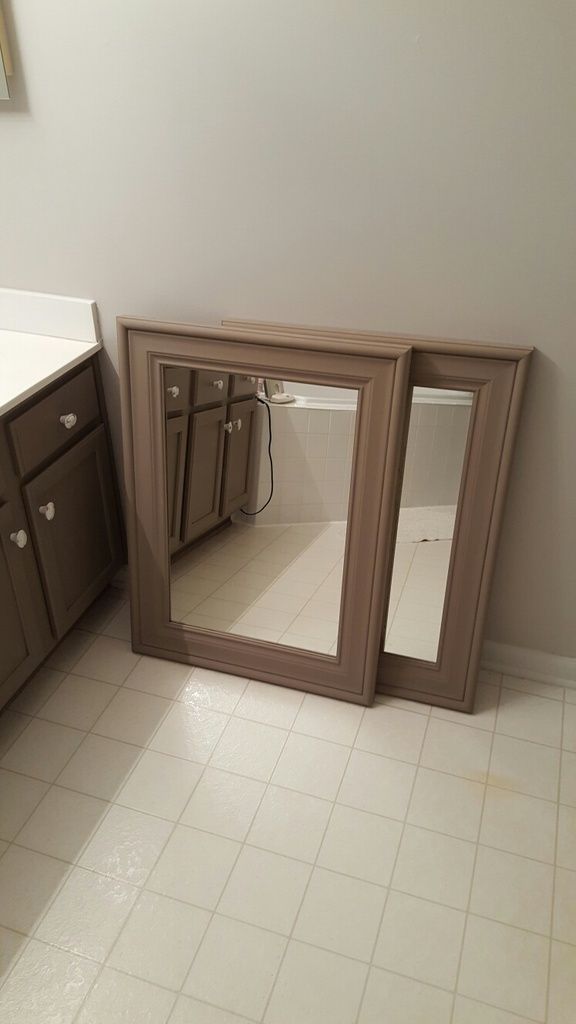
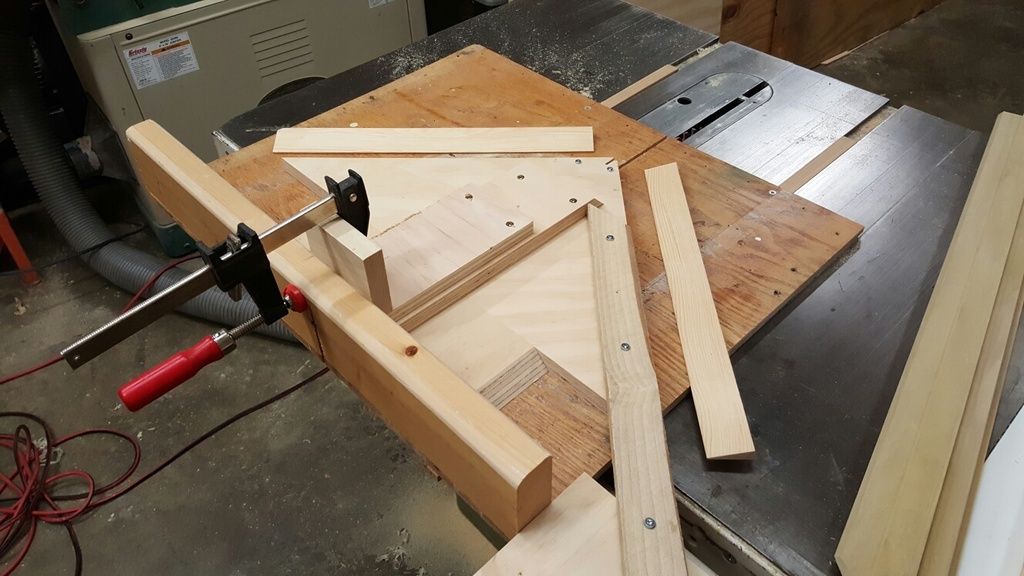
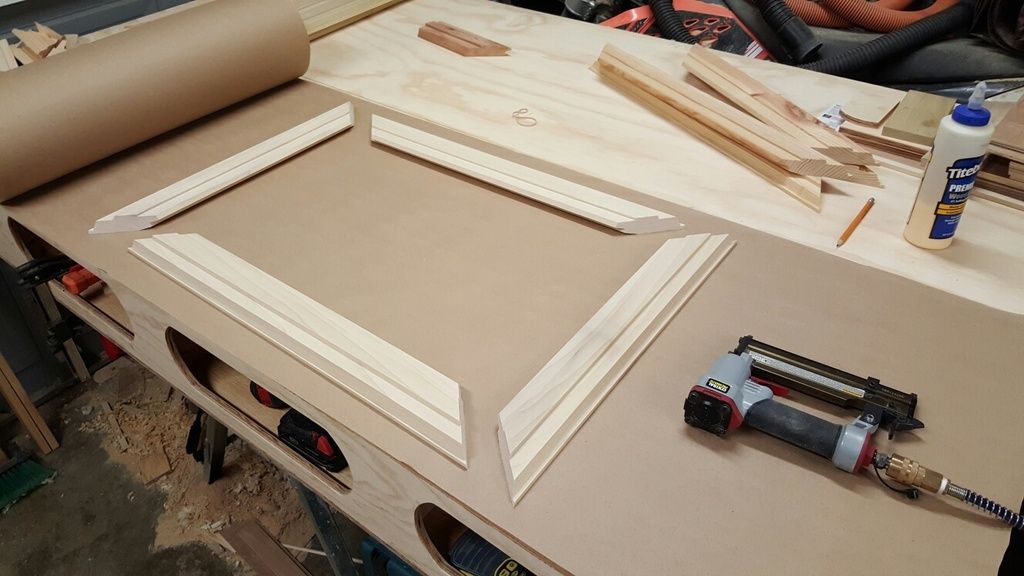
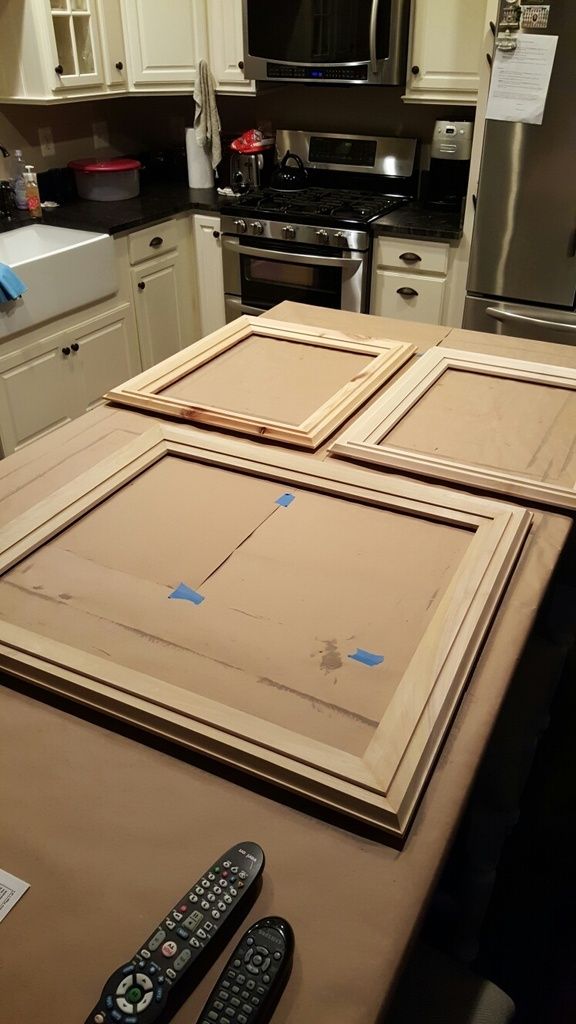
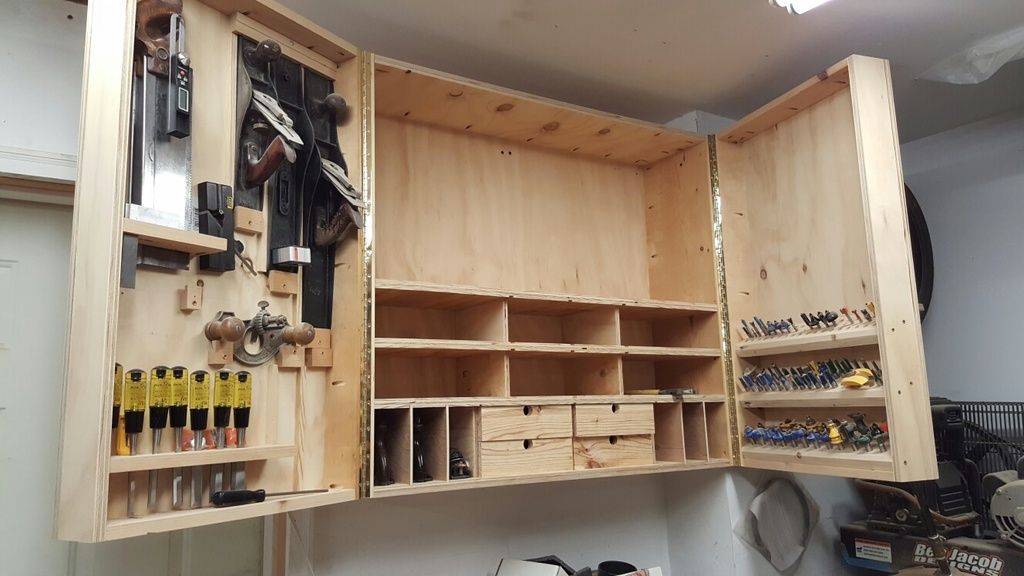
    I finished gluing up a Paulk style bench, the proceeded to use it when finishing a set of mirror frames and gluing up some picture frames. Then in between I worked on the center section of my hanging tool cabinet.

    Paulk bench


    Mirror frames.


    Picture Frames


    And finally my tool cabinet. The center has been bare since I built it last fall, I finally decided to add some plane cubbies, and some drawers. I have the parts cut for the 6 missing drawers. I just ran out of weekend.


  6. #6
    It would seem to me you had a very productive weekend. I like the wall cabinet and those mirrors look quite nice.

  7. #7
    Join Date
    Jul 2012
    Location
    Mercer Island
    Posts
    185
    There you go - I basically did 1 stick of wood and others did much larger projects! Nice!

  8. #8
    Join Date
    Apr 2016
    Location
    Tasmania
    Posts
    2,162
    Saturday I sanded and prime coated a booth load of doors and panels for one of the kitchens in the house I am completing (it has 3). Sunday I sanded them and applied the top coat. The doors and panels are moisture resistant MDF. It is a 2 coat paint system. The primer is Ilva PA30 polyurethane. The top coat is Ilva PA76 high gloss polyurethane. The colour is Designer White. I'll post photos when I can get the camera to talk to the laptop. OK, technically it was not the weekend for me because I work fly in/fly out 3 weeks on/2weeks off and it is Day 5 of work. 16 days to go and its back home to Tasmania! Cheers

  9. #9
    Join Date
    Mar 2015
    Location
    SE Michigan
    Posts
    3,225
    Here in the Midwest we've finally broken into the 70s during the day, so it was time to get out of the basement shop and into the yard. Spent most of the weekend outside.

    I did replace a few rotten floor boards and rehab a bench at our park's gazebo.

    Saturday evening I practiced edge jointing a couple pieces of scrap for a glue up panel I have planned in a few weeks.
    Went at it face clamped with a hand plane. A bit more to it than a few good swipes, but finally worked them to a pretty decent match up.

  10. #10
    Join Date
    Feb 2003
    Location
    Conway, Arkansas
    Posts
    13,182

    Creeker's Weekend Accomplishments

    23 May 2016

    Good Morning Everyone,
    Been pretty busy for me. Took 2 days off work last week and spent those 2 days driving to Alabama and back to bring my mother out for a visit with us, left on Thursday, drove back on Friday and now the LOML, my mother, and the MIL are all packed up and headed out to Alabama for a high school graduation...the last one in the family (as of right now). Visited with my mom this weekend and just enjoyed what short time we had.

    A local woodworker contacted me via email about my chair rebuild project. He said that he had some scraps of mahogany that I could have if I wanted them. So..a huge THANK YOU to Keith Newton for reaching out to me and offering up his scrap supply of wood to fit the bill!!!

    Back to the grindstone today for me, so what did YOU do this past weekend?

    Best of weeks to you all.
    Thanks & Happy Wood Chips,
    Dennis -
    Get the Benefits of Being an SMC Contributor..!
    ....DEBT is nothing more than yesterday's spending taken from tomorrow's income.

  11. #11
    Join Date
    Oct 2007
    Location
    Pottstown PA
    Posts
    972
    One step closer to my ar15 magazine loader. Refined the magazine well and cnc'd the prototype. next step is put the two pieces together (mag well & round holder) to complete a single unit or milling.

    Design in sketchup & g-code done in vcarve pro and control is mach-3

    https://www.flickr.com/gp/22447246@N06/A1o8x4

  12. #12
    Join Date
    Mar 2003
    Location
    SE PA - Central Bucks County
    Posts
    65,850
    Just so there's not two identical threads, I've combined them this week and Dennis's regular weekly thread will be on top next week.

    Jim
    Forum Moderator
    ----------

    As for me, I did a little time in the shop this weekend avoiding the rain and doing a simple project in support of Professor Dr. SWMBO's beekeeping.

    http://www.sawmillcreek.org/showthre...52#post2567952
    --

    The most expensive tool is the one you buy "cheaply" and often...

  13. #13
    Join Date
    Feb 2013
    Location
    Duvall, WA
    Posts
    706
    Made a rough prototype of the ends of the bunk bed that I'll be building over the next couple of weeks. This gave me a chance to better visualize what I've been doing in SketchUp and get a feel for the overall size and dimensions. I used Kreg screws for quick assembly and only about $12 worth of two-by lumber from the local big box store. This bed is a twin over full design that needs to fit into a room with a ceiling that's just under 7'.

    ForumRunner_20160523_074739.jpg ForumRunner_20160523_074813.jpg ForumRunner_20160523_074753.jpg
    Last edited by Mike Ontko; 05-23-2016 at 10:55 AM.

  14. #14
    Join Date
    Jul 2012
    Location
    Mercer Island
    Posts
    185
    Quote Originally Posted by Mike Ontko View Post
    This bed is a twin over full design that needs to fit into a room with a ceiling that's just under 7'.
    Just curious - why twin over full? I almost bought 2 twin/twin bunks when we were going to have 10(!) house guests this month but when it dropped to 5 I got by with what we had. But I'm thinking of doing a cabin and was curious about the advantages of that style.

  15. #15
    Join Date
    Feb 2013
    Location
    Duvall, WA
    Posts
    706
    Quote Originally Posted by Keith Pleas View Post
    Just curious - why twin over full?
    This project is being done at the request of a friend who has a small house (only 2 br), one offspring, and only an occasional need for the second bed. During those times, the guest (MIL) will get the full size and the offspring (currently 6) will get the top/twin.

Posting Permissions

  • You may not post new threads
  • You may not post replies
  • You may not post attachments
  • You may not edit your posts
  •