Results 1 to 8 of 8

Thread: Mini Project: Hive Boxes

  1. #1
    Join Date
    Mar 2003
    Location
    SE PA - Central Bucks County
    Posts
    65,888

    Mini Project: Hive Boxes

    As I've mentioned previously, Professor Dr. SWMBO recently became a beekeeper and as you might expect, bee hives are made of wood. Since the weather was rainy this weekend, I decided to spend some time in the shop (landscaping work in the rain is NO fun!) and just for fun, build a couple of hive boxes. In general, there's little point in building them from scratch myself financially as knock down kit boxes with production box joints cost about $15 (with select pine) and my cost for common pine to do buy material for the same box is $12. So unless "free" material is involved, making these things is primarily a fun way to spend time in the shop. That said, I enjoyed the task so the fun part was covered. And I'm not ruling out making more in the future if needed just because it's pleasurable to do so, even though financially, there's little incentive.

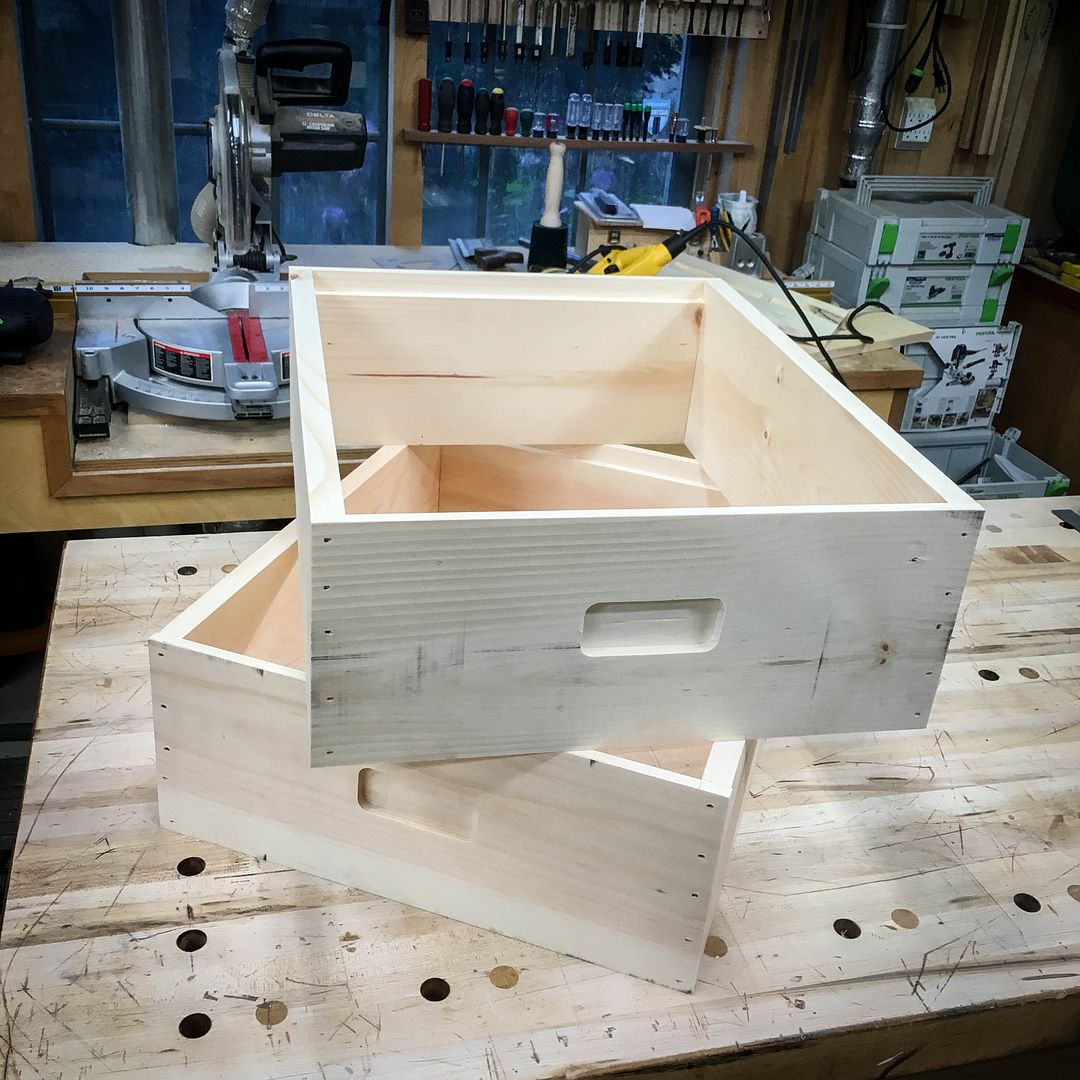
    Ok, it's a box. Without a top or bottom. Really exciting, eh? But there's good things about simple projects and lessons to be learned from them, too. The ends have a rebate that the comb frames sit on. I'm not setup to do box joints and chose to use simple rabbit joints with glue and nails which is plenty sturdy for the job. Each of the two hive boxes (in this case, called "medium supers") came out of an 8' long 1x8 pine board. All four sides also get a hand-hold to make it easy to pick them up...they are quite heavy if the 10 comb frames they hold are filled with honey. And I'll mention now that those hand-holds need to be on the outside of the box...you'll see why in a moment.

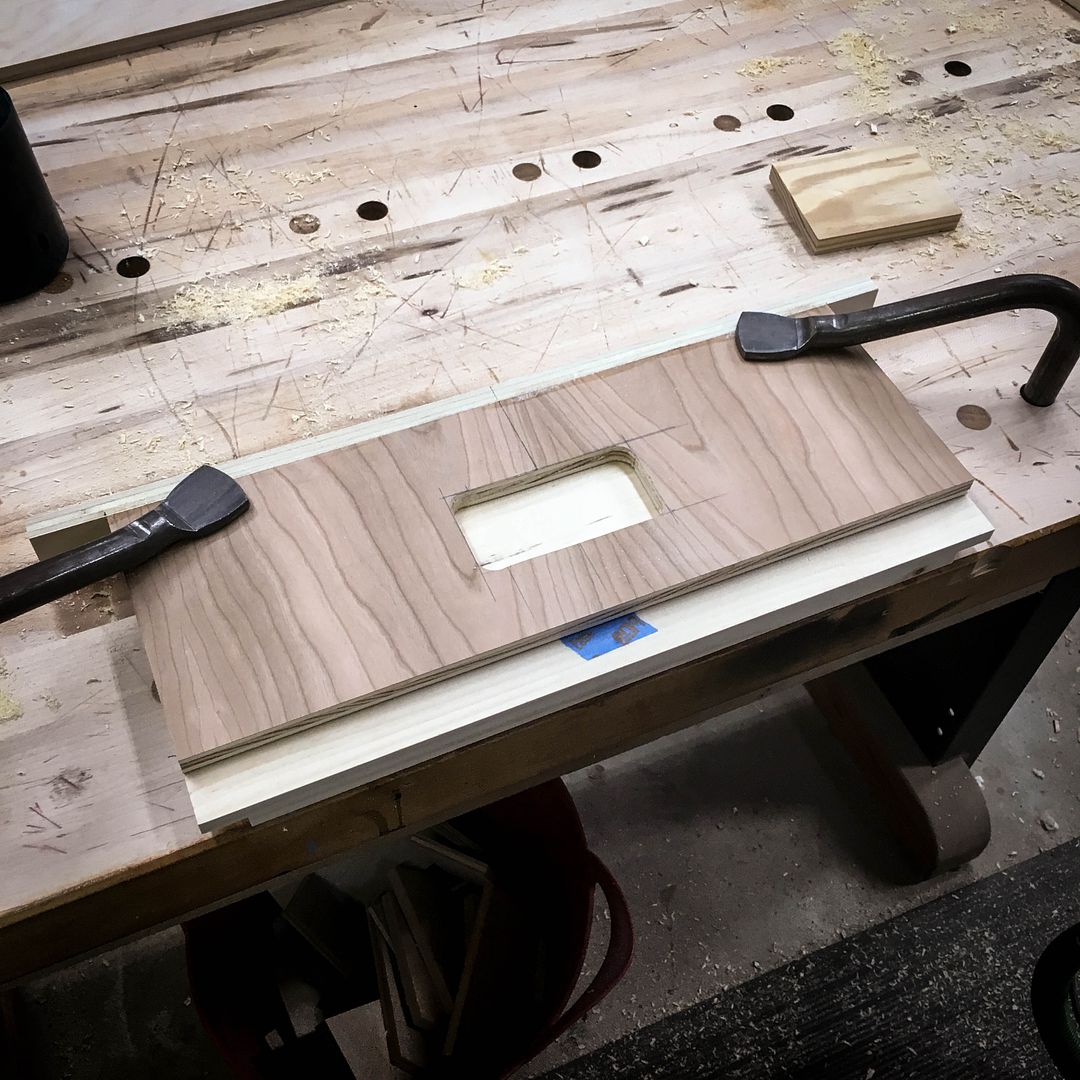
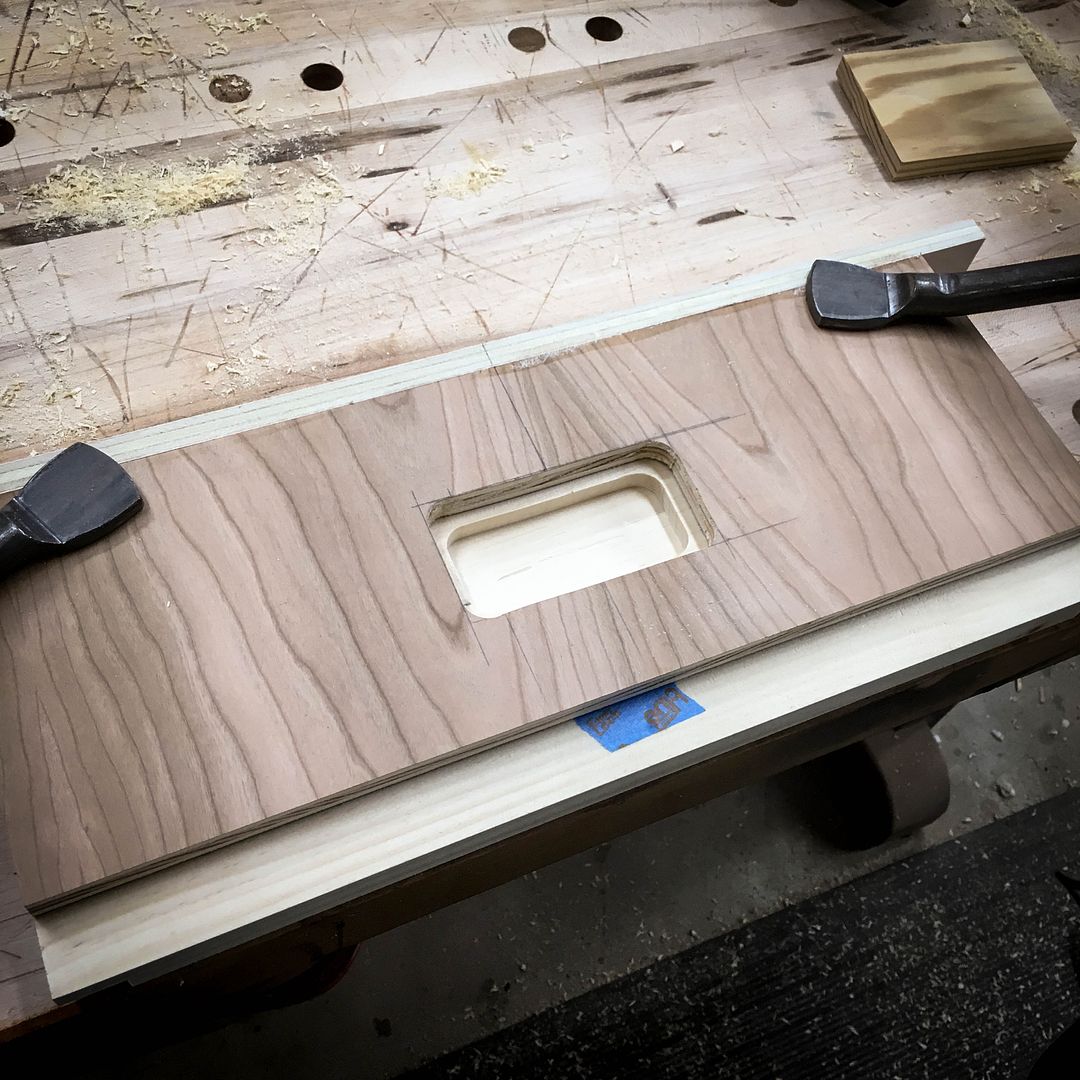
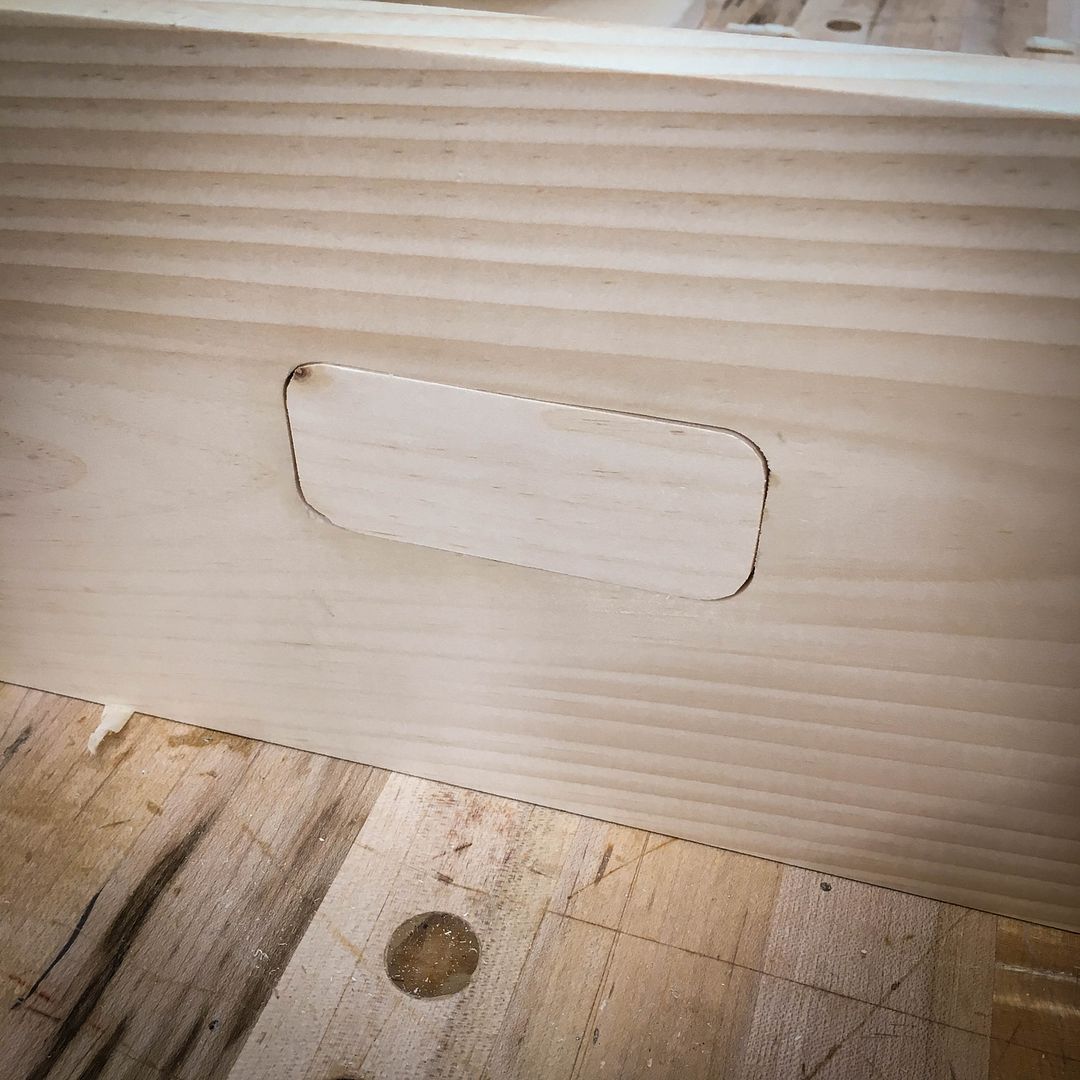
    I didn't bother to take photos of the four pieces of wood used to construct the box nor cutting of the rebates...all done on the sliding table saw. The rebates are all 3/8" deep and 3/4" wide and only appear on the box ends that hold the comb frames. You'll see that relationship post assembly. But in the meantime, there are those hand-holds. To accommodate that need, I made a template to use a router. Some folks use a sloped jig and a circular saw, but I didn't feel like building something like that for this quick rainy day project. The template is designed so that it's easy to center on both the shorter ends and the longer sides...the "fence" at the top is the length of the longer sides and the flat portion is the length of the shorter ends. This can also be used for hive boxes of any depth in the future, should I decide to make more.


    The template is used with the router to cut the handholds...bit depth was 3/8".


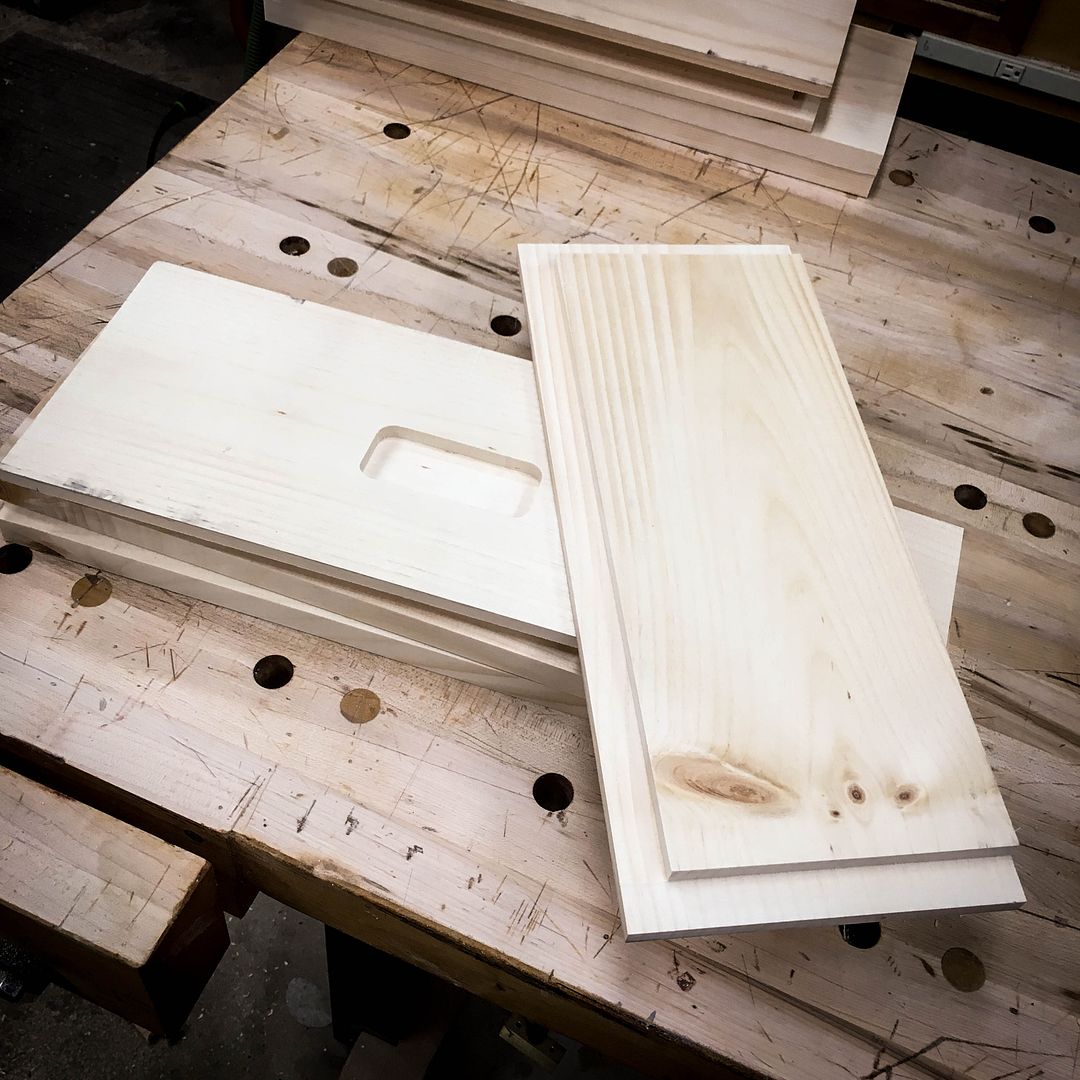
    Here are the components for one box and you can see how the rebates are setup on the box ends


    Assembly is just by glue and 15 gage 1.5" nails from a gun while everything was locked square in parallel clamps


    Remember I mentioned that lessons can be learned? In the "excitement" of assembly, I accidentally inverted one side (on EACH of the two boxes) and inadvertently ended up with the handhold on the inside of that piece. ("D'oh!!") Now I know why some of the folks who make their own hive boxes cut their handholds after assembly. LOL The fix was to use the template to cut an hand-hold in some scrap material, re-saw that to create a pattern that could be traced on a piece of 3/8" thick material and then cut out a patch to glue in place. Once that was in place, the template was used to re-cut that particular hand-hold in the correct side of the box side. Yea, "stuff happens", even with simple projects...


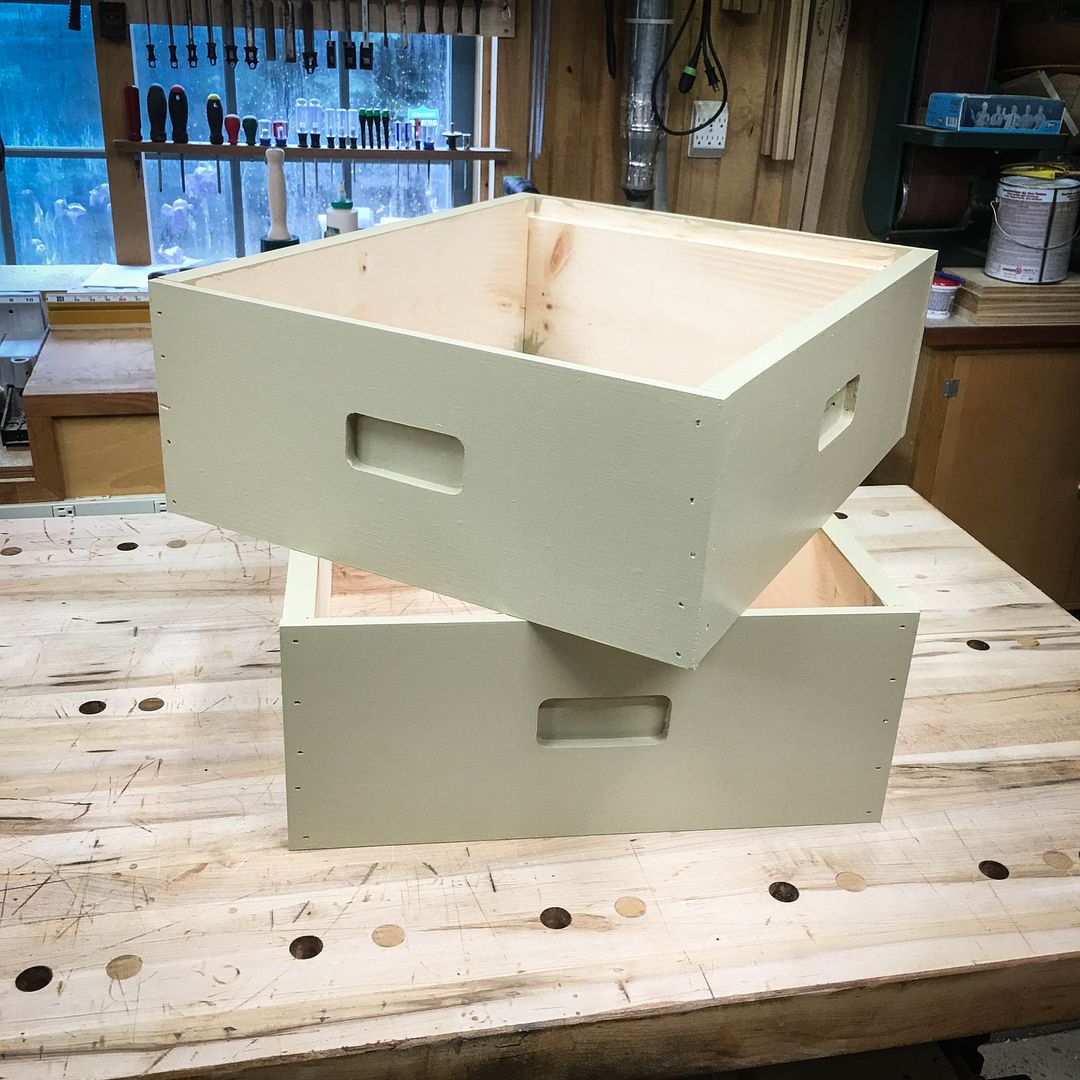
    At the end of the day...a couple coats of paint went on and these are ready to be used in the future if and when they are needed.


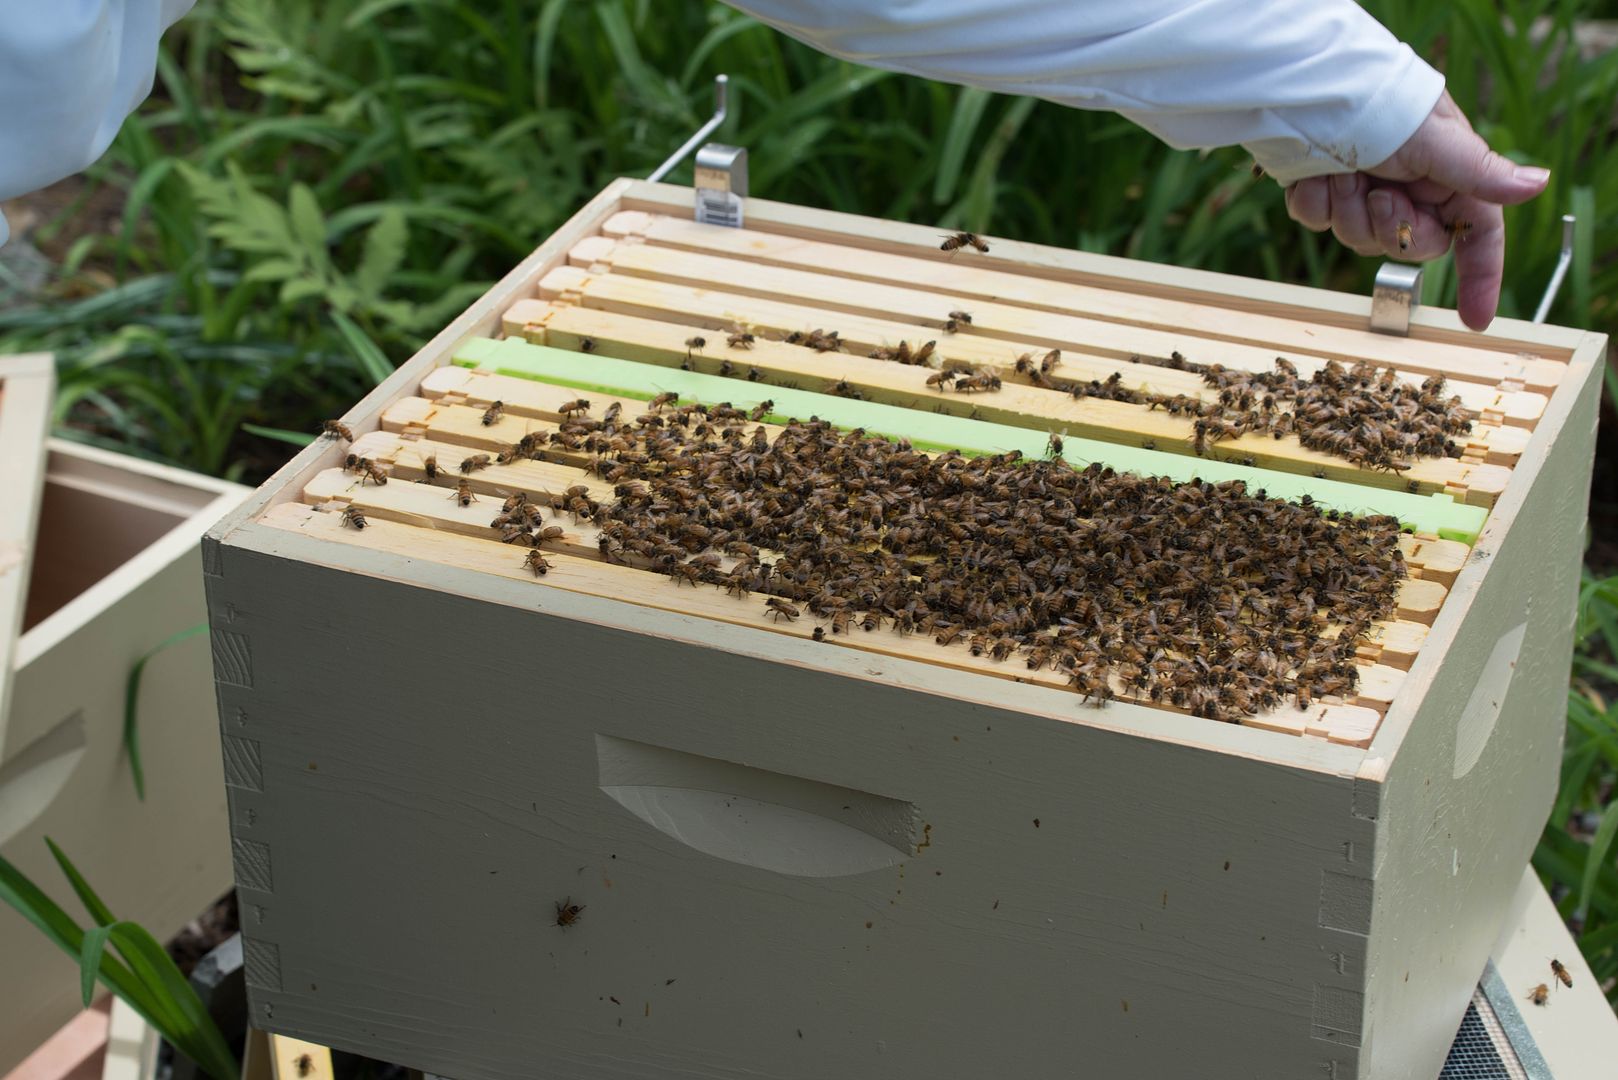
    And just so you can easily understand the function of the rebates if your'e not familiar with beekeeping, here's a photo of how the frames sit in a hive box
    --

    The most expensive tool is the one you buy "cheaply" and often...

  2. #2
    Join Date
    Mar 2015
    Location
    Columbia, MO
    Posts
    46
    Nicely done! I am a beekeeper too and build everything except the frames. In fact, beekeeping is what got me interested in woodworking. I started out building hive bottoms and decided I liked working with wood. So many hundreds of dollars later, I am happily making hives, furniture and loads of other things. I buy my wood when it is on sale at the big box stores and usually can save a bit when making supers. But where I save the most money is by making my inner and outer covers and bottom boards. I also have made quite a few swarm traps and nuc's. So once the bee bug bit me--- the woodworking interest followed.

  3. #3
    There's more to building a hive box than some people think - there's quite a few steps involved in the making of the boxes. I've built several hives and some other beekeeping things. Here's a hive I built of western red cedar. I used half blind dovetails to put the boxes together.
    RedCedar01.jpg

    Clear, or even number 2, pine also works well. One thing to add to your hive boxes is a metal strip for the ledge where the frames sit. (this hive is #2 pine)
    Beehive004.jpg

    I bought some sheet metal from Home Depot and bent and cut it. Attach with a few screws. The real pro beekeepers tell me that this keeps you from tearing up the wood when you take out the full frames.

    I don't try to build frames - you can purchase them unassembled pretty inexpensively.

    Beehives are a fun project and allow you to work with nice smelling woods (pine and cedar). I build them for the fun of building, not to save money.

    Mike

    When your wife needs to handle full boxes, especially full size brood boxes, they make a tool called a "hive lifter" (if I recall correctly). It takes two people, one on either end, but it's a way to handle heavy hive boxes (or even move a complete hive). Of course, you'd have to get a bee suit, also
    Last edited by Mike Henderson; 05-23-2016 at 12:43 PM.
    Go into the world and do well. But more importantly, go into the world and do good.

  4. #4
    Join Date
    Feb 2008
    Location
    E TN, near Knoxville
    Posts
    12,298
    Way to go! I've built a lot of hive boxes. The biggest mistake I made was making one from yellow poplar and it was just too darn heavy! I'll stick to pine and cedar (ERC). Contrary to some dire warnings I had from some people about the problems I would have with cedar, given the legends it of protecting clothing from insects, I had zero issues. (Some research has show cedar to be not as useful as previously though.)

    I am one who routed the hand-holds after assembly. I cut a rough rectangular hole in a board with a jig saw and clamped that to each side as a router template.

    A friend of mine who makes these boxes by the dozens and sells them came up with a quicker, but rougher method: he ganged a few inches worth of old circular saw blades and mounted the stack in an old table saw. With an jig he presses each side of the box down and cuts the recess in about 2 seconds!

    One thing I won't do is make the frames! They are so cheap to buy in quantity and a pain in the neck to set up to make, unless maybe you are making 10,000 to sell...

    BTW, I like to cut the rabbet a hair deeper than spec and tack in one of the smooth metal strips. This keeps the bees from gluing the frames to the box as strongly with propolis. For the brood boxes I like the strips with notches made to space 10 frames evenly but in the supers I like the smooth strips so I can space out 9 frames instead (for easier honey extraction) OR fit in 10 frames if needed. I've gone to two deeps and one shallow for my brood chambers to give the bees extra space for winter honey stores.

    JKJ

  5. #5
    Join Date
    Feb 2008
    Location
    E TN, near Knoxville
    Posts
    12,298
    Gail, have you seen the nuc boxes made from corrugated plastic "cardboard"? The last nuc I bought came in one of these. It looks like it is made from a large die-cut piece folded up and snapped together. I didn't try to price these since I don't usually make nucs but I bet it would be a lot cheaper to buy than the time and materials to make one from wood.

    JKJ

  6. #6
    Join Date
    Mar 2003
    Location
    SE PA - Central Bucks County
    Posts
    65,888
    Quote Originally Posted by Mike Henderson View Post
    Of course, you'd have to get a bee suit, also
    I actually have a bee suit already, Mike.

    BTW, those hive boxes are way too nice looking with those dovetails. LOL

    Quote Originally Posted by Gail Ludwig View Post
    Nicely done! I am a beekeeper too and build everything except the frames. In fact, beekeeping is what got me interested in woodworking. I started out building hive bottoms and decided I liked working with wood. So many hundreds of dollars later, I am happily making hives, furniture and loads of other things. I buy my wood when it is on sale at the big box stores and usually can save a bit when making supers. But where I save the most money is by making my inner and outer covers and bottom boards. I also have made quite a few swarm traps and nuc's. So once the bee bug bit me--- the woodworking interest followed.
    Good to hear, Gail, and I'm glad that it brought you to woodworking, too. I may make a Nuc box because I can see having one around might be convenient. Professor Dr. SWMBO is actually about to get a Nuc so we can get a second hive going...as you know and for a variety of reasons, it's good to have at least two hives. (but it's like tools...you can never have too many I hear. LOL)
    ----

    I like the suggestion for the metal edge on the frame supports and may try that in the future should I build more. And yea...no point in making frames. They are relatively inexpensive, even fully assembled with foundation. Professor Dr. SWMBO ordered some last night for these mediums, as a matter of fact...
    --

    The most expensive tool is the one you buy "cheaply" and often...

  7. #7
    Join Date
    Mar 2015
    Location
    Columbia, MO
    Posts
    46
    I am a collector of old political signs because I use them as tops and bottoms of swarm traps. The corrugated plastic works perfectly - I can sink a screw into it to hold and, if I need to be quick, duck tape sticks pretty well. I also have used the corrugated plastic to make a dust shield for my miter saw. You can cut, bend and staple this stuff pretty easily -- so they are very useful. I have about 25 sitting in a pile in our garage waiting to be cut, taped or stapled into something. Great stuff for FREE!

  8. #8
    Quote Originally Posted by Gail Ludwig View Post
    I am a collector of old political signs because I use them as tops and bottoms of swarm traps. The corrugated plastic works perfectly - I can sink a screw into it to hold and, if I need to be quick, duck tape sticks pretty well. I also have used the corrugated plastic to make a dust shield for my miter saw. You can cut, bend and staple this stuff pretty easily -- so they are very useful. I have about 25 sitting in a pile in our garage waiting to be cut, taped or stapled into something. Great stuff for FREE!
    That's a good suggestion, especially now that we're in the election season. Thanks!

    Mike
    Go into the world and do well. But more importantly, go into the world and do good.

Posting Permissions

  • You may not post new threads
  • You may not post replies
  • You may not post attachments
  • You may not edit your posts
  •