Page 1 of 2 12 LastLast
Results 1 to 15 of 19

Thread: Finished

  1. #1

    Finished

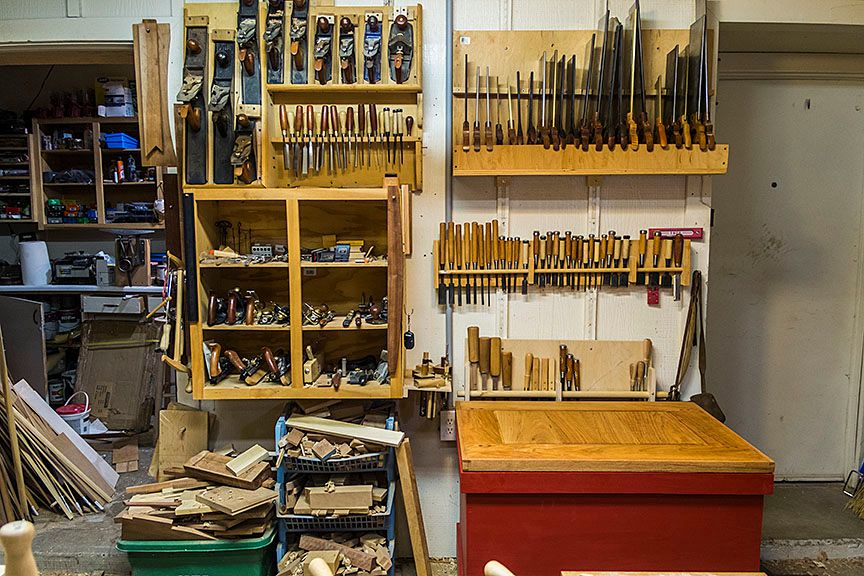
    The almost but not quite traveling tool box is finished. It took several weeks longer than I expected for that sentence to be typed. Whatever, the tool chest is in place with a top and a load of tools. For now it holds most of my wood stock and molding planes, some of the marking and measuring tools along with other misc. stuff. The shop wall cabinets have been moved a couple of times to make a spot for the tool chest where it will be functional and at the same time keep the old tool storage functional as well.


    I'm not sure this is the final resting place for both the tool chest and the wall cabinet and tills but for now it seems to work.


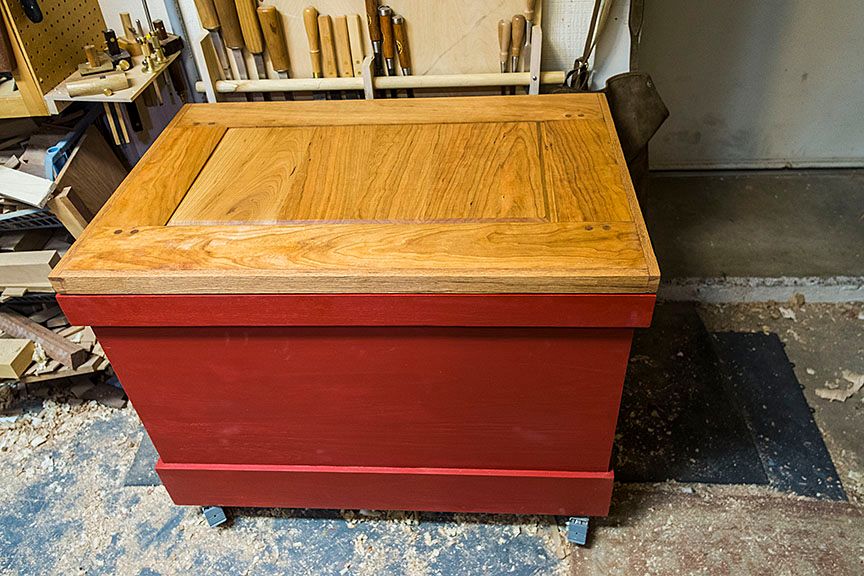
    On to the tool chest: The inside is unfinished Cypress, the outside is painted with red milk paint and the top is BLO'ed White Oak and Cherry. To my eye it looks pretty good even with all the mistakes and as best I can tell it will fill a shop need.


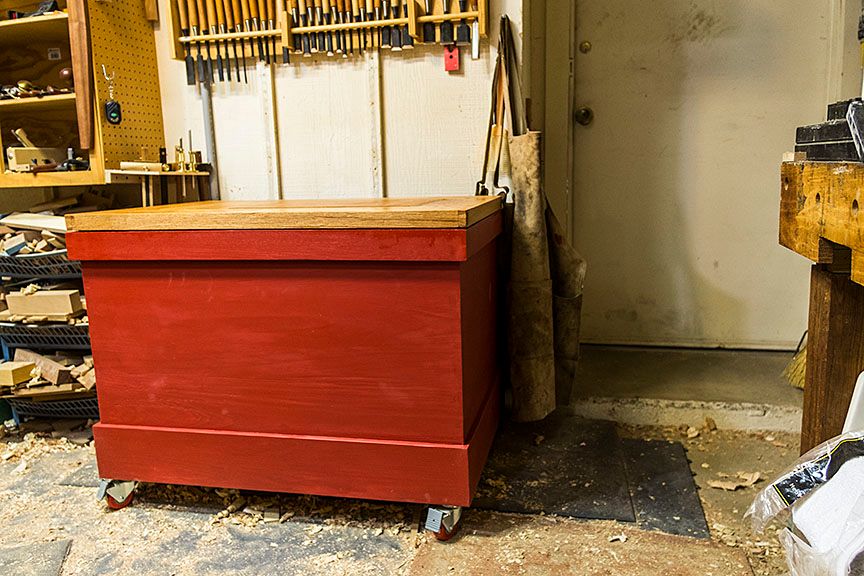
    If it doesn't, the grandpeanut will have a big red toy box. A couple of photos of the chest in its new home:
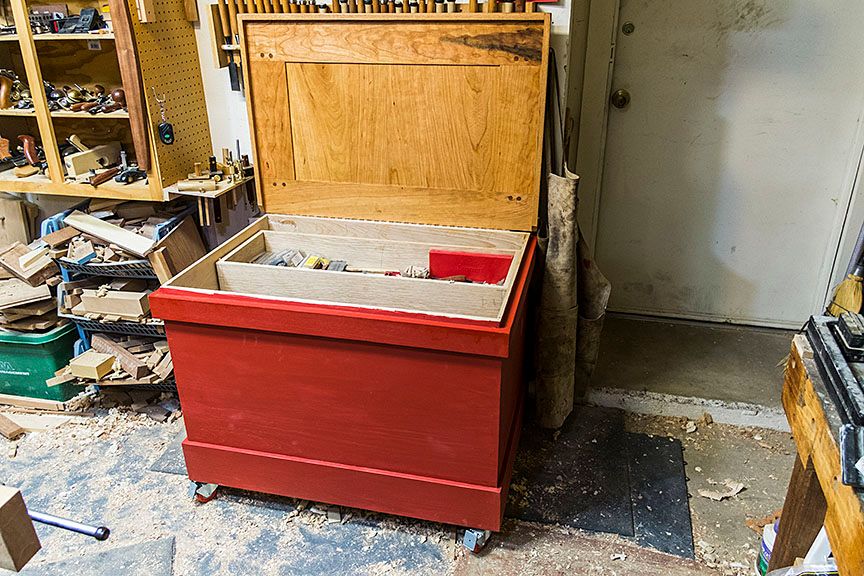


    With the top open:


  2. #2
    Join Date
    Dec 2012
    Location
    Ste-Julienne, Qc, Canada
    Posts
    194
    Looks very nice!
    What is its approx. weight when empty?
    Oh! You should buy a broom

  3. #3
    Looks like it came out very well, Ken! So now you've gotta post some pics of work you do while off on an RV trip. Look forward to seeing more!
    Fred

  4. #4
    Join Date
    Aug 2013
    Location
    Princeton, NJ
    Posts
    7,298
    Blog Entries
    7
    Looks great Ken!
    Bumbling forward into the unknown.

  5. #5
    Quote Originally Posted by Normand Leblanc View Post
    Looks very nice!
    What is its approx. weight when empty?
    Oh! You should buy a broom
    I have one but I lost the instructions and haven't been able to figure out how to turn it on.

    It is heavy, once I decided it was going to be too big for the RV I quit trying to save weight, An example the top is Oak and Cherry instead of White Pine. A RV chest will follow soon.

    ken

  6. #6
    Quote Originally Posted by Frederick Skelly View Post
    Looks like it came out very well, Ken! So now you've gotta post some pics of work you do while off on an RV trip. Look forward to seeing more!
    Fred
    Quote Originally Posted by Brian Holcombe View Post
    Looks great Ken!
    Thanks guys, it is good to get it off the plate so I can move on.

    BTW, Brian my new stone from So arrived yesterday. I haven't really had a chance to use it other than on an western O-1 iron. It was silky smooth and gave a beautiful edge on the O-1.

    ken

  7. #7
    Join Date
    Aug 2013
    Location
    Princeton, NJ
    Posts
    7,298
    Blog Entries
    7
    Oh cool, the Nakayama asagi?
    Bumbling forward into the unknown.

  8. #8
    Join Date
    Jul 2014
    Location
    Edmond, Oklahoma
    Posts
    1,752
    Looks great Ken, and really functional! Good job!

    I really like the underside of the opened lid, and bet the top view is just as good.

    The grain of the two types of lumber really work well together. I've never used milk paint, but it is obviously highly regarded by Neanders. If I ever build a tool chest, and such is high on my "to do" list of someday items, I will have to think hard on milk paint. I have always thought if I build one it will be hard not for me to want to go with some sort of stain and varnish, because of being able to see the grain, but your idea of seeing the grain of the lid, and milk paint on the body may be a very good way to go, and may be the best of both worlds of tradition and seeing grain.

    It sounds like you've crossed the Rubicon with regards to making a decision whether you will build a chest to take camping. Cool, and I was kind of hoping you would, because your original idea seemed too good not to do.

    Now that you have a big chest for your shop, and know how much it weighs, have you modified your original thoughts on a traveling chest, make it smaller and have to think more about what tools you will pack with you?

    At any rate congrats on finishing the chest.

    One thought on the broom. Years ago when I was running a lab and QC program for a company I used to work for, one of the maintenance guys told me he could not use a wooden handled shovel. He said he had to use a metal handled shovel with cooling water pumping through it so he wouldn't burn the handle off of it. I knew the guy a little bit, and would never have realized that about him, in fact I don't think that anyone who knew him would have had that thought even occur.....

    I don't know if the instructions to your broom had anything like an option for a water cooled handle as an add on, but I wouldn't want to take a big chance about accidentally starting the broom handle on fire......

    Probably best to not take any unnecessary foolish chances or wild risks on safety.....wait till you find the instructions on the broom so you know how to operate it safely.....

    Stew
    Last edited by Stew Denton; 06-05-2016 at 11:05 PM.

  9. #9
    Join Date
    Jan 2013
    Location
    Temecula,CA
    Posts
    442
    Quote Originally Posted by ken hatch View Post
    I have one but I lost the instructions and haven't been able to figure out how to turn it on.

    It is heavy, once I decided it was going to be too big for the RV I quit trying to save weight, An example the top is Oak and Cherry instead of White Pine. A RV chest will follow soon.

    ken
    Hahaha well done Ken. Looks nice and I like the red.

  10. #10
    Quote Originally Posted by Brian Holcombe View Post
    Oh cool, the Nakayama asagi?
    Yep, that's the one. It sure is pretty. The Nakayama may be my last stone for awhile unless something comes along I can't live without.

    ken

  11. #11
    Join Date
    Aug 2013
    Location
    Princeton, NJ
    Posts
    7,298
    Blog Entries
    7
    Hah, I can appreciate that sentiment, I felt the same way after my asagi. Enjoy it, it will make a razor out of your plane blades and paring chisels.

    I don't know if you have watched my planing videos but the most recent one, off camera I took the plane apart, worked the blade with that asagi, then came back and put a mirror on the walnut panel.
    Bumbling forward into the unknown.

  12. #12
    Quote Originally Posted by Stew Denton View Post
    Looks great Ken, and really functional! Good job!

    I really like the underside of the opened lid, and bet the top view is just as good.

    The grain of the two types of lumber really work well together. I've never used milk paint, but it is obviously highly regarded by Neanders. If I ever build a tool chest, and such is high on my "to do" list of someday items, I will have to think hard on milk paint. I have always thought if I build one it will be hard not for me to want to go with some sort of stain and varnish, because of being able to see the grain, but your idea of seeing the grain of the lid, and milk paint on the body may be a very good way to go, and may be the best of both worlds of tradition and seeing grain.

    It sounds like you've crossed the Rubicon with regards to making a decision whether you will build a chest to take camping. Cool, and I was kind of hoping you would, because your original idea seemed too good not to do.

    Now that you have a big chest for your shop, and know how much it weighs, have you modified your original thoughts on a traveling chest, make it smaller and have to think more about what tools you will pack with you?

    At any rate congrats on finishing the chest.

    One thought on the broom. Years ago when I was running a lab and QC program for a company I used to work for, one of the maintenance guys told me he could not use a wooden handled shovel. He said he had to use a metal handled shovel with cooling water pumping through it so he wouldn't burn the handle off of it. I knew the guy a little bit, and would never have realized that about him, in fact I don't think that anyone who knew him would have had that thought even occur.....

    I don't know if the instructions to your broom had anything like an option for a water cooled handle as an add on, but I wouldn't want to take a big chance about accidentally starting the broom handle on fire......

    Probably best to not take any unnecessary foolish chances or wild risks on safety.....wait till you find the instructions on the broom so you know how to operate it safely.....

    Stew
    Thanks Stew,

    Here is a photo of the closed lid:


    Yep, I'll still make a traveling tool chest and workbench. But it will be much less ambitious, made for a panel saw and a couple of backsaws and a smaller tool kit.

    My thoughts exactly on the broom, those things can hurt you if you don't know what you are doing.

    ken

  13. #13
    Quote Originally Posted by Brian Holcombe View Post
    Hah, I can appreciate that sentiment, I felt the same way after my asagi. Enjoy it, it will make a razor out of your plane blades and paring chisels.

    I don't know if you have watched my planing videos but the most recent one, off camera I took the plane apart, worked the blade with that asagi, then came back and put a mirror on the walnut panel.
    I noticed a change in apparent effort and figured you had taken a break to sharpen or changed planes. It did put a beautiful finish on the panel.

    ken

  14. #14
    Quote Originally Posted by Mike Cherry View Post
    Hahaha well done Ken. Looks nice and I like the red.
    Thanks Mike.

  15. #15
    One more photo, this time how the tool chest fits into the work station. My main bench is just out of the foreground and the photo is of the area just behind the bench:


    My most used tools are stored somewhere in that mess. The sharpening bench is off the left end of the main bench and there is a secondary bench and tool storage off the right end of the main bench. The machines are in front of the bench in their own area. It is compact but works well for my builds and way of working.

    I'm not 100% sold on a tool chest vs. tool cabinets but I'll give it a try....As posted before if it doesn't work out the Grandpeanut will have a nice red toy box to play with.

    ken

Posting Permissions

  • You may not post new threads
  • You may not post replies
  • You may not post attachments
  • You may not edit your posts
  •