Results 1 to 7 of 7

Thread: Mahogany Veneer Vanity

  1. #1
    Join Date
    Dec 2010
    Location
    WNY
    Posts
    9,737

    Mahogany Veneer Vanity

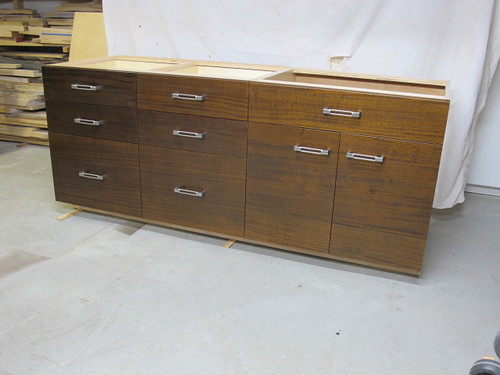
    I designed and built this vanity for a friend veneer he cut from some beautiful mahogany stock he's been hoarding.


    It's built of Baltic birch plywood and the doors and drawer fronts were veneered using Weldwood Plastic Resin Glue in my vacuum bag. The finish is Lockwood's Brown Mahogany water soluble dye, mixed in 2 pints water. I sprayed a light coat and then wiped it with a paper towel to make sure it was as uniform as possible. Prior to that I sanded to 325 grit, raised the grain, and cut the whiskers with 600 grit. I had minimal grain raising from the dye.

    The rest of the finish was one light, sprayed coat of Sealcoat shellac followed by 3 sprayed coats of GF's incredibly expensive EnduroVar Satin. The drawers and inside of the right cabinet were done the same minus the dye. The inside of the left cabinet has a coat of shellac, only.

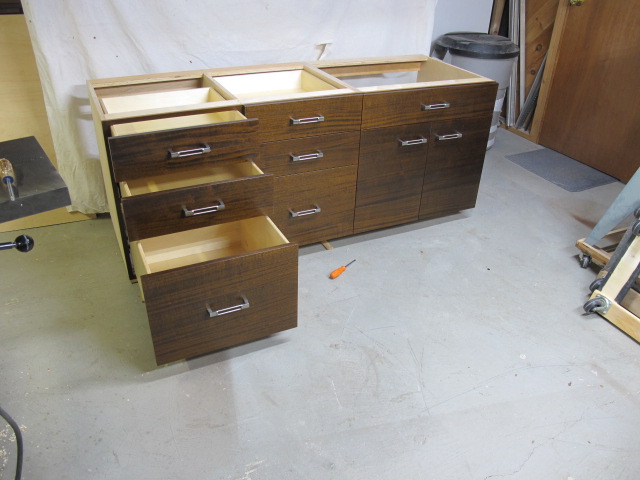
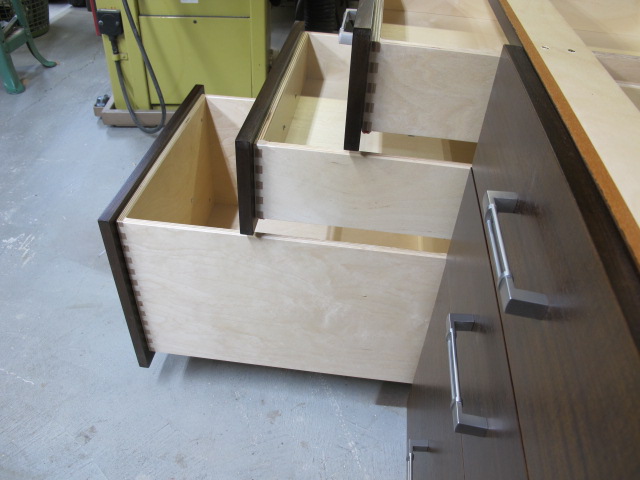
    The drawers are 1/2" BB ply joined with 1/2" finger joints and riding on Blum Tandem BluMotion slides.


    The handles are from Lee Valley.


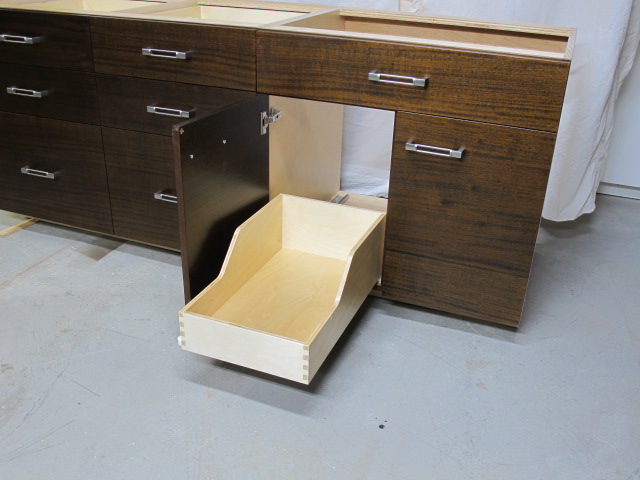
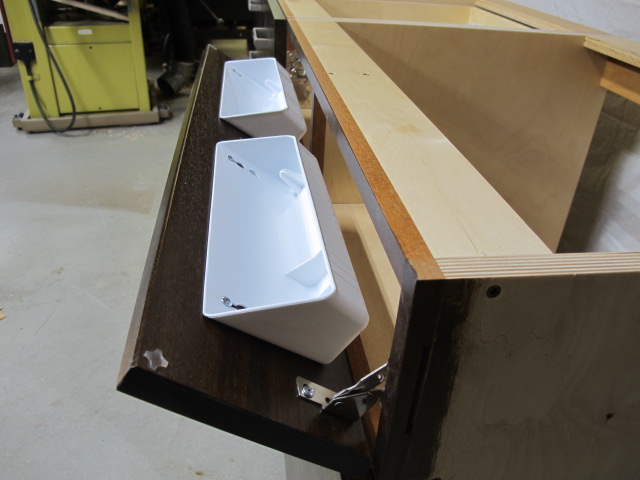
    The drawer front below the sink tips out on some very clever soft close pivot hinges from RevaShelf. For $12 a pair they are a bargain. The little plastic trays were about $4 each.


    [/image]

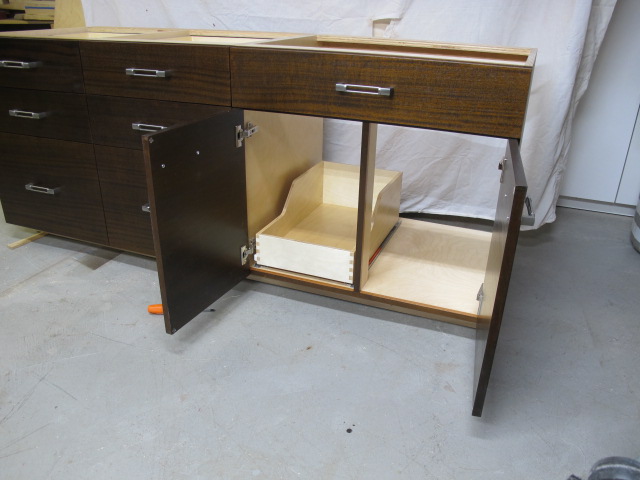
    The two doors open with Blum BluMotion hinges and there is a pull out shelf mounted on a Blum bottom mount BluMotion slide specifically designed for this application.


    The cabinets sit on a separate base made from 2 layers of 3/4" plywood, a simple ladder type construction. A mahogany toe kick, not shown, will trim out below the cabinets. There are scribe strips on both sides of the cabinet, too, also not shown, that attach to the cabinets with biscuits and a couple of screws from inside the cabinets.

    Thanks for looking.

    John

  2. #2
    Fantastic work, John. I love the tip-out drawer idea!

  3. #3
    Join Date
    Mar 2003
    Location
    SE PA - Central Bucks County
    Posts
    65,876
    Excellent work! And I'm a fan of the separate base design for cabinets like this. It's so much easier to build and install that way...leveling that separate base is a snap without the heavy cabinet on it!
    --

    The most expensive tool is the one you buy "cheaply" and often...

  4. #4
    Looks great!

  5. #5
    I love it!

  6. #6
    Join Date
    Jun 2008
    Location
    So Cal
    Posts
    3,776
    That's is some fine work.Your flat work and ability to finish is top shelf.
    Its not easy to make mahogany look like walnut.
    Thanks for sharing.

    Aj

  7. #7
    Join Date
    Dec 2010
    Location
    WNY
    Posts
    9,737
    Thanks all. I couldn't agree more, Andrew, it sure is flat isn't it? But it's a MCM house and this will fit right in with that theme. It does look a lot like walnut in the photos, but not so much in person, certainly not the grain anyway. But that's what Lockwood's Brown Mahogany dye gives you when you put it on mahogany. The bathroom this goes in has brown elements, so the owners didn't want the red color we normally associate with mahogany. He actually gave me the Lockwood's dye and told me that was the color he wanted. Absolutely, sir.

    Jim, you are so right about how much easier it is to use a separate base. You get it nice and level, lock it in place, and then just set the cabinets on top. Saves on some Baltic birch plywood, too.

    John

Posting Permissions

  • You may not post new threads
  • You may not post replies
  • You may not post attachments
  • You may not edit your posts
  •