Page 6 of 7 FirstFirst ... 234567 LastLast
Results 76 to 90 of 98

Thread: A sharpening thread of my very own (Japanese Natural Stones).

  1. #76
    Join Date
    Dec 2015
    Location
    Dublin, CA
    Posts
    4,119
    Quote Originally Posted by Brian Holcombe View Post
    The work I typically do with the Try plane is to true a panel or board prior to finish planing. Tear out at that juncture causes a substaintial increase in the time spend on the finish plane. So it makes the planing easier but the work harder.
    I think that this is a key point, and one that I've tried to bring up a few times in various threads but probably haven't expressed as well as you did.

    IMO jointer/try planes benefit even more from a close-set cap iron than do smoothers. As you say you don't want to leave much tearout behind for the smoother, or else you have to take a lot of passes and productivity becomes an issue. At the same time jointing usually requires a moderate amount of material removal, so productivity also demands relatively thick shavings with a wide blade. The former means that you can't mitigate tearout by reducing shaving thickness, and both taken together make high cutting angles undesirable unless you're very strong and/or masochistic (while the cap iron does increase cutting forces, it is my experience that it does so less than does increasing the cutting angle enough to get equivalent tearout performance).

    Smoothing is much less constrained, again IMO. You can take thinner shavings, which both mitigates tearout directly and makes high cutting angles less onerous, which in turn opens the door to further tearout mitigation.

    If I were only allowed to use a close-set cap iron on one plane the choice would be easy: #7.

    EDIT: To be completely clear, I use my planes with the cap iron set a bit back (~1/64") from the edge most of the time. For the most part I only advance it to a tighter setting for troublesome grain. My point above is that when I do so with a smoother I usually have other (less desirable but still viable) options, whereas with the jointer it's more of an a**-saver.
    Last edited by Patrick Chase; 07-04-2016 at 12:13 PM.

  2. #77
    Join Date
    Dec 2015
    Location
    Dublin, CA
    Posts
    4,119
    Quote Originally Posted by Stewie Simpson View Post

    • Richard Maguire March 3rd, 2016 Hmm… so ‘wrong’, yet you agree. A cap iron that’s doing something adds resistance.
      Not everyone’s aware of this and it’s an essential mechanic to understand.
    This is inarguably true in the "there is no free lunch" sense - obviously if the cap iron is doing work on the wood then it must add some incremental resistance.

    With that said I think that Richard's reply is based on a creative (and perhaps intentional) misinterpretation of what Kees said. Kees didn't claim that the cap iron adds no incremental resistance, he merely pointed out that the setting is a tradeoff between resistance and tearout mitigation, which is an equally inarguable truth, again in the "no free lunch" vein. The real questions are "how much resistance does it add" and "how does it compare in that respect to other means of tearout mitigation"?

    The second (and more important) part of Kees' argument addresses those questions. He argues that for any given amount of desired tearout mitigation, a low-angle blade with a close-set cap iron adds significantly less cutting resistance than does a single iron (no cap iron) pitched at a sufficiently high angle to achieve the same results. While that's clearly open to debate, it's consistent with my experience. That's also why I think that close-set cap irons are *very* useful indeed on jointers.
    Last edited by Patrick Chase; 07-04-2016 at 2:29 AM.

  3. #78
    Indeed!

    The "You are wrong" was a catchy title of course. Maybe a bit too catchy?

  4. #79
    Join Date
    Aug 2013
    Location
    Princeton, NJ
    Posts
    7,296
    Blog Entries
    7
    Quote Originally Posted by Stewie Simpson View Post
    Brian; you have probably viewed Richard Maguire's previous video on his blog site; http://www.theenglishwoodworker.com/...ear-out-video/

    Within the comments section; Richard offers some clear insight on his approach to the use of cap irons.

    Richard May 11th, 2015

    Warren; don’t worry, I left the concerns of tear out behind with puberty. As David said, this is a great topic worth further discussion, but is beyond the scope of this video and this post. I aim for clarity on subjects for my audience so try to cover one point at a time, but I have mentioned previously that I don’t simply class a plane by it’s length but how I’ve chosen to set it up for use. 90% of my work is finished off the try which is set up closely to my smoother (I don’t do any of the wispy, thin gravity defying shavings).

    If I’m hogging off material however then I won’t concern myself with the cap iron, I don’t have problems with tear out since I’ll read the wood, make judgement and alter my approach on the fly, but that’s a whole other subject. I’ll not just judge every piece of wood as being the same, I’m working it by hand so I can respond as a human.

    When I look for the positive point in what you’ve written I do find that we’re almost on the same page… almost.


    Bumbling forward into the unknown.

  5. #80
    Placing the cap iron is an art. If it is placed appropriately for the work at hand the plane is less work to push because cutting cleanly takes less effort than creating tear out.

  6. #81
    Join Date
    Dec 2015
    Location
    Dublin, CA
    Posts
    4,119
    Quote Originally Posted by Warren Mickley View Post
    Placing the cap iron is an art. If it is placed appropriately for the work at hand the plane is less work to push because cutting cleanly takes less effort than creating tear out.
    Warren, I wouldn't question your expertise, but doesn't this depend on extent? if you have a very localized grain reversal causing a narrow band of tearout, then in my experience the increase in cutting force is modest relative to the overall effort. In contrast you generally pay "full price" for mitigations (cap iron, pitch, etc) since those can't be applied locally for the most part.

    I also should have been clearer that Michael's specific point in his article was that if you take a plane with a close-set cap iron to a piece of straight-grained wood the forces will be higher. Obviously in that case you can just relax the cap iron set, as Kees pointed out, so it's a somewhat pointless debate.

    I don't doubt that you use the cap iron more efficiently than I do. In particular I tend to be "binary" - either there's no tearout and it's set back ~15-20 mils from the edge, or I expect trouble and set it basically up as close as I can get it. I expect that with more experience I would be able to make more refined and continuous tradeoffs.
    Last edited by Patrick Chase; 07-04-2016 at 12:10 PM.

  7. #82
    Quote Originally Posted by Patrick Chase View Post
    Warren, I wouldn't question your expertise, but doesn't this depend on extent? if you have a very localized grain reversal causing a narrow band of tearout, then in my experience the increase in cutting force is modest relative to the overall effort. In contrast you generally pay "full price" for mitigations (cap iron, pitch, etc) since those can't be applied locally for the most part.

    I also should have been clearer that Michael's specific point in his article was that if you take a plane with a close-set cap iron to a piece of straight-grained wood the forces will be higher. Obviously in that case you can just relax the cap iron set, as Kees pointed out, so it's a somewhat pointless debate.

    I don't doubt that you use the cap iron more efficiently than I do. In particular I tend to be "binary" - either there's no tearout and it's set back ~15-20 mils from the edge, or I expect trouble and set it basically up as close as I can get it. I expect that with more experience I would be able to make more refined and continuous tradeoffs.
    Actually if there is one part of the board that is tearing out, it is that section which will tire a worker out, jarring his frame whenever it is worked. How easy the rest of the board is is not so important.

    I searched the thread for references to Michael, but found none.

    Your "binary" use of the double iron is a very clumsy approach. I have avoided providing distances for cap iron placement for nearly a decade because the cookbook approach is not so profitable in this work. The distance depends on the quality of the timber and the extra force needed is not so very apparent if the cap iron is well placed.

  8. #83
    Join Date
    Dec 2015
    Location
    Dublin, CA
    Posts
    4,119
    Quote Originally Posted by Warren Mickley View Post
    Actually if there is one part of the board that is tearing out, it is that section which will tire a worker out, jarring his frame whenever it is worked. How easy the rest of the board is is not so important.
    To be clear I was referring to the case where tearout happens in narrow strips, such that most of the blade is cutting cleanly and only a small portion of it is seeing higher cutting forces due to tearout. The impact of tearout on overall cutting force is thereby diluted even within a single section. Admittedly that isn't terribly common - I've mostly seen it with species like Mahogany, and in some quartersawn pieces with nonuniformly interlocked grain.

    Quote Originally Posted by Warren Mickley View Post
    I searched the thread for references to Michael, but found none
    Whoops, that was an error on my part. I was referring to Stewie's quotation from Richard McGuire. My apologies.

    Quote Originally Posted by Warren Mickley View Post
    Your "binary" use of the double iron is a very clumsy approach. I have avoided providing distances for cap iron placement for nearly a decade because the cookbook approach is not so profitable in this work. The distance depends on the quality of the timber and the extra force needed is not so very apparent if the cap iron is well placed.
    Yes, that's why I highlighted it as an inefficiency in my current technique Thanks for the confirmation :-).
    Last edited by Patrick Chase; 07-05-2016 at 3:36 AM.

  9. #84
    Join Date
    Oct 2010
    Location
    Australia
    Posts
    2,534
    the following article is a worthwhile read imo.

    Stewie;


    http://www.smallworkshop.co.uk/2016/...-the-cap-iron/
    Once the plane blade starts to cut into the surface of the wood, the shaving rides up the blade and acts as a lever on the fibres ahead of it – the fulcrum being the leading edge of the mouth and the blade itself acting like a wedge. The leverage can cause other fibres that are connected to the shaving to be pulled from the wood before they are cut by the edge of the blade (“tear-out”).

    One way to reduce the leverage exerted by the shaving is to adjust the frog so that there is a very small opening between the front of the mouth and the blade, thus effectively reducing the length of the unsupported shaving.

    The other techniques involve causing the shaving to break early, for instance by raising the ‘angle of attack’ of the blade. That is to say, if you increase the pitch of the blade it causes the shaving to bend more sharply than would normally be the case, and this weakens the fibres immediately in front of the blade and, thus weakened, they are less likely to lever out fibres they are attached too.

    One way to accomplish this is to use a modified frog that seats the blade at a higher angle than normal, and indeed so common was this technique in days gone by that the preferred angle (50°) was given its own name (“york pitch”) compared to the standard pitch (~45°).

    The argument follows that the cap iron has the same effect, presenting a steep surface to the shaving and thus creating an effective higher angle of attack.


  10. #85
    Join Date
    Apr 2010
    Location
    Tokyo, Japan
    Posts
    1,550
    Here are some pictures of the end products of a natural stone.

    I will include more pictures in subsequent posts to this thread. I think this is the best way to understand what Brian is trying to convey,

    Stan
    Attached Images Attached Images

  11. #86
    Join Date
    Apr 2010
    Location
    Tokyo, Japan
    Posts
    1,550
    Here are some more pics that will perhaps help to illustrate Brian's point.

    More pics coming.

    Stan
    Attached Images Attached Images

  12. #87
    Join Date
    Apr 2010
    Location
    Tokyo, Japan
    Posts
    1,550
    Some more pics.

    First is a shaving. This did not win any prizes, but it is decent.

    The other pics are of something guys who are into sharpening over here work hard to accomplish once in a while. I have done it several times myself, and there is a knack to it besides simply knowing stones and steel. The blades are stuck to the stone's surface by water suction, and are not supported. The stones and blades are wet. As the water dries, the blade will drop free. Give it a try sometime.

    Stan
    Attached Images Attached Images

  13. #88
    Join Date
    Apr 2010
    Location
    Tokyo, Japan
    Posts
    1,550
    Lastly, I am attaching pics of Japanese swords. I hope these will be informative about the historical background of sharpening in Japan.

    There are some details you may find interesting, and that will help to dispel the confusion that always surrounds these beautiful blades.

    First, unlike the planes and chisels and knives in my previous posts, the hamon (edge pattern) is not created by laminating the steel. While most Japanese sword blades are laminated with a softer mild-steel core to absorb shock and provide flexibility, the steel you see in the pictures on the sides of the blades is all continuous and homogeneous. The pattern is due to differential hardness, but more importantly, shows the varying crystalline structure at the surface of the steel (and which goes down inside the blade too, of course).

    When a professional sharpener sharpens, or "polishes" a sword as the term is used nowadays, the beauty of the crystalline structure becomes vaguely apparent when he is done with the finishing stones, but it is his use of the thin slices of he various types of "uchigumori" stone that causes the patterns to jump out. Small slices of this stone are attached with lacquer glue to mullberry paper which he places under his thumb to polish the blade. A tremendous amount of skill and experience is required to do this work. Since ancient times, the sword polisher was higher in rank in Japanese society than the blacksmith that made the sword, frequently equal to the samurai, unlike the more lowly craftsman.

    Many years have gone by since I had a sword polished. But back in the day, a top-quality polish by a top-tier polisher like Fujishiro san of a top-quality sword like a Sukezane or Nagamitsu cost as much as a new economy car.

    Prior to the Meiji Restoration in Japan, the local lords of the samurai clans owned the mountains and mines where the highest-quality sharpening stones were produced, creating monopolies. The best stones were even more precious back then than they are nowadays.

    It is not an exaggeration to say that sword blades were considered sacred then, and that they continue to have a deep hold on the DNA consciousness of the Japanese people even nowadays. Once again, this is not an exaggeration.

    Considered in the light of cultural background, the Japanese obsession with sharpness and quality steel is understandable. It does not have its equal in the West. Natural sharpening stones are part of that heritage. A Japanese craftsman that believes himself good with planes and chisels and knives will always try to go beyond simple sharpness to achieve beauty in his blades. This is the rabbit hole of which one must beware. The tea party at the bottom of the hole is a lot of fun, if costly. Don't forget to bring a nice coat and hat.

    Stanuchigomori.jpg
    Attached Images Attached Images
    Last edited by Stanley Covington; 07-23-2016 at 4:09 AM.

  14. #89
    Join Date
    Aug 2013
    Location
    Princeton, NJ
    Posts
    7,296
    Blog Entries
    7
    Awesome Stan! Those pics are really wonderful.

    BTW, I am attending Kezurou Kai in Brooklyn, NY at the end of August. Should be fun.

    The picture of those Nomi are really something incredible, that is the best looking ura I have seen on a chisel!
    Bumbling forward into the unknown.

  15. #90
    Join Date
    Aug 2013
    Location
    Princeton, NJ
    Posts
    7,296
    Blog Entries
    7
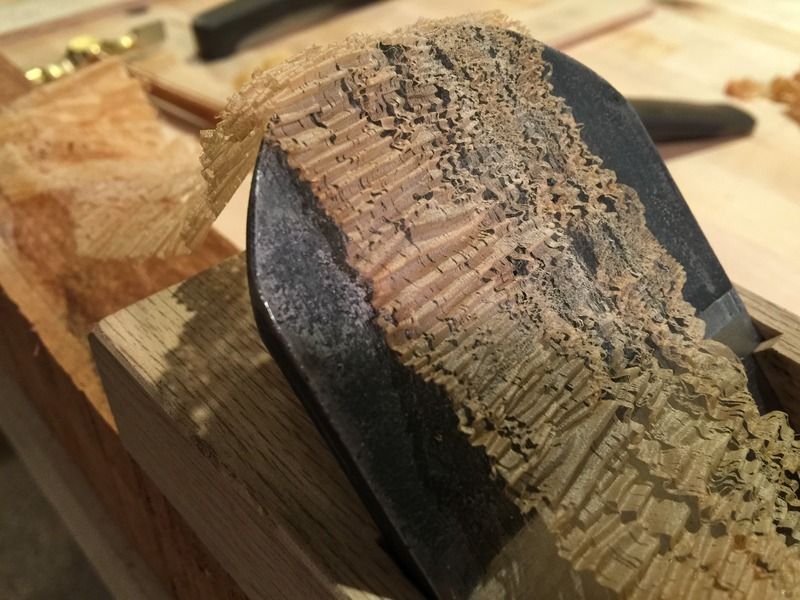
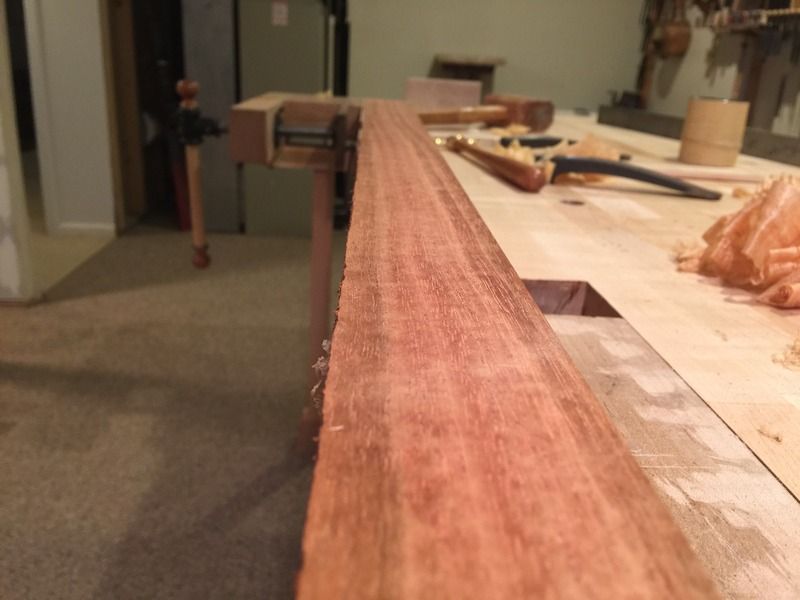
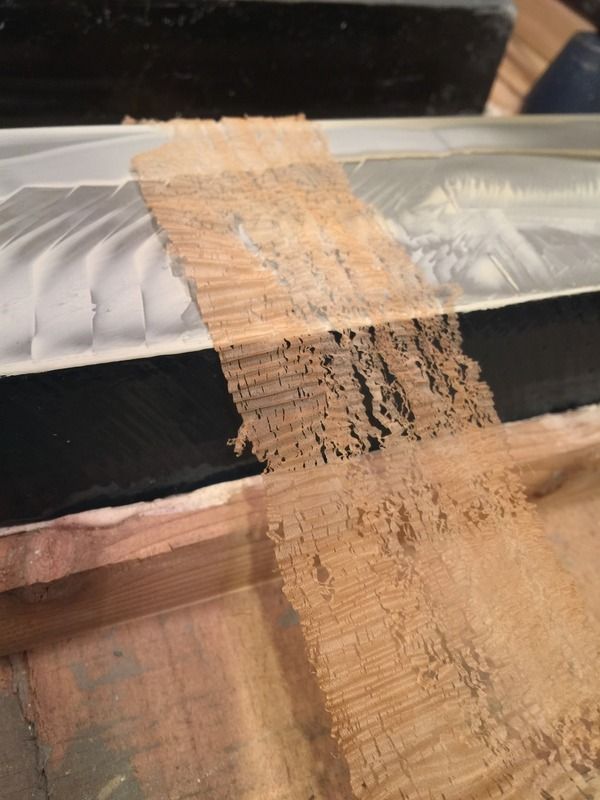
    I have some photos of my practice run on Honduran mahogany (I should really go out and buy some hinoki cypress to practice on....and later turn into furniture).


    To stand a chance these shavings are going to need to get a lot thinner.
    Bumbling forward into the unknown.

Posting Permissions

  • You may not post new threads
  • You may not post replies
  • You may not post attachments
  • You may not edit your posts
  •