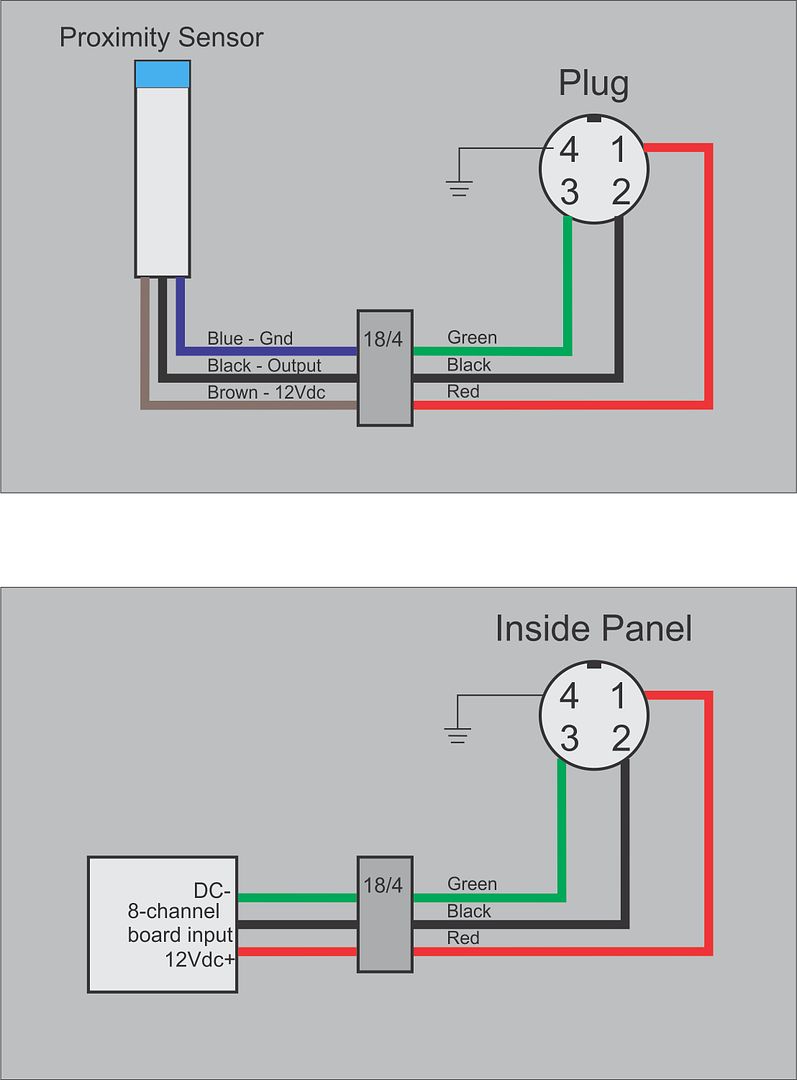
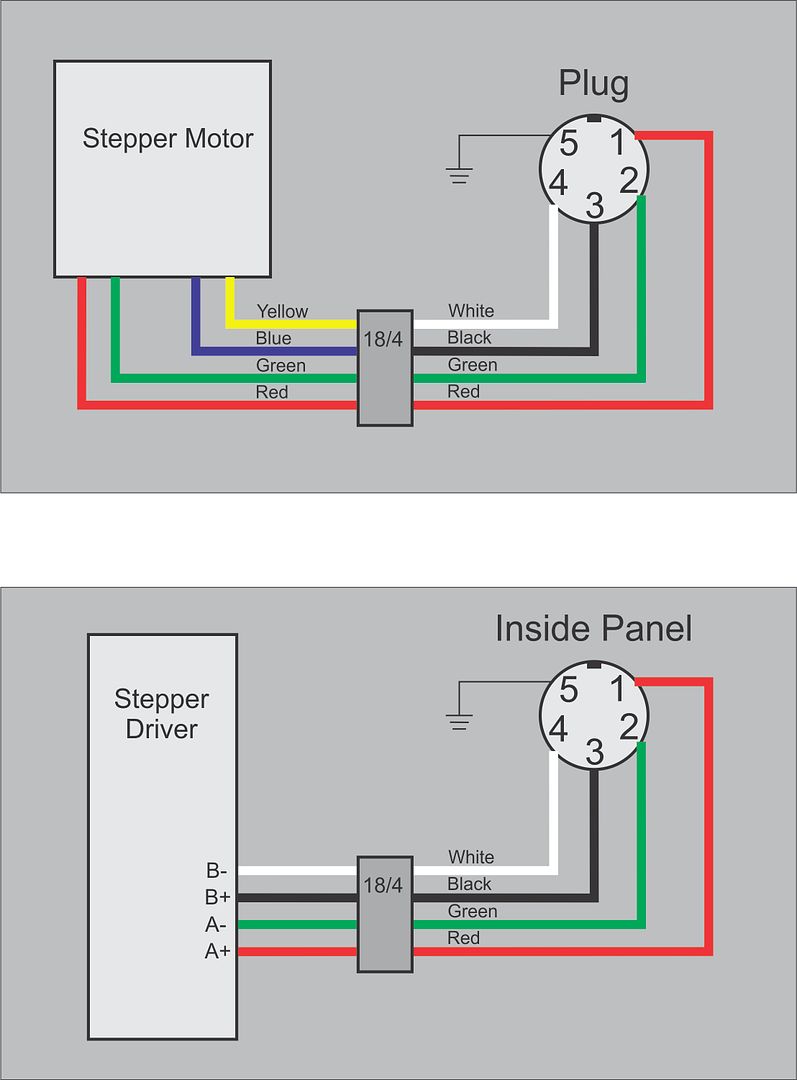
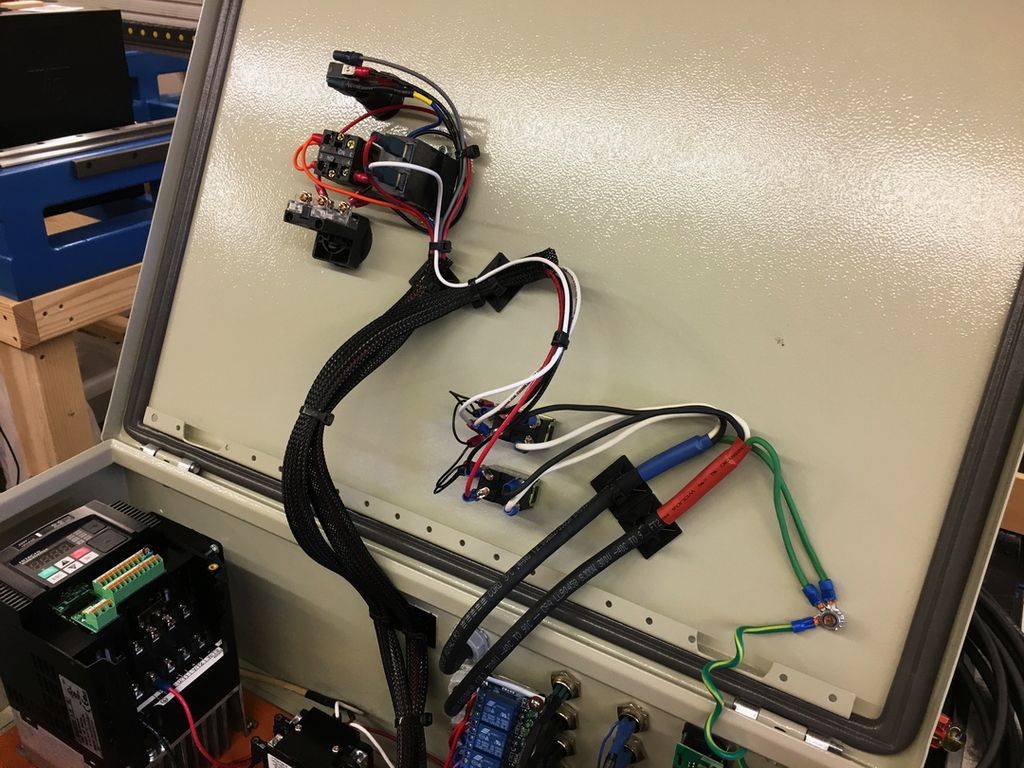
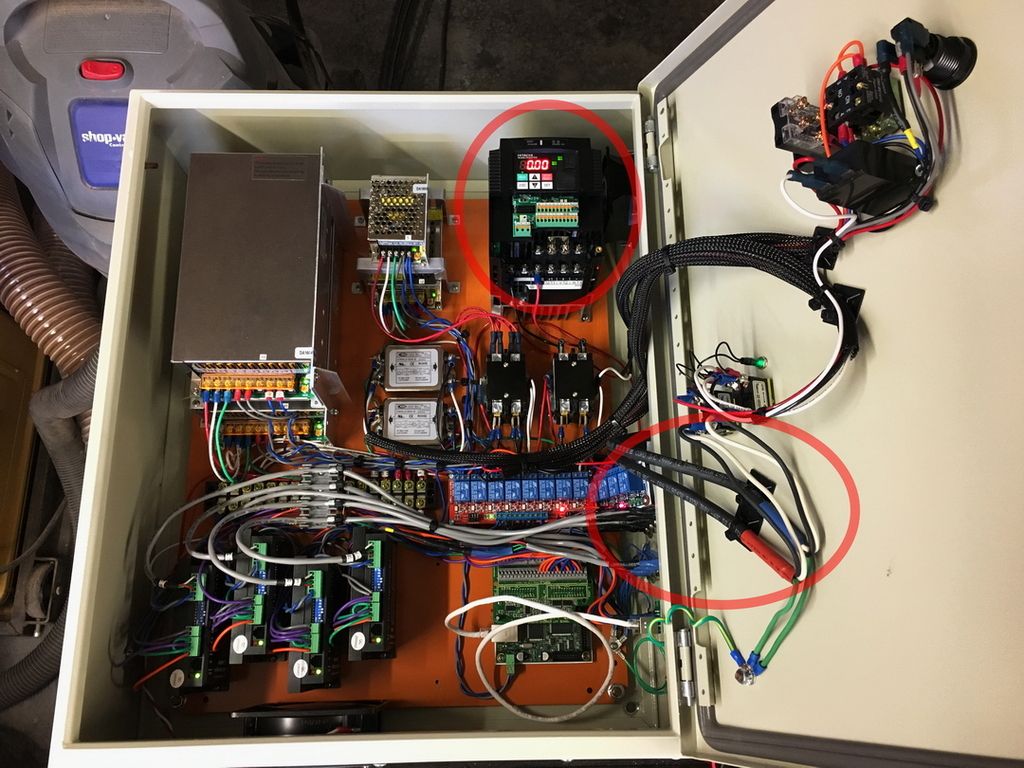
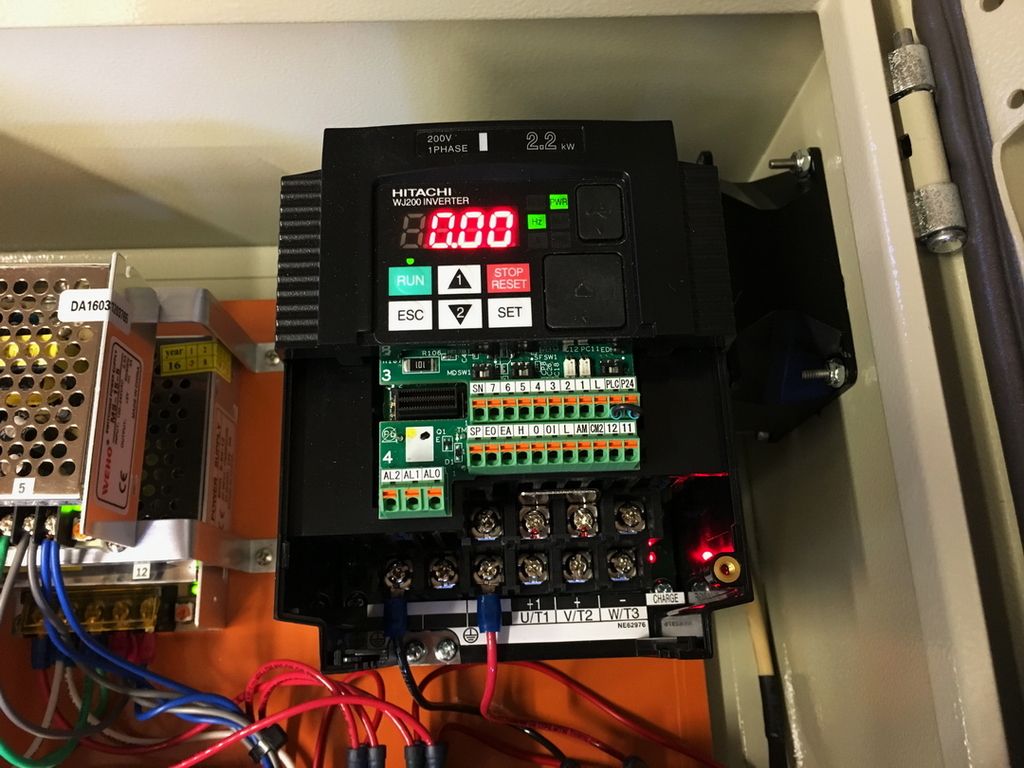
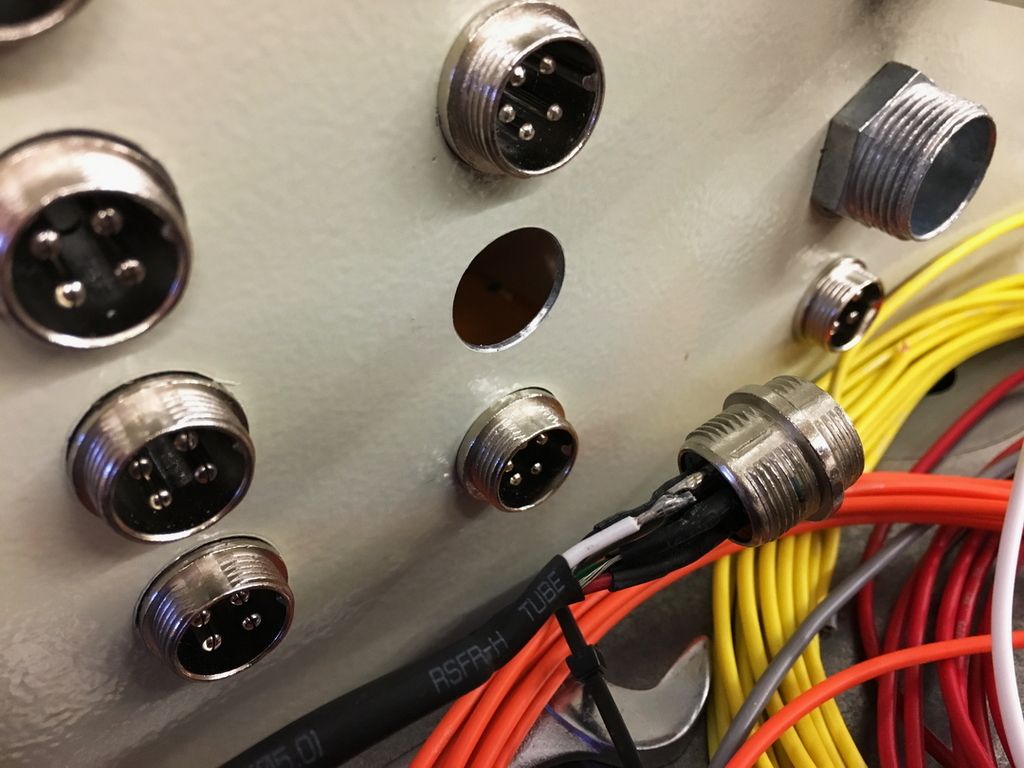
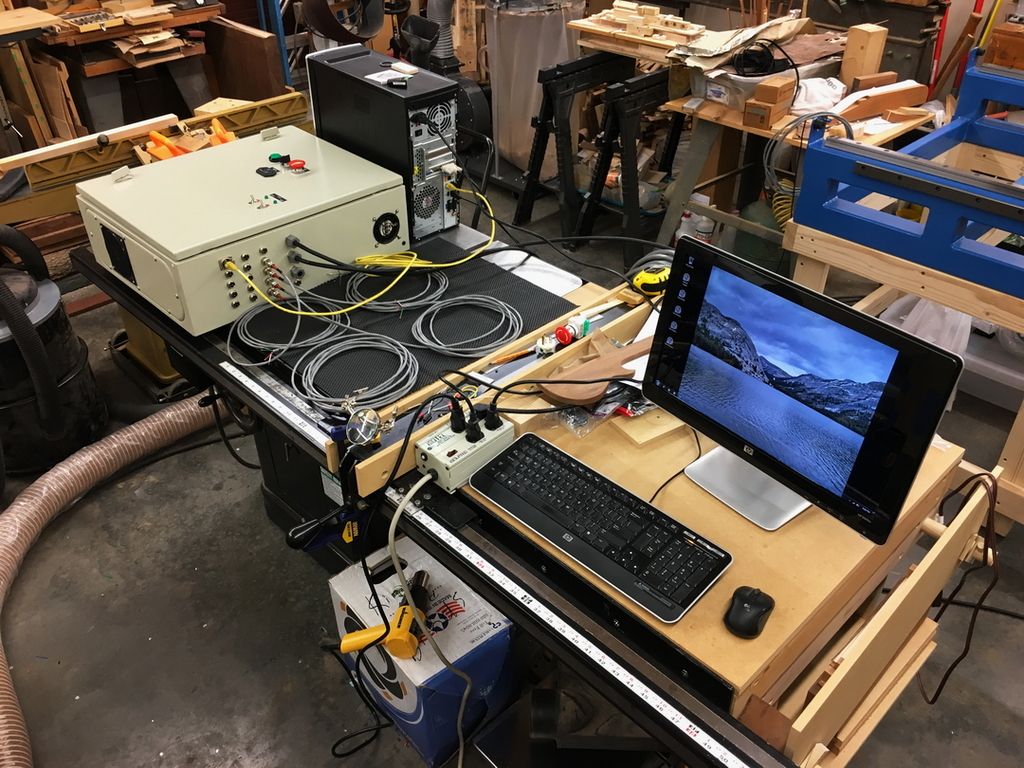
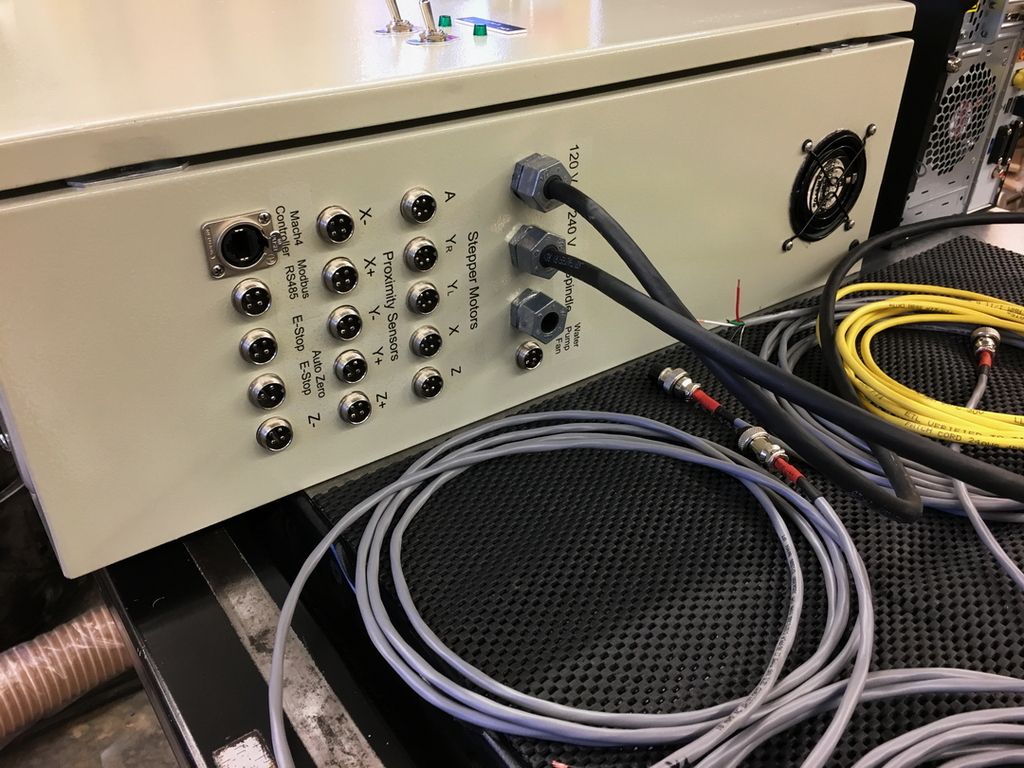
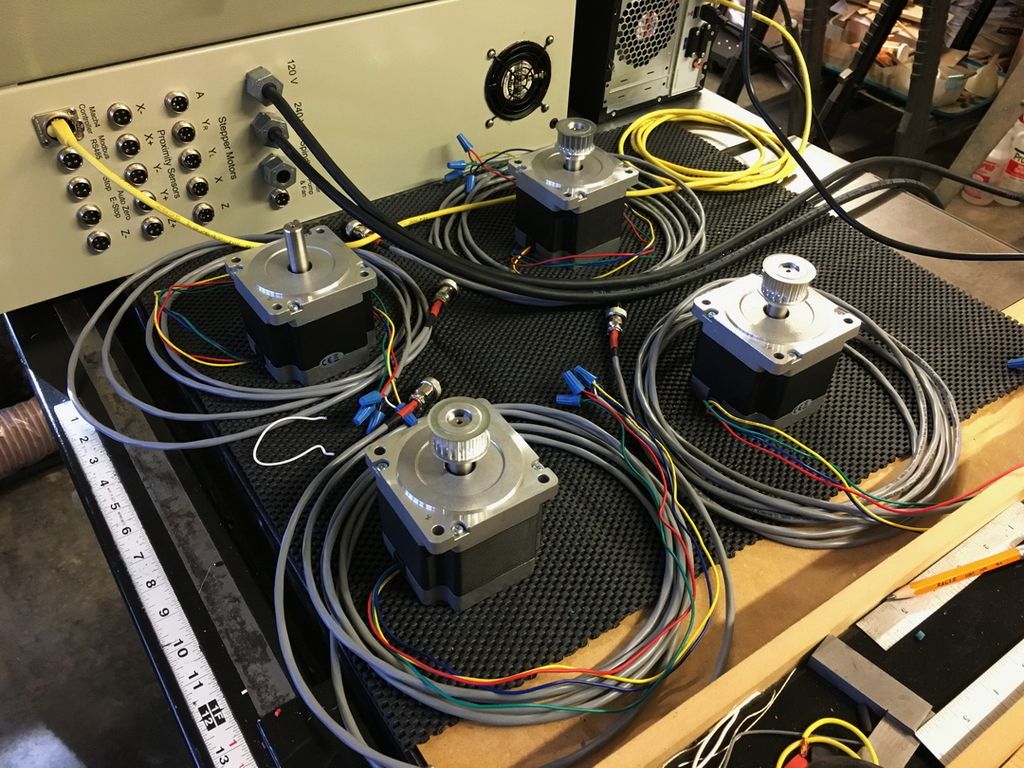
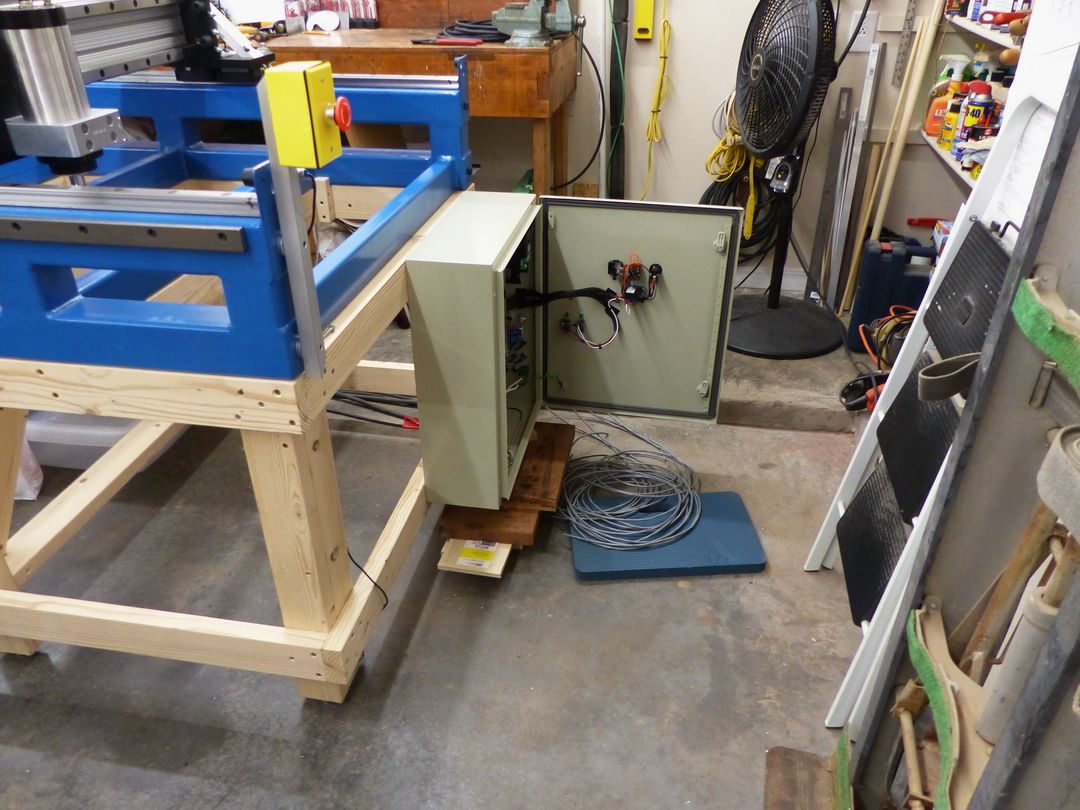
I've been making up cables for a good part of the afternoon but started by mounting the enclosure on the stand so I could get the proper lengths of the stepper and proximity cables. So the enclosure is mounted temporarily but will come off later so I can configure the VFD, the Ethernet SmoothStepper, and Mach4. It'll be so much easier to program the VFD with it on the bench (table saw) instead of having to squat down and manage this.
Getting closer -
David
CurlyWoodShop on Etsy, David Falkner on YouTube, difalkner on Instagram


 Reply With Quote
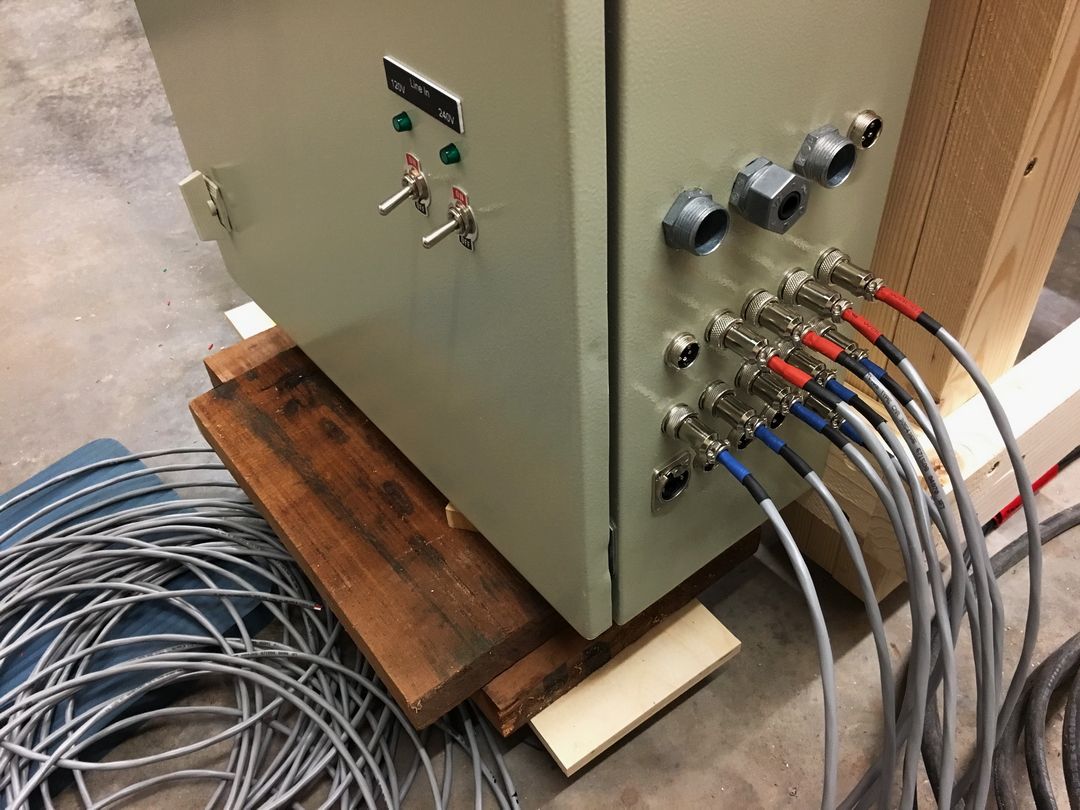

 People around me used to think I was nuts talking to myself while putting equipment together, but mine worked the first time power came on. It's worth the effort.
")