Results 1 to 13 of 13

Thread: First Goblet

  1. #1
    Join Date
    Jan 2006
    Location
    Chicagoland
    Posts
    2,802

    First Goblet

    Figured I'd have more questions about the subject piece so started this thread although my first question about the nub in the bottom of the cup can be found here:

    http://www.sawmillcreek.org/showthre...ttom-of-Goblet


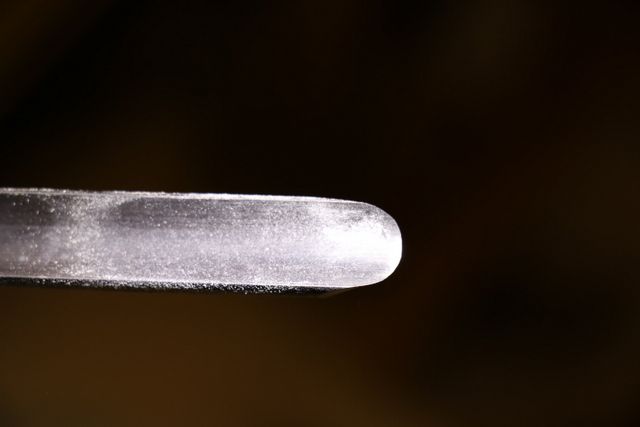
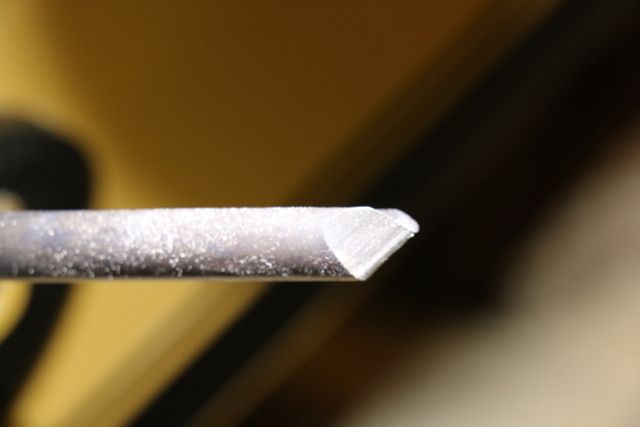
    I had a little time to play some more with the goblet. After removing the nub I wanted the taper the bottom of the cup to the stem. I pulled out my new Thompson 1/2" spindle gouge:


    Don't know why but even though I've been turning on/off for about 2-years it was a little scary thinking about using this tool. I watched some online videos and thought I knew the technique. I know, my skills are screaming to go to a club but don't seem to have the time to commit to that yet. Anyway, I was doing fine going downhill but then a catch that spiraled me up the outside of the cup. I think I was turning too slow at 500RPM so went to 1000RPM. Had it just about done two more times and "bam" similar catches riding me up the outside of the cup. Then somehow I cleaned it up without another incident. Wonder how thin the cup wall is now? In this case the catches were a good thing. I like the end shape of the cup better than my original plans.

    I was trying to ride the bevel, start my cut to the left of center on the tool, started flute straight up (maybe this is the problem), pulled the handle up and turned the flute to the left as I progressed down the cup. Any ideas for the catches?

    This test piece is from a very dry ash bat blank. All my other turnings have been soft or green turnings. I noticed as I went down the outside of the cup and tried to form a cove my tool didn't cooperate. It wanted to make a taper. I was even trying to use my hip to try to swing the gouge around. Also, even though the gouge was sharp I seemed to have to push hard to cut. Is this due to the hard ash or bad technique?

    Now for the captured rings. I have a 3/8" D-Way beading tool I thought I'd use to get the top of the ring done with. I tried it late last night but didn't cut as smooth and quick as I see in the videos so stopped and will reload this morning. Think I was trying to cut too high above center. I see to cut the bottom of the ring some purchase a hook tool and some seem to make a tool - suggestions please. Again any hints appreciated.

    I'm too scared to make the stem any thinner right now. I'ts about 1/2" diameter - is this OK? (OK - to tell the truth I'm afraid to get another catch and ruin my cup shape if I go thinner.)


    Thanks,

    Mike

  2. #2
    Join Date
    Sep 2015
    Location
    San Diego, Ca
    Posts
    1,647
    I am by no means an expert. Like many others, I continue to learn and refine my skills.

    From your description of "riding the bevel" and presenting your spindle gouge with the flute straight up, while cutting downhill, I think that is more likely to result in a catch. So, when you raise your handle to initiate cutting, it almost sounds a bit like a peeling cut. If you start with rubbing the bevel, it also sounds like you have your tool angled up quite a bit and perhaps have a bit of extra overhang. When you start cutting from the left side of the tool, there will be downward forces on the left side, and encouraging the left side to rotate CCW. Also, with the flute straight up, you are presenting a lot of tool to your work and as it starts to cut, there will be forces trying to raise the handle and let the cutting edge dig in more.

    When I'm using a gouge on the outside (similar to your situation) I try to angle it upwards at roughly a 45 degree angle and also try to have the cutting edge present to the wood at roughly a 45 degree angle (looking from above). Brendon Stamp has a couple of videos on "No Catch Bowl Turning". They are reasonable videos.

  3. #3
    Join Date
    Jan 2006
    Location
    Chicagoland
    Posts
    2,802
    Brice thanks for the info..

    I also noticed it's difficult to use the D-Way beading tool on this wood. This ash is grainy and the beading tool want to catch when it hits the end grain.

    I looked online and Sorby makes a captive ring set. Anyone have experience with this?


    Thanks

  4. #4
    Join Date
    Apr 2006
    Location
    Escondido, CA
    Posts
    6,224
    The thickness of your stem is fine. The only time I go for a really thin stem is when I am trying to push the limits of skill and see what I can do artistically. A 1/2" stem looks far better than a 1/4" spiral of broken fibers. Try that on your 10th or 100th or 1000th goblet.
    Veni Vidi Vendi Vente! I came, I saw, I bought a large coffee!

  5. #5
    Join Date
    Feb 2008
    Location
    E TN, near Knoxville
    Posts
    12,298
    Quote Originally Posted by Mike Goetzke View Post
    ... I was doing fine going downhill but then a catch that spiraled me up the outside of the cup.
    Mike,

    That grind on the tool looks like the way they come from Thompsons, right? I love the Thompson tools and have quite a few but I have never used a single one the way they come. I always use the Wolverine Varigrind jig or the Tormek (or hold by hand) and reshape the grind with much more swept-back wings. That moves that transition at the ends of the "U" shaped edge way back out of the way. (Sorry, I don't know a name for that transition point.) It sounds like you are catching on those, especially if as Brice mentioned, you are not starting with the tool rotated so the centerline of the flute is not pointing in the direction of the cut.

    I also grind a secondary bevel on each spindle (and bowl) gouge, often rounding and sometimes even polishing the heel of the bevel. This gives some clearance and prevents the heel from marking or burnishing the wood.

    Forgive me if you already know this, but if not: When cutting down the slope of the bowl and ending on the stem you are essentially cutting a deep cove, in which case (when cutting from right to left) the tool would normally start with the flute almost 90 degrees to the left with the bevel pointing exactly down the desired surface. This will probably mean the end of the handle will have to be quite a bit to the right at the beginning. As you proceed down the cut, smoothly rotate the tool until the bevel is straight up when you hit the bottom of the cove. At the same time, you need to push the tool forward AND move the handle to the left. When you stop at the center of the bottom of the cove, the flute should be straight up, the tool pushed forward so the tip and bevel are just barely kissing the wood, and the entire handle should be almost 90 deg to the axis of the spindle. It is very much a "scooping" cut.

    A clean cut requires coordinating all those motions or the dreaded catch monster may get you! This cut is also a lot easier to demonstrate than to write about!

    Do you have any spare wood like what you are using? If not, any wood will do. I highly recommend putting a few practice pieces on the lathe and practice making coves until you are comfortable with the gouge. As mentioned, start with the flute sideways and practice twisting the handle during the cut until the flute is straight up at the bottom of the cove. Stop in the center and repeat on the opposite side cutting the other direction.

    After you do a dozen or so deep coves for practice, look out goblet! Your next cut will be perfect!

    Note that as long as you have the cup supported by the tailstock you can aggressively hog away most of the wood for the handle with a parting tool, skew, or bedan (with peeling cuts) and just use the spindle gouge for final cuts. This is usually a lot quicker.

    A 1/2" stem on a goblet should be fine, most of mine are about that, sometimes thinner depending on the size of the goblet. Those of us who make a lot goblets would be glad to post a picture or two if you are looking for ideas about design or detail. You may not like any of them but then you'd know what you don't like!

    BTW, I turn spindles at pretty high speeds - the cut is smoother and cleaner that way. For a goblet, maybe 1200-2000. For a thin spindle (magic wand, top, finial, etc) maybe 3000+ rpm.

    JKJ

  6. #6
    Join Date
    Jan 2006
    Location
    Chicagoland
    Posts
    2,802
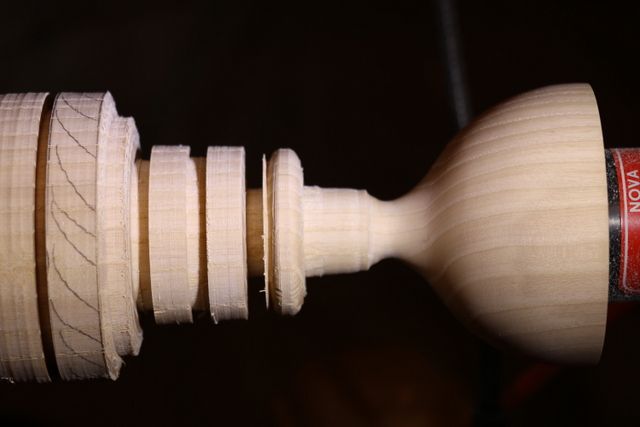
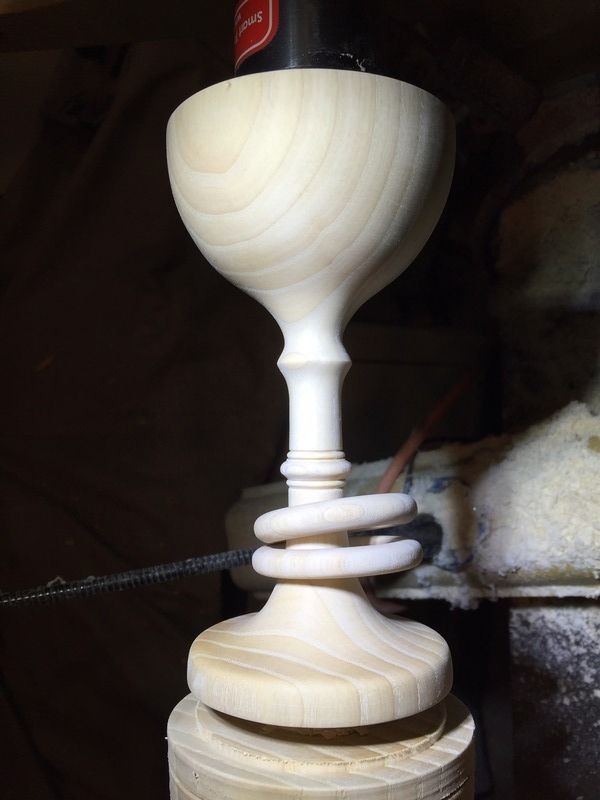
    Had little more time to work on my goblet - 3 rings!


    I purchased the Robert Sorby captive ring tool and I had so much fun with it it's going back. Guess I'll have to research how to make my own. I got the first ring loose with the Sorby ring tool but just used a parting tool to get the next two.
    Mike

  7. #7
    Join Date
    Feb 2008
    Location
    E TN, near Knoxville
    Posts
    12,298
    Quote Originally Posted by Mike Goetzke View Post
    Guess I'll have to research how to make my own.
    Some people use sharpened dental pics, some people grind a ring tool. I googled "make a captive ring tool" and got a bunch of interesting hits.\

    JKJ

  8. #8
    Join Date
    Jan 2006
    Location
    Chicagoland
    Posts
    2,802
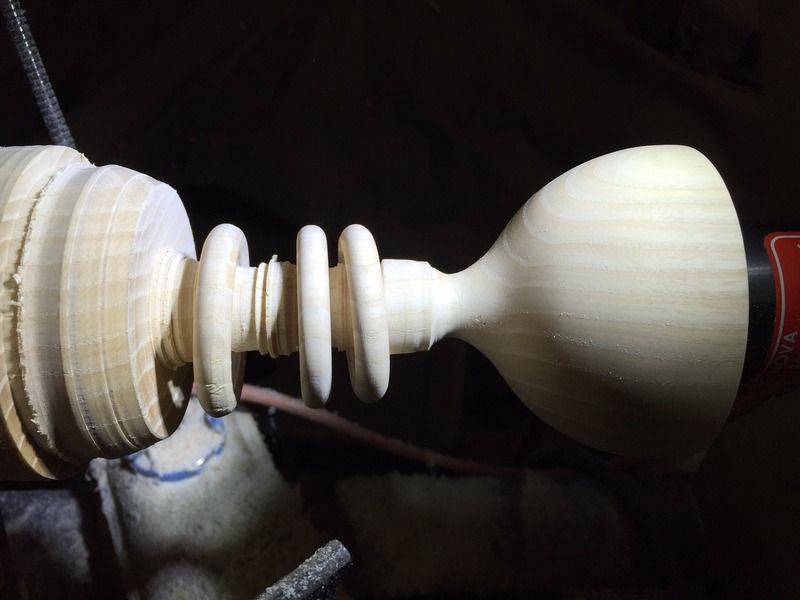
    Got time to work some more on this. The stress level was high (guess I should practice more) but went slow at it and got it almost done:


    (WOW - just noticed the rings are defying gravity!)

    I've been trying to become a turner for the past couple years. It's fun trying new things and see a block of wood become something. When I showed my son and his bride to be the wood I had available to make the goblet they liked padauk. I made this trial goblet out of an ash bat blank and think it's THE keeper: 1) came out OK 2) probably want to burn in their names/date etc. and won't see it on dark wood.

    Any suggestions on how:

    1) to finish it off - do I just part the base off and sand the bottom?
    2) what finish is recommended? I do have Beall buffers/compounds.


    Thanks,

    Mike

  9. #9
    Join Date
    Apr 2006
    Location
    Escondido, CA
    Posts
    6,224
    Yes, Part off the base and sand the bottom. If you like a golden tone, then start with de-waxed shellac sanding sealer. I use at least 3 coats on the inside of the bowl. Sand with 320 between coats. Then finish it off with wipe-on poly. Sand to 400 or more between coats and wax the outside when you are done.

    Although there are many options, this is one I use on goblets that is quick and effective.
    Veni Vidi Vendi Vente! I came, I saw, I bought a large coffee!

  10. #10
    Join Date
    Feb 2008
    Location
    E TN, near Knoxville
    Posts
    12,298
    Quote Originally Posted by Mike Goetzke View Post
    Any suggestions on how:
    1) to finish it off - do I just part the base off and sand the bottom?
    2) what finish is recommended? I do have Beall buffers/compounds.
    Nice job! I've never tried one with rings.

    You can certainly sand the bottom. I think it is best to use something like a 2" disk and sand the bottom a little concave so the goblet will sit nicely on the table. It helps when parting off to angle the parting tool slightly inward to leave less wood to sand to make it concave.

    I like to turn a little detail into the bottoms of every turning. Sorry, I don't have a picture of the bottom of a goblet but this little box shows something of the idea - just a little detail to make it look interesting when someone turns it over. A concentric ring or two also gives a nice boundary for signing, for the couple's names, etc. Small negative-rake scrapers can leave a glass-smooth surface - I grind these from tool stock or even spare gouges. (I usually apply some sander sealer first for woods prone to a little tear out.)

    bottom_IMG_5346.jpg chip_carved_goblet_c.jpg

    For the goblet like the one shown, I make a jam chuck to just fit the bowl. I use soft wood like red cedar or basswood and make it a snug fit without much pressure to keep from cracking the bowl. Then I bring up the tailstock to hold the bottom while I turn and decorate the bottom except for the very center. I turn as close to the center as possible then cut away the nub with hand tools like a sharp gouge or a woodcarving gouge, then smooth the center with a little curved hand scraper or sand paper.

    Note that most live centers are bulky and get in the way near the center but if you have one with a removable point or hole you can turn a wooden peg to fit and use it to press into the bottom. Or easier, part the goblet off leaving a taller central support column which will keep the tailstock center out of the way. Either way, use a gentle touch when turning the bottom - no catches allowed here!

    When deciding on a finish, is this goblet intended to be used with liquid?

    JKJ

  11. #11
    Join Date
    Sep 2015
    Location
    San Diego, Ca
    Posts
    1,647
    Mike, you did a great job - - especially for your first goblet. Congratulations. You have a keeper and something of which to be proud.

    On my first goblet, I did it on a glue block also. I actually turned the bottom of it to a concave surface in the center, applied some masking tape to the center and carefully glued it to the glue block. When I was done, I either pried it off or parted it off and then removed the unwanted glue, wood and paper from bottom. Then I removed the masking tape. It required extra care to make sure that I kept everything concentric but it did work.

    John, I like the detail on your goblet. I presume that you hand carved that detail ??

  12. #12
    Join Date
    May 2010
    Location
    Ambridge, PA
    Posts
    968
    You've done a nice job on this Mike.
    Member Turners Anonymous Pittsburgh, PA

  13. #13
    Join Date
    Feb 2008
    Location
    E TN, near Knoxville
    Posts
    12,298
    Quote Originally Posted by Brice Rogers View Post
    John, I like the detail on your goblet. I presume that you hand carved that detail ??
    Thanks, yes, I like to make goblets but that is the first one I've tried chip carving - that was my first try on a turned item (most chip carving is done on flat things). The goblet is a glue-up of cherry, walnut, and a basswood section just for the carving. The layout was a real pain. I like the look and have done some ornaments and other things since.

    Now I need to try one with some captive rings! Mike's goblet has inspired me.

    JKJ

Posting Permissions

  • You may not post new threads
  • You may not post replies
  • You may not post attachments
  • You may not edit your posts
  •