Results 1 to 2 of 2

Thread: Portable/desktop laser VS. non-portable laser stand

  1. #1

    Portable/desktop laser VS. non-portable laser stand

    Thanks to everyone's help on here and the research that I have done, I have really been able to learn a lot and narrow down my selection/choices.
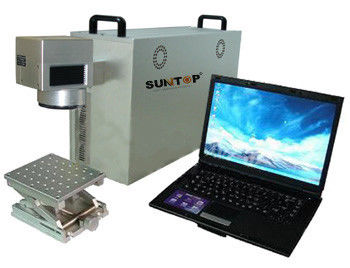
    Portable:


    Non-portable:


    The main drawback, that I can see anyways, is really just the table work size.

    Aside from simply making sure that anything I work with or engrave will be able to fit on that table, are there any other drawbacks or thoughts on the portable vs non-portable versions?

    Also, not a directly related question, but what are your guys' thoughts on the Chinese 3 chuck rotary attachments that most Chinese manufacturers try to have you add on? Are they reliable/worth the extra couple of hundred dollars? Admittedly, I haven't done much research on the rotary devices yet, since it was not a major consideration for me previously.

  2. #2
    The rotary works great, but they don't work the same as a C02 machine rotary--Those rotary's take over the Y axis (or X I suppose in some cases), and it steps in the same lines-per-inch as your gantry in 'flat' mode.

    Since a galvo has no axis to take over, the rotary moves sectionally, based on user input as determined by how far you think the laser can run around the circumference and remain in focus. EZcad calls this the "split" Example, a 1" diameter part can probably tolerate a 4 to 5mm tall section of engraving. Suppose your graphic is 2" across by 1" tall, 25.4mm (1") / 6 (splits) = 4.24mm, so by entering 4.24mm as the split size, the laser will run a 2" length x 4.24mm section, then rotate, then engrave the next 4.24mm tall section, etc. until the 6 sections are done.

    There's 2 ways you choose the split size, either direct entry, or you can drag lines onto the screen, and it will create a break point on those lines, which works well if you're marking certain graphics. Text is easy, it will do one letter at a time..

    The caveat with sectional engraving is that the part you're marking must be very close to level in the same X plane as the laser, or the seams may not match up. I ran into this issue a couple of days ago, practicing on a stainless cup that was curved top to bottom. The extreme right and left ends of the marking weren't quite level to each other (or the machine), and while the left end (top of the cup) seamed together flawlessly, at the right end (bottom of cup) there was a .020" or so gap. Closing the spacing of the sections helped, but I never did eliminate the gap. I didn't have a chance to play with adjusting the horizontal angle to see if I could level the ends, but I'm pretty sure that would've taken care of the seam gaps. However, it might create seam overlaps in the middle which was closest to the lens. But for basic flat cylinder shaped objects, it does pretty good!

    MY only issue with the rotary is that it comes with nothing as far as a tailstock to support the other end of what you're chucking up, like a Hydroflask. They're kind of end-heavy, but I'm working on it!
    ========================================
    ELEVEN - rotary cutter tool machines
    FOUR - CO2 lasers
    THREE- make that FOUR now - fiber lasers
    ONE - vinyl cutter
    CASmate, Corel, Gravostyle


Posting Permissions

  • You may not post new threads
  • You may not post replies
  • You may not post attachments
  • You may not edit your posts
  •