
-
Nurse was just a retailer,wasn't he? No telling who really made the saw,I suppose,except by examination of the details with known makers of saws.
Groves is also my favorite maker.
I wouldn't change the back,blade,or handle. You could straighten the back,but don't change it.
The LN saw handle needs more work: The curves on the bottom of the handle need to look like the Nurse's handle. Also,the LN's rounded over areas need to be MORE rounded over.
I can't get my thoughts written down this morning! Up too late last night with my broken foot.
Last edited by george wilson; 08-25-2016 at 10:07 AM.
-
Pete; you do realize your partly responsible for the growing interest in sharpening your own handsaws.
Stewie;
-
Steve,
The thought has crossed my mind. Thanks for noticing! 
Regards,
Pete
-
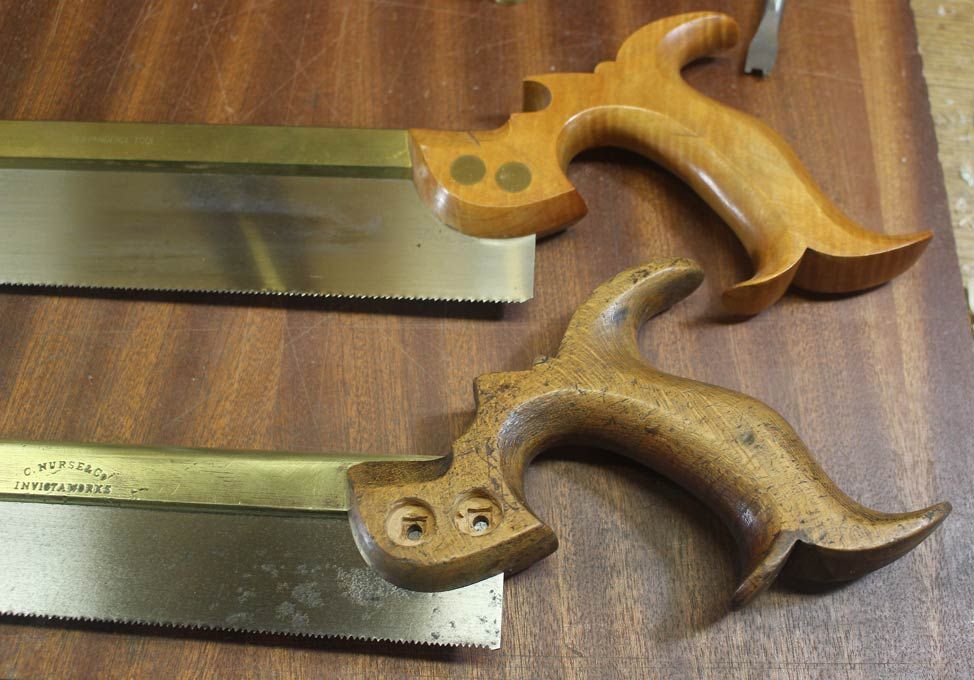
And, of course Pete, you'd recall this comparison ... 
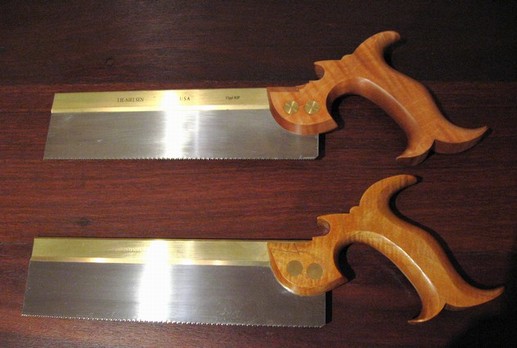
You can see the difference in the handle - LN became thicker and lost the subtleties shaped into the IT.
I wouldn't change the back,blade,or handle. You could straighten the back,but don't change it.
George, that is my first priority.
Regards from Perth
Derek
-
Derek,
Is that your saw? Did we ship one all the way to Australia? Looks like night and day to me.
Regards,
Pete
-
Pete, I've owned and used that saw for a decade now. I purchased in in new condition on eBay and wrote about it here: http://www.inthewoodshop.com/ToolRev...en%20saws.html
I recall you once mentioning to me that you recognised the piece of curly maple it was made from, but that was several years ago.
It is a joy to use, and still looks like new.
Thanks for a great saw.
Regards from Perth
Derek
-
I spend part of Sunday afternoon pulling apart the saw and completing the restoration. I had been reluctant to mess with the brass back at the start, since I did not wish to alter the vintage appearance of the saw. However, with your urging, I have returned to deal with the curved and skewed back.
After wrestling the brass back off the plate, this is what was uncovered ...
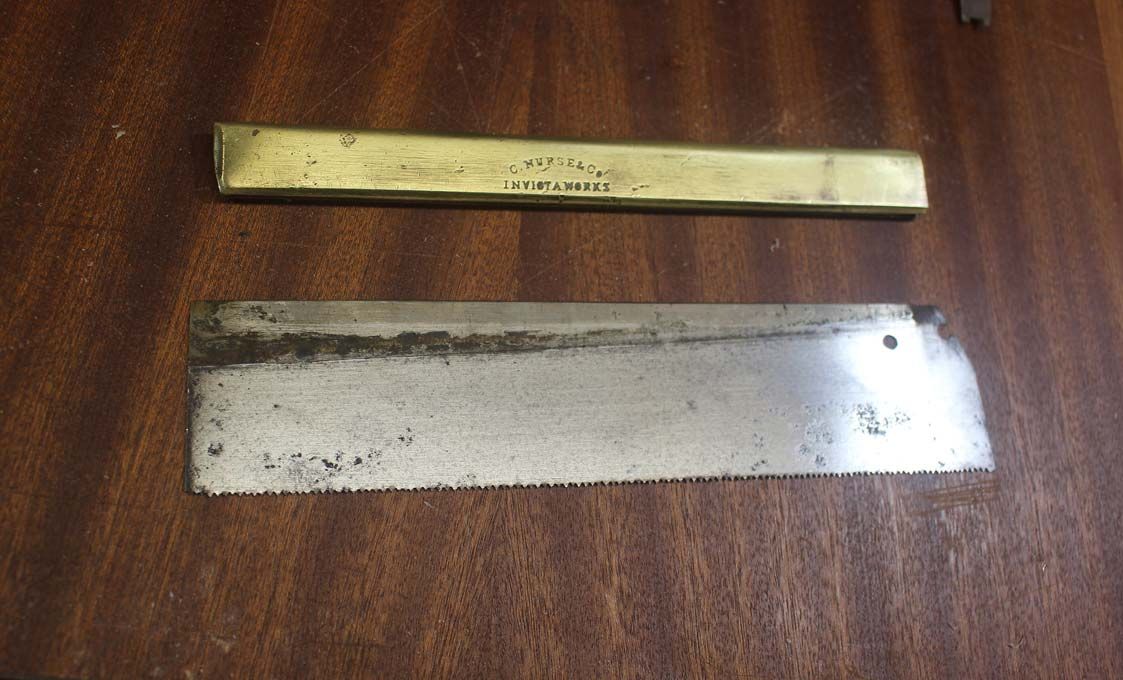
This is a bit of a puzzle. The back appeared to have dropped. However the bolt holes are original and, if the plate is pushed higher into the back, then the handle cannot be bolted back. Possibly, the front of the plate was hammered in? There is an even line in the steel (seen in the photo) that appears to be where the brass held the plate. Alternately, someone filed the saw at an increasing taper?
The brass back was straightened as much as possible by placing it curved side down, and wacking the centre with a hard rubber faced Thor hammer. The ends remained a touch high (less than 1mm), and I carefully sanded this down.
The plate was returned to the back, and adjusted to match the hang of my IT dovetail saw ..
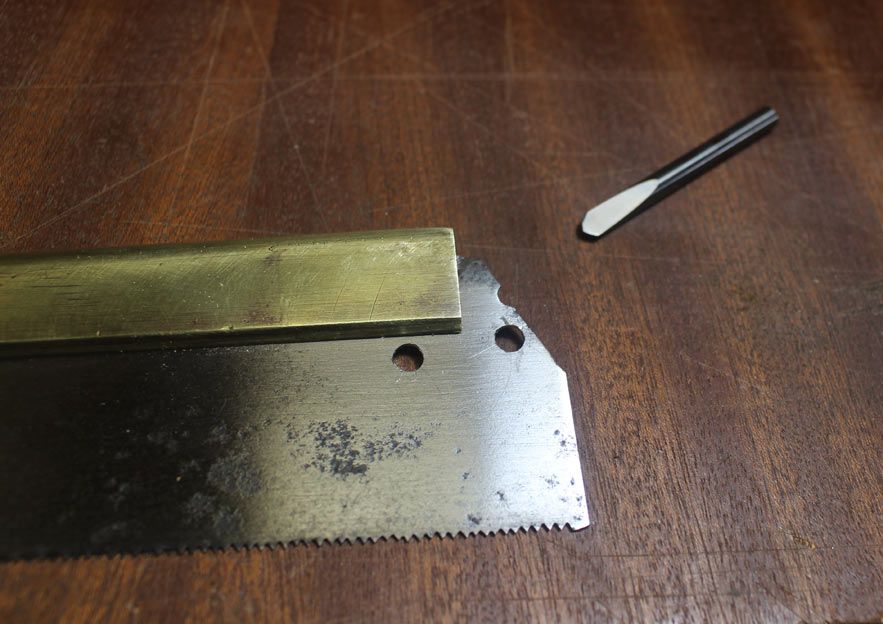
To facilitate this, a sliver of plate needed to be removed (on the diagnonal), and then new holes drilled (use a carbide drill bit for this) ..
The plate was then re-jointed and re-filed (still 19 tpi, with 5 degrees rake), and all bolted up.
The rear of the saw plate has 1 1/4" to the back, and there is 1 1/8" at the front (i.e. a taper of 1/8" along the length).
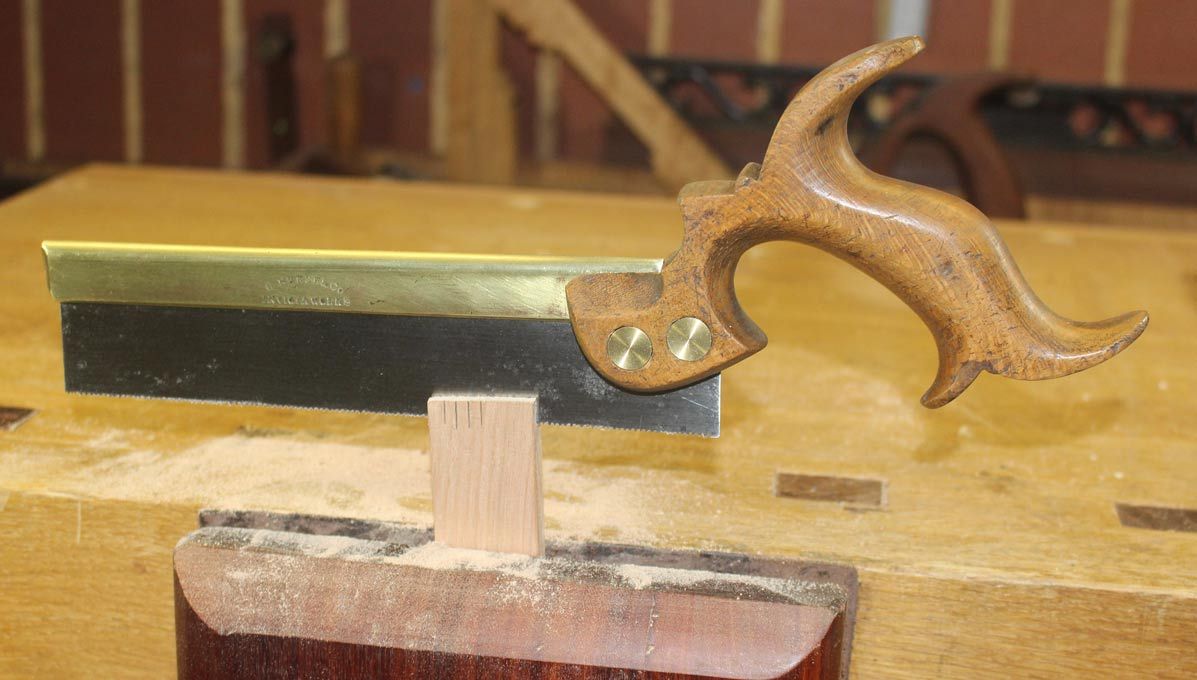
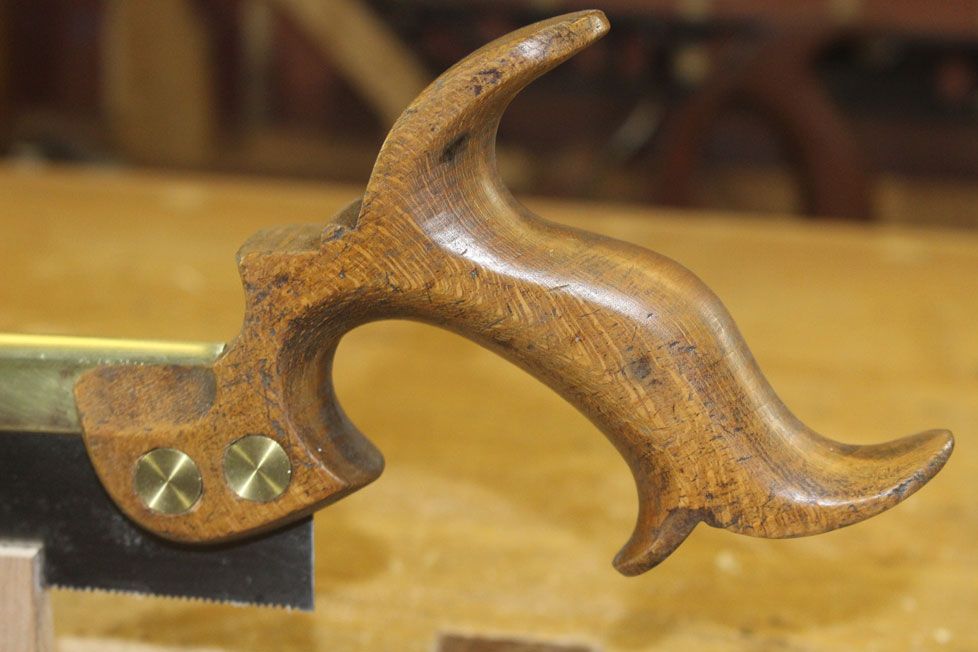
The handle is just gorgeous, and it is difficult to see the reduction I made to the "hump". It is really comfortable ...
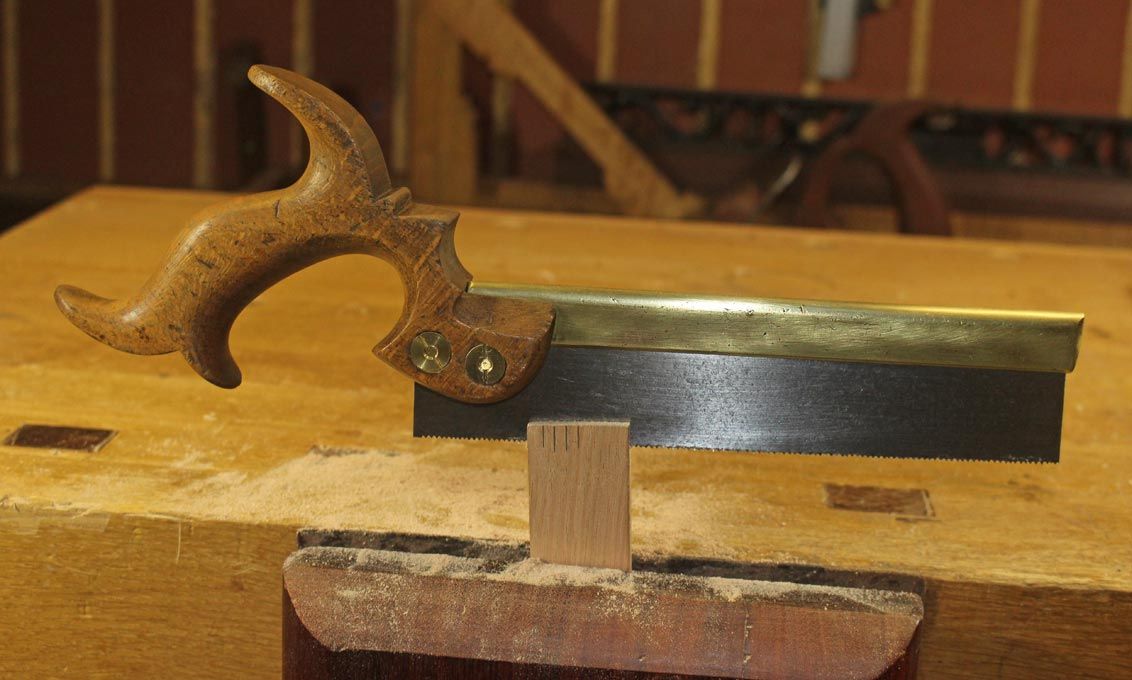
A few test cuts ..

Something more meaningful ...
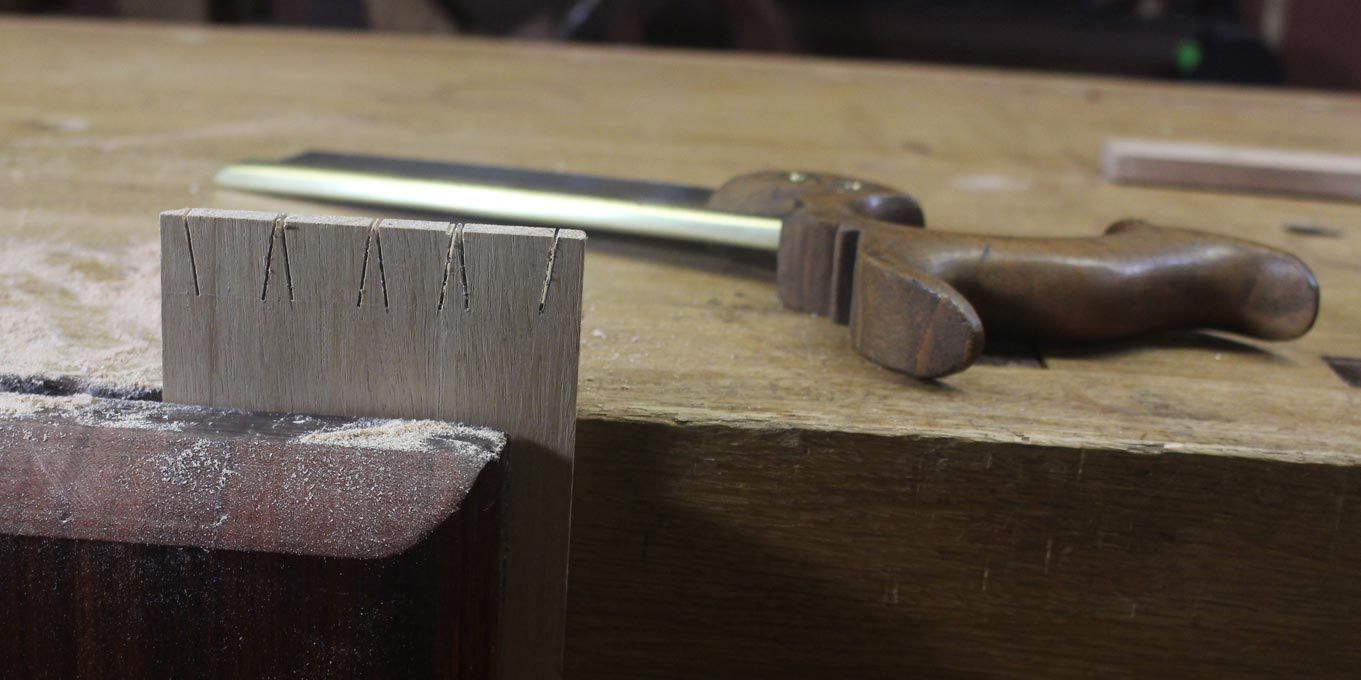
It is cutting beautifully. This is now a go to dovetail saw.
Regards from Perth
Derek
-
Nicely done, Derek. Love seeing old tools back in service, with all its original character. Thanks for sharing the process.
-
I totally love it Derek! It looks now a 1000 times better! Good job, and I am jelous.
-
Did you reshape those "peg" teeth?
-
Ha! I did refile the teeth. As well as I could. 5 degrees of rake and 19 tpi. It's cutting well. Perhaps that says more about anything sharp being capable of cutting. Actually, its cutting as well as the LN, which was cutting well before, so I guess I did OK.
Regards from Perth
Derek
-
Very nice work Derek. The solid carbide spade bits do an excellent job at drilling through saw plate.
Last edited by Stewie Simpson; 08-28-2016 at 9:57 AM.
-
Derek,
What a great way to start my Sunday! Love to see full blown, Katy bar the door saw doctoring! It is not hard as you found out. I've long been a skeptic about the whole "tapered" blade as a sold feature. When a saw drops off the bench, 9 times out of 10 it lands spine down and the blade gets lifted out of the mortise in the back and pushed down in the front. This is how tapered blades are born. Harvey Peace of the Vulcan Saw Works sought to correct this by putting a bolt through the back, handle and blade to try to prevent this from happening. It was a good idea, but didn't go far enough. That is why I adopted the solid milled back when designing the original IT saws. The blade will never move in the spine, or otherwise come out. 20 years has proven it to be a valid approach.
Here is a tip to help file those small teeth. Take two pieces of scrap as long as the blade (or longer) and joint them with a plane to be dead straight and flat. Do them at the same time. Next, clamp the blade between the two teeth with the wood at the same height on each side, and maybe .030" below the root of the lowest tooth. Now, when you file, go until the file just creates a track in the wood. For teeth so small, this is the most accurate way to make sure you are getting to the same depth each time. The wood acts as a brake, and you can easily judge the depth of the "trenches" that are produced. Unless your eyes are much better than mine, or you have access to an electron microscope, you just can't see the flats on the tops of teeth that small. You'll be amazed at the consistency you will get.
Happy Sawing,
Pete
-
Derek, The saw looks great. Looks like it will work for a very long time too. It is sometimes amazing how much an1/8 changes everything.
Jim
-
I suppose you've seen the Smith's key to the various manufactories of Sheffield (1816). Here is the entry for the saws:
Explanation_or_Key_to_the_[...]_btv1b8529037p.JPEG
Not just tapered blades, even tapered spines!
So there you go with your theory that tapered baksaws were merely an accident from dropping the saw on the floor. 
 Posting Permissions
- You may not post new threads
- You may not post replies
- You may not post attachments
- You may not edit your posts
-
Forum Rules


 Reply With Quote


