Big project for me and it took forever.
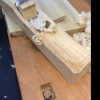
The finished bench is 58" x 19" x 20.5
image1.jpg
A friend requested a bench with storage space for records. I used poplar to keep his cost low and dye to darken the surface of the poplar.
The bench came out great and my friend and his girlfriend love it and use it, so for all intents and purposes it's a successful project.
The poplar boards were nice, but they could have been planed a little flatter before glue up but I guess I was in a hurry.
image5.jpg
The bench has legs that flow into and out of the top with continuous grain, but the boards that I chose had knots where they had to be cut. That's why my half blind dovetails are staggered inconsistently. whoops
image2.jpg
It was a lot of dovetail cutting, so I resorted to a power drill. The drill might have saved some time, but there was still a lot of chisel clean up after the drilling. The bench also has a thin plywood back that's nailed into a rabbet for support.
I suspect this bench is over engineered. Could I have used fewer or smaller dovetails and saved myself some time?
image3.jpgimage7.jpg
Dyes. Second time I've worked with dyes. I don't have a spray set up. The weather was nice so I used a rattle can high gloss poly for the first coats of finish over the dyed surface in an attempt to seal the dye. It worked better than wiping the poly right over the dye (my last proj). After a few layers with the rattle can I wiped on a semi gloss poly.
I used a blotch stopper before the dye and that worked ok.
Ideally I would use actual cherry or walnut from the start. I thought dye would be a great solution for the economical poplar but it's going to take a lot more experimentation. I'm going to try to avoid dying projects for the time being.
image4.jpg
No doubt this bench was going to need a center support, but I pretended that wasn't true until the end, then I attached a support with pocket screws. It was a solution.
image6.jpg
Thanks for looking

 Reply With Quote