


The design of this federal table from a Fine Woodworking article by Steve Latta, calls for oval thistle marquetry inlays that go on the top of show side of the legs.
Ive never done any marquetry before and the how to descriptions in the FWW article were confusing to me; requiring marking/cutting from the front side for stack cutting and marking/cutting from the backside for bevel cutting. Also used thin, commercial thickness veneers which required taping on the backside and also taping with veneer tape on the front side, each of which had to be scraped/removed at some point in the sequence, which I couldnt figure out.
I followed The Fine Art of Marquetry by Craig Stevens. The primary difference was Stevens uses thicker (~ 3/16) shop sawn veneers. The benefit of this approach (at least to me) is that the show side of the inlay is always visible. Once you simultaneously bevel cut the contrasting inlay piece and the background, you glue the inlay piece in place no taping/scraping. It was easier for me to picture.
Bevel sawing requires a birds mouth. This is what I made from a plan in Stevens book. The top surface can be rotated (he recommends 8°) so that moving the saw vertically up and down produces a 8° bevel on the edges of both the background and the piece to be inlaid theory is should wedge together to fit more tightly
There are couple supplies/tools that were helpful for me: it really helps if you can get consistent thickness, shop sawn veneers. This gives you some thickness to play with when scraping the surface flush. A challenge is the background is dyed green, commercial thickness veneer. This means I might be able to scrape the, shop sawn inlay flush, but dont have very much thickness to play with on the background. I glued another layer veneer, at 90° to the back of the green background veneer to get it more thickness and stability.
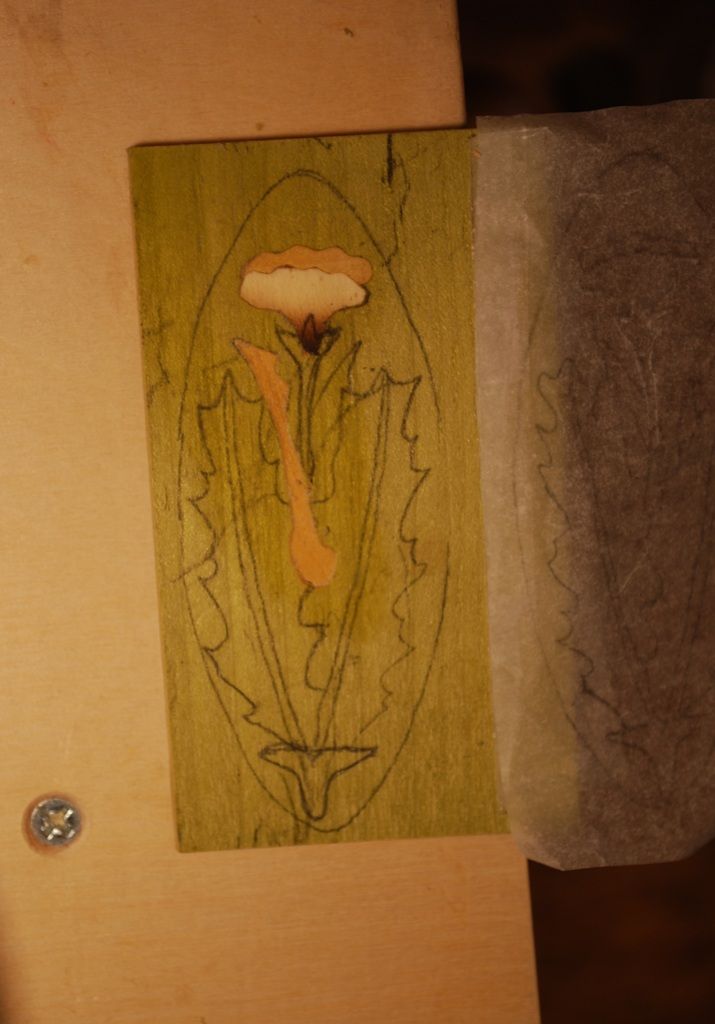
Graphite paper (not carbon paper) and a scribe from an art store let you transfer the design from tracing paper onto the work piece. You keep the tracing paper outline attached to the work piece so you can redraw the lines that get removed when adjacent, overlapping pieces are cut. Sand and an electric hot plate for shading.
One of the challenges is figuring out the sequence for sawing out each piece of the design. Stevens says start with the background pieces and leave them oversize where they overlap adjacent pieces. Heres the first couple pieces.
I used a Kew Fret saw and .02 blades. Because the depth of cut is limited, as far as I can tell the fret saw will only work for small pieces. I have a larger saw with a 14 depth of cut, but its a lot heavier and it was more difficult for me to saw accurately. A small # 69 drill bit makes the initial hole the blade is threaded through.
A red pencil highlights the line I was supposed to saw along to so I leave overlap for adjacent pieces. Took me a couple tries to figure this out.


 Reply With Quote


