Page 1 of 3 123 LastLast
Results 1 to 15 of 34

Thread: An adventure building a Morgan automobile body frame

  1. #1
    Join Date
    Nov 2005
    Location
    Whidbey Island, Washington
    Posts
    92

    An adventure building a Morgan automobile body frame

    I am just completing this project...my biggest take-away is that I'm not a very good woodworker!

    Considering Morgan did not use preservative on the wood frame, and only brush painted what they could see before rolling it out the door, the wood was in decent condition...for 60-year-old English Ash. However, the car had been hit on the right side hard at some point, and it was "repaired" in an abysmal fashion with scraps and cheap plywood. So I decided to rebuild it from scratch.

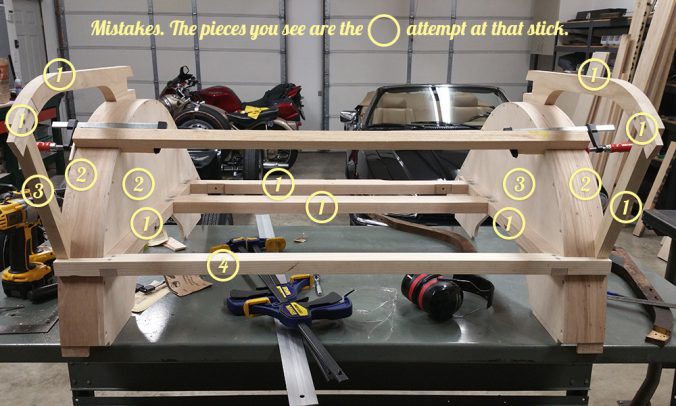
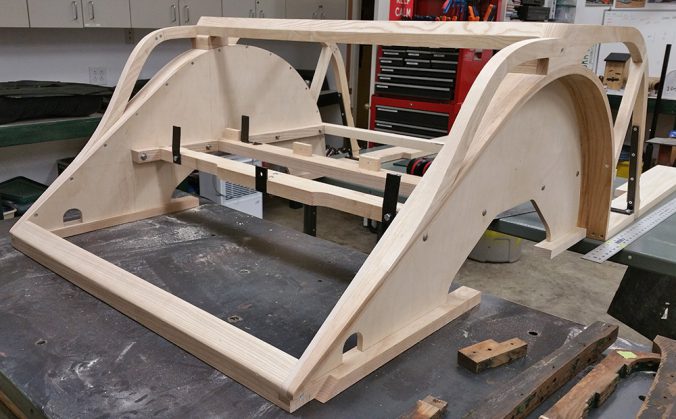
    The biggest challenge on this project has been that there are no standardized pieces, no patterns or plans...just whatever damaged wood remained to use as patterns. (I'm not even sure in 1955 that Morgan had fancy tools like "rulers" or "tape measures"--just held-up thumbs and a practiced squint.)

    I used American ash, and a lot of it: At least twice as much as a pro would have used, as I made a lot of scrap. One day I will learn how to do "reflection" properly; I've very good at making two left pieces and no right pieces (for all meanings of the word "right").

    If you really want to be bored with more detail, my blog at http://rustyheaps.com has more photos, etc., just choose the Morgan from the category list.

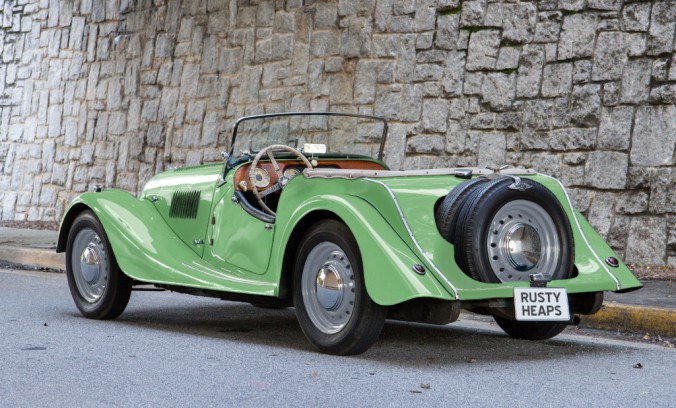
    So you have an idea of what the car is, this is my "Moggie", "photoshopped" to show its original and eventual color (it was dark green when purchased). I drove this car six miles home, and those were easily the most dangerous six miles I've ever driven--and I've been 140 mph on a motorcycle!


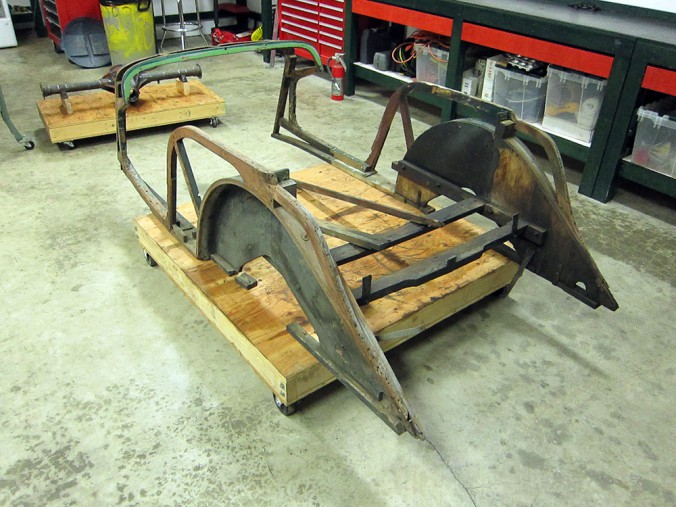
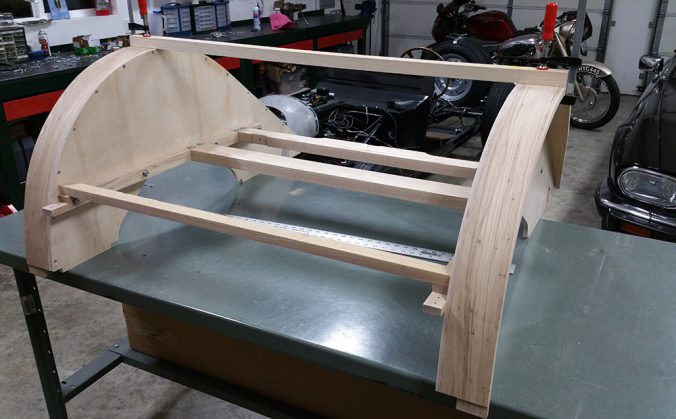
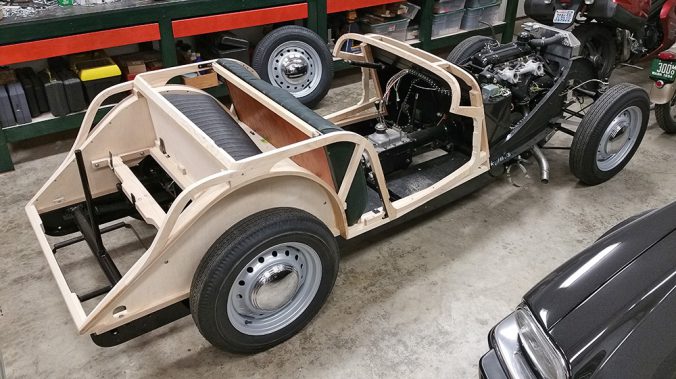
    This is what the body frame looked like after being freed from the chassis and de-skinned:


    This frame was so shaky someone used a turnbuckle and bailing wire to try and keep it in one piece. The main horizontal cross members, such as they are, fell out and are lying on the cart in the photo (that's not encouraging, FWIW). The left side is largely original; the right side is junk.

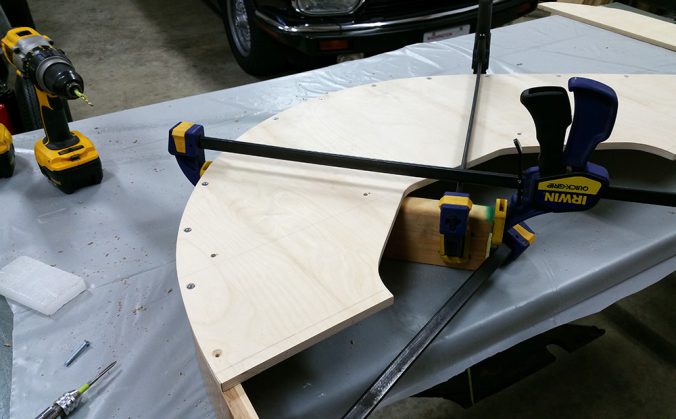
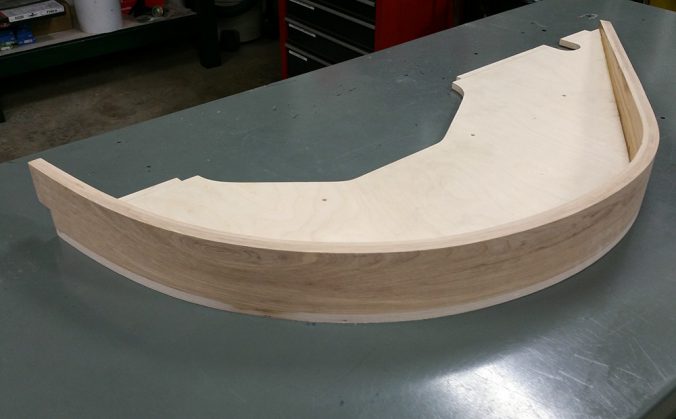
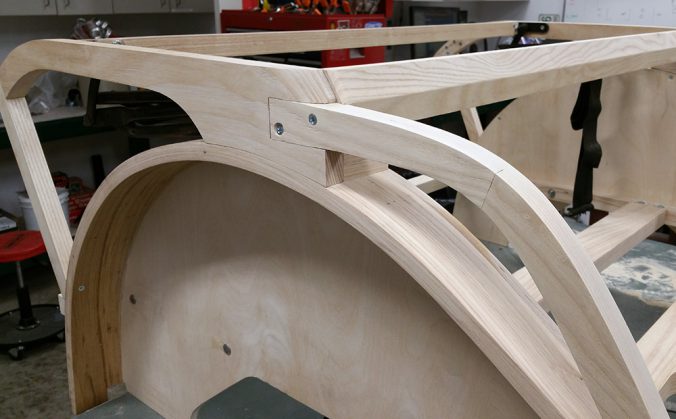
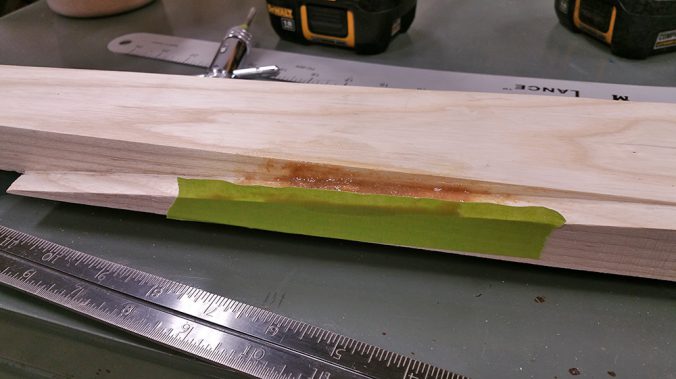
    The original wheel arches are made from laminated ash (three 1/4" pieces glued and set on a mold), while the backing board (the vertical piece) originally was as seen below, two 12" wide boards joined with a spline, above the axle. These are not ash, I suspect they may be poplar.


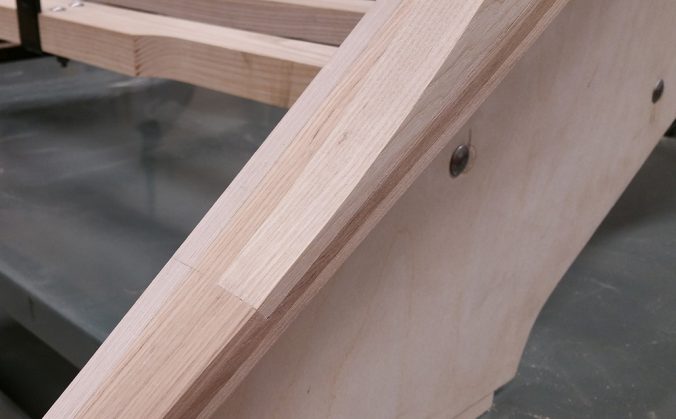
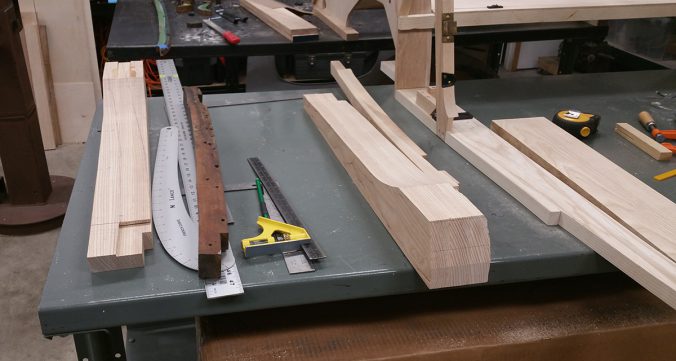
    The left-side frame pieces, most would serve as at least rudimentary patterns


    Also (sort of) suitable for patterns were these "cross pieces"


    Though two or those turned out to not be original.

    The floors in the car were originally boards salvaged from shipping crates, joined with a spline...you can see a few of those on the table as well.

    Deja moo -- the feeling you've heard this bull before

  2. #2
    Join Date
    Nov 2005
    Location
    Whidbey Island, Washington
    Posts
    92
    I started by building the wheelarches. I re-sawed the ash on my hard-working 1947 Delta 14" bandsaw, then ran it through a lunchbox planer, and used West System 105 epoxy and this form:


    I ended up making two sets of these, after a series of errors ran me out of wiggle room on the first set. (A pattern which was to repeat itself, over and over and over...)

    I used plywood for the vertical boards, like the factory did starting in about 1960:


    (As an aside, the factory used fiberboard (!) for a couple of years. Someone who has restored a few cars from that period tells me he's never taken one apart where the 3/4" fibre board wasn't over an inch thick, and once close to one and half inches.)

    The form takes into account springback, but if I was to do yet another set of arches, I would continue the front of the form down at least another six inches and back towards the rear in hopes that the arch was truly vertical where you end up cutting it off.


    I used machine screws into tapped holes throughout this project, mainly because I can't screw worth a damn, so to speak (perhaps it's only coincidental I'm getting divorced at the moment?). This has worked fairly well, but you get about ten ins-and-outs (!) before the grip gets pretty tenuous. Every joint is going to be epoxied, so the fasteners will be functioning as clamps, really.


    "Finished" arch, the taper was eyeballed and cut on the bandsaw; the straight edge was done via jointer, a 4" one at that (I bought a 6" Jet after that experience):


    Deja moo -- the feeling you've heard this bull before

  3. #3
    Join Date
    Nov 2005
    Location
    Whidbey Island, Washington
    Posts
    92
    Next step was the join the arches together:


    In the photo above, the piece at top of the arch and the piece at the front are spacers in an effort to keep things reasonably square. One nice thing about working on a Morgan: tolerances for this stuff are typically 1/8 to 1/4" ex-factory. I achieved 1/32"...mostly.

    Progressing with the back, I added the side rails:


    And here's the same picture with how many times I made each piece. Ahem.


    Morgans of this period are often called "bustle-backs" due to the hump which hides the petrol tank on two-seaters like this one. The bustle was interesting to make:


    The original was one piece, but I opted for two so I could concentrate on one challenge at a time. The back piece is let into the arch, like so:


    This marks one of the few times I've used a router successfully. I really dislike routers, due to lack of technique; they always seem to get away from me.

    Deja moo -- the feeling you've heard this bull before

  4. #4
    Join Date
    Nov 2005
    Location
    Whidbey Island, Washington
    Posts
    92
    Moving forward, the convertible top bracket has the seat-back support screwed to it, normally a 1" square on the front face. However, I opted to move the seat back about an inch, and ended up attaching that support like so:


    Which gave me 3/4" without any dramatic alterations to much else on the frame.

    The door latch posts were next, and the sill boards as well:


    The sill boards actually end up shaped to match the chassis, but I left them wide to allow scribing them on the car (this is the second set, did not do that on the first!).

    Deja moo -- the feeling you've heard this bull before

  5. #5
    Join Date
    Nov 2005
    Location
    Whidbey Island, Washington
    Posts
    92
    I mostly finished the back by making the rear cross-member:


    and the 1/4" plywood "bulkhead" in front of the fuel tank and the load floor:


    The small blocks on the sill boards are for the seat back (the small perpendicular blocks) and as a tacking strip for interior trim (the long blocks behind the posts).

    Deja moo -- the feeling you've heard this bull before

  6. #6
    Join Date
    Nov 2005
    Location
    Whidbey Island, Washington
    Posts
    92
    The rocker boards were interesting, those lie below the doors and curve both upwards and inwards:


    I had to laminate those, as they were originally 16/4 ash and no supplier locally had anything that thick. Just as well, as I made two sets...


    Here I've cut the front angle and the notched back where it meets the rear door post, and traced the profile of the curves onto the boards.

    Once they were roughed into shape, they seemed to fit OK. I eventually had to adjust the front angle from 20 to 19 degrees, but this set has survived, unlike the first. The sill board is trimmed flush with the outside of the rocker where they meet, and then an inset is routed to continue the sweep along the bottom to the door latch post. Like this:


    These are still only roughly shaped. You can see a door hinge post; alas, this one ended up in the scrap pile. (Can you sense a theme, an expensive and wasteful one? I ended up making three sets of door posts, and four sets of the support pieces they attach to at their upper end.)

    Remember my dislike of routers?


    Did not notice my template had come adrift, because that's how we roll here. I have some epoxy/sawdust setting in the "oops"--I was NOT going to make another set of sill boards.

    Deja moo -- the feeling you've heard this bull before

  7. #7
    Join Date
    Nov 2005
    Location
    Whidbey Island, Washington
    Posts
    92
    I finally gave up my theoretical "bench build" and bolted it to the chassis for the remainder of the front work. This has proven to be remarkably challenging to get right. There are not many pieces up here, but the fit of all of them are critical for the look of the car, and it took a lot of tries to get to the "very nearly done" phase:


    I still have to move the dash support up 1/4", finish shaping everything so it "flows", and then take it apart and glue it all together. Plus doors, which consist of four pieces of wood each, though with plenty of curves through two planes to keep things interesting. The final step will be a coat of black paint and then completely hiding it behind steel panels.

    The wood frame is a large part of the strength of the car, as the chassis is quite light and completely without triangulation (!). It's not even box sections, it's two "Z" shaped rails joined with four cross-members. This new frame is just a wee bit stronger than the old one.

    Of course, if my joinery was good enough, I wouldn't need glue at all, but maybe next life I'll have the skills.

    Anyway, this project has proven to be frustrating but satisfying, and I'd gladly do another if I had any money left from doing this one, which I don't!
    Last edited by Roger Los; 11-15-2016 at 1:21 PM.

    Deja moo -- the feeling you've heard this bull before

  8. #8
    That is one heck of a neat project! Looks to me like you're a pretty good woodworker, Roger - or you developed into one. What you are doing is challenging in many aspects.

    Mistakes? Every time I learn a new technique, I need to practice making parts multiple times before I'm ready to proceed. First time I cut large box joints by hand took about 6 practice runs till I felt I was ready. I practiced the silly chisel handles I posted last night about 6 times to get it right. So you aren't alone. Maybe the only thing you might have done differently, that I do on purpose, is to recognize the learning curve and practice some of the harder parts using cheap wood instead of ash.

    I like it and will go look more at your blog. Thanks for posting this.
    Fred
    Last edited by Frederick Skelly; 11-15-2016 at 6:39 AM.
    "All that is necessary for the triumph of evil is that good men do nothing."

    “If you want to know what a man's like, take a good look at how he treats his inferiors, not his equals.”

  9. #9
    Join Date
    Mar 2003
    Location
    SE PA - Central Bucks County
    Posts
    65,827
    Wonderful build! This is great woodworking at its finest...while most of this will end up "hidden", it's clearly what makes things right once the skin is back on.
    --

    The most expensive tool is the one you buy "cheaply" and often...

  10. #10
    Join Date
    May 2005
    Location
    SE South Dakota
    Posts
    1,538
    Fine Woodworking!

    Bruce
    Epilog TT 35W, 2 LMI SE225CV's
    CorelDraw 4 through 11
    CarveWright
    paper and pencils

  11. #11
    Join Date
    Mar 2003
    Location
    San Francisco, CA
    Posts
    10,319
    Wow! That's some project!

  12. #12
    Join Date
    Nov 2008
    Location
    Northern Oregon
    Posts
    1,825
    You made one huge mistake. At the begining of your post you said--"I'm not a very good woodworker".
    That's obviously wrong. You are an excellent woodworker!
    "Whether you think you can, or you think you can’t - you’re right."
    - Henry Ford

  13. #13
    Join Date
    Nov 2007
    Location
    Goleta / Santa Barbara
    Posts
    967
    WOW. I'm impressed. I always loved Morgans. Very nice work. Patrick

  14. #14
    Join Date
    Feb 2003
    Location
    In the foothills of the Sandia Mountains
    Posts
    16,635
    Beautiful craftsmanship, definitely not a project for the faint of heart!


    Quote Originally Posted by Andrew Joiner View Post
    You made one huge mistake. At the begining of your post you said--"I'm not a very good woodworker".
    That's obviously wrong. You are an excellent woodworker!
    Andrew nailed it.
    Please help support the Creek.


    "It's paradoxical that the idea of living a long life appeals to everyone, but the idea of getting old doesn't appeal to anyone."
    Andy Rooney


  15. #15
    Join Date
    Nov 2005
    Location
    Whidbey Island, Washington
    Posts
    92
    Thank y'all for the kind words, I do tend to be pretty critical of my work, and really, any Norm "that's good!" were hard earned...or ironic.

    I really do need to learn to make definitive, dark pencil marks with the direction of angles and curves for reflection pieces, though. I probably ruined more pieces through simple errors that boil down to "oh, that left".

    My miter saw is nothing special, a 12" non-sliding deWalt which has given good service for 20 years...but I sure wished it would tilt in both directions. And the same on the old Delta bandsaw, whose table tilts 45 degrees right but only 15 degrees left. I have no complaints about my ancient Unisaw, though it was somewhat unhappy ripping the thicker ash with a plain combo blade (it's a 1949 machine with a 3-phase bullet motor, run via a converter).

    And I definitely need to up my router game.

    By far the most satisfying tool to use is my cheap 4-sided wood rasp/file. Spent the last couple of evenings shaping the rockers and it's very pleasant "tedium" to transform them from "close" to "good" to "nice".

    Deja moo -- the feeling you've heard this bull before

Posting Permissions

  • You may not post new threads
  • You may not post replies
  • You may not post attachments
  • You may not edit your posts
  •