I agree just makes you wanto turn off the TV..


 Guest
Guest
I agree just makes you wanto turn off the TV..
Member
Love the work on the curved carcass.
[OP]
Member
[QUOTE]Originally Posted by Phil Mueller

Hi Phil,
These gouges are in the 1/2"– 3/8" wide range. I tend to use the narrower gouges like these more frequently than the larger ones+1 inch wide.
Best, Mike
[OP]
Member
Malcolm, if only that were true! My wife would tell you the probably one of the least patient people you're going to run into.
Shaping the curve into the carcass sides was fairly robust, straightforward work (lots of sawing, chiseling etc.). I find the smaller, more detail oriented jobs like inlay and carving to be a lot more tedious, which is more likely to try my patience.
All the best, Mike
Last edited by Prashun Patel; 12-21-2016 at 12:55 PM.
[OP]
Member
Hi Mel, I appreciate the suggestion. I would like to try some pierced B&C feet at some point, but this chest is intended to carry a lot of weight and for that application I'm hoping these B&C feet without piercing will be a little sturdier.
Cheers, Mike
Last edited by Prashun Patel; 12-21-2016 at 12:55 PM.
[OP]
Member
Hey Don, I don't have any transitional planes, and but I like your idea of shaping the soles for planning curved surfaces. Whether it's shop built, wooden planes or transitional planes, either way having planes with curved bottoms would make this work a lot easier.
Best, Mike
Last edited by Prashun Patel; 12-21-2016 at 12:55 PM.
Moderator
Intimidating work, as usual, Mike. Thanks.
Now, if only you were as facile with the "Reply with Quote" feature as you are with hand tools
[OP]
Member
The last thing I want is to be intimidating - my apologies if that's the case! My only intent is to " pay forward" a tiny amount of the of the benefit I've personally gotten from the Creek.
Prashun, You're completely right, I'm horrible in many ways , but particularly egregious with regard to my I.T. abilities. Thanks for having my back.
Prashun, totally my bad! Thanks for having my back.
 Friend of the Creek
Thanks Mike!
[OP]
Member
Bompe chest build – part 3 veneering carcass sides and top
It’s been a while since my last post on this project - here’s the latest update for those that are interested.
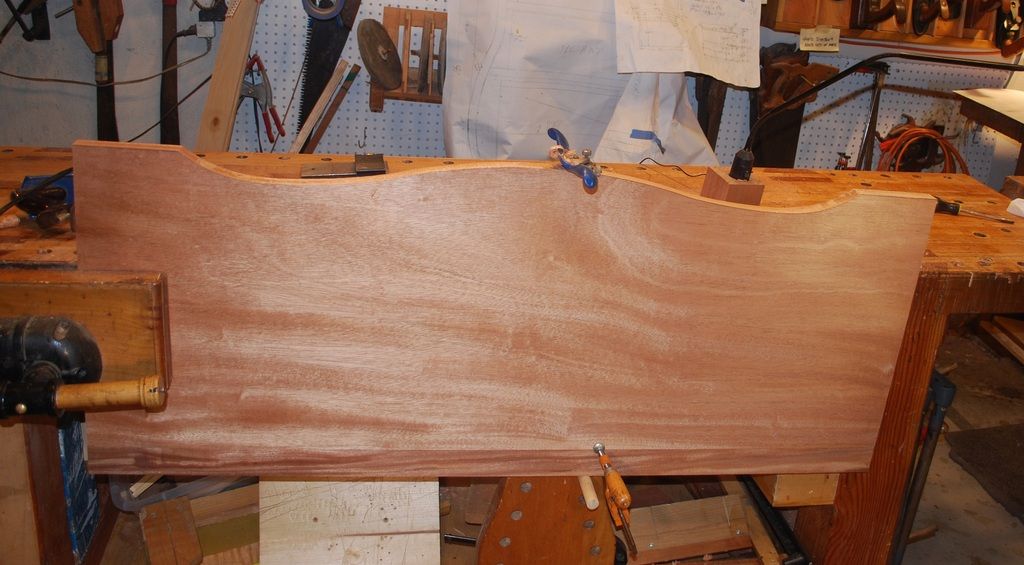
This is veneering the curved carcass sides described in the previous post. Again geometry rears its ugly head trying to layout smooth curves for the front of the carcass to correspond to the curves of the carcass sides. Sawing out the curves and gluing up ¼” thick solid mahogany on the curved front of the carcass sides. I need this solid stock as I want to do some beading to surround the shelf openings.
I’ve never done bent lamentations of this was kind of a brute force effort – thank goodness modern glues have strong staying power!
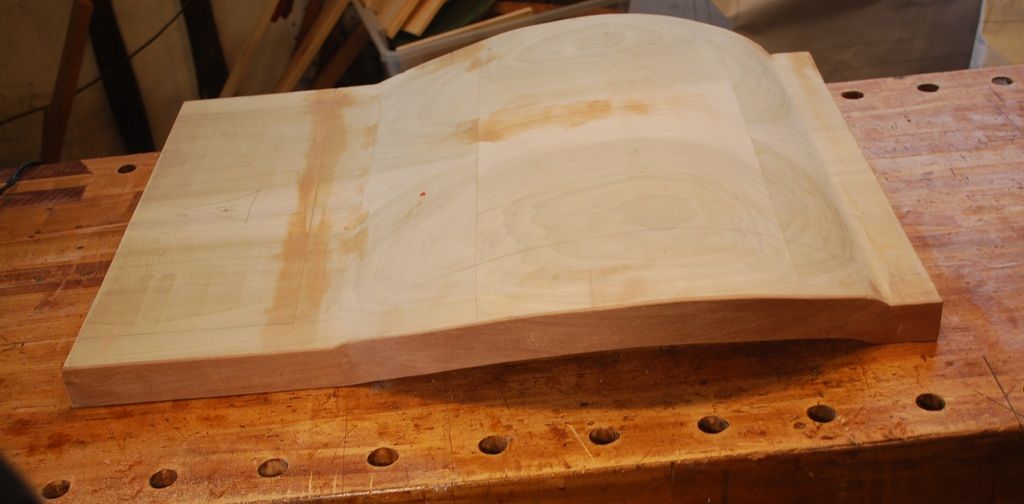
Here is truing up carcass sides once the front lamination is glued.
[OP]
Member
This is the veneer Im going used to cover the carcass sides.
I got it from Brett Hesser here in San Diego who builds beautiful custom furniture that incorporates lots of veneers etc. and also stocks tons of a beautiful veneers.
Brett couldnt have been more gracious and accommodating for a rookie like me. Not only did he help me pick out his veneer, but he also used a giant machine I didnt even know existed, that edge glued veneers together in 30 seconds, saving me tons of work. When Brett asked if thats what I wanted, I didnt even understand what he was talking about (who knew there was machine you could do this?). Recognizing my ignorance, Brett took pity on me and said trust me. Not only did the glue up the veneer for no additional cost, he said if you screwed up, come back and Ill give you some more veneer to try again. I couldnt recommend Brett or his work more highly!
http://www.hesserhandcrafted.com/Fir...ages/home.html
Here are some shots gluing up the veneer. I dont have much experience with veneer. I tried gluing up one face with Tite bond 3, which soaked through the veneer and yielded pretty, horrible results. The other 3 faces I use spray on 3M adhesive which yield a thinner glue layer and worked a lot better for me. Im sure thats not how youre supposed to do it but if it all falls apart no one will know but me.
These are the completed carcass sides with top and ball and claw feet.
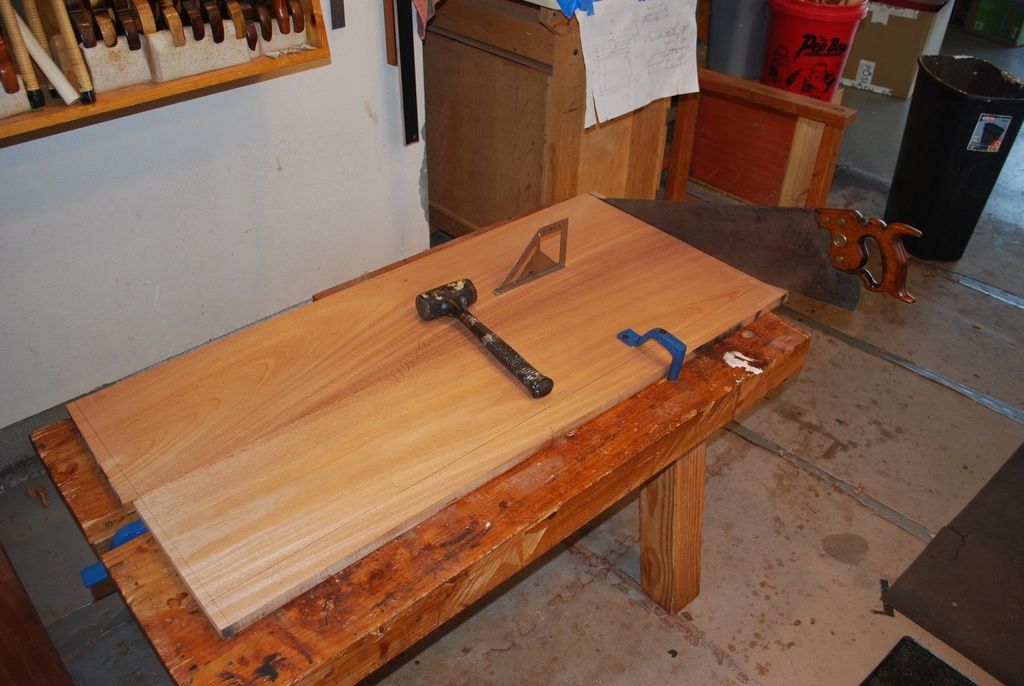
Next step was the chest top. Heres dimensioning the size and planing the show surface.
[OP]
Member
This was my first opportunity to use my new Jack plane from Steve Voigt and it was awesome! I don’t care if I sound like a giggly fan boy. I’m just a woodworker and the fact is Steve’s plane gave me an new appreciation for the benefits of how a well-made wooden plane glides over the surface. A lot lighter and easier to use than my metal planes. There was no comparison with my own shop built wooden planes – there’s a reason why Steve is a professional toolmaker – his planes are fantastic and I’m saving up for one of his try planes.
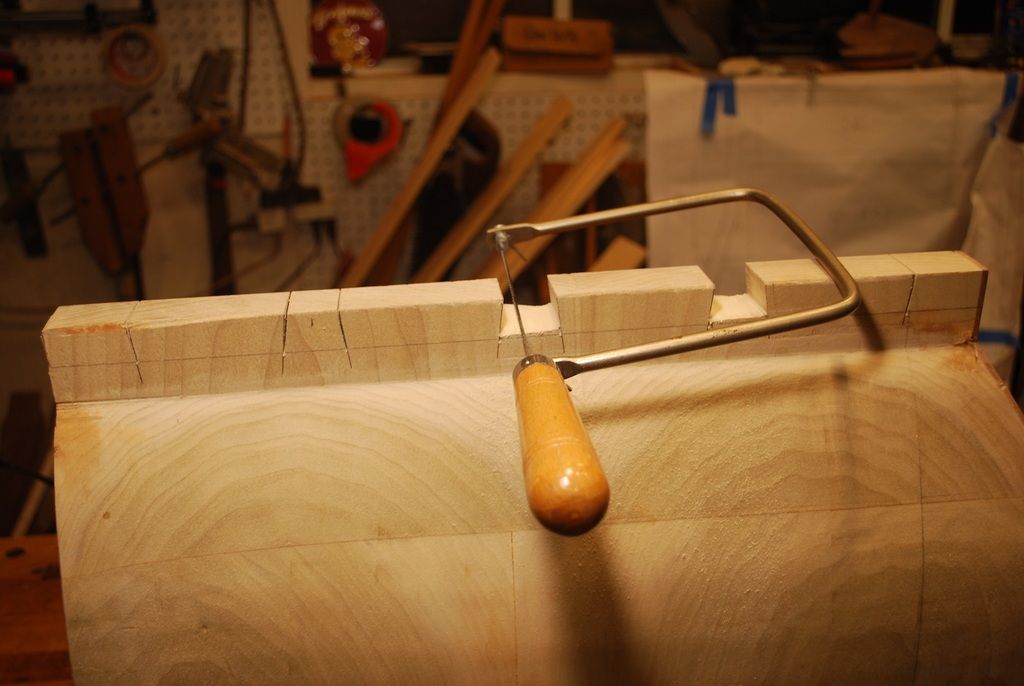
Next up was cutting the dovetails that joined the carcass sides to the bottom of the chest.
[OP]
Member
Carcass sides are jointed to the top with sliding dovetails. Sliding DTs are one of my favorite joints. Im happy to use power tools whenever they provide the best result, but in this case I really like using a hand plane because it lets you sneak up on the tapered fit that makes glue up for complex carcass like this a lot easier.
I used an electric router to plow the stopped dadoes for the other 2 shelves. Because the carcass sides are curved, it required a little bit of acrobatic jigging to try and get them 90° to the primary axis of the carcass sides.
I made a paper template to layout the curves for the front edge of the top. Again plenty of SWAG geometry with beam compass and what I hope our whole number ratios.
[OP]
Member
Here is scratching the bead on the inside edge of the carcass sides that I hope will match up to the corresponding beads on the horizontal shelves. As usual, I wasn’t paying attention to my layout lines and ended up creating “extra” beading where I didn’t want it. I’m hoping some creating creative filling/finishing can cover my mistakes.
The veneer on the carcass sides overlaps the solid edging on the front of the carcass sides. As you can see, the joint turned out pretty crummy. Like I said, I’m not so good with veneer.
As a consequence, I tried to cover things up with Holly inlay, which isn’t consistent with period design- sigh, I’m hoping I can make some accommodation elsewhere that’lll tie things together, but that’s probably a pipe dream.
Here is the glue up of the carcass; – 1 ¼ “thick through DT for the bottom and sliding DT’s for the top made for a typically frantic glue up. I think I got the carcass reasonably square.

[OP]
Member
In an effort to tie the Holly beading on the carcass sides to the overall design, Im going to try and inlaid some Holly design elements on the carcass top. Since Im using this chest to hold some hi-fi audio equipment, I thought musical symbols might be appropriate.
Ive screwed up plenty of projects with crappy inlay. Im no expert, but the only advice I can offer is thicker, shop sawn veneer (I shoot for 1/8 inch thick) works best for me. Delicate, cross grain shapes hold together better and Im less likely to plane through the inlay during final surfacing (Please dont ask how I know that the memory still makes me cringe! ).
Once the inlay shapes are sawn out on the birds mouth, I use some hide glue to stick them to the surface temporarily so I outline their shapes with an X-Acto knife. Patience is definitely a virtue here nothing worse than rushing things and trying to outline the inlay recesses before the glue is dry and everything shifts in the process ugh!
Lastly here is the glued up stock for the horizontal shelves. I decided to wait till the carcass is glued up before trying to layout the curves on the front edges the shelves so I can hopefully get them to fit with the progressive curve Im hoping to achieve along the front edge of the carcass.
Thanks for looking. Ill post updates to this thread as the project progresses.
All the best, Mike
 Posting Permissions

 Reply With Quote


