Page 5 of 6 FirstFirst 123456 LastLast
Results 61 to 75 of 78

Thread: Thin pins..

  1. #61
    Join Date
    Aug 2013
    Location
    Princeton, NJ
    Posts
    7,295
    Blog Entries
    7
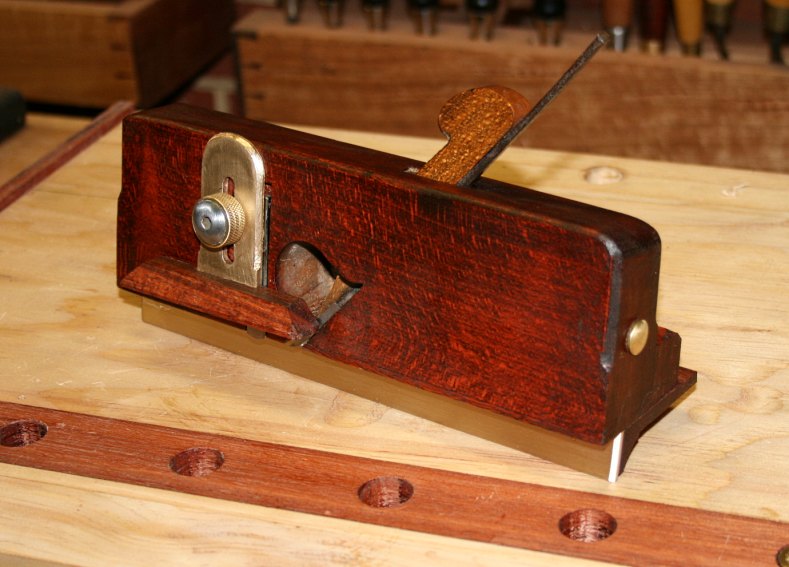
    The HNT gordon is the same in that technically it can do both sides of the joint, however I find that a dedicated plane specifically made for cutting the male side of the dovetail does a much better job of it, cutting a crisp shoulder due to the nicker.

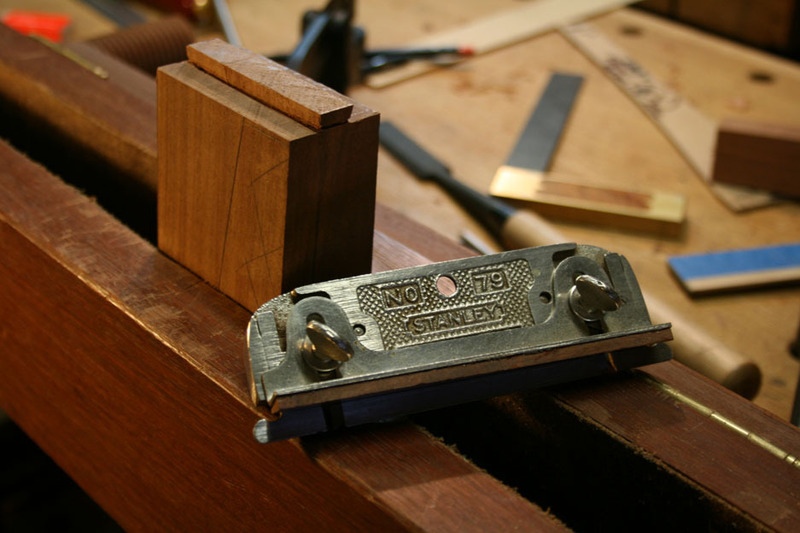
    I'm defaulting to your preference on the side rabbet planes, I use the HNT Gordon, but I have not used the stanley. You have you used both and maintain that the stanley plane is the better of the two. Frankly, I'm not convinced of that, but given that you have used both I'm happy to default to your preference and if I were buying tools for the job now (as opposed to already owning them), I would be interested in tracking down a well kept 79.

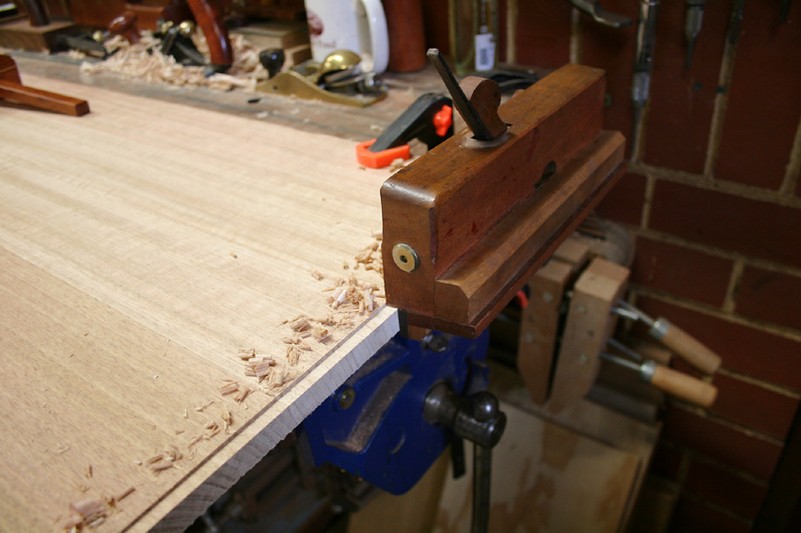
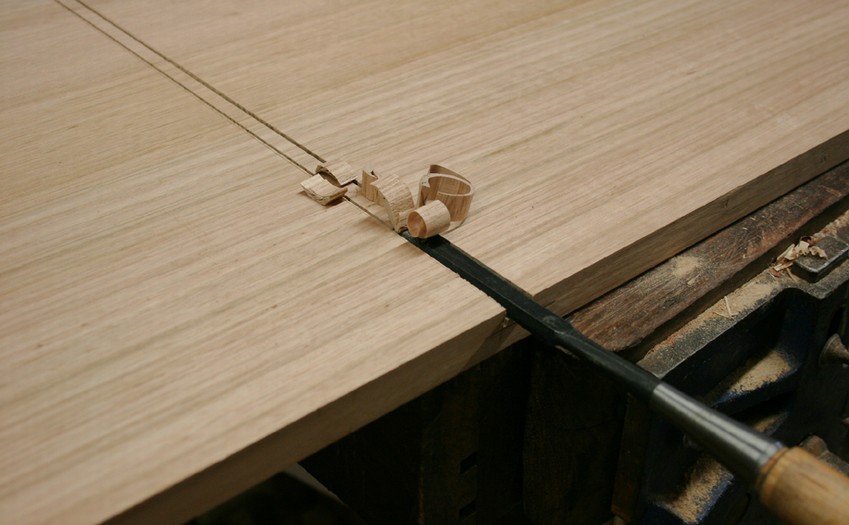
    I've cut 10 full panel (ranging from 15" to 19" wide), wide shouldered sliding dovetails in the past few weeks, all of which are nice and tight and exist without the need for additional support. So my work will not benefit from a change in planes. For someone starting now, with their options wide open, it's a nice to consider additional options.
    Last edited by Brian Holcombe; 01-31-2017 at 10:59 AM.
    Bumbling forward into the unknown.

  2. #62
    Join Date
    Feb 2004
    Location
    Perth, Australia
    Posts
    9,492
    Brian, the #79 is only really better in the sense that it has two blades and can cut in either direction. This is helpful when cutting the female socket as it is not always possible to reverse the plane to go in the other direction (such as with blind sockets). Further, the #79 does have a longer fence, and this is also a better solution. The HNT Gordon plane has a single blade, and so one ideally needs a pair of planes to do the same.


    A dedicated dovetail plane trumps them all for the male section ...


    Regards from Perth

    Derek

  3. #63
    Join Date
    Aug 2013
    Location
    Princeton, NJ
    Posts
    7,295
    Blog Entries
    7
    Thank you for providing additional info. I can see how that is a nice benefit to have two blades in one plane.

    The short fence is a weak point, I've considered making an additional dovetailed receiver and making a full length fence for it. It's pretty low on my list though.
    Bumbling forward into the unknown.

  4. #64
    Brian,

    Thank you for sahring your thoughts.

    I have a couple questions as a result. First what program do you use for design and generating working drawings.

    Second, what do i need to do to modifications do i need to make to the fence.

    Third, how would younuse a router table to put a sliding dovetail or dado in the middle of a 47" carcass side?


    Quote Originally Posted by Brian Holcombe View Post
    I feel pretty much the same way, of course I'm doing this professionally now and so the designs must be my own doing, but I did so before as well. The increased level of thought process in working out the details for yourself WRT your own tools and preferred technique is well worth it. I feel that is one of the reasons that I barely refer to my own drawings in the process of building. I've worked out the details carefully in my head, then drawn them, the mechanics of such being the important thing to memorize.

    Its worth the additional effort to use a program and design, but I usually only go so far is to make myself a basic reference, going over ever detail is often more of a time sink than anything and often the processes used will dictate specifics that aren't easily drawn out on the computer.

    The plane from Philly planes is only for the male portion of the joint. The HNT gordon one would be for the female side of the joint, I'm forgetting what I recommended you to use for the female side (forgive me) but I believe any side rabbet with a modified fence will work, I know Derek is keen on the stanley planes. The HNT plane works great for the side rabbet but Derek maintains that his Stanley planes are better still for that purpose.

    It's good to have both planes, even when cutting out by machine, unless you're capable of cutting perfect housings, which frankly.....isn't happening with the Festool setup, there is too much slop in the adjustable guide's seat on the rail and I don't believe it can be adjusted out. The router table is better for this, even more so if you can manage infeed and outfeed tables and a power feeder. I don't have room for all that.

    Don't get me wrong, the festool setup is good enough to rough the housings, but you'll find they need to be tuned afterward.

    For small dovetails I find it much easier to just use a dado plane then follow up with the dovetail plane.

    No one likes to admit this part, but if any cupping forms in the panel between surfacing and routing, then the machines are more trouble than they're worth. The process of using a batten for a dado plane flattens the panel in the same way that a power feeder would flatten the panel. It's cup that causes the cutout not to go well with machines more than anything else.

  5. #65
    I Like the idea of a saw, chisel and router plane. I just have no idead how to get such long straight shallow cuts. Sure i could figure it out. Maybe it is as easy as just trying?


    Quote Originally Posted by Derek Cohen View Post
    To be clear, Brian, I like the modified Stanley #79 as an all rounder - it can do both joints.

    However for the male section, the dovetail plane I built 10 years ago still rocks ..


    For the female socket it is also easier to use a female dovetail plane I built, and widen if necessary with the HNT Gordon dado plane ...


    Still, the modified Stanley #79 is a sweet user, and can do it all ...


    Not to forget more simple and basic methods, such as sawing ...


    ... chiseling ...


    … and finishing with a router plane …


    Lots of options here.

    Regards from Perth

    Derek

  6. #66
    I took the case out of the clamps first thing this morning before getting to work. No Work on this or the bench today. Instead i got to build a couple plywood carcass and mill up a bunch of hard maple for face frames and doors. Still a bad day at work is better than a good day golfing to me.

    As you can see i lost the tip of one point. I also got a couple very small chips in a tale on the top or bottom of the case.

    image.jpgimage.jpg

  7. #67
    Join Date
    Sep 2007
    Location
    Longview WA
    Posts
    27,437
    Blog Entries
    1
    Quote Originally Posted by Patrick Walsh View Post
    I Like the idea of a saw, chisel and router plane. I just have no idead how to get such long straight shallow cuts. Sure i could figure it out. Maybe it is as easy as just trying?
    If the cuts are all the way across a piece it isn't as much work as a stopped cut. For a stopped cut, it helps to first use a chisel to cut out the stopped end so the saw has somewhere to go and push the saw dust.

    This is my favorite saw for such work:

    Cutting the Hearts.jpg

    It is a Bishop #10. The plate has two sets of teeth. The back is adjustable and can be used like a depth stop when making multiple identical cuts.

    jtk
    "A pessimist sees the difficulty in every opportunity; an optimist sees the opportunity in every difficulty."
    - Sir Winston Churchill (1874-1965)

  8. #68
    Join Date
    Aug 2013
    Location
    Princeton, NJ
    Posts
    7,295
    Blog Entries
    7
    Quote Originally Posted by Patrick Walsh View Post
    I took the case out of the clamps first thing this morning before getting to work. No Work on this or the bench today. Instead i got to build a couple plywood carcass and mill up a bunch of hard maple for face frames and doors. Still a bad day at work is better than a good day golfing to me.

    As you can see i lost the tip of one point. I also got a couple very small chips in a tale on the top or bottom of the case.

    image.jpgimage.jpg
    Some of that may plane out...otherwise looks fantastic.
    Bumbling forward into the unknown.

  9. #69
    Join Date
    Apr 2013
    Location
    Stone Mountain, GA
    Posts
    751
    Agreed, that looks great, Patrick. Plane the sides and chamfer the end corners a little, will probably remove that.

    Also, I appreciate the discussion of sliding dovetails and dovetail planes in this thread. Inspired, I bid and won an auction for a Stanley 79 tonight. Looking forward to trying this type of joinery

  10. #70
    Thanks brian,

    From what i can tell most all of it will plane out.

    If i go with my standard Waterlox finish i can just tint some epoxy and sand it out prior to finish. If not a couple glued in end grain pieces of wood should do.

    I am actually questioning what to finish this project with. Im inclined to go waterlox to get the most out of the figure mostly on the doors. In person they are pretty amazing.

    I actually considerd just a oil finish so I could finish them before glue up so as the pannels move i wont have any issues. I really could not see not putting some kind of film on the doors and back pannel considering the figure. Funny enough these are the areas that oil would had most helped with regard to wood movement and shrinkage.

    I would also like to have stained the Africa Mahogany a shade or two darker than its natural color. Nothing crazy just a little something to get rid of the pink. Again up against the maple i would have had to do this before glue up. I couldnt figure out how the heck to not get glue all over my oiled pannels and what i would do with the inevitable spot here and there that i would get regardless of how carfeful i was.

    Wish i could trudge on with this this week but i cant. Long way to go still with the interior dividers and 8-10 drawers. Then im sure i have a good day of work cleaning the whole thing up prior to finish. If i waterlox it thats another ten coats and ten days. My guess is its a few hours work a coat with a thorough sand,vac and tack between every coat with all those drawers. Man the hours spent on what seems like such a small simple project.

    In contrast i will build three of these same size cabinets out of plywood all dadoed together with beaded face frames just the same, glass doors all hounched then mortise and tennoned together and hung in about 3-4 days max. That seems like a lot of time but in reality its 32 hrs max. Ill have 32hrs in Waterlox into this case alone.

  11. #71
    Take it from a guy who has had to fill in many an imperfectly cut dovetail: If it's too small to shim with a shaving, then wetsanding to topcoat to fill the void is superior to epoxy. The epoxy leaves a crisper line which highlights the imperfection. Wetsanding acts to sort of airbrush the imperfection.

    Nice work.

  12. #72
    I am considering wet sanding or grain filling this piece with BLO prior to finishing with waterlox.

    I am in the middle of a project where i used West Systems on mahogany to grain fill it prior to Waterlox. As much as im not into a gloss plastic film finish i am very impressed by the grain filling ability of the epoxy to leave a smooth as glass finish.

    My foray into the trades started as a uber high end painter/finisher. I think this is where i got my perfectionism from. A good painter can loose his mind taking care to make sure his end product has zero foreigh objects in it when working on sight. This is very easy to control in a spray booth. I think it was these ten years as a high end painter that developed my real appreciation for a perfect finish.

    Think $25 million dollar plus homes and custom milled south american mahogany libaries for miles. Or custom doors made from exotics such as wengee and floating birdseye ceiling pannels. That does not take into account the miles of painted oil based interior trim treated like the finish of a car. We would often spend 1-1.5 years on such projects on just the interior finishing. As much as i appreciate the outcome of such a fine finish i really hate doing it. Just not enough to let someone else touch my own work


    Quote Originally Posted by Prashun Patel View Post
    Take it from a guy who has had to fill in many an imperfectly cut dovetail: If it's too small to shim with a shaving, then wetsanding to topcoat to fill the void is superior to epoxy. The epoxy leaves a crisper line which highlights the imperfection. Wetsanding acts to sort of airbrush the imperfection.

    Nice work.
    Last edited by Patrick Walsh; 02-01-2017 at 9:03 PM.

  13. #73
    Well i just could not help myself. It is almost like this case and bench are calling me all day as i work saying "plywood kitchens are crap, and hounching a million rails and styles together to bead face frames and door styles is annoying as all can be when not a personal project, come play with us instead"

    So I broke away for a hour and planed my tails flush. I will still do a final smoothing and fix a couple oopsies.

    image.jpgimage.jpgimage.jpgimage.jpg
    Last edited by Patrick Walsh; 02-01-2017 at 8:20 PM.

  14. #74
    Join Date
    Aug 2013
    Location
    Princeton, NJ
    Posts
    7,295
    Blog Entries
    7
    Fine work! I think you'll discover that moving away from African Mahogany will solve many of the problems like that. That stuff is not tough to work in, but a bit coarse IIRC. In fairness to the wood...it may have needed a slightly sharper cut to cleanly slice that line. On woods like that I will stop and resharpen more often than I would otherwise.
    Bumbling forward into the unknown.

  15. #75
    What line are you speaking of Brian?

    I agree with moving away from African Mahogany. I keep buying it because it is inexpensive and I consider myself deep in the learning phase of this whole furniture grade woodworking.

    The few times i worked in actual Honduran mahogany i was in heaven. I also have a inn to some really old mahogany. I cant pick it up till the spring but i am still very excited.

Posting Permissions

  • You may not post new threads
  • You may not post replies
  • You may not post attachments
  • You may not edit your posts
  •