Results 1 to 11 of 11

Thread: Project: Retro-Modern LP Record Rack

  1. #1
    Join Date
    Mar 2003
    Location
    SE PA - Central Bucks County
    Posts
    65,854

    Project: Retro-Modern LP Record Rack


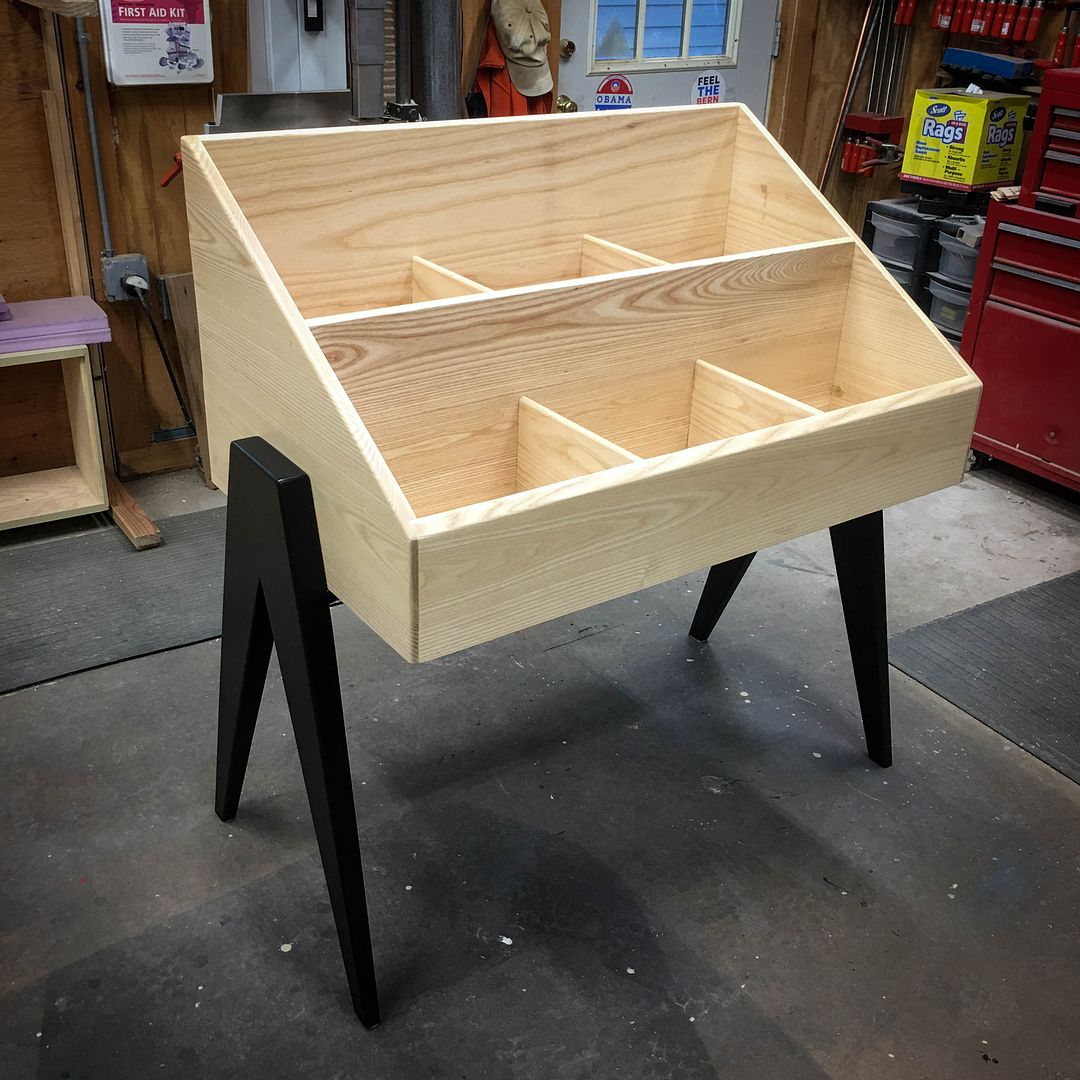
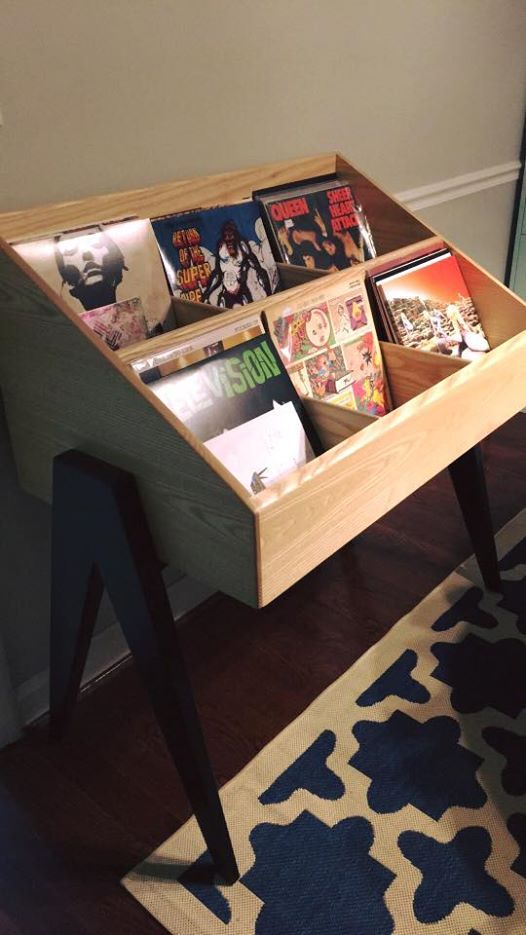
    This project is a commissioned work for a family friend. She provided me with a tiny photo/rendering and I worked things out from there. It's not "my" taste, but this woman did great service helping with some of the emotional issues our older daughter "enjoys" and that was worth the time I put into it. When she asked for a cost, let's just say I covered the material plus a couple lattés. If anybody else asked...nope...big bucks...

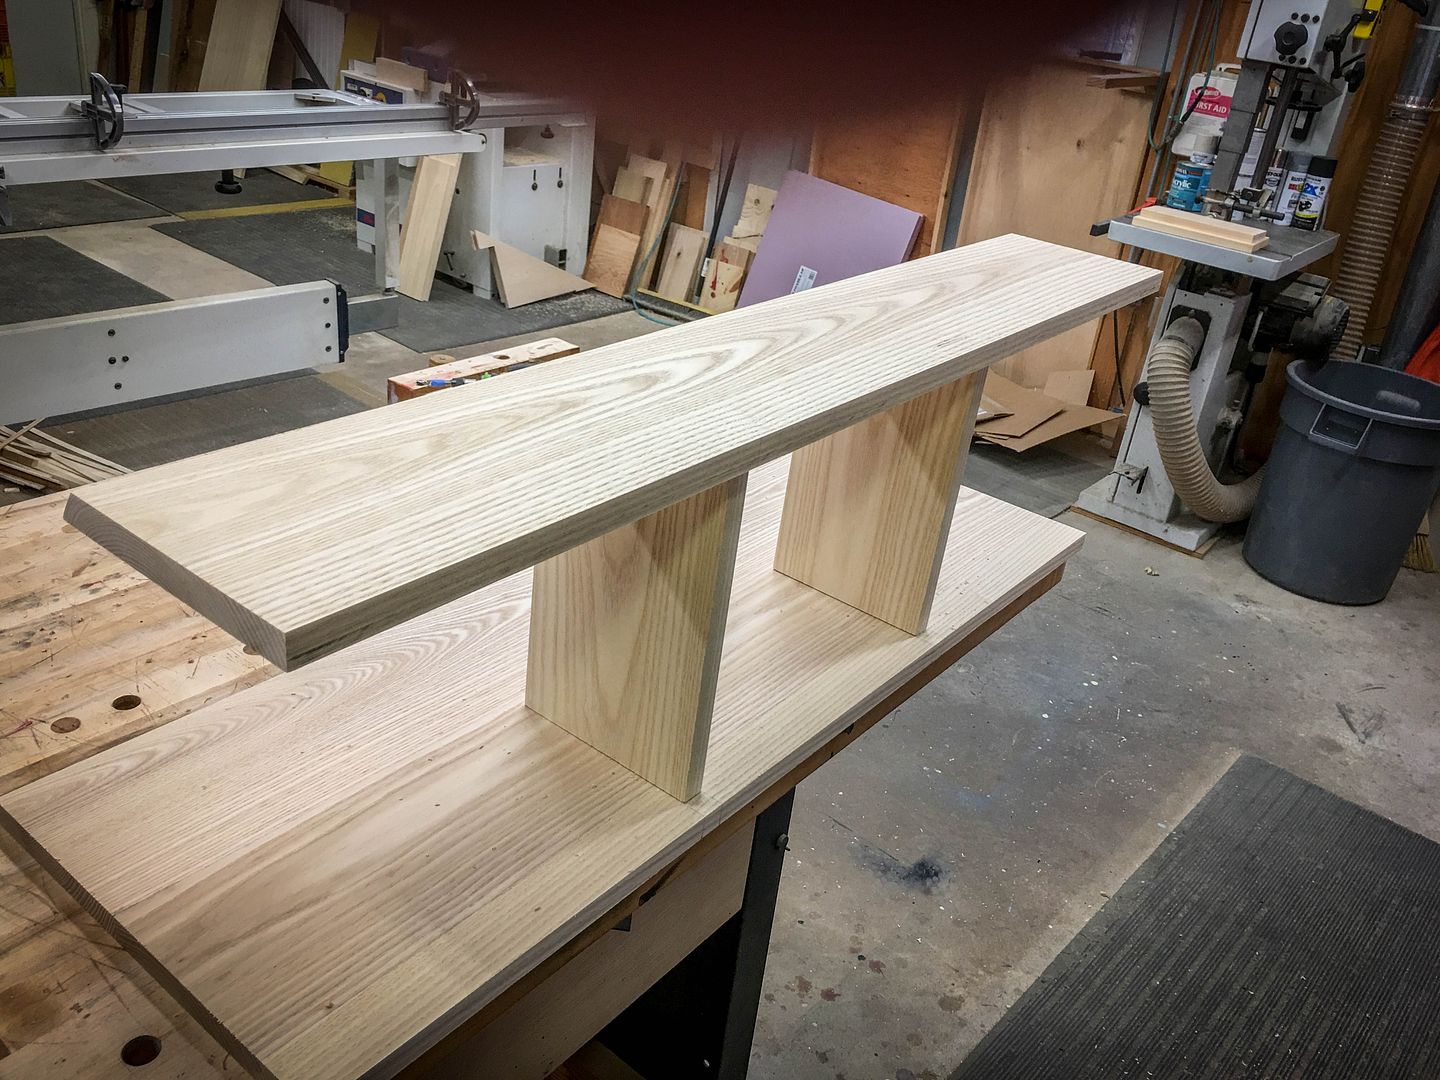
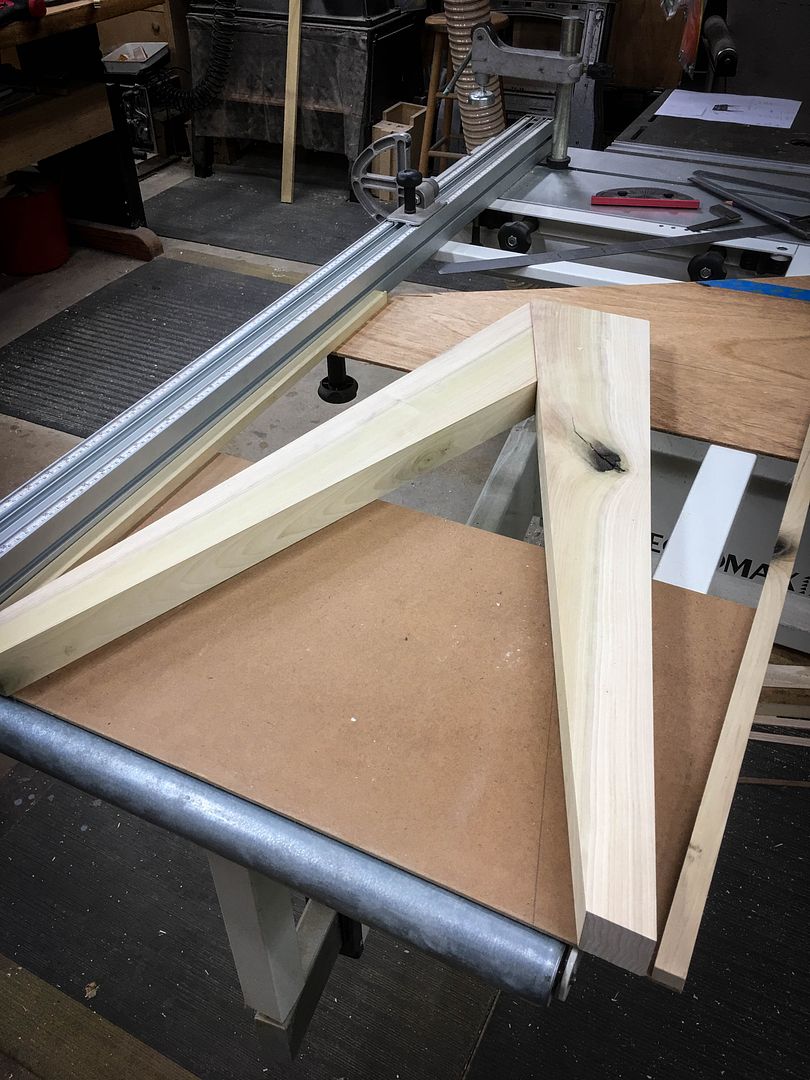
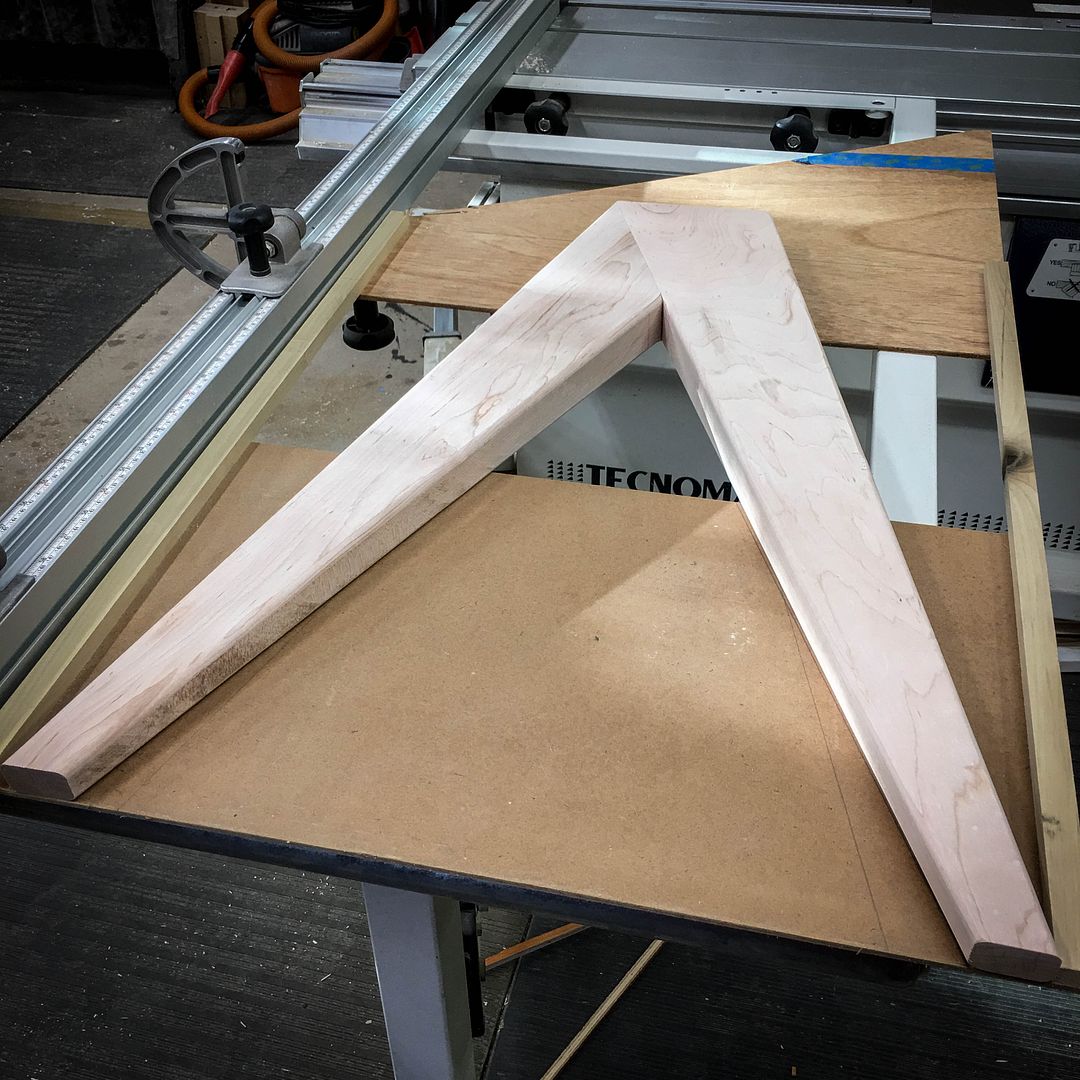
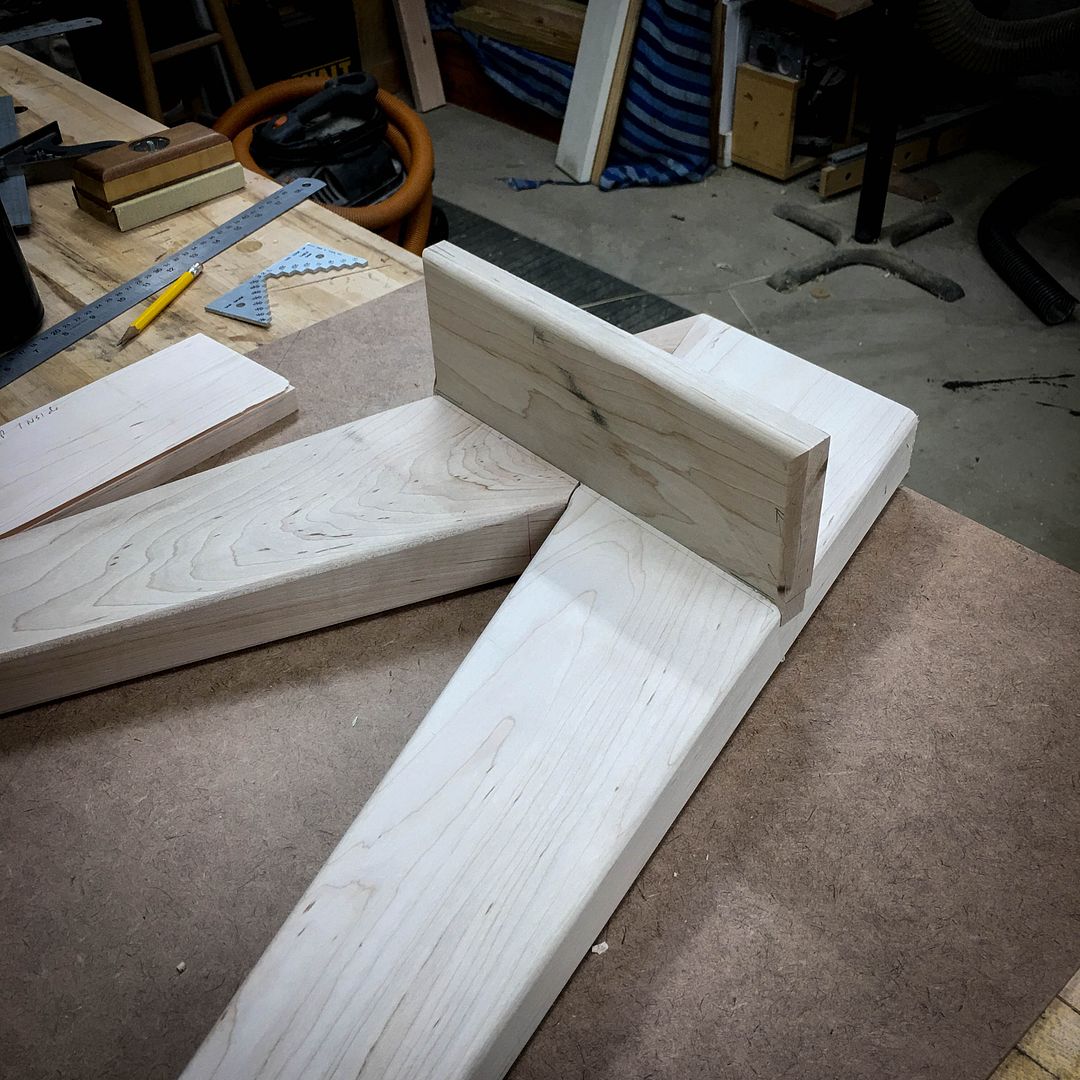
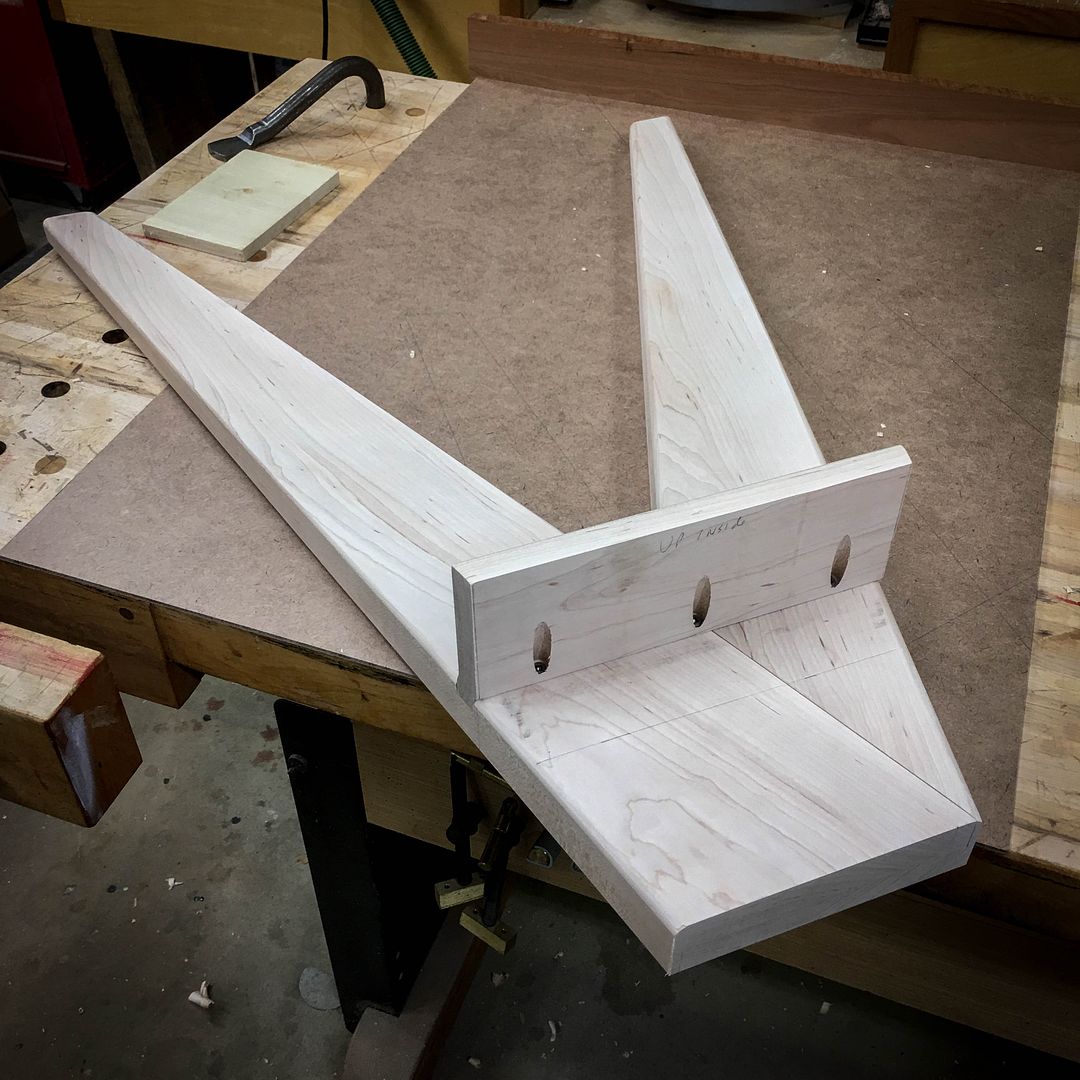
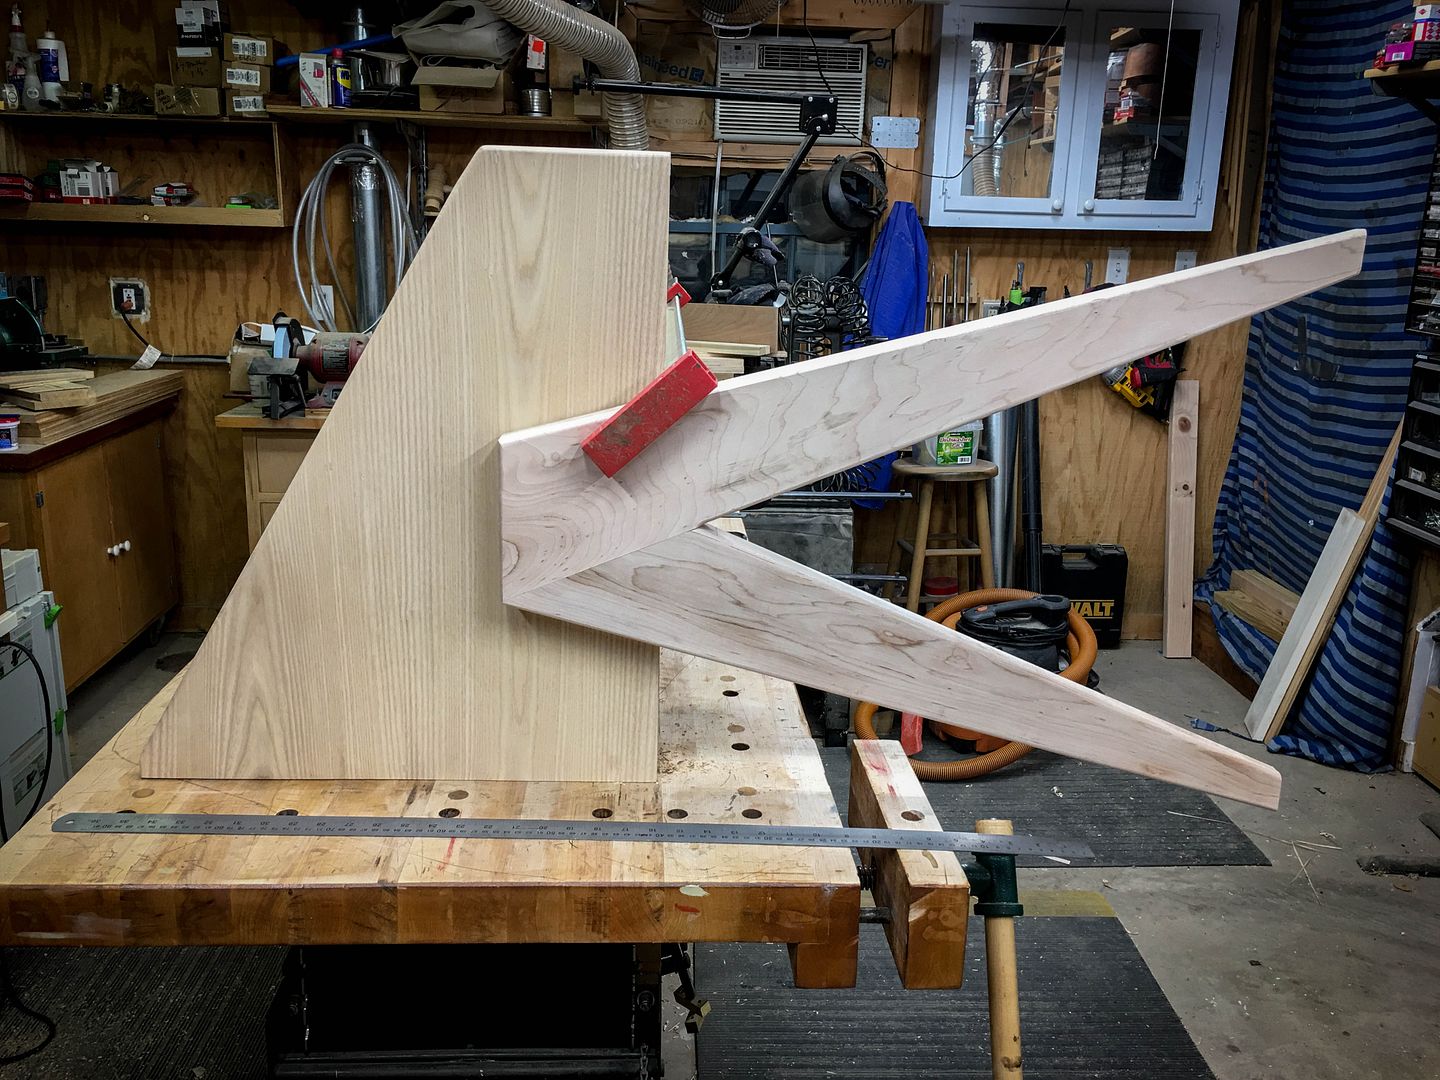
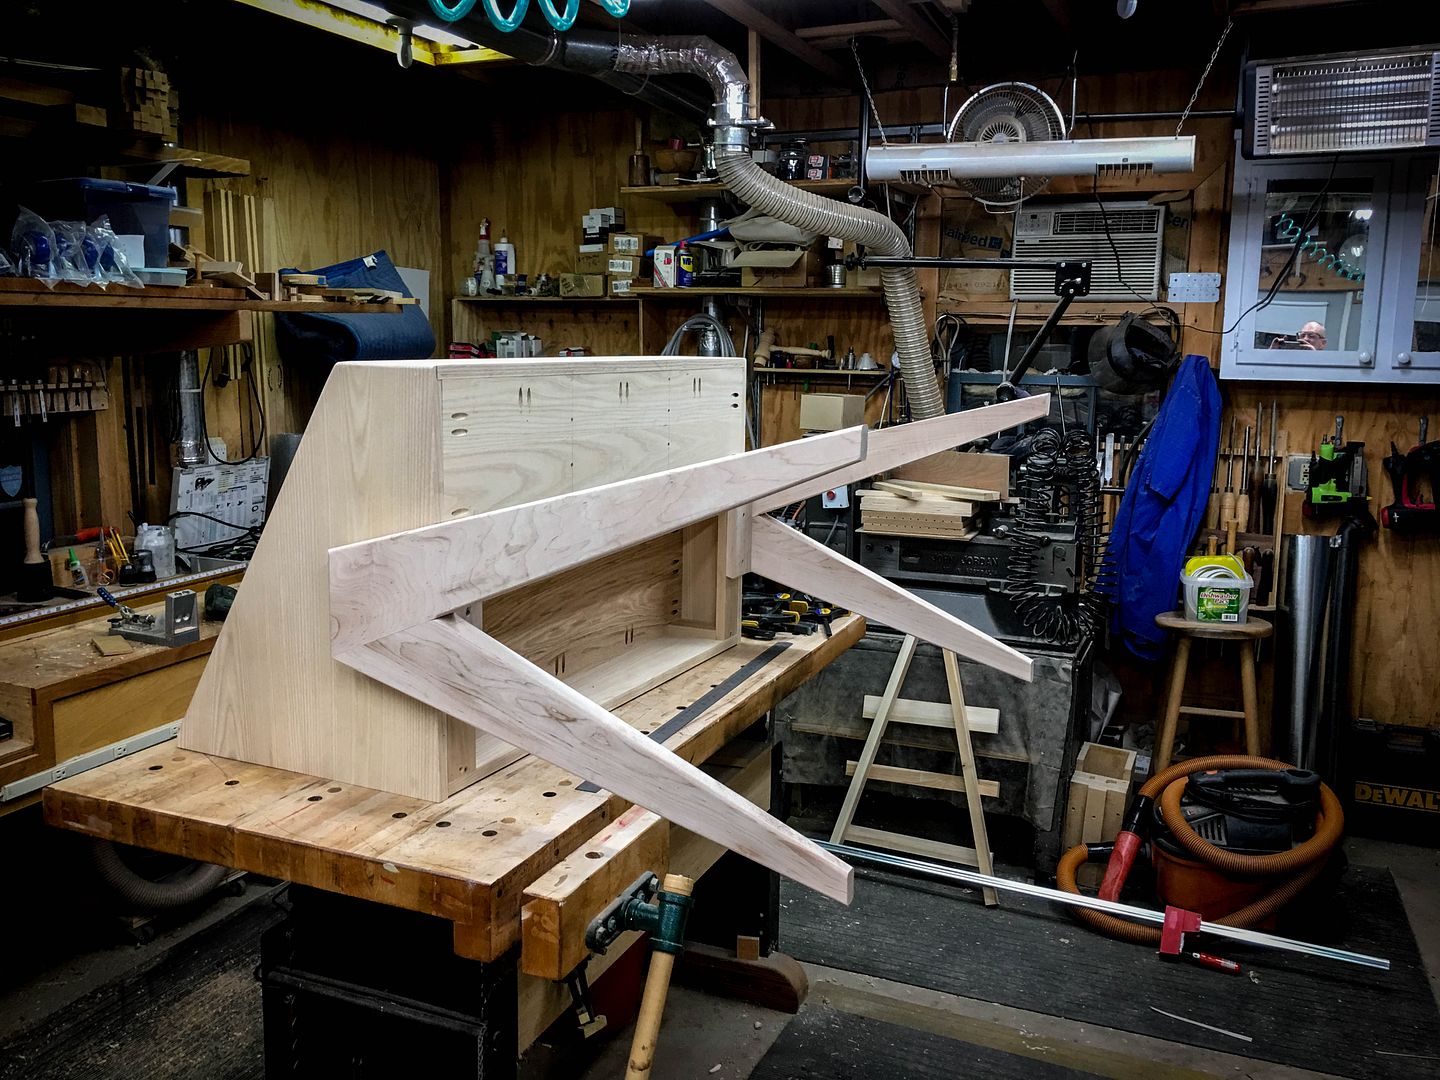
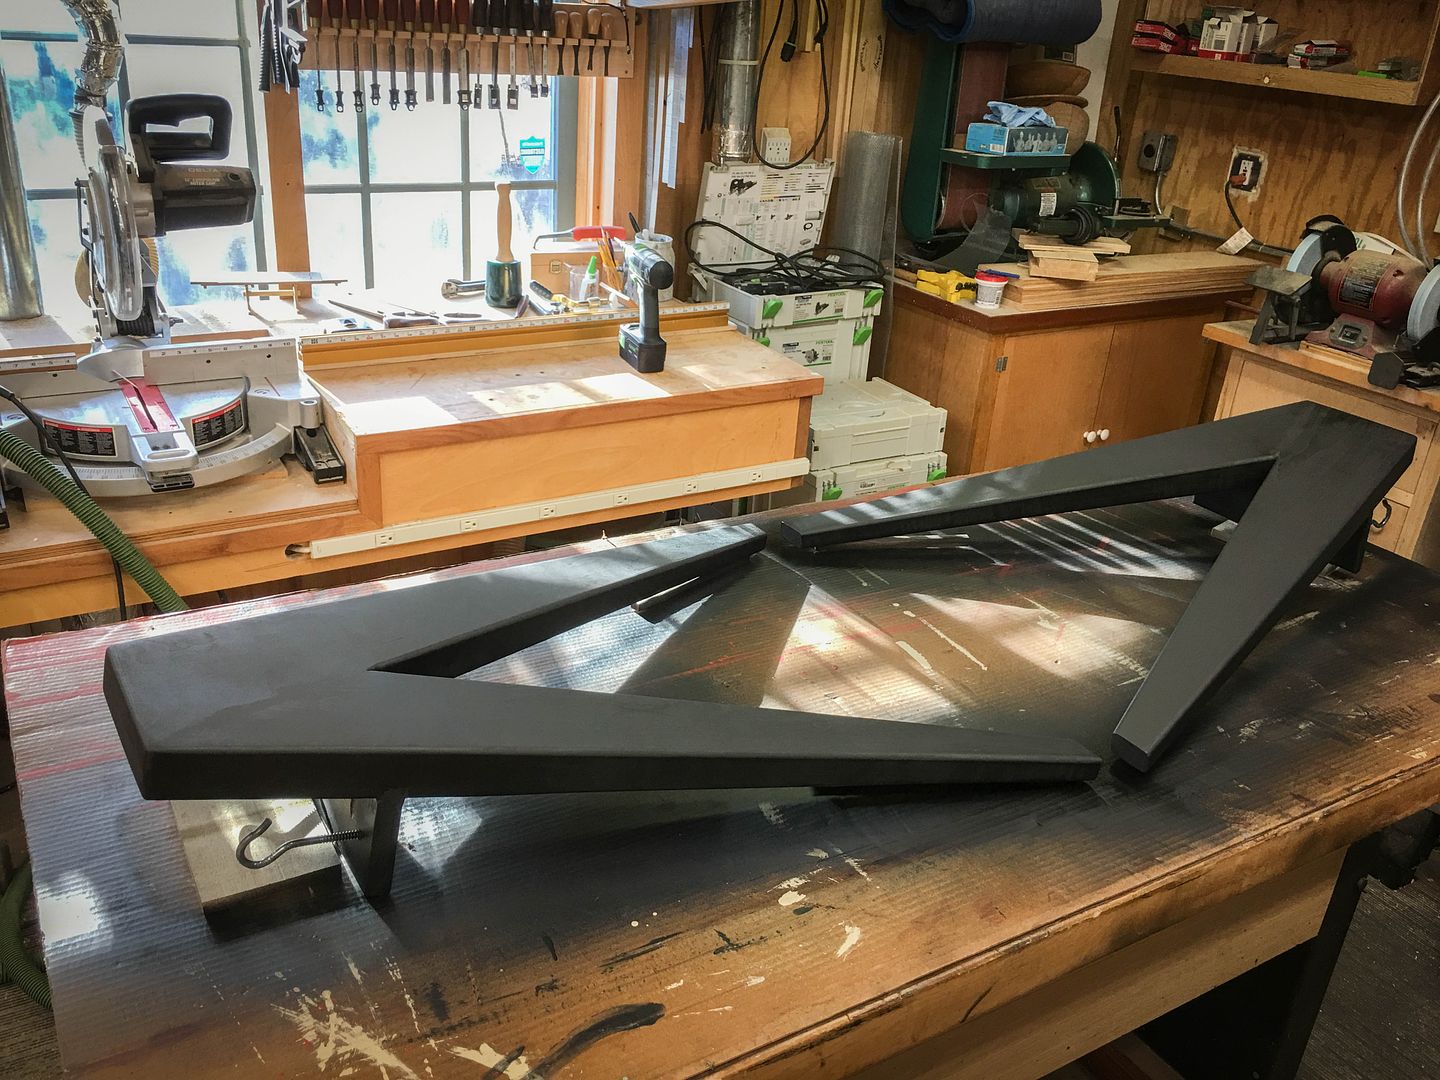
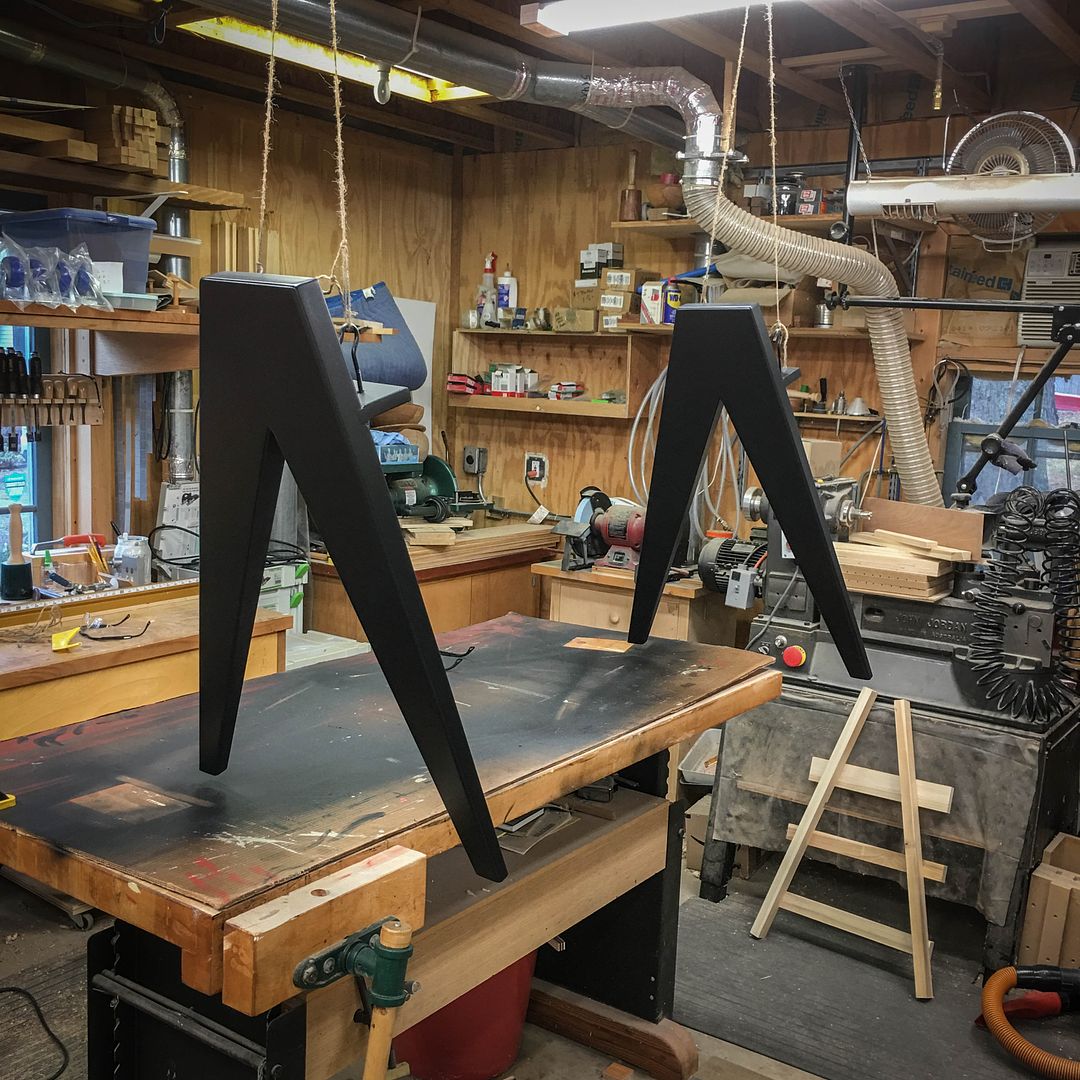
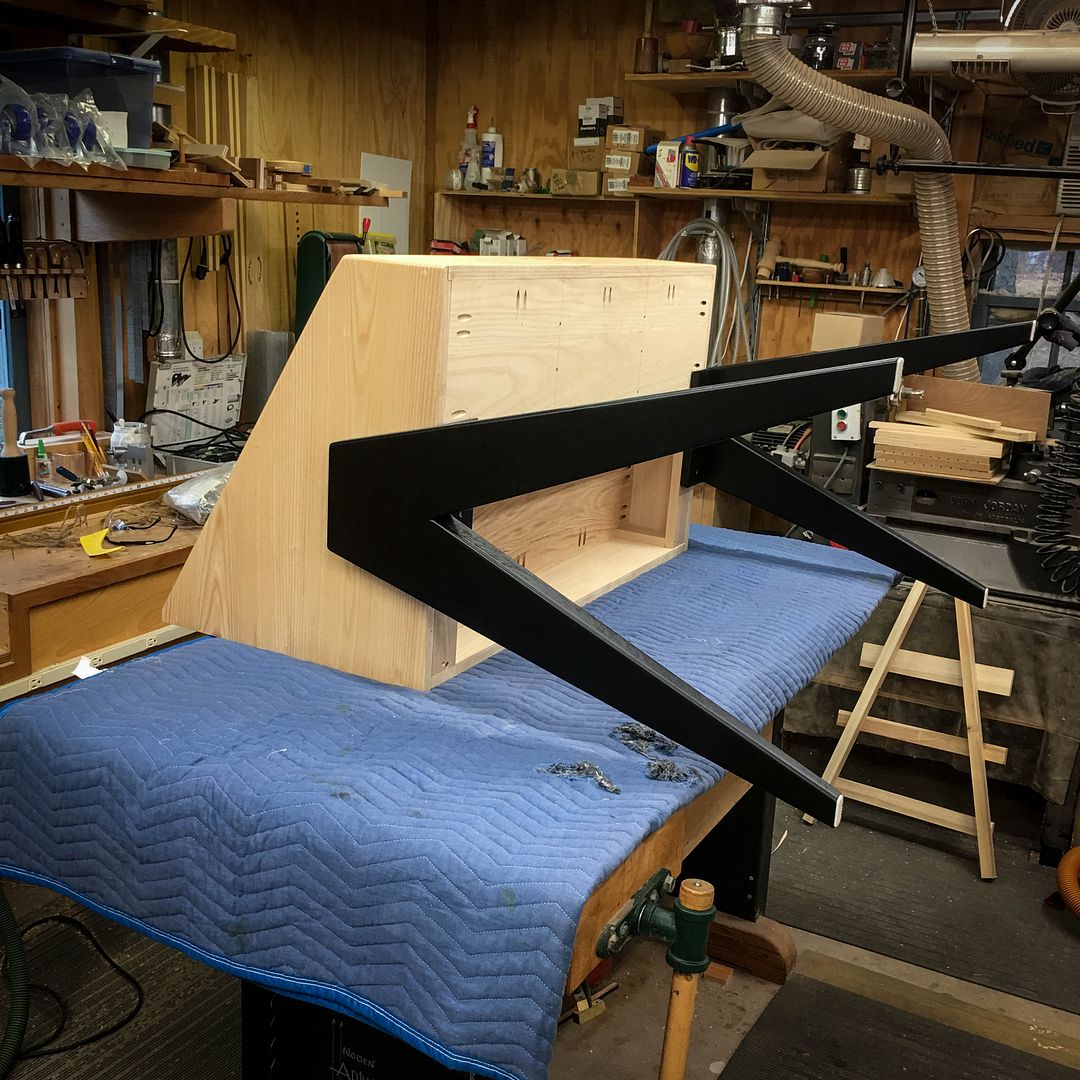
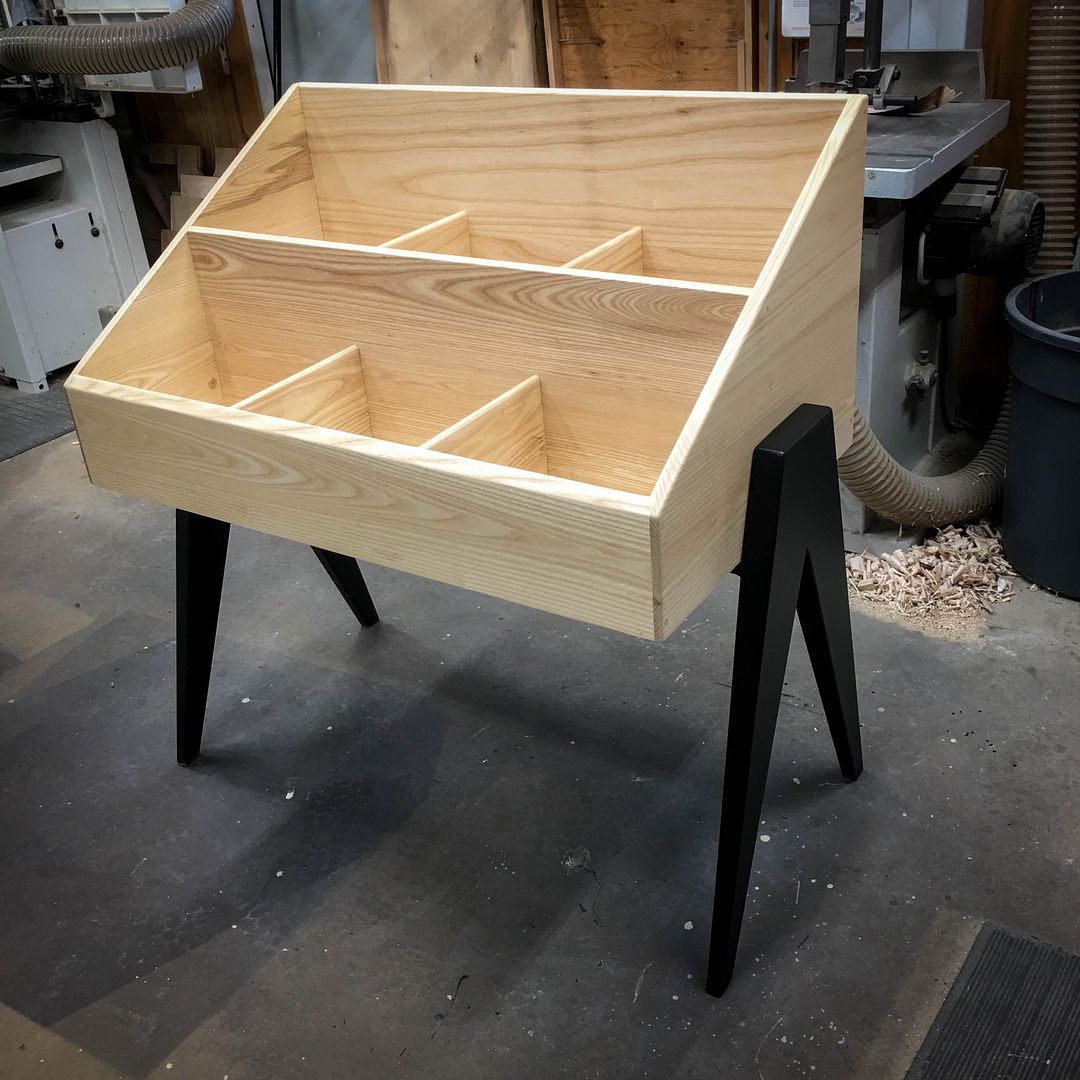
    Construction of the carcass was relatively straight forward, but the ash I used resulted in an extremely heavy piece. The legs are where the "action" was relative to construction with interesting angles and a half-lap for strength. The legs were made from 8/4 maple milled to 1.75" finished thickness. I chose maple because of its strength, stiffness and the ability to get a perfectly smooth surface once painted which contrasts with the grain and pore structure of the ash. The client (thankfully) selected the option to keep the ash natural...that piece would have been a pain to dye/stain, etc.

    The following is a "build" thread for this project.

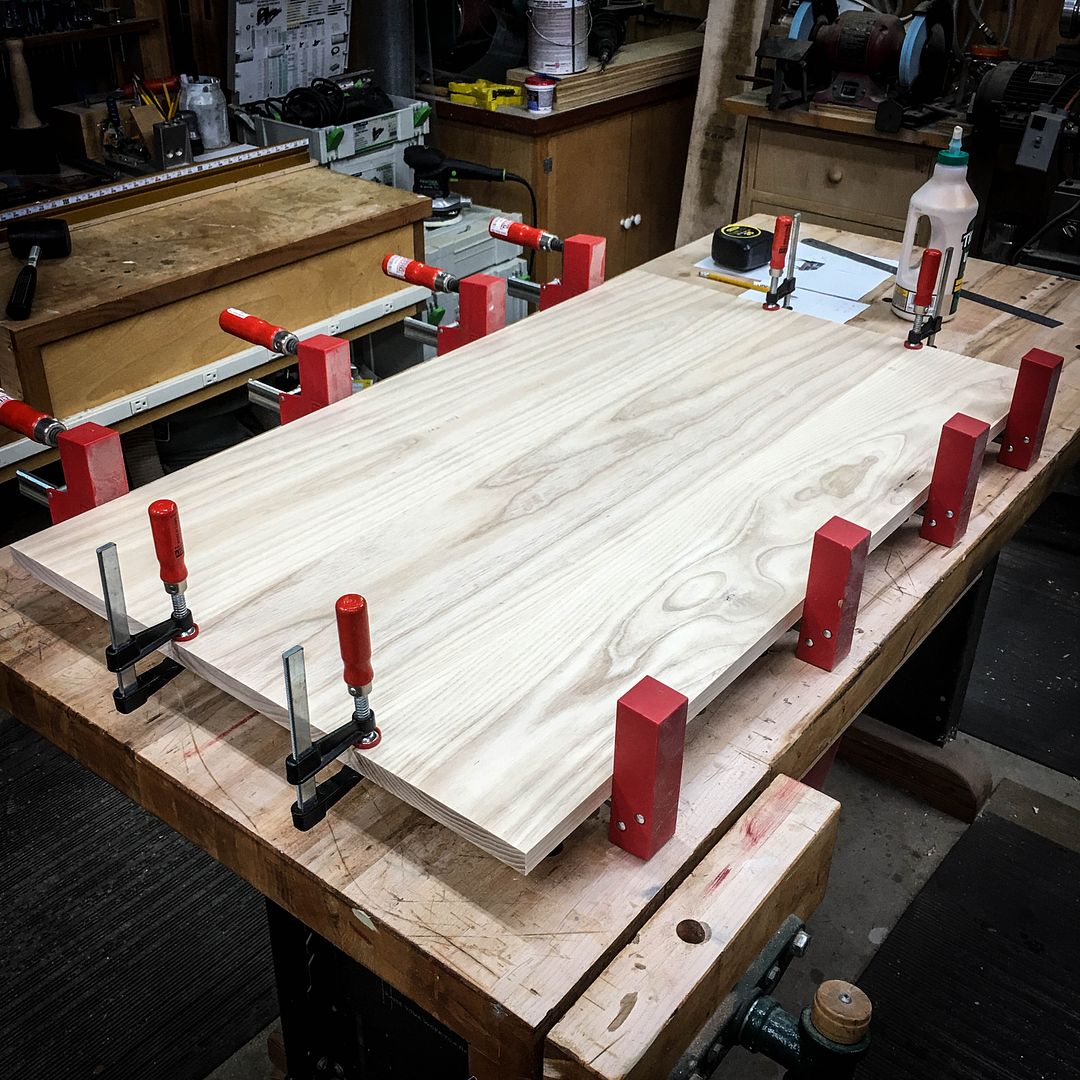
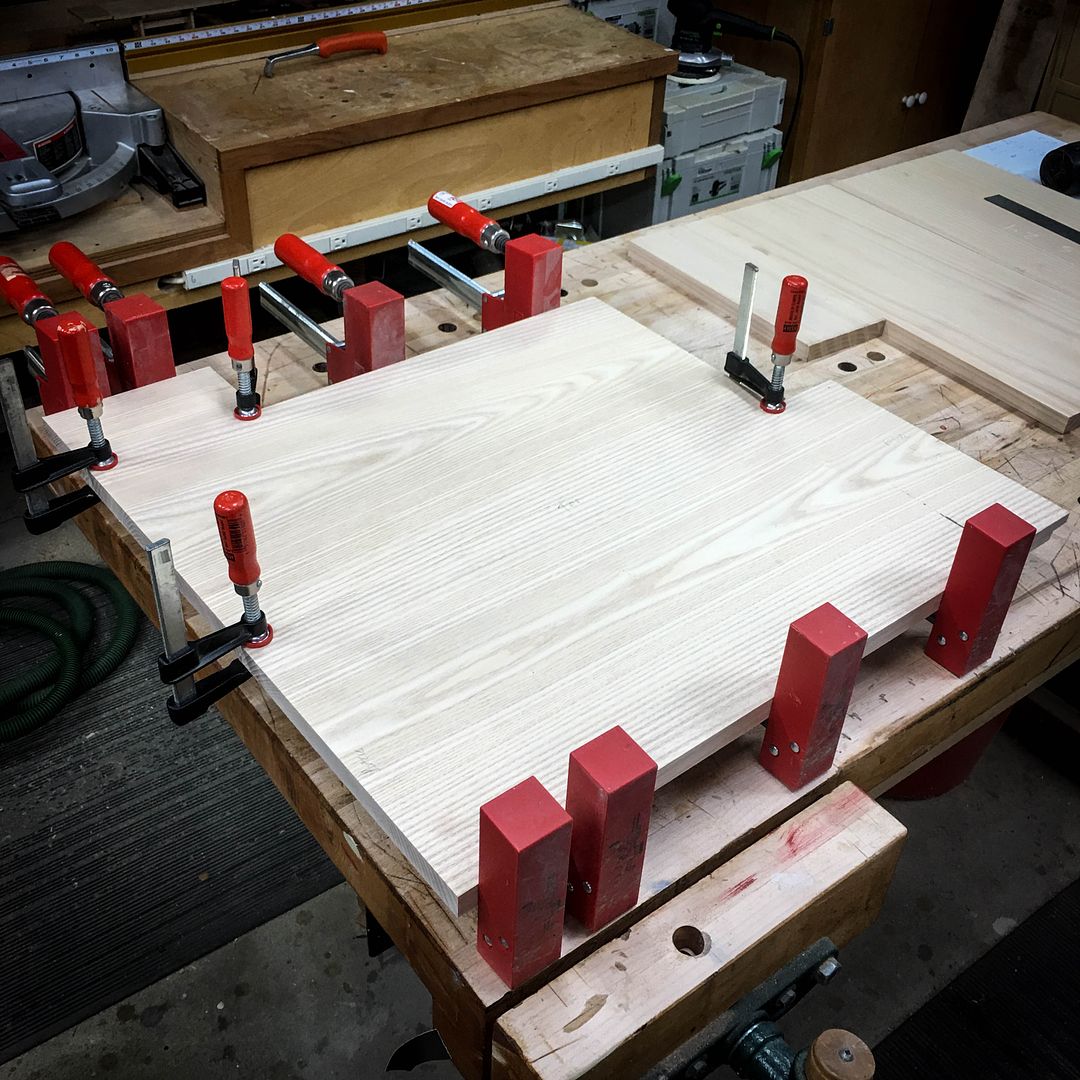
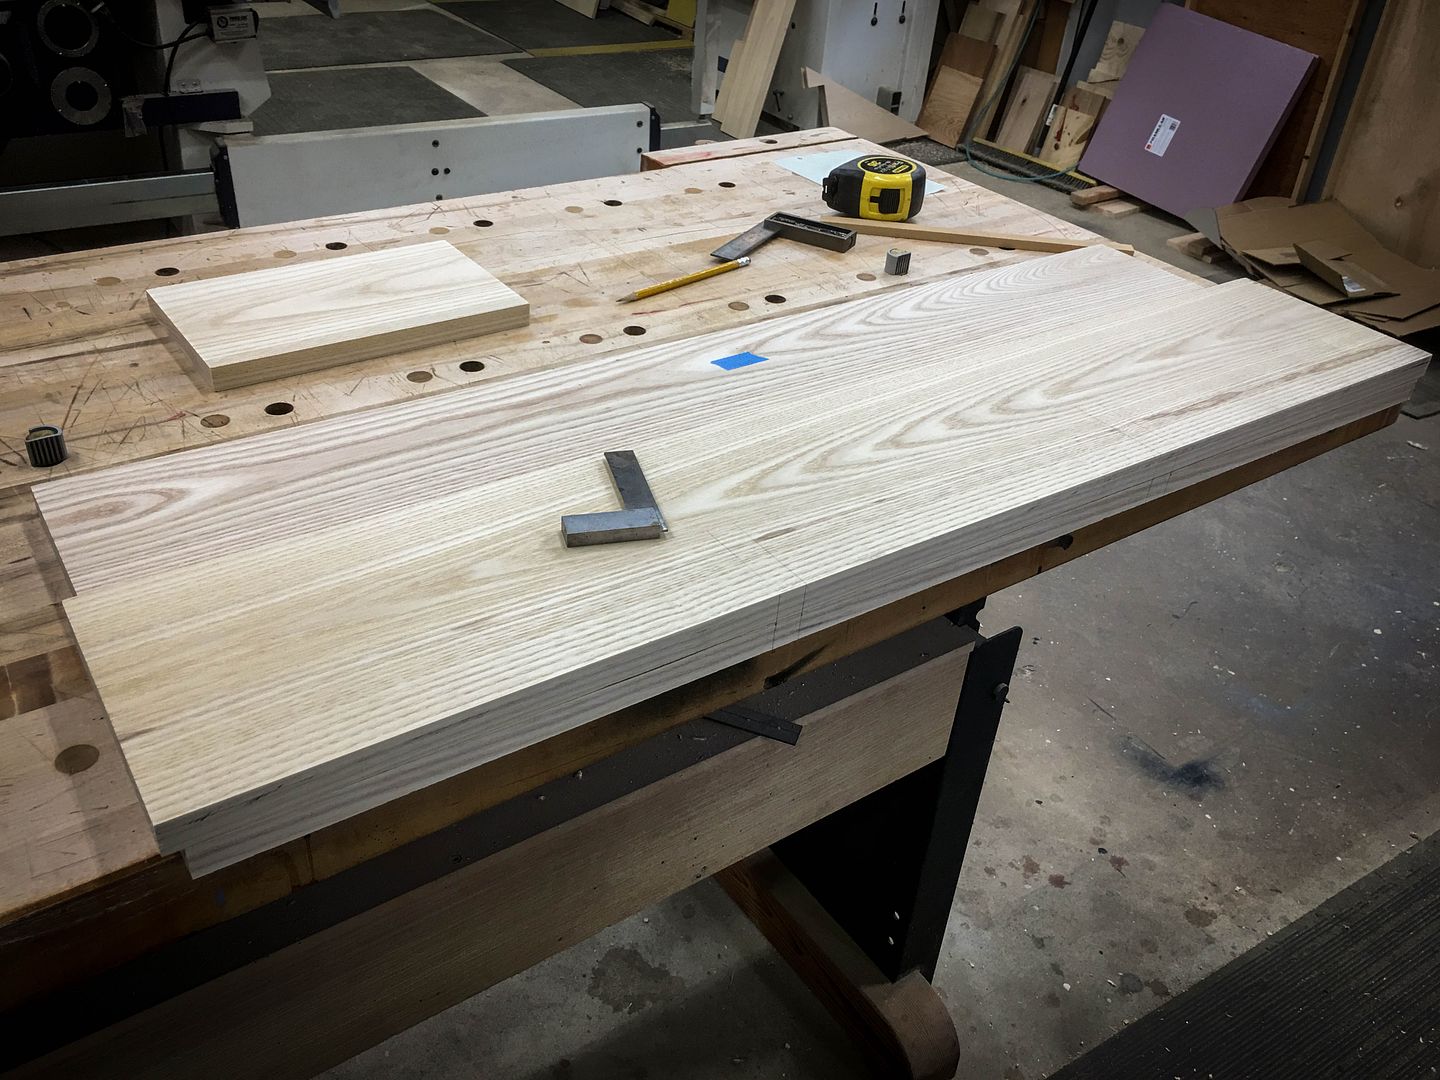
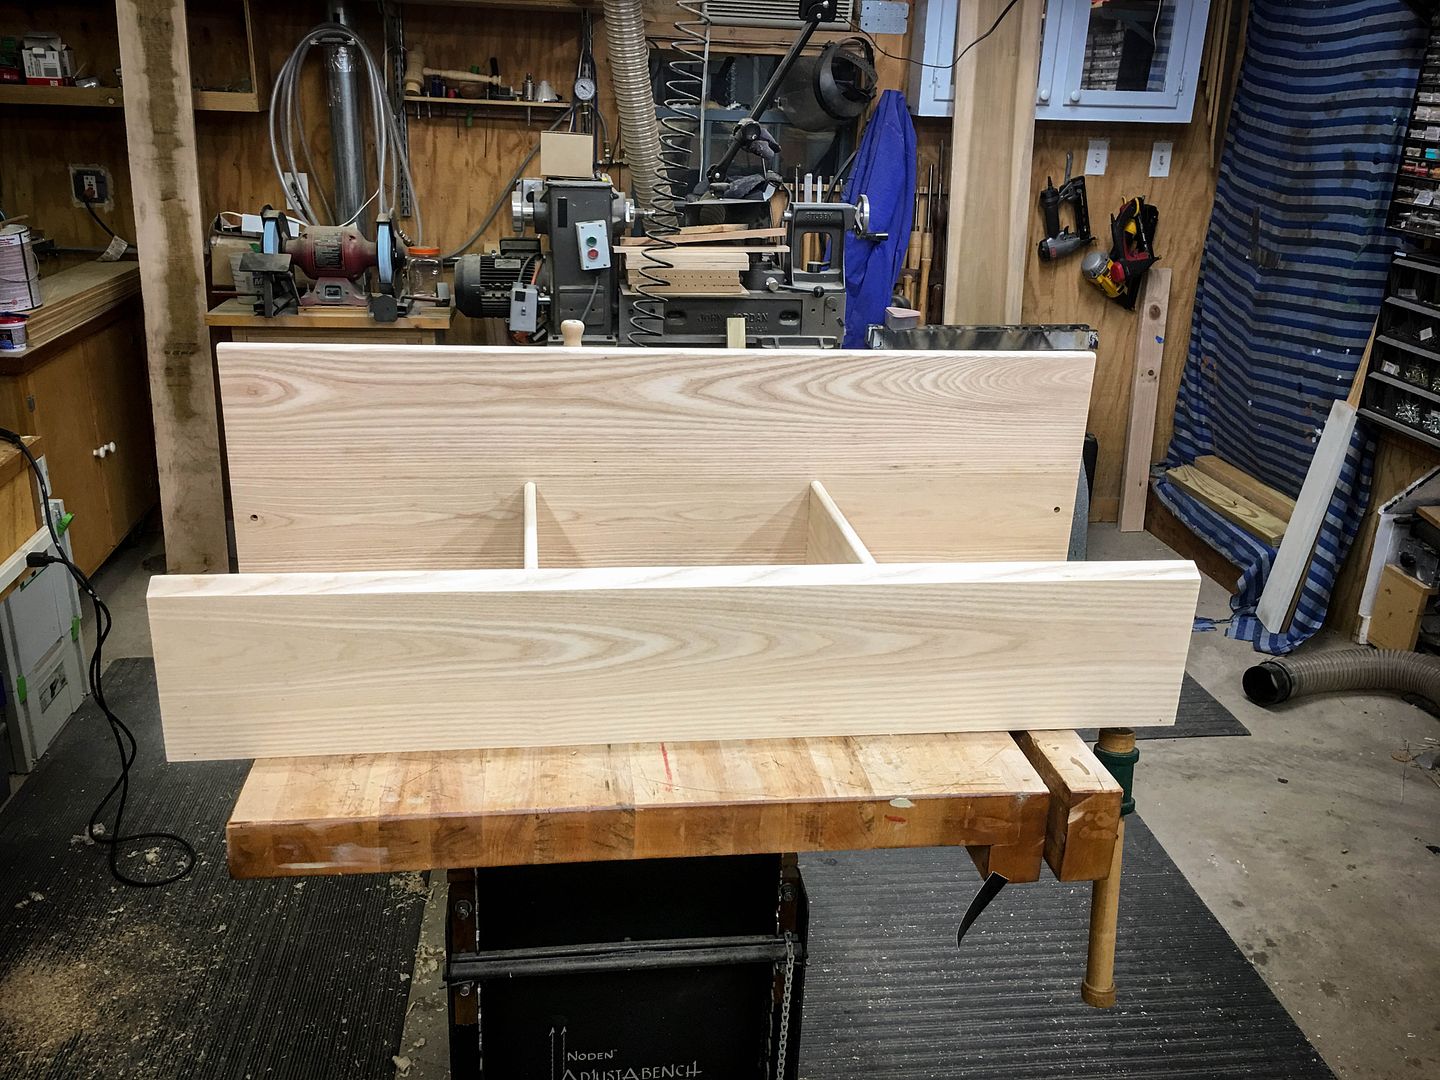
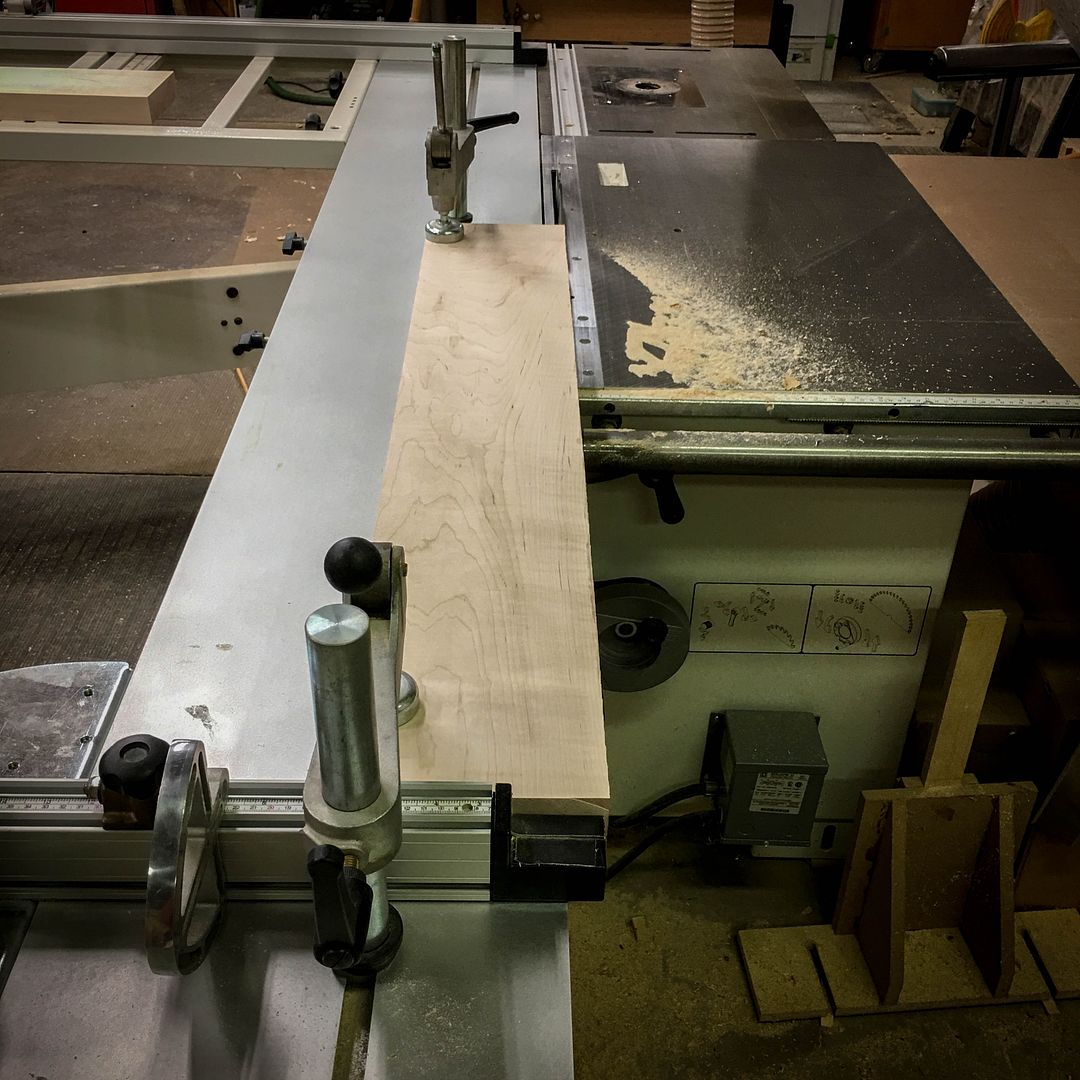
    After milling the 4/4 ash to 3/4" on the J/P and straight line ripping at the sliding table saw, several panels needed to be glued up to accomodate the required dimensions. This piece is ~40" wide by 20" tall relative to the carcass. This is the case back blank


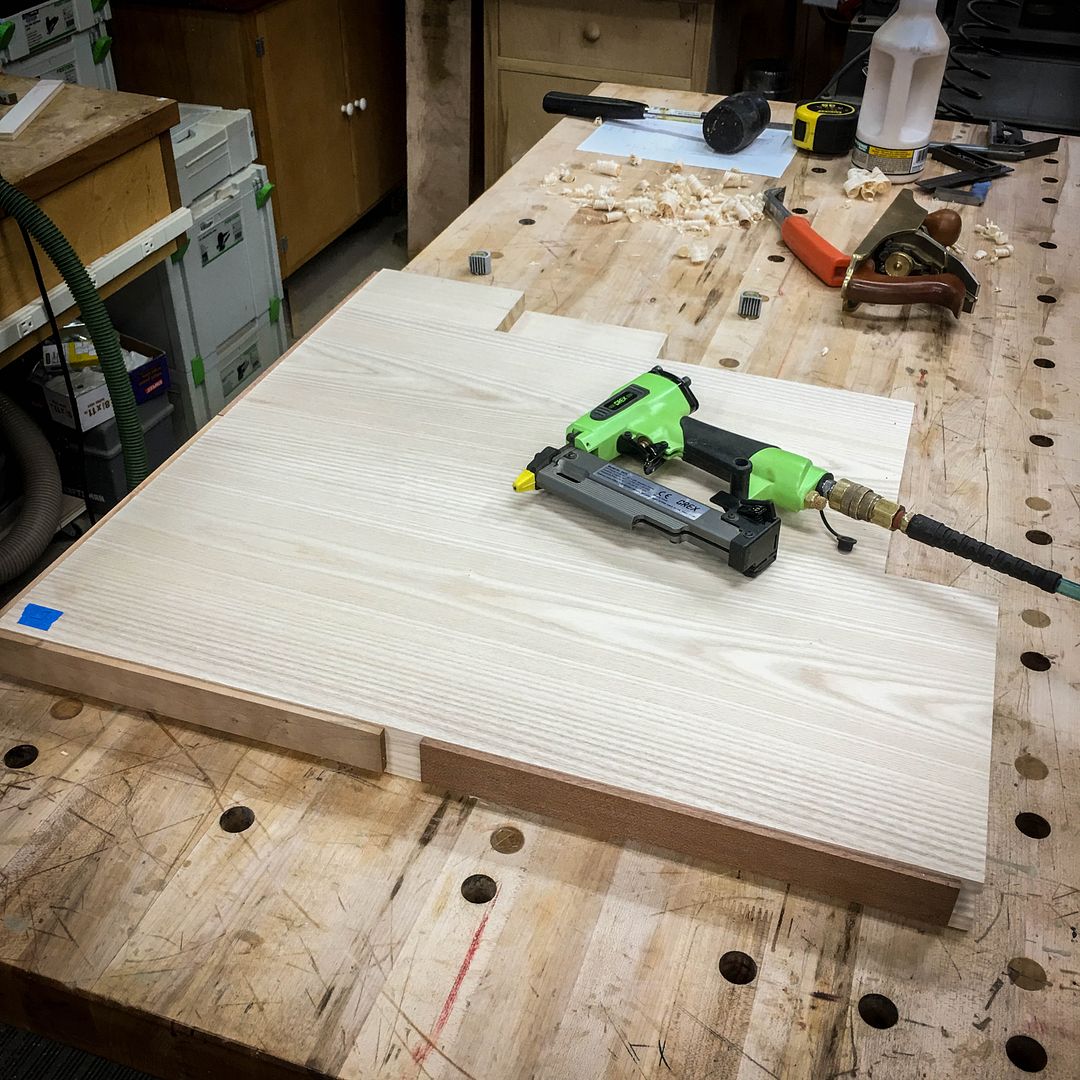
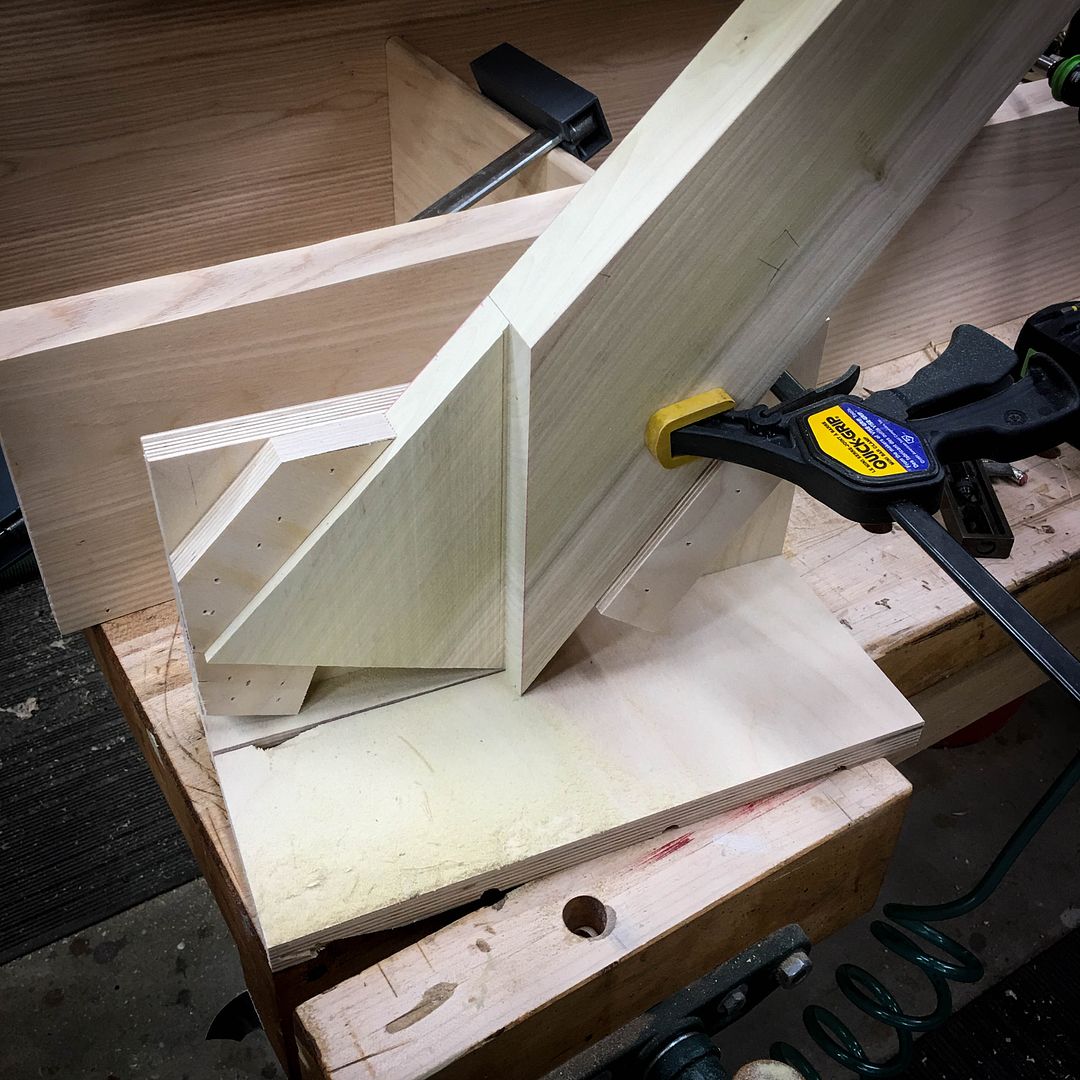
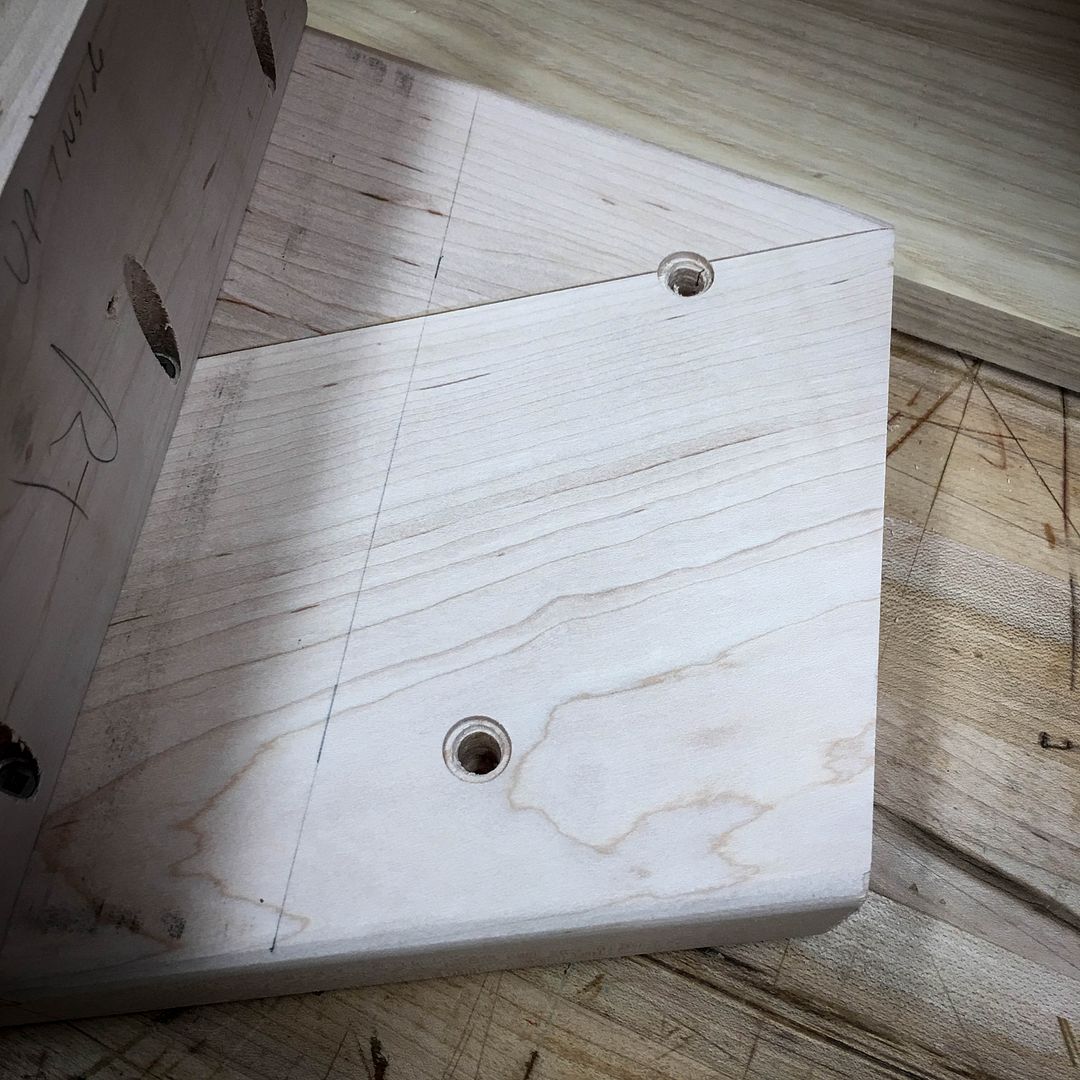
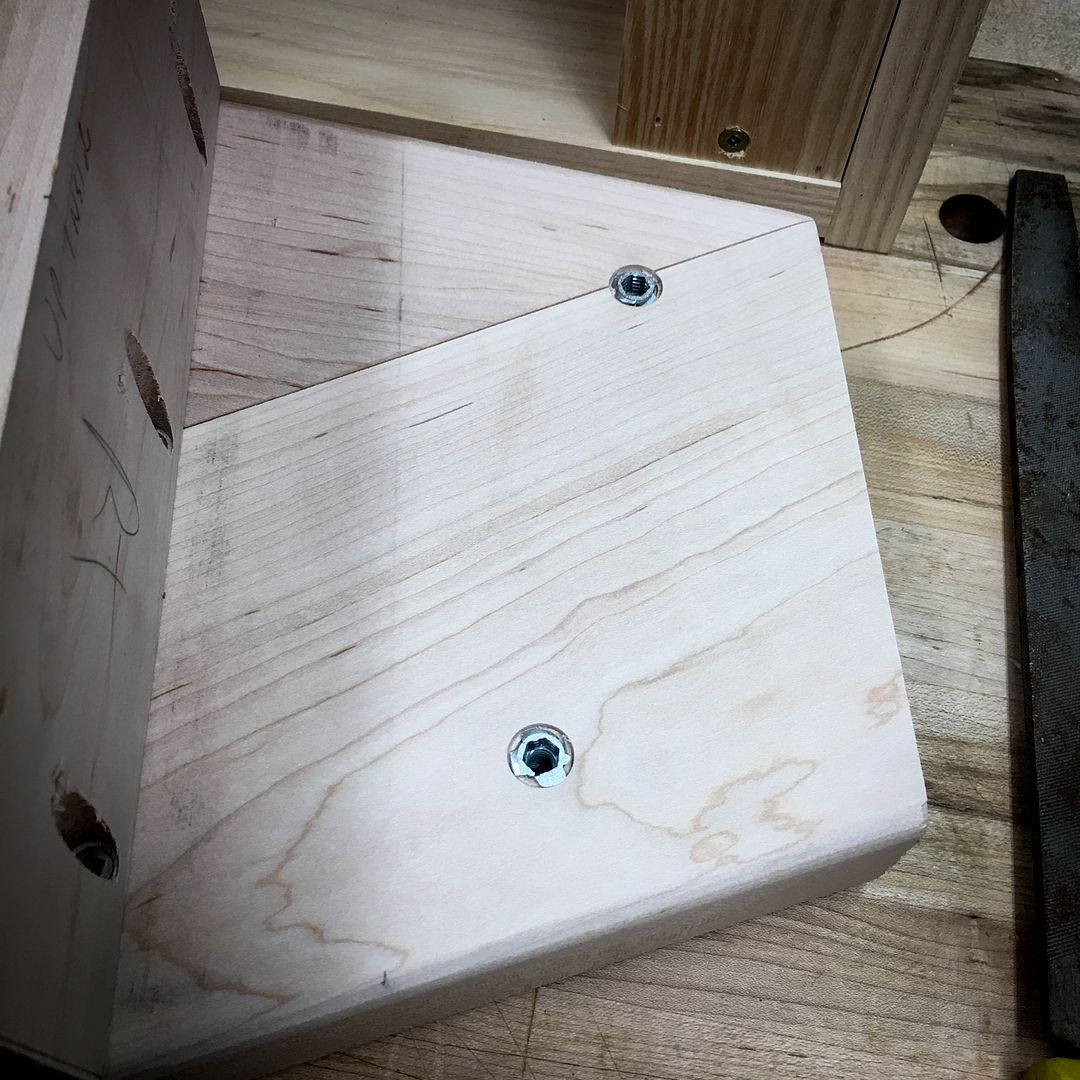
    Before gluing up the end panels, the bottom board received a 3/8 rabbit at the front to help lock together that lower piece later on. It could have been a butt joint like the back to the sides would be, but I chose the rabbit "just because"


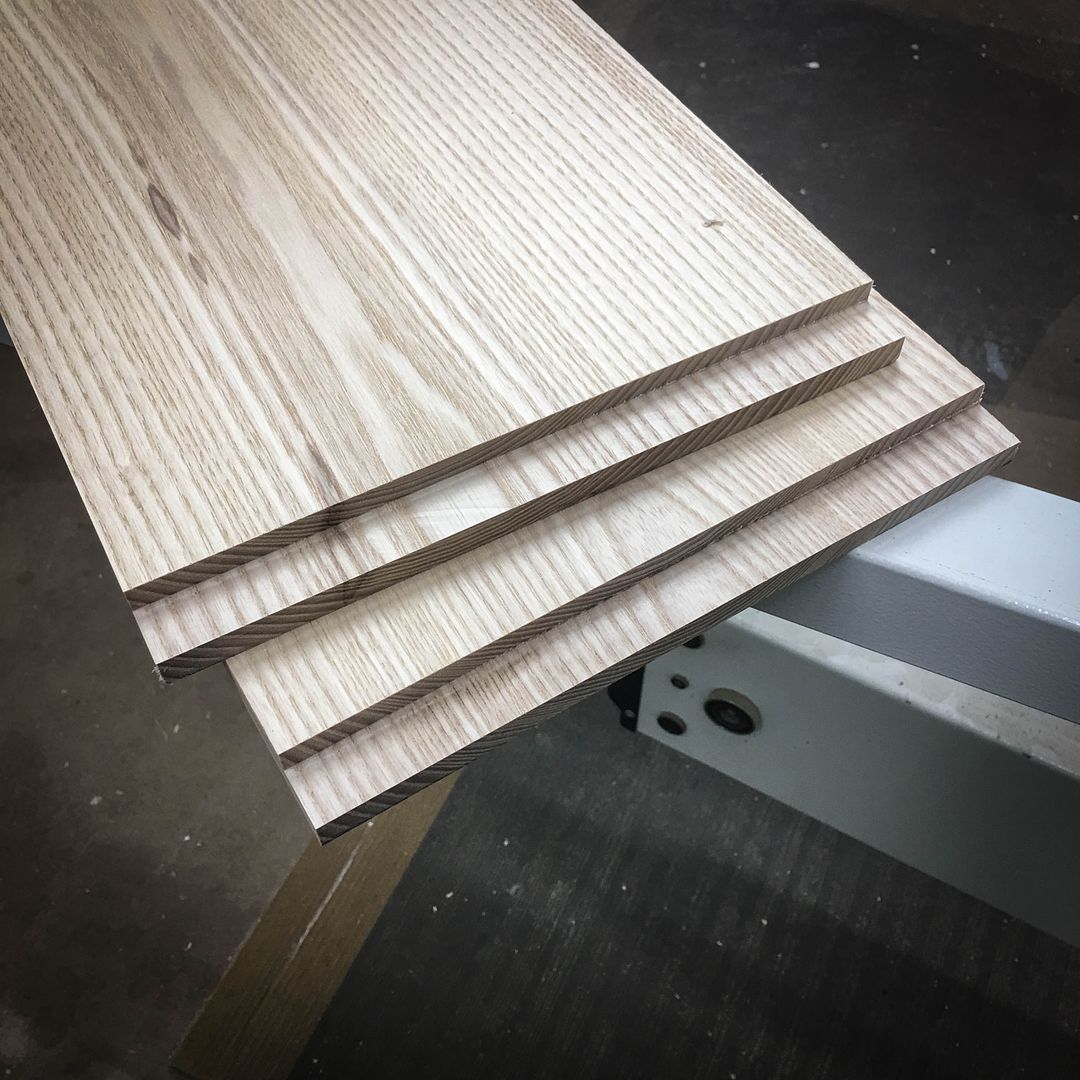
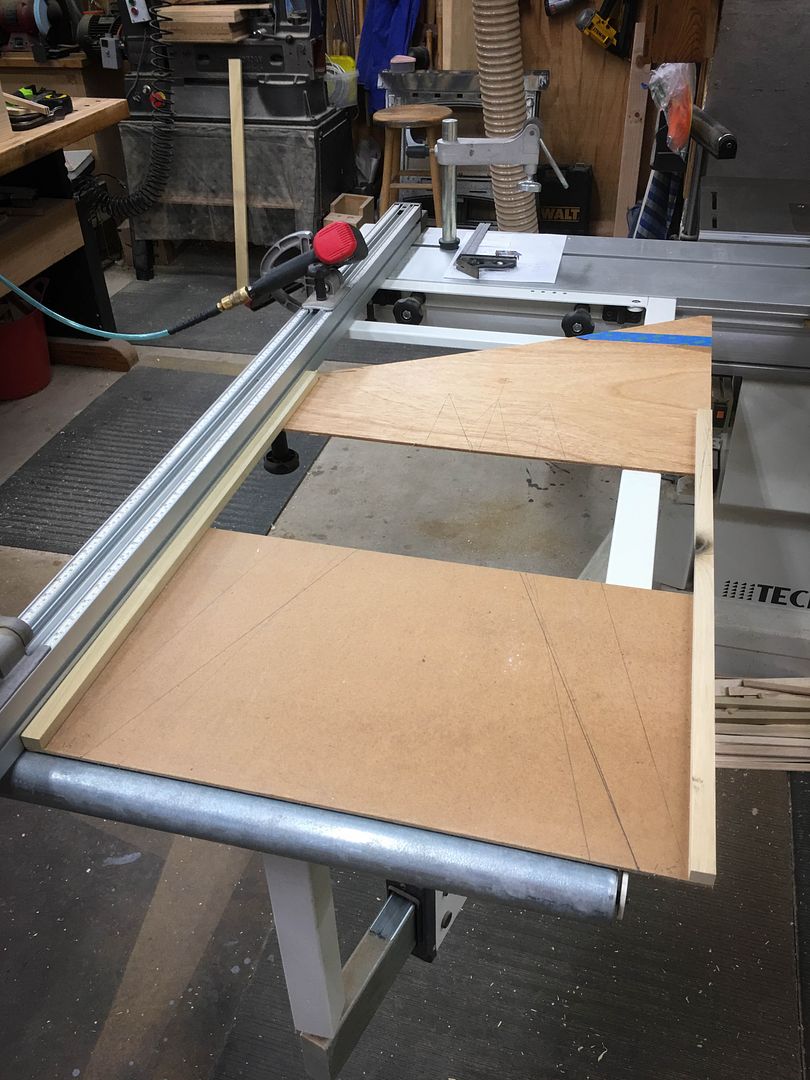
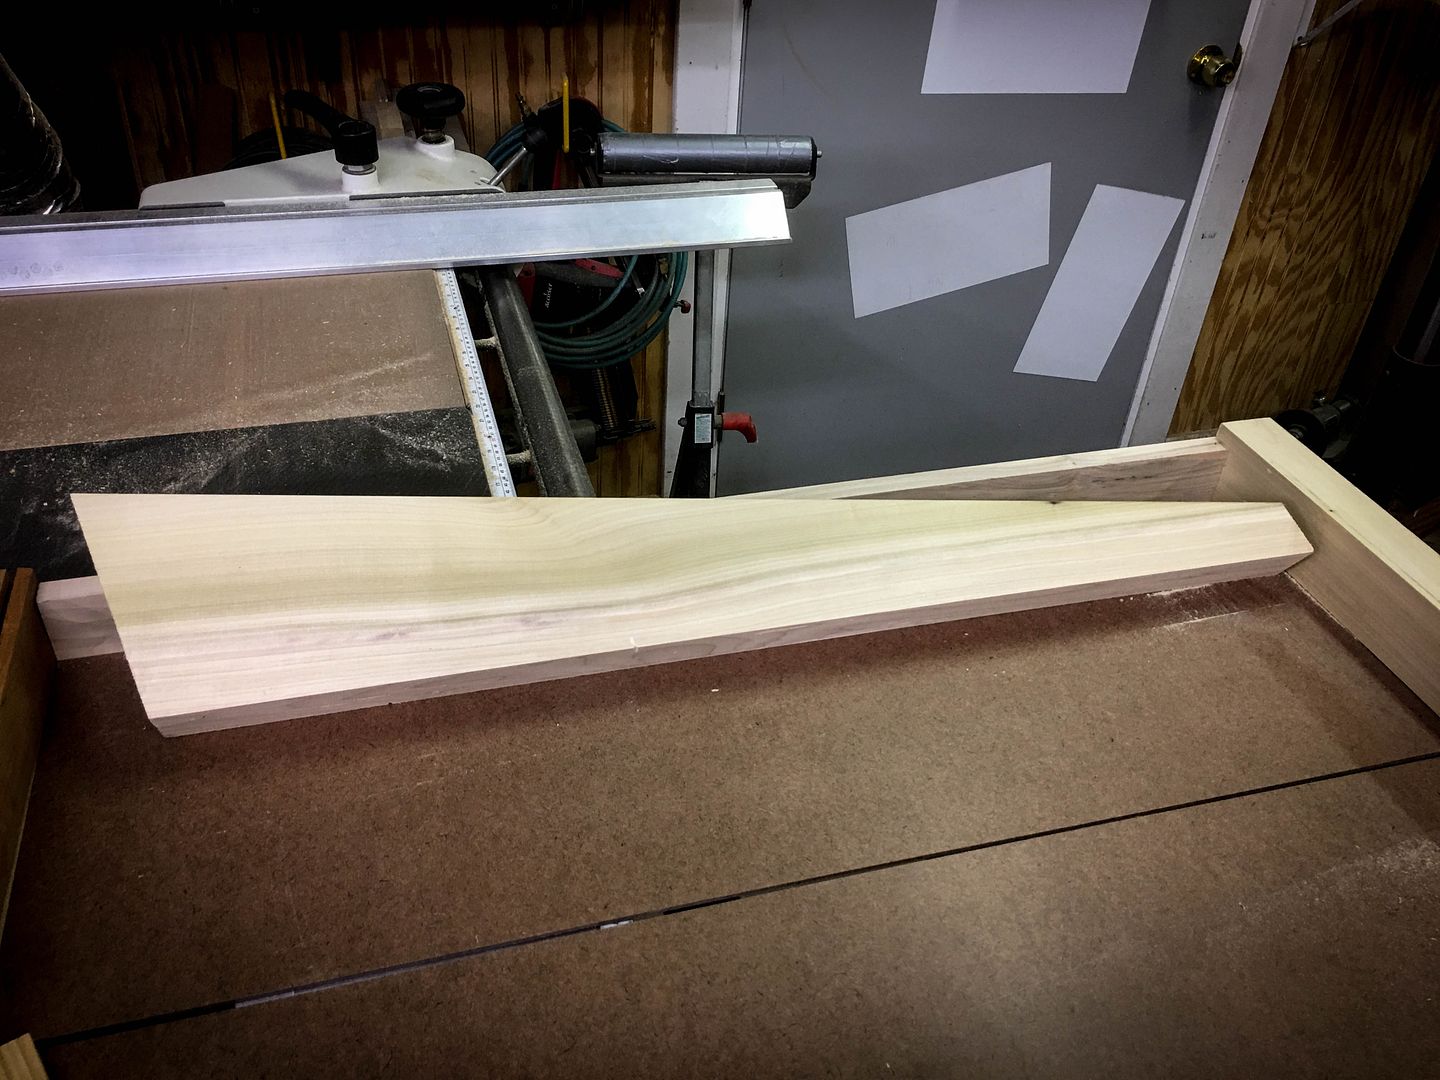
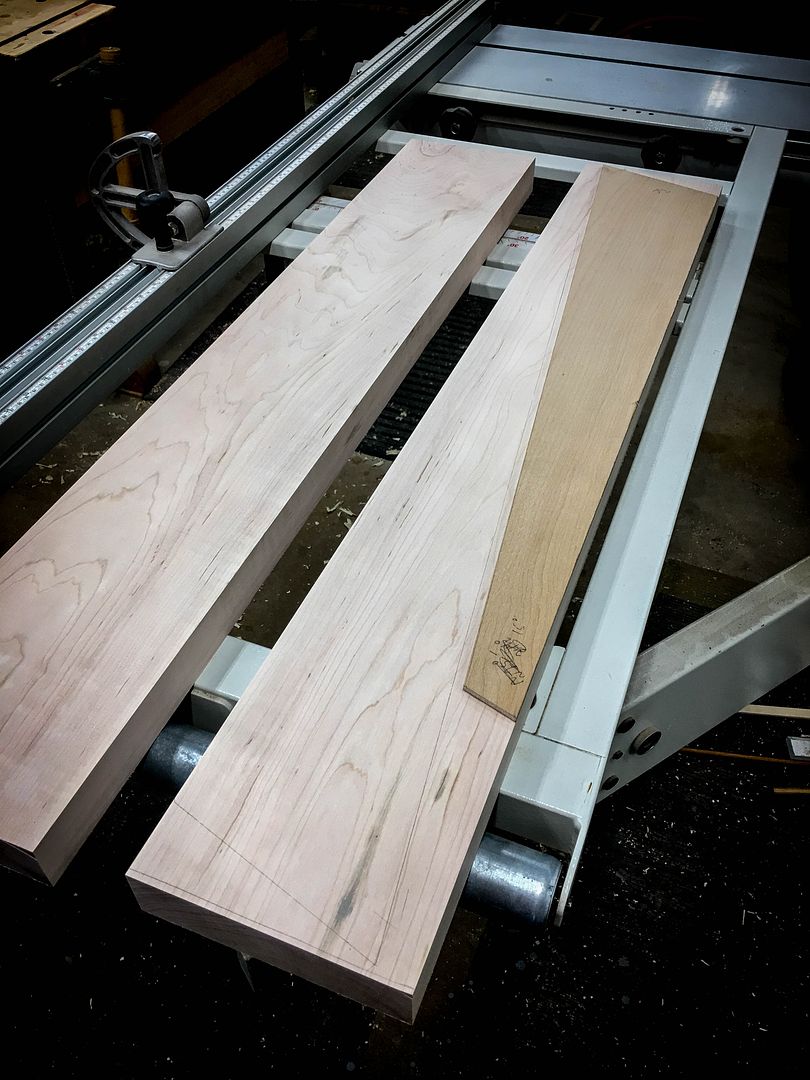
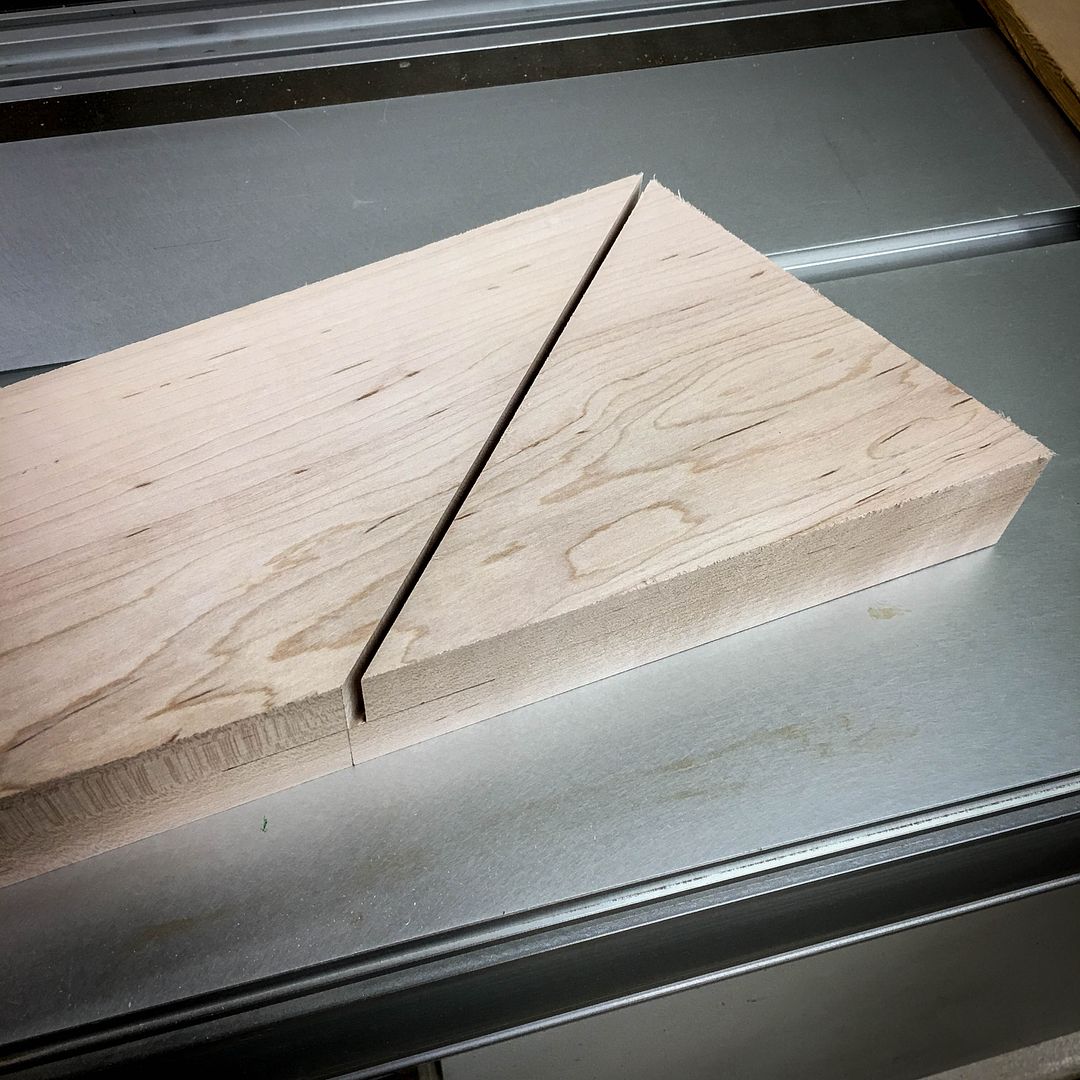
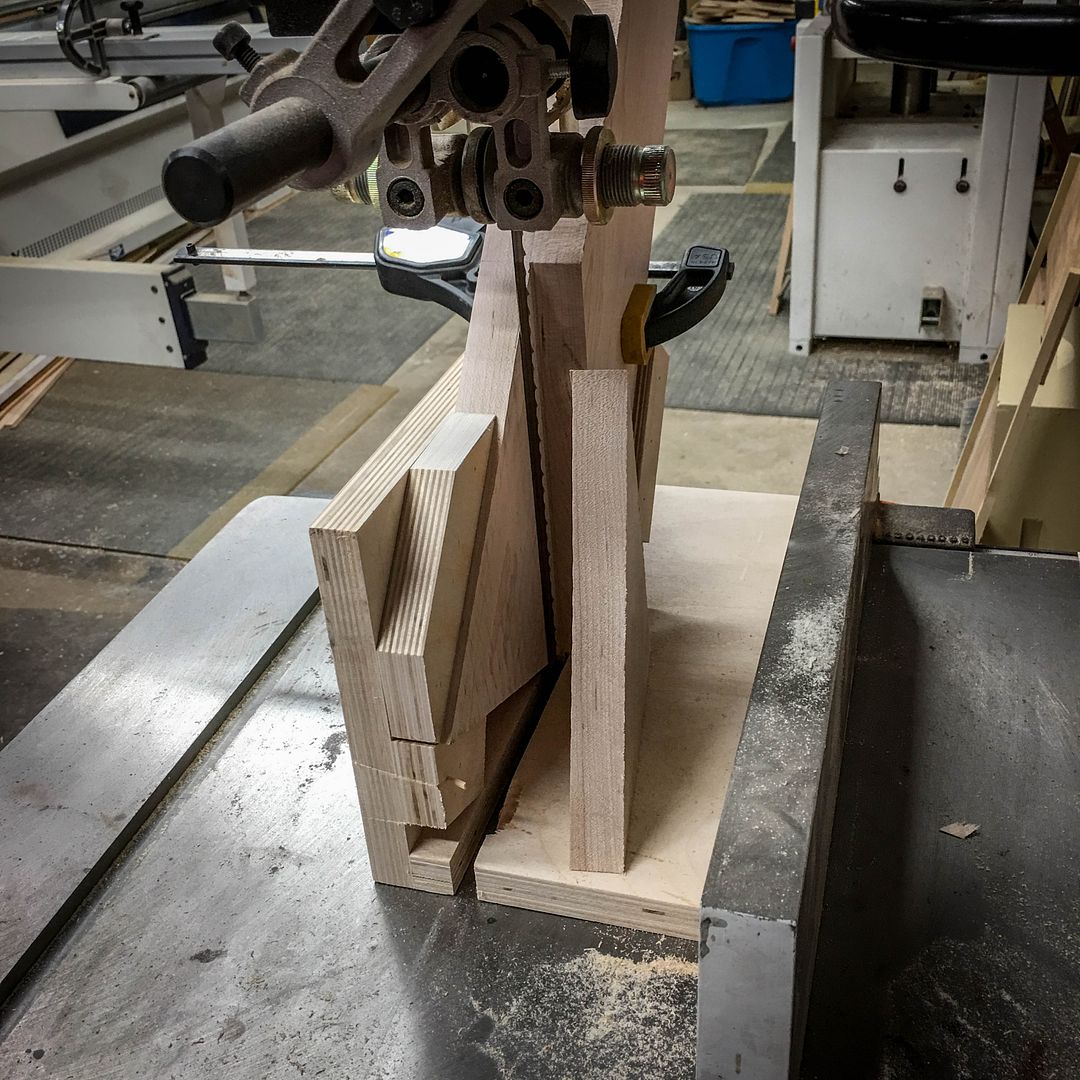
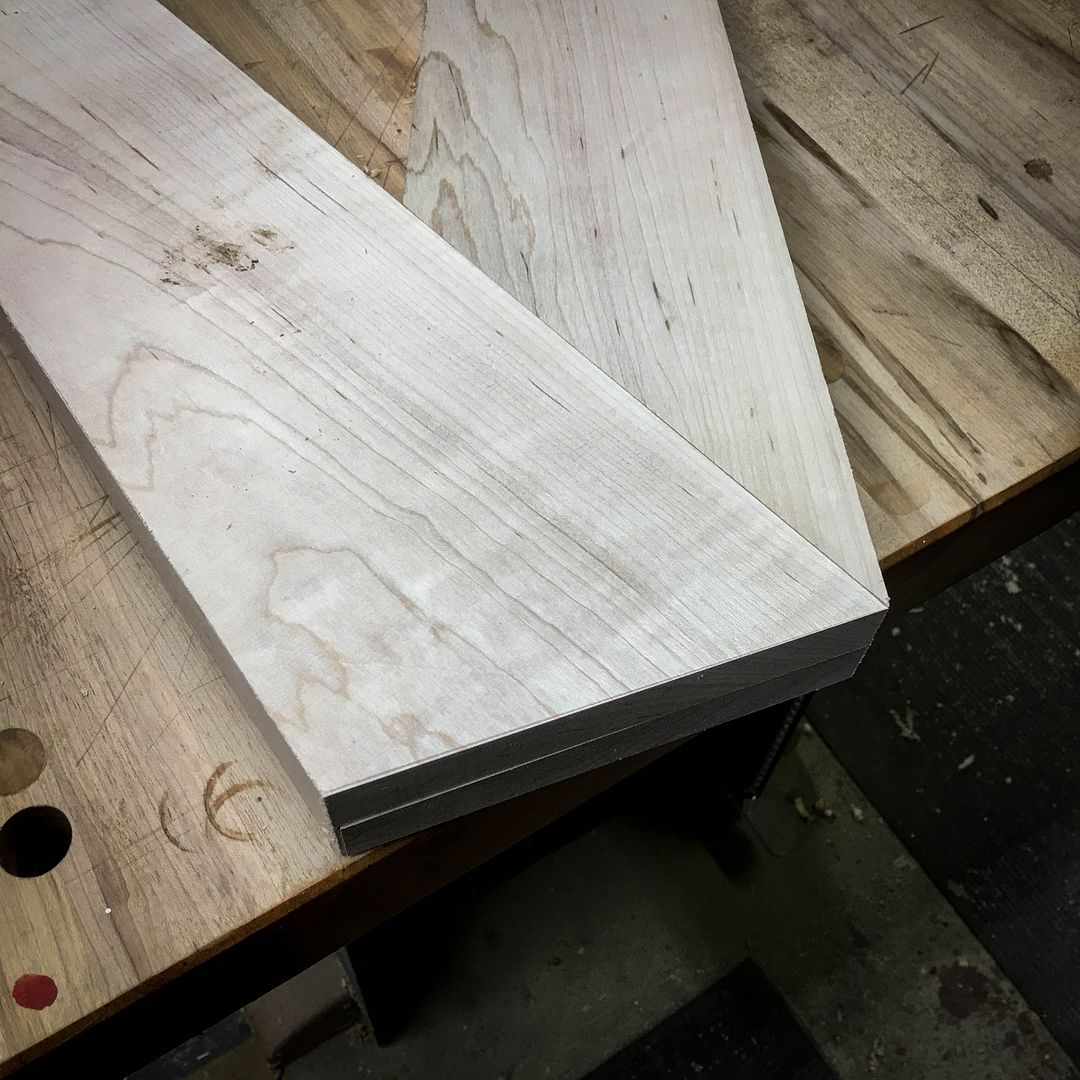
    The ends/sides would effectively be triangular, so their glue-up reflects that to avoid excessive waste. I was in advertantly "really close" on material for this project as I'll note again soon


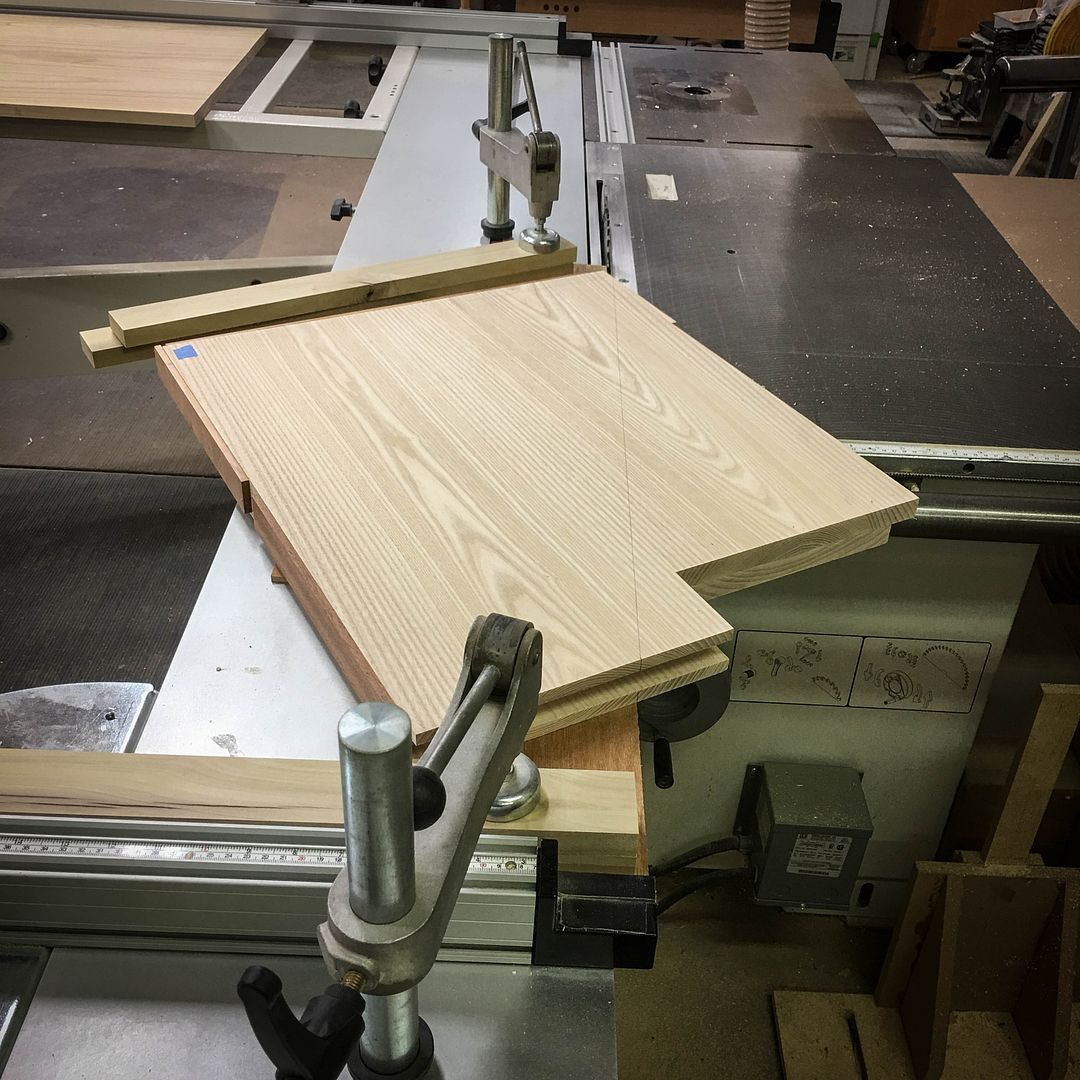
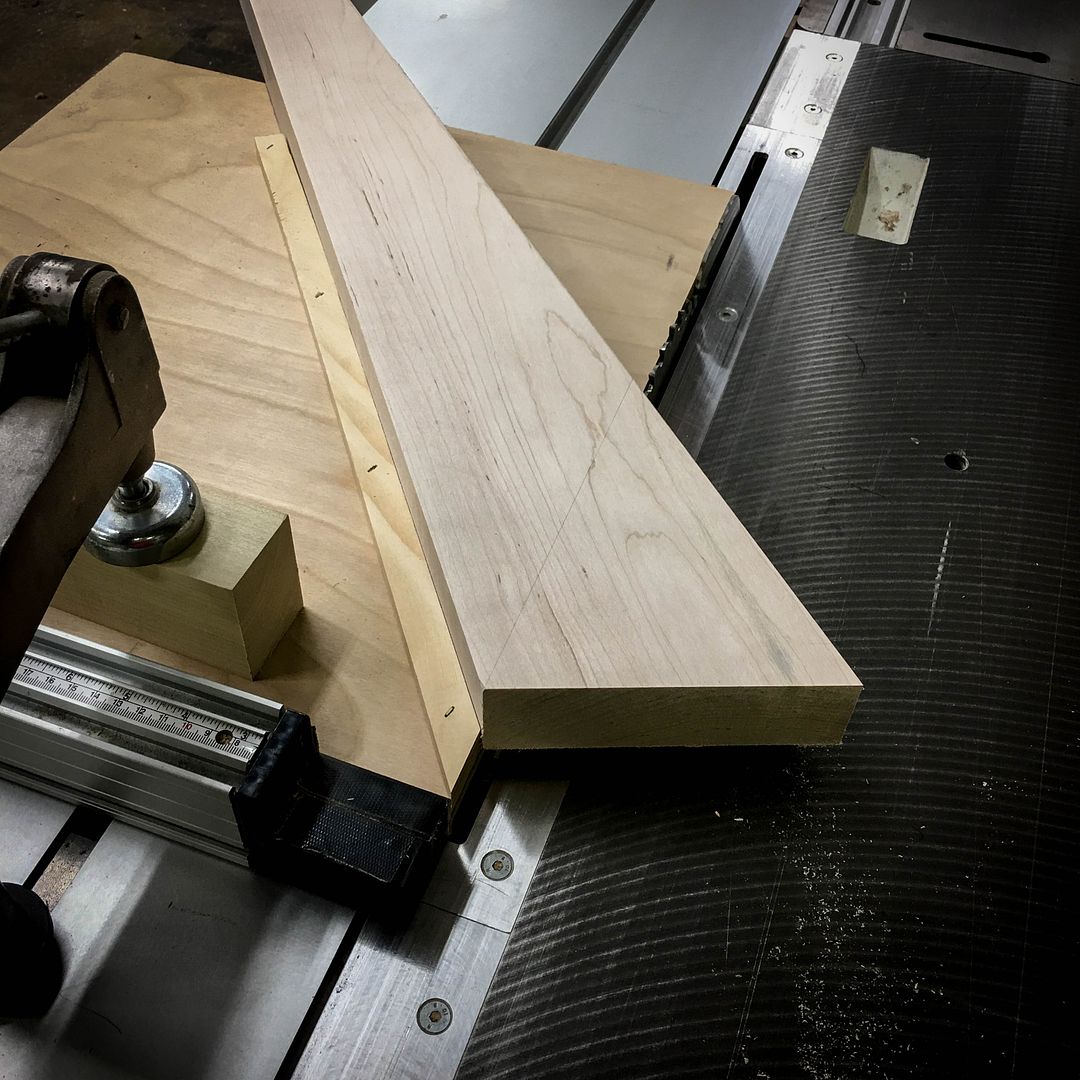
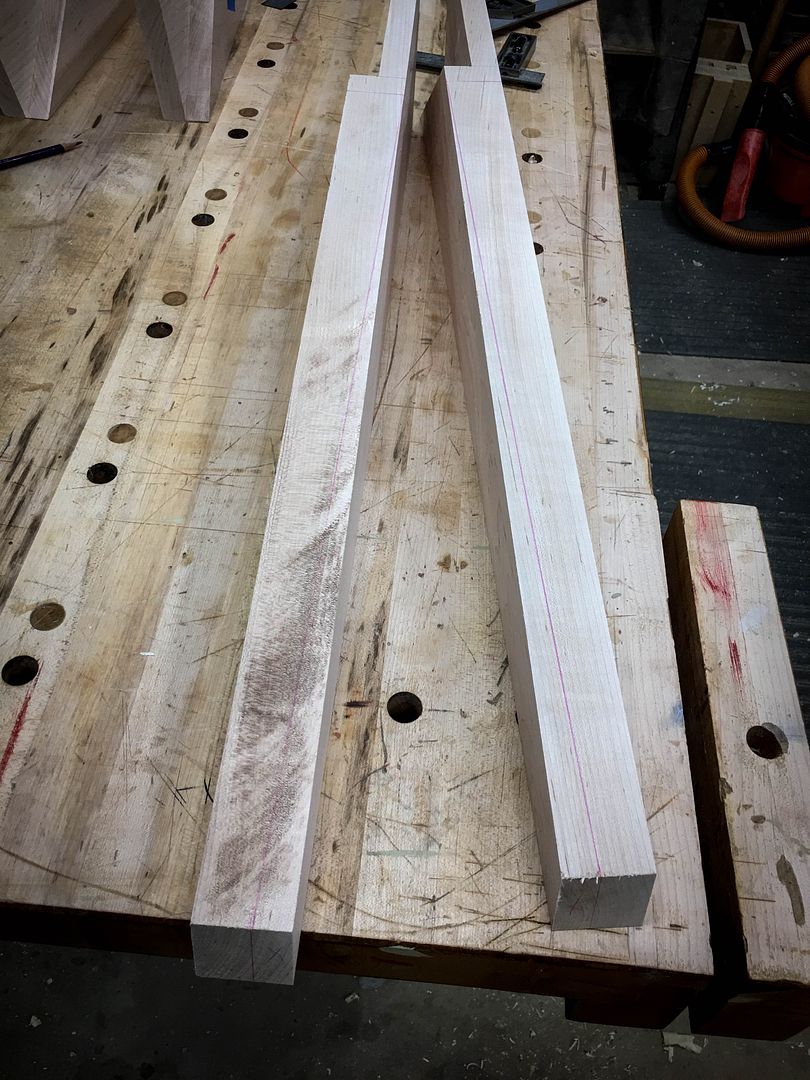
    So that I could make both ends/sides exactly the same, I ganged them together with some 23 gage pins in off-cut areas and with some scrap pinned to the edges. In that manner, one cut for the angle would take care of both ends/sides


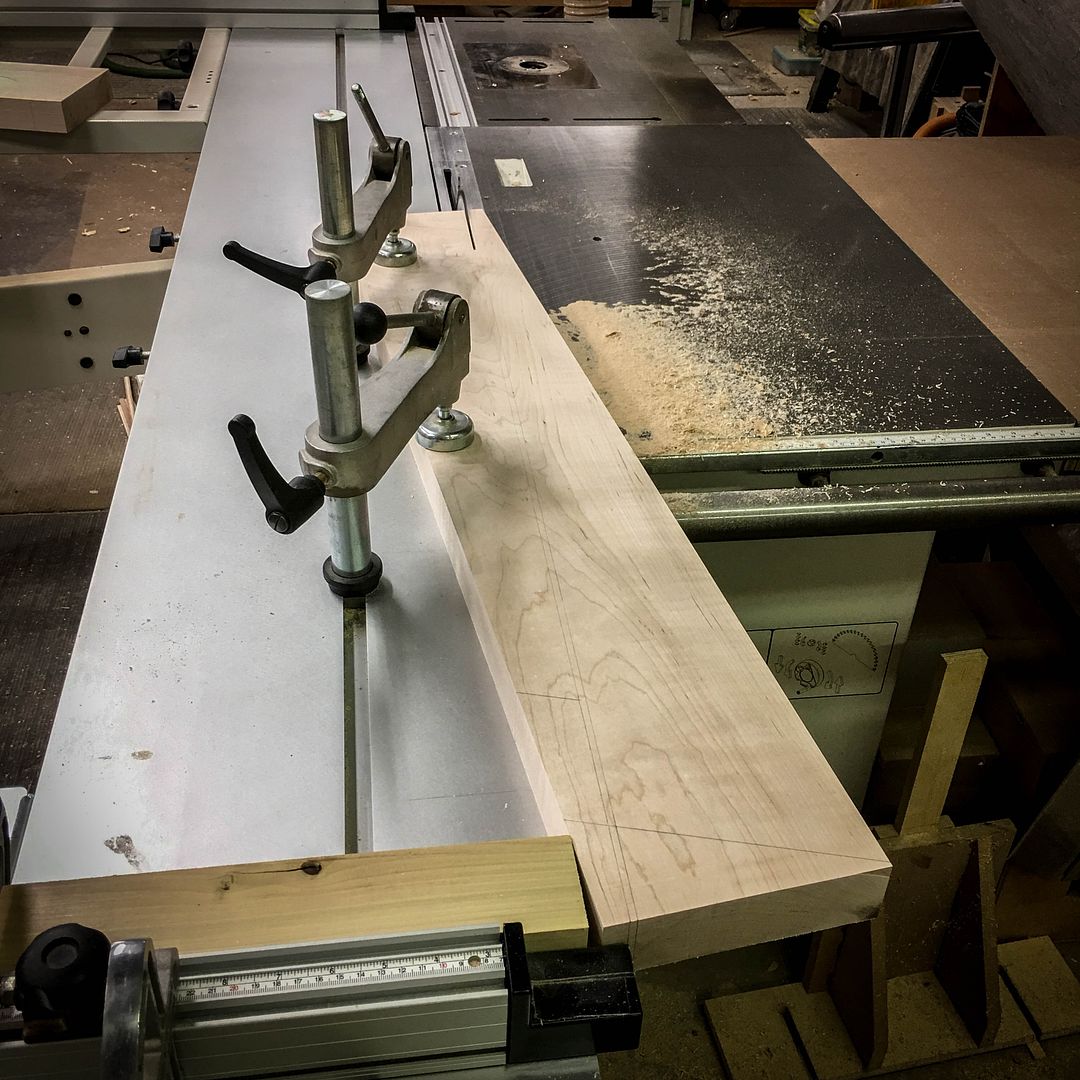
    I further lightly tacked some thin scrap to the ganged blanks; one on the exact cutting line so I could line things up at the saw and one smaller piece further back to support the panels "flat" to the saw's wagon


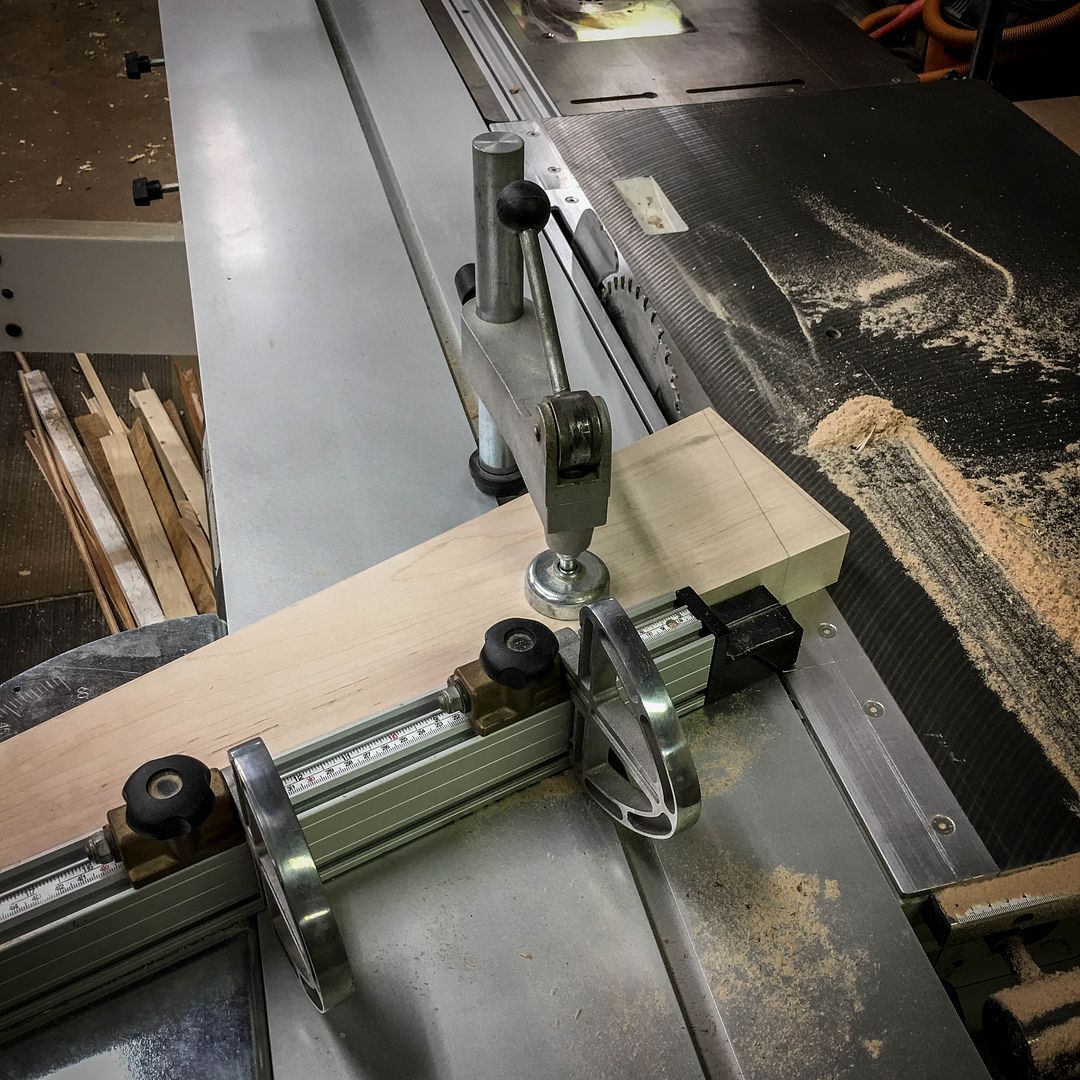
    One of the wonderful benefits of a sliding table saw is the inherent ability to clamp the workpiece down in whatever orientation gives you the exact cut line your want. Here, you can see that the ganged blank for the ends/sides is fastened such that the cut line is lined up with the blade and the miter fence, using the long thin scrap you saw I pinned to the bottom as a guide for the line


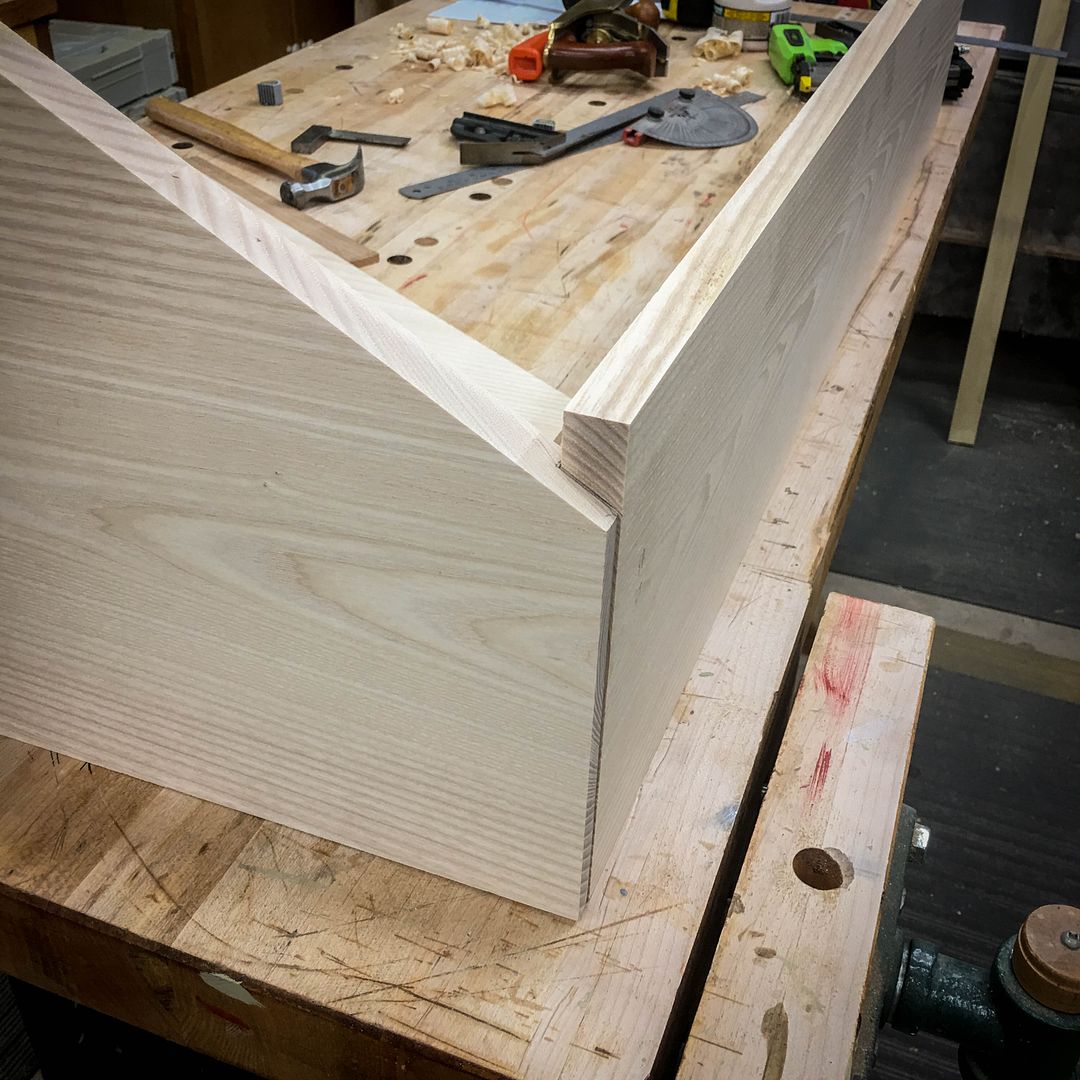
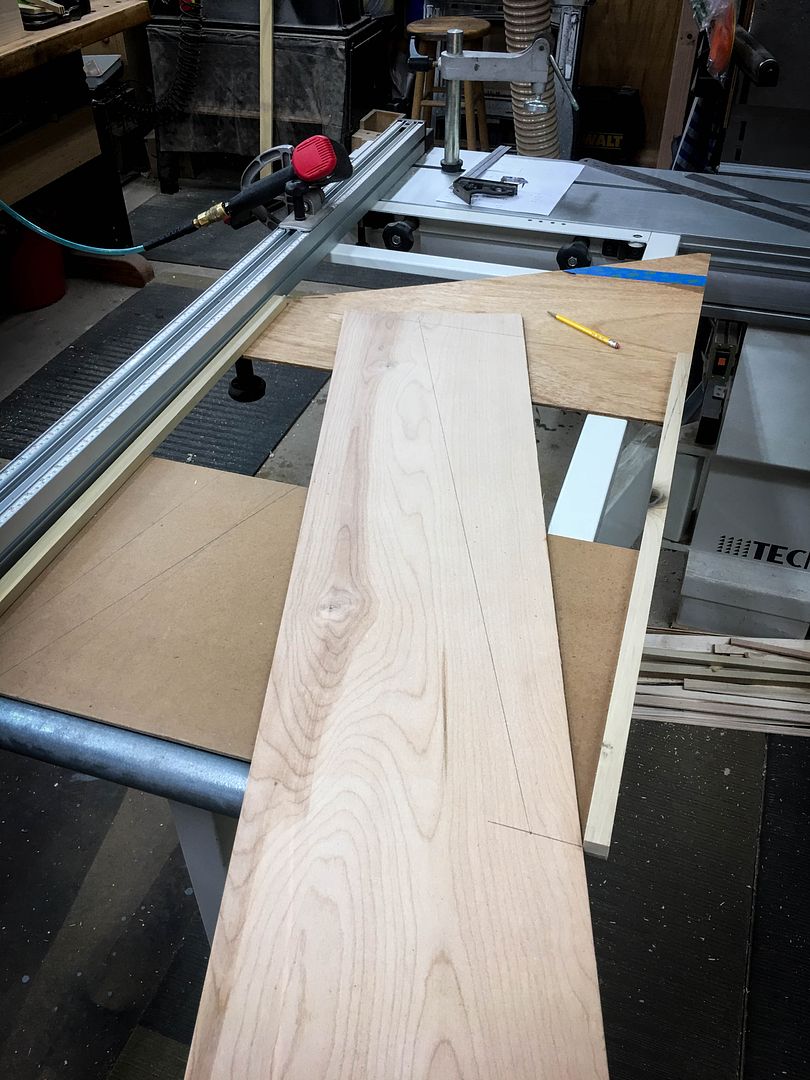
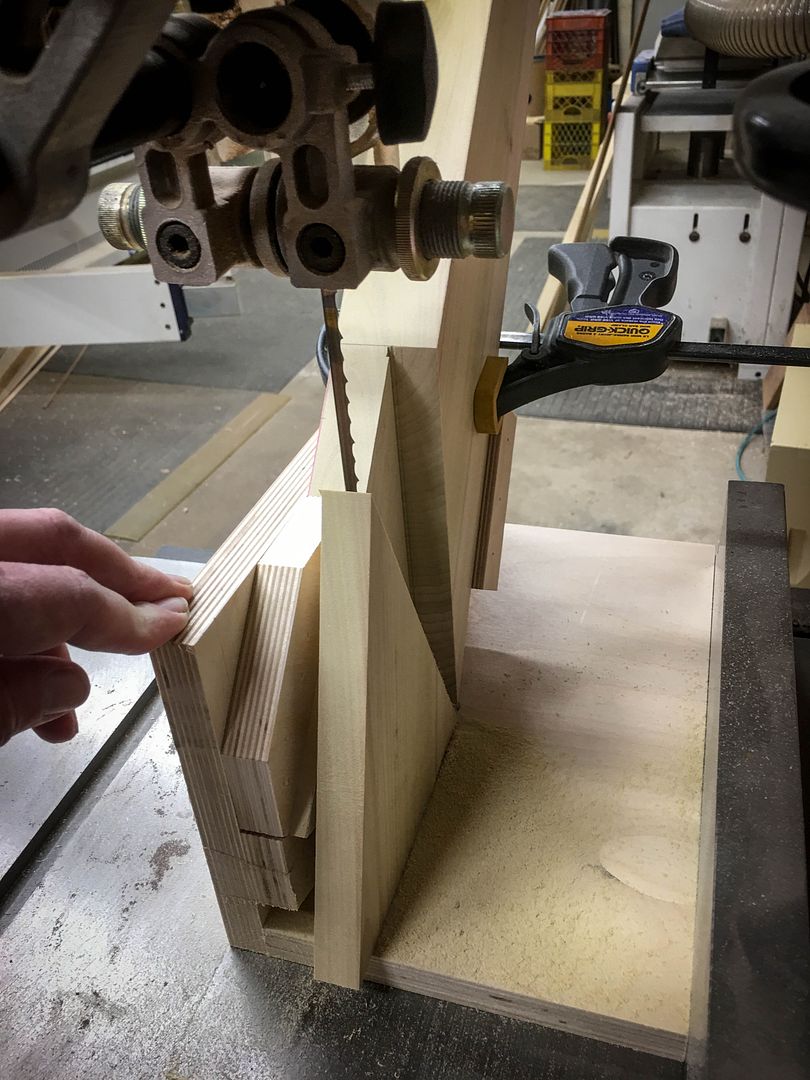
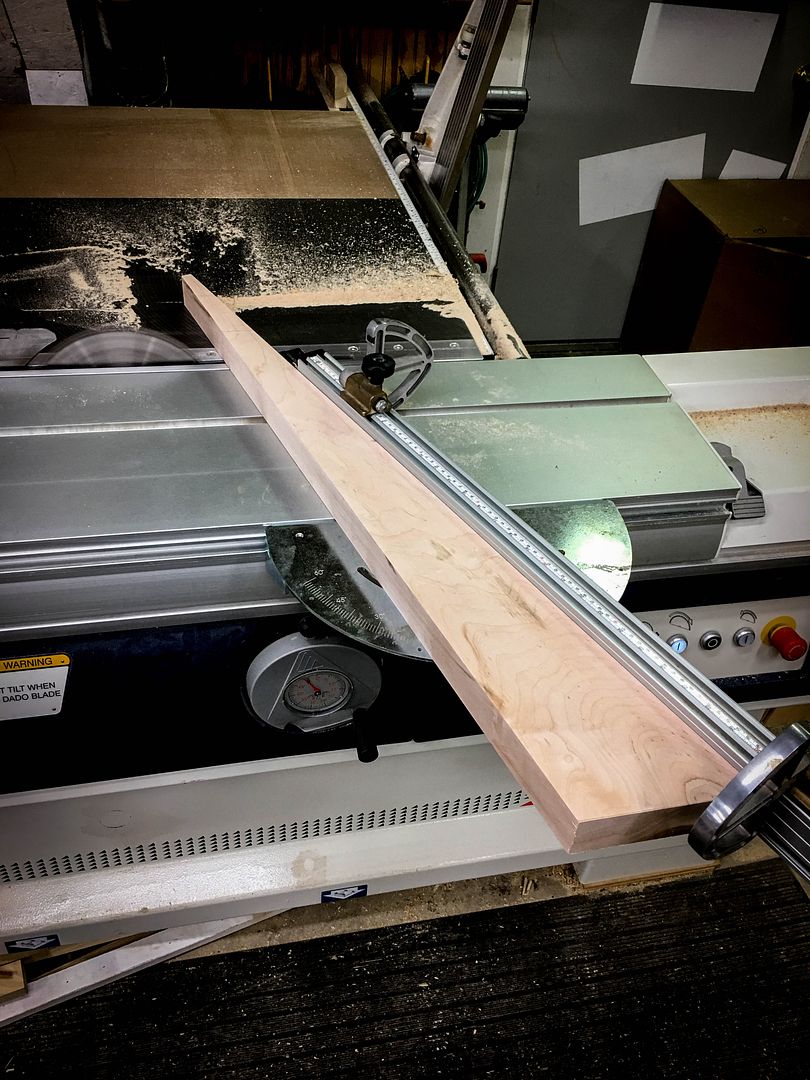
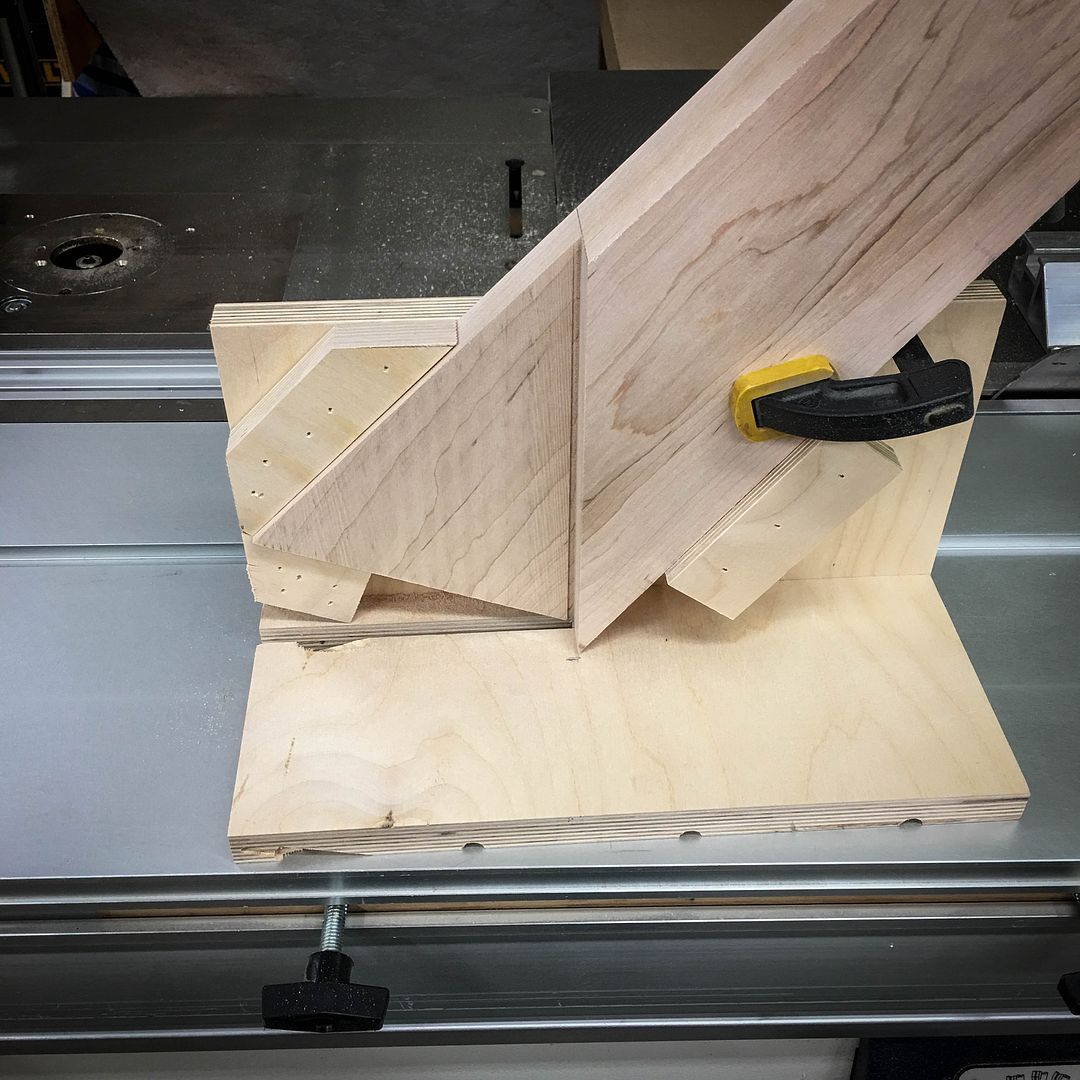
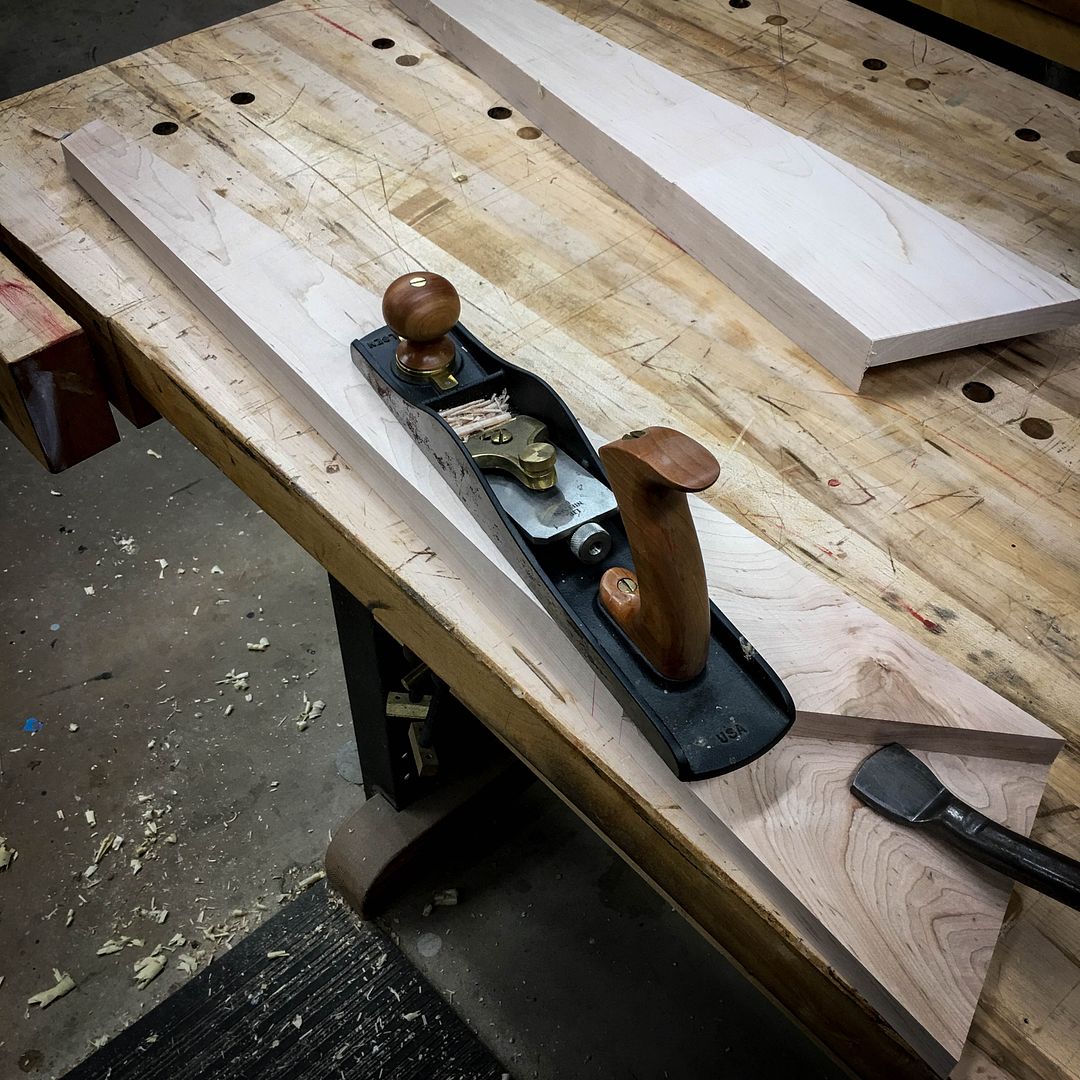
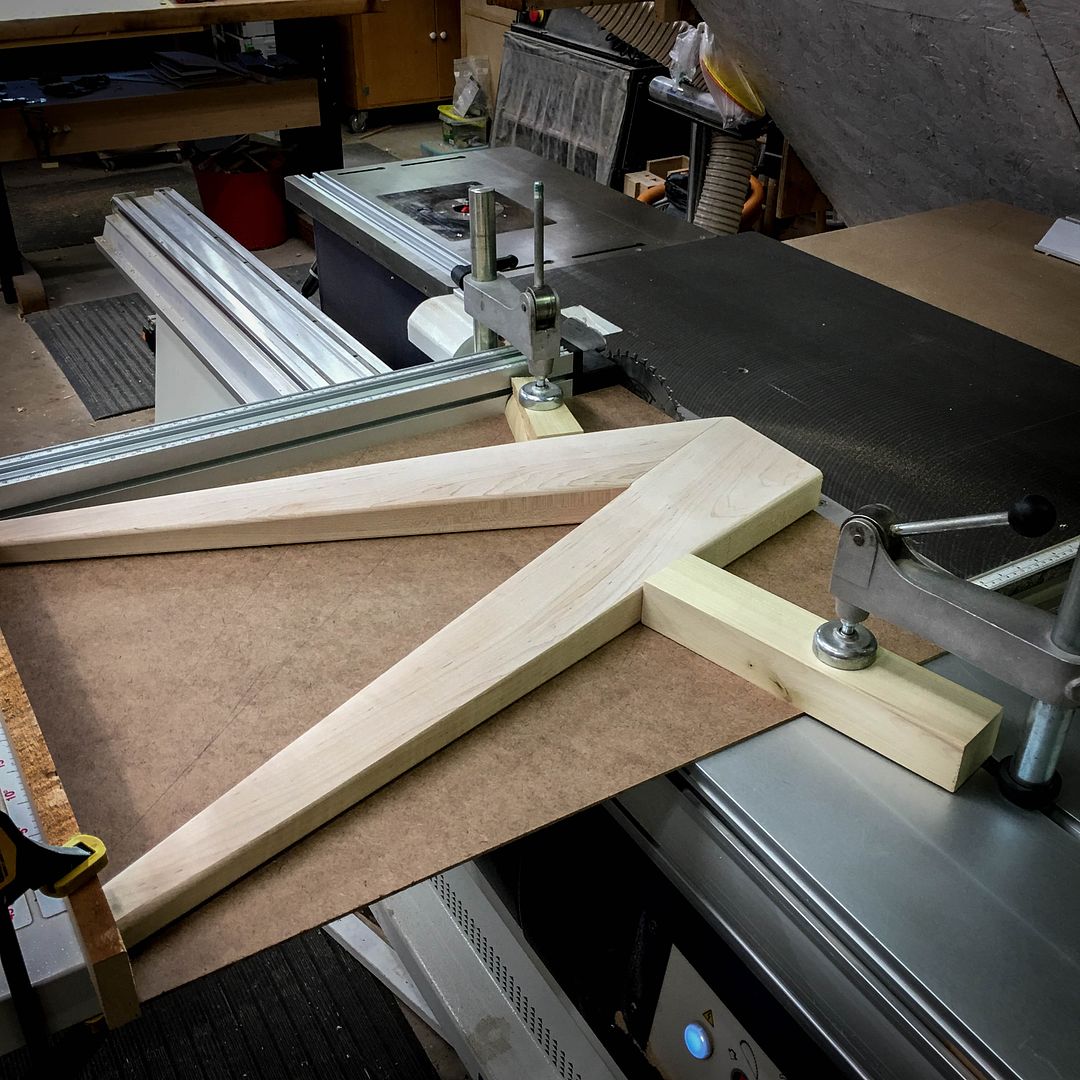
    The board for the front was left wider than needed so that it could be marked to match the sides, the angle measured and the angle then transferred to the saw's arbor for a bevel that would match the mark. In hindsight, I would have done this piece a little differently relative to profile, but the client liked this idea


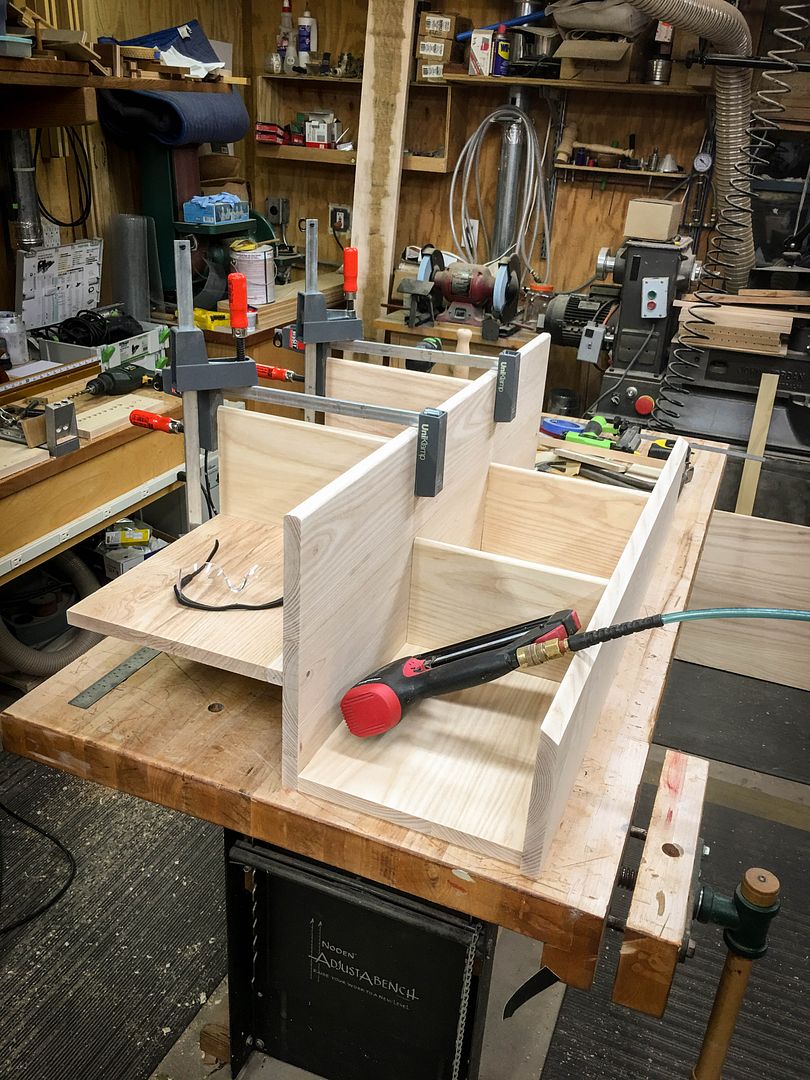
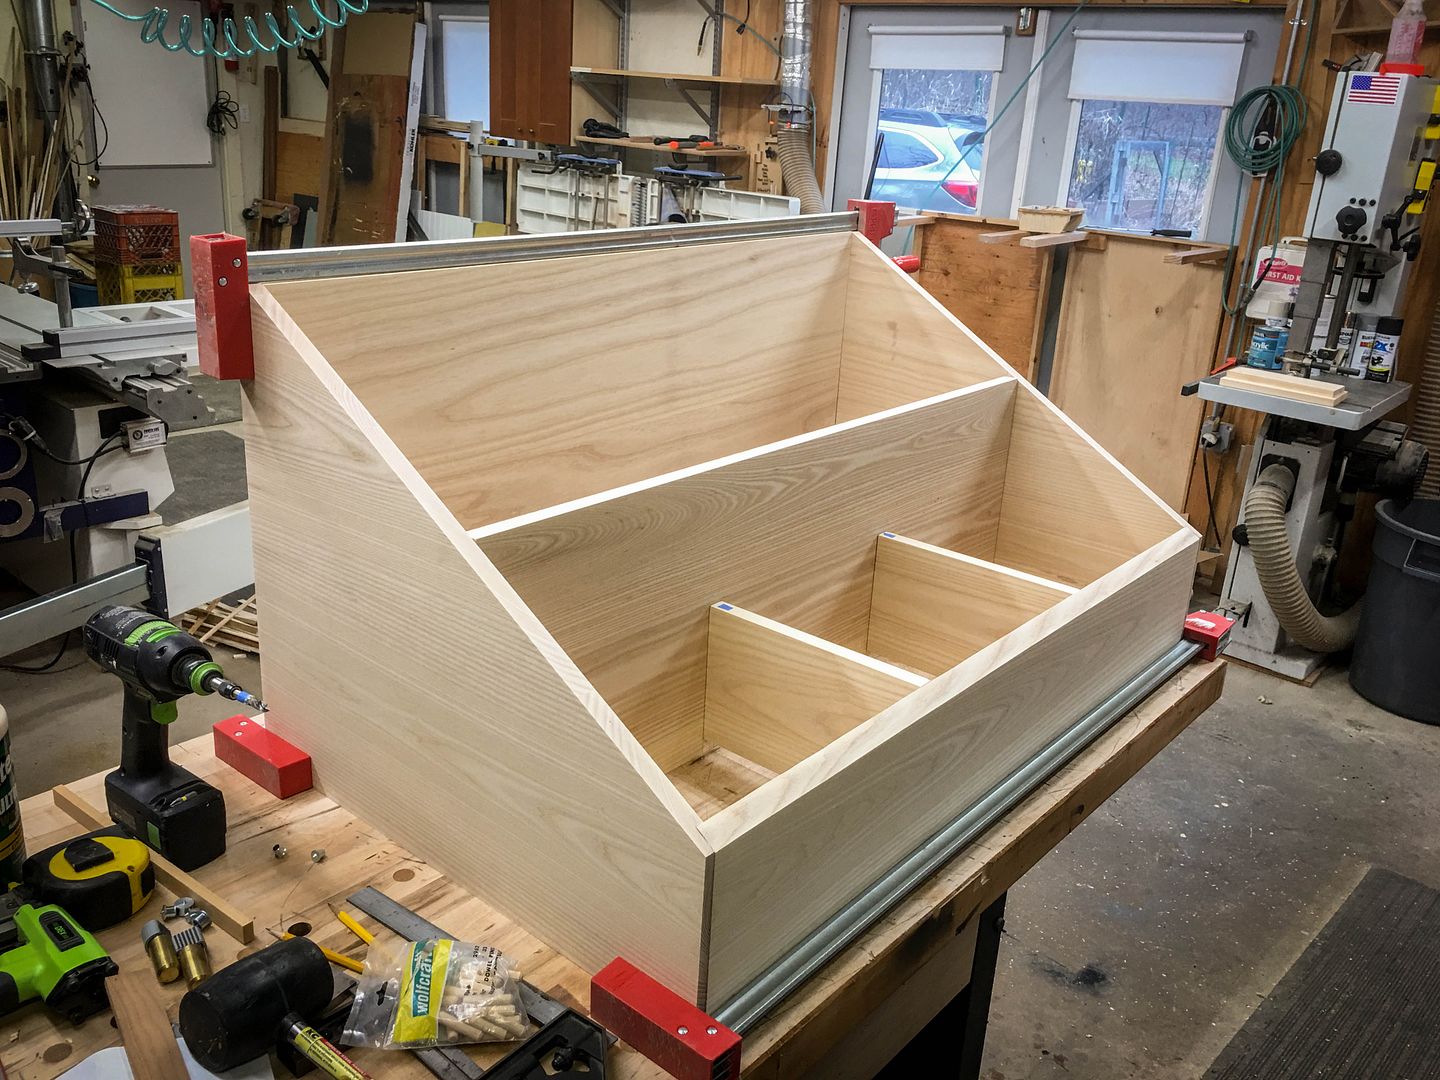
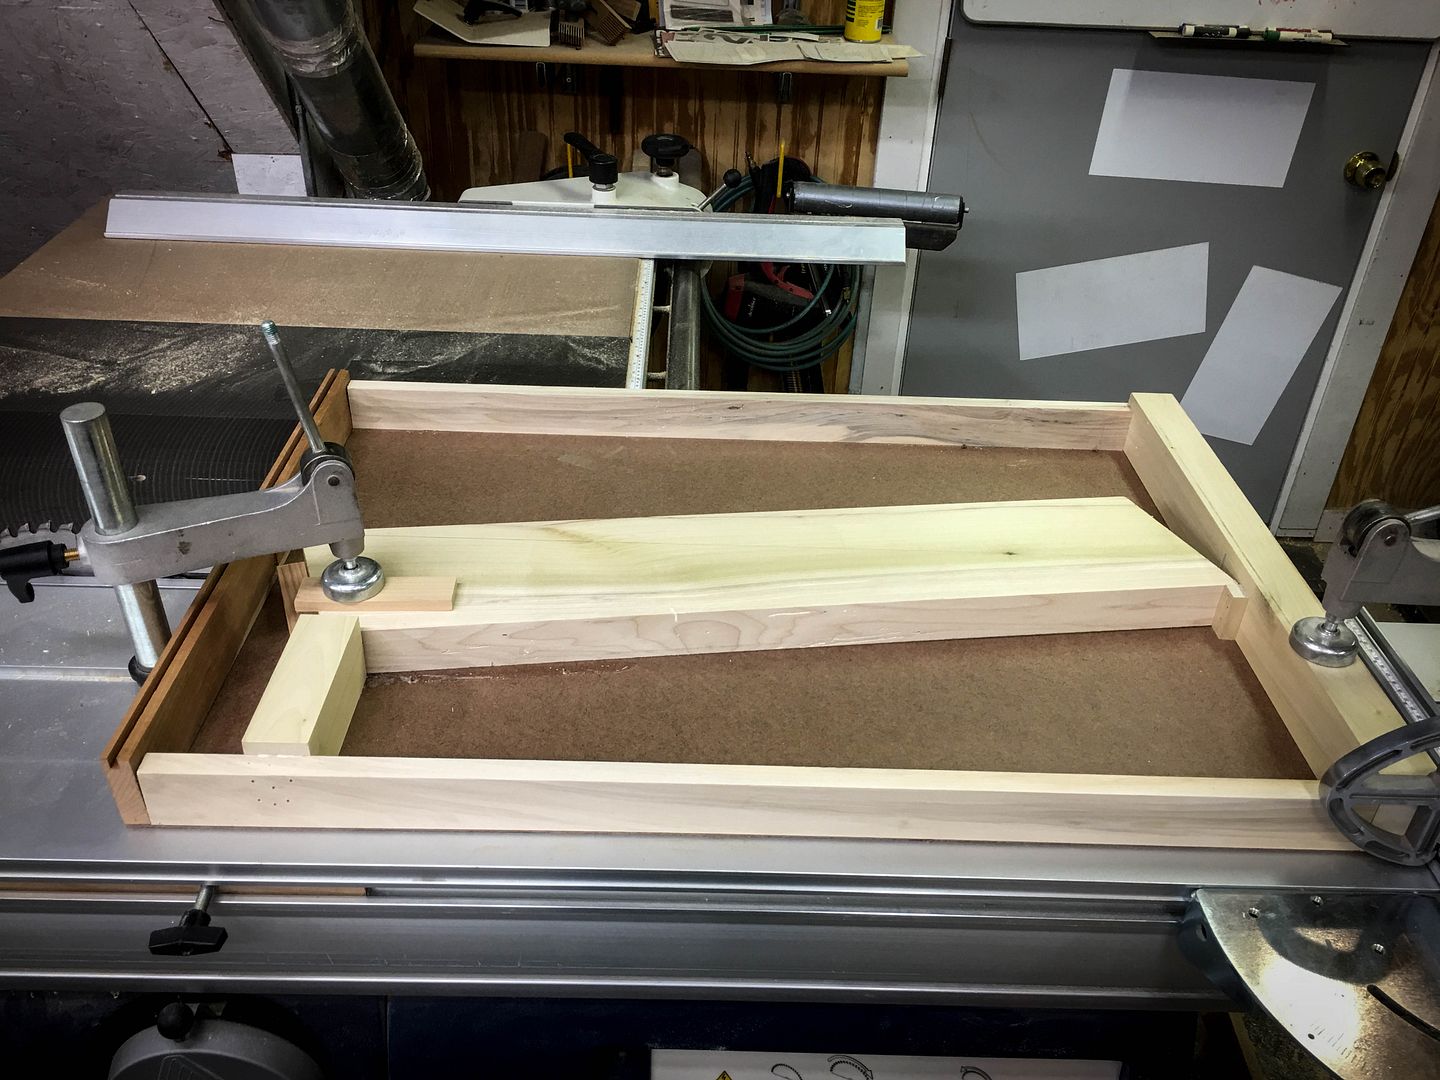
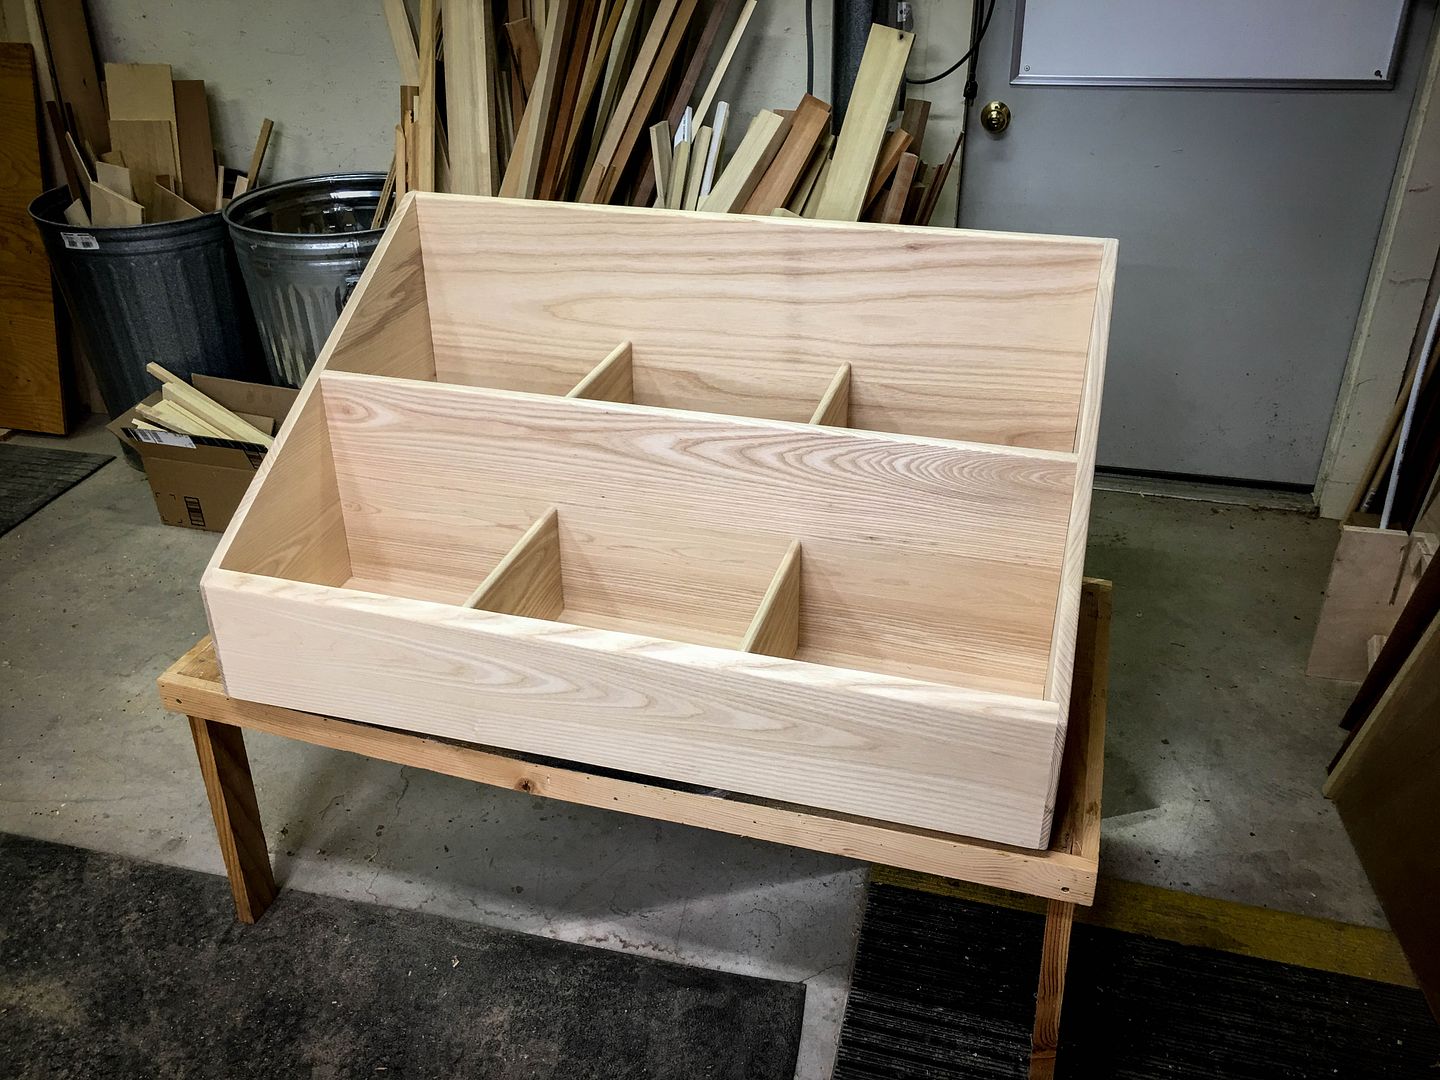
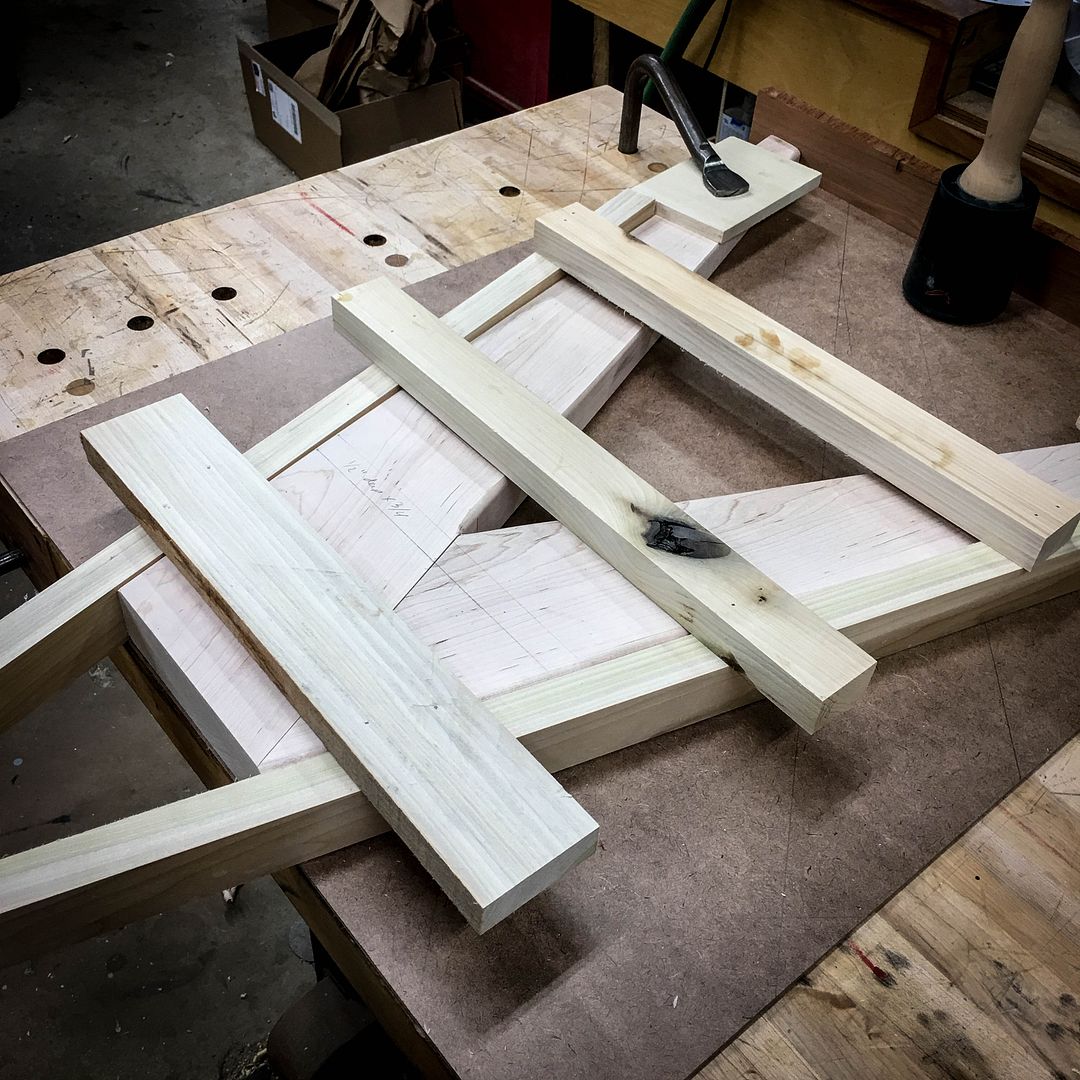
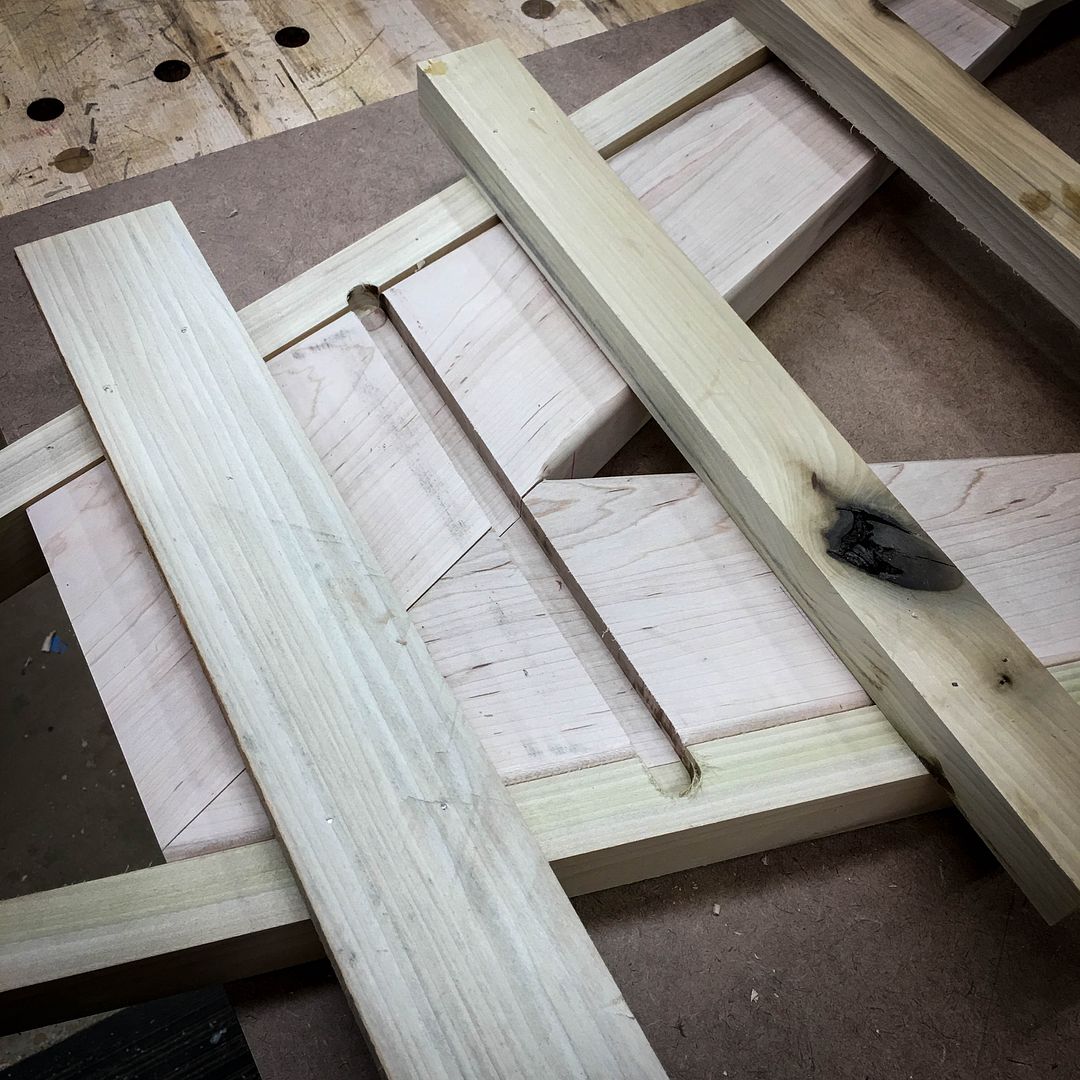
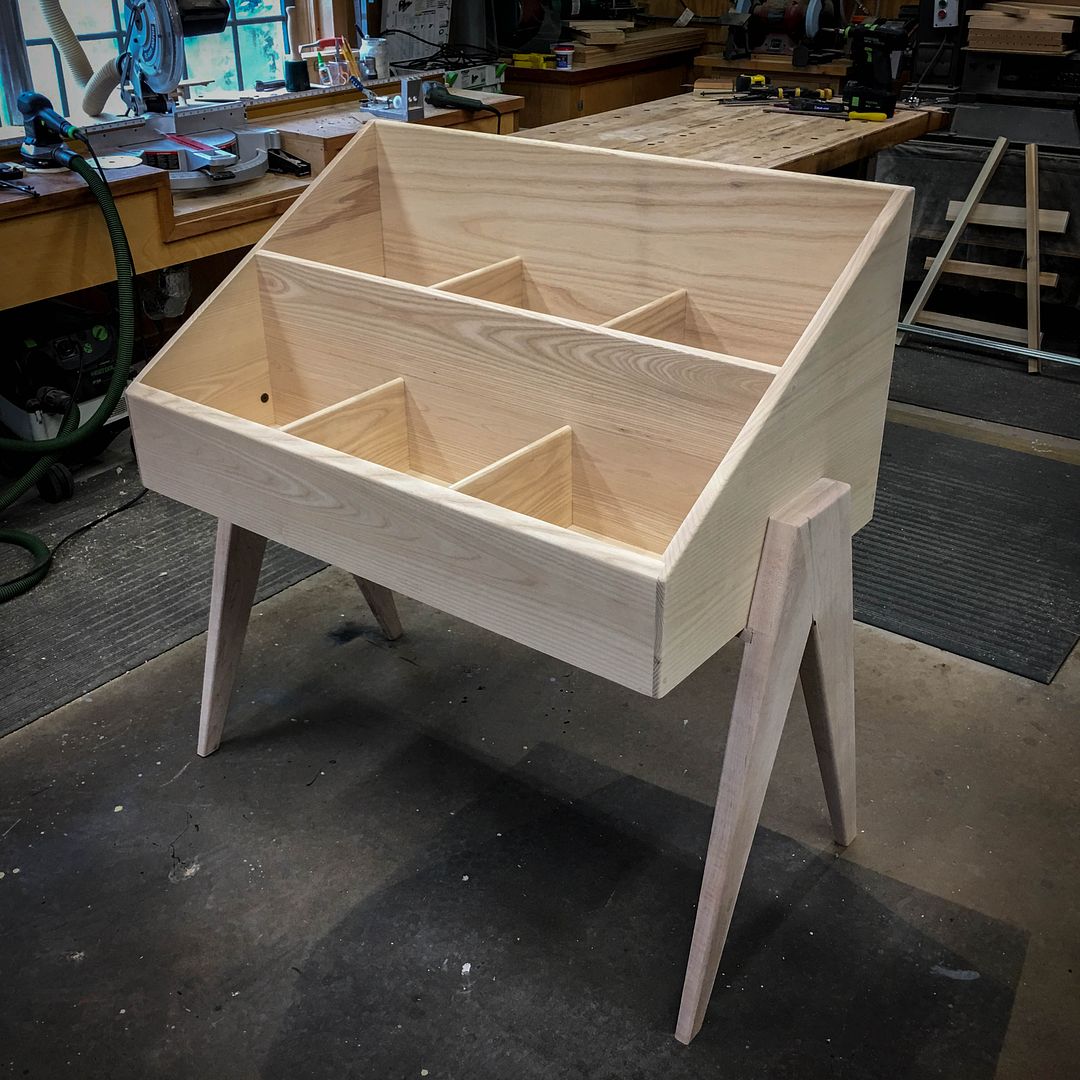
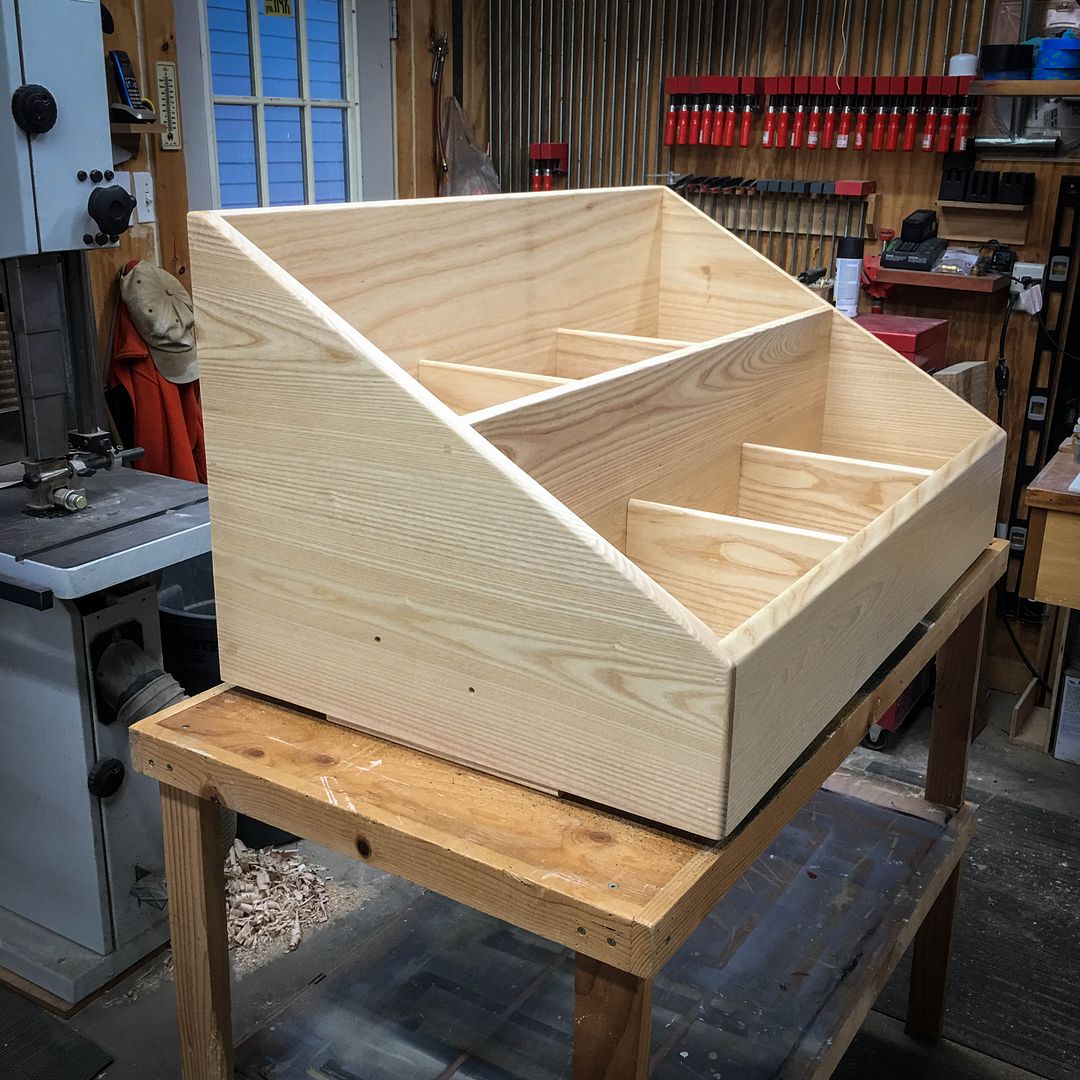
    The next operation was to locate the partitions that keep the LP records separated into three bins on two levels. Initially, the plan was for 3/4" thickness on these partitions, but the math didn't work and I reduced them to 1/2"...which actually turned out to be more attractive


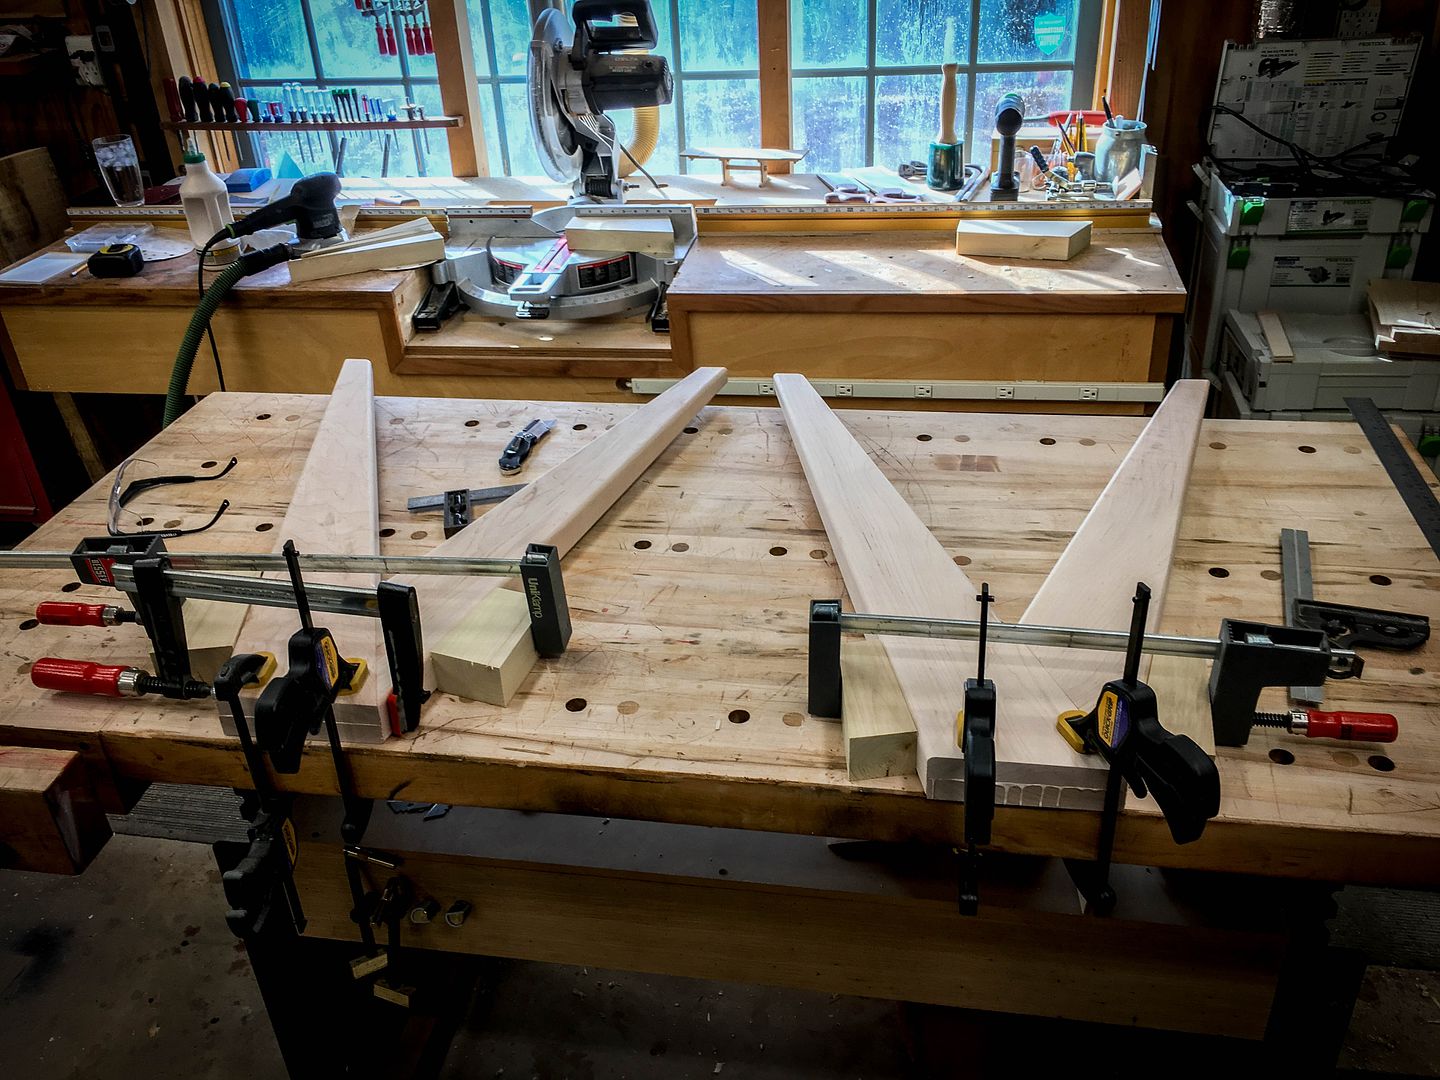
    That was followed by a dry fit without the bin bottoms


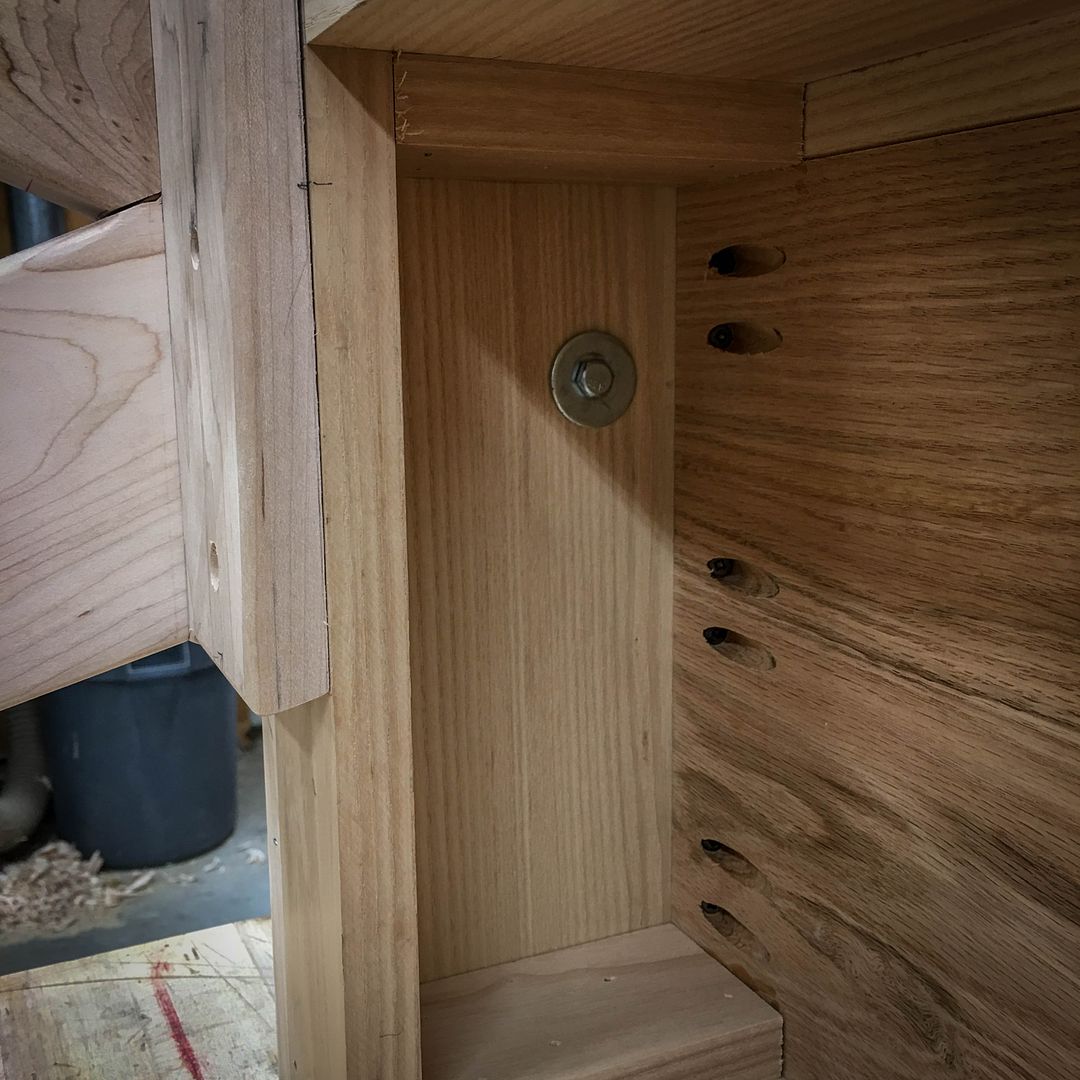
    From there, we start at the front and work our way back...here, the front piece and the middle partition are glued up. Where I could, I used pocket screws on the bottom to help speed things up and provide additional mechanical security. LP records have weight to them...


    The result of that first glue-up is thus...


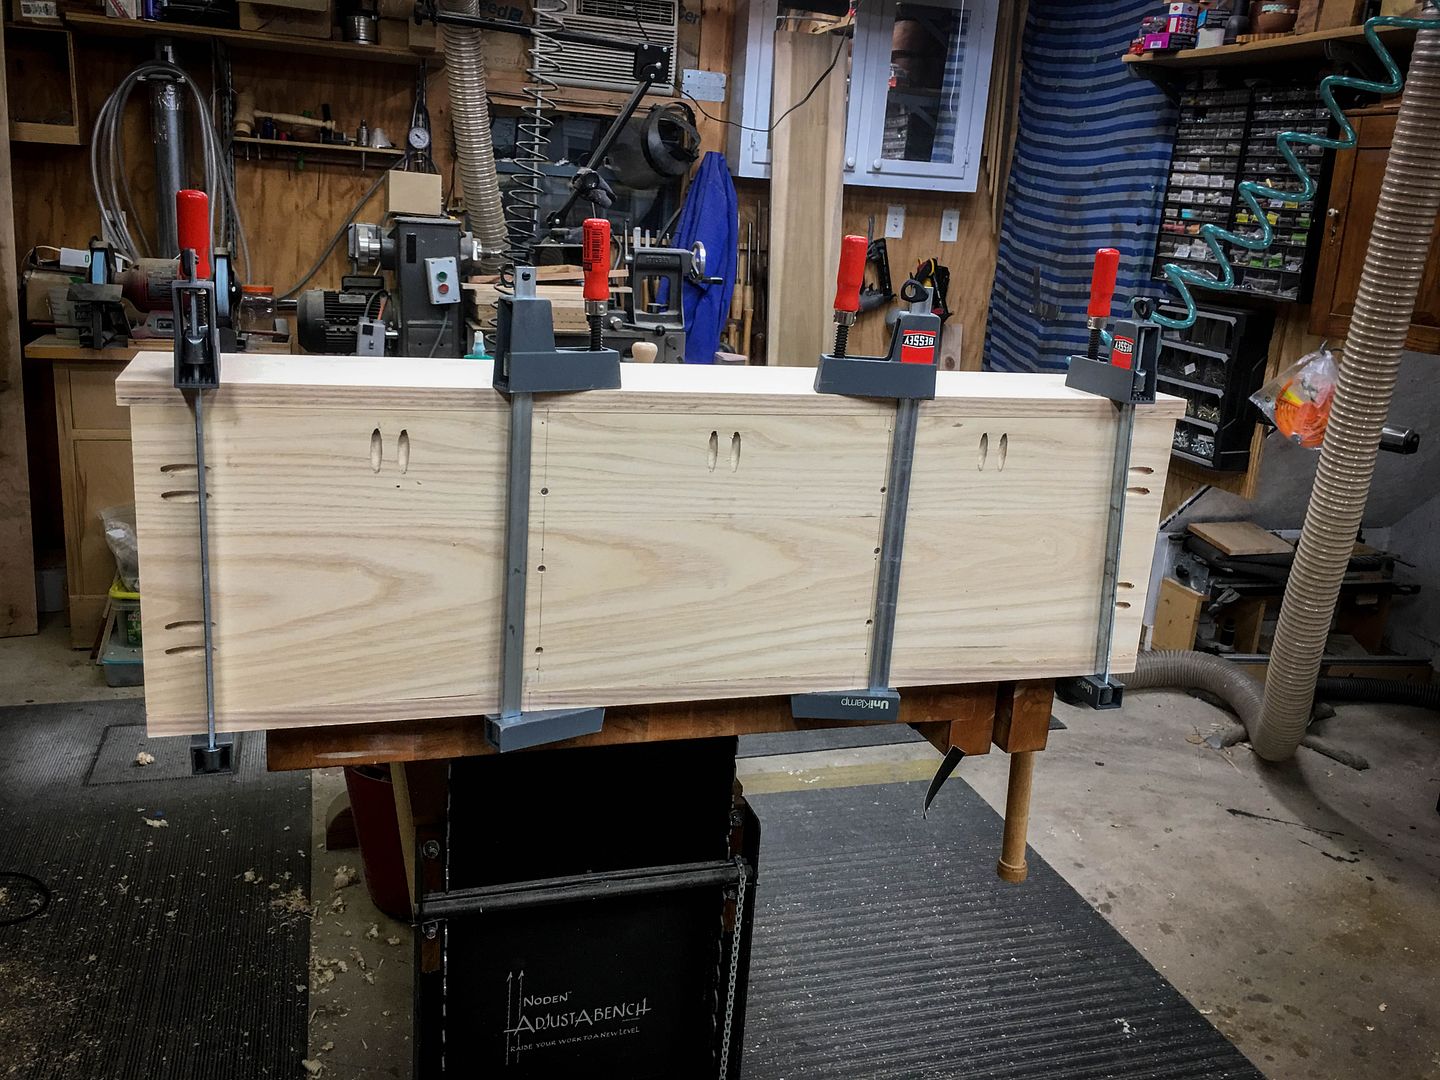
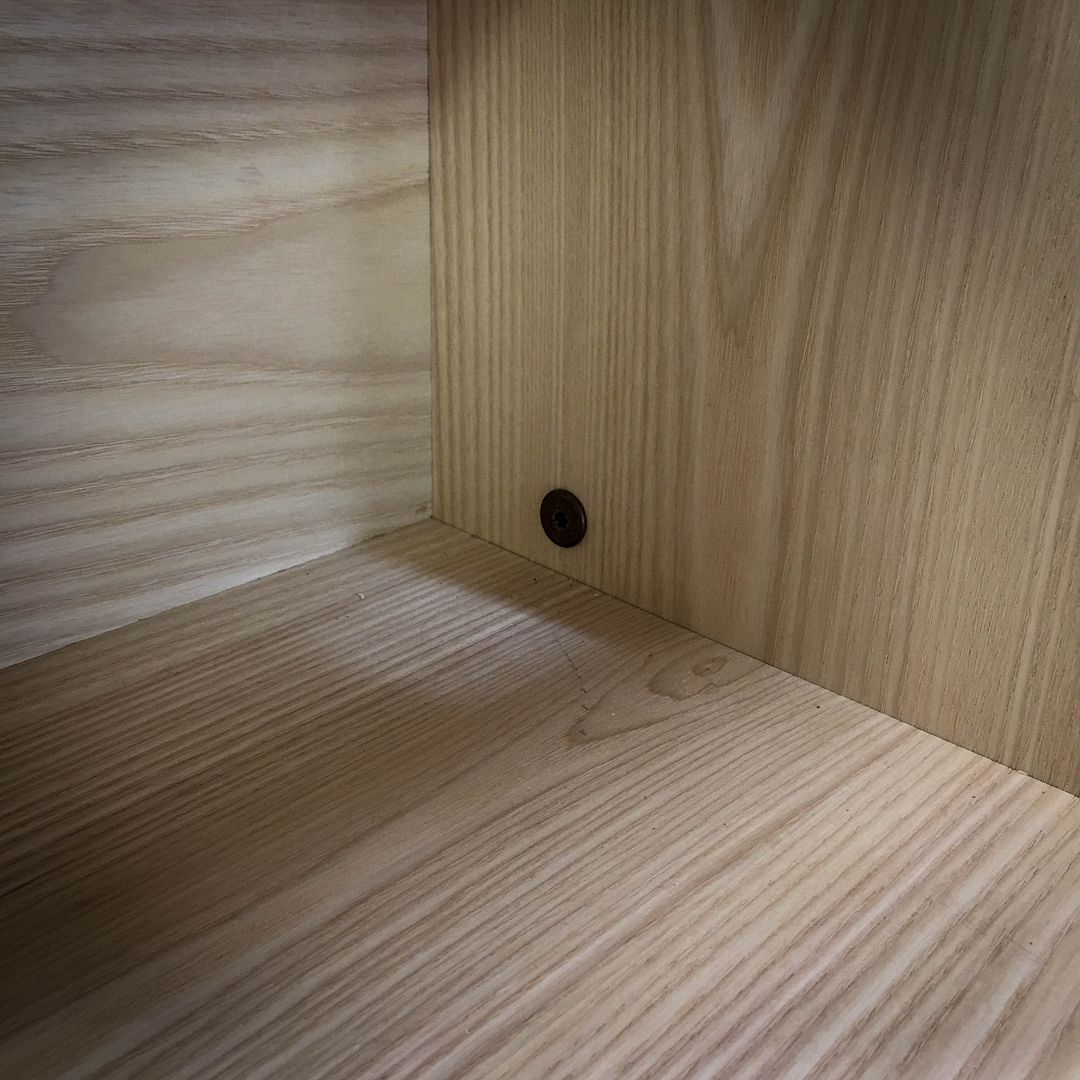
    The second level gets added to that, again with pocket screws hidden underneath and just two countersunk screws from the front which will not likely be visible very often once the unit is in use. A temporary support is under that back shelf to insure it stays perpendicular to the middle partition. And this is where I bring back that mention of "material being really close". I bought 31 board feet of ash which should have been more than enough. But that last piece remaining was an inch short of being able to be used for the rear bottom piece. Since there will be a felt liner inside the bins, I grabbed a piece of 'scrap' red oak and used it for that bottom piece, adding an inch to it's width with scrap ash. No regrets and it will "disappear" later.

    --

    The most expensive tool is the one you buy "cheaply" and often...

  2. #2
    Join Date
    Mar 2003
    Location
    SE PA - Central Bucks County
    Posts
    65,854
    In the end, we end up with the completely assembled carcass. There are some countersunk and plugged screws used toward the top of the partitions and to bond the back to the sides, but I was careful with my plugs in matching grain and they are barely visible, especially with no dye/stain being used.


    What comes next is the legs. For that, I had to work out both the proportions and the angles and that was best done with a full-size mockup of the end-view...some scrap materials came into play for that as you can see here. Pencils and rulers and erasers, oh my!! But it was the best way to get things so they matched the tiny photo I had of the desired end result and then work the angles on the leg components. As it turned out the distance from the top of the leg assemblies to the floor would be 30", with 6" of that overlapping the case. That's drawn out here on the mockup, although the pencil marks aren't the easiest to see in the photo. The legs would taper from just below the case to 1.75" at the bottom. There would later be a taper from the side, too.


    After figuring all the angles, it was time to make a template for the leg blanks. Some scrap 1/4" luan was perfect for this


    Before committing to the expensive maple, I made leg blanks from some 8/4 poplar to 'work things out'. The pattern was used to mark them as well as confirm the angles at the saw. I also created a sled to cut the angled long side for these poplar blanks. It worked, but I later abandoned that with the real blanks as it was simpler and quicker to just clamp the material to the slider wagon and make the cut along the intended line.


    This is the end result for a leg blank. All four required are actually identical as it turns out


    This is where it gets interesting...each pair of leg blanks need to half-lap the other to create the inverted "v" shape of the construction. I again returned to the mock-up and worked things out with the poplar blanks to determine how best to make this work. I then created a quick and dirty jig to hold the workpiece as the shoulder cut was made on the saw


    I then built another jig to use at the band saw to remove the waste and create the half-lap-half, as it were...this jig had to hold the leg securely at an angle such that the shoulder cut was parallel to the band saw blade both vertically and relative to the cut line. A single quick clamp kept it in place and the fit was snug, too


    And....we have a half-lap. Not a perfect one for thickness, but I wasn't worried about that so much at this point with the poplar. They were not going to get glued up


    It was time to move on to the maple, so after milling it flat and to thickness, it was off to the saw to straight-line the edges (which is what I do to "joint the edges" these days) so I could lay out the leg blanks using the template


    ...which was the very next step. It was also when I decided not to use the sled because the clearances were not there to rough out the material. Again, I was, um...a bit close...on the amount of material available


    So the cuts were made directly on the wagon, clamping the material down so that the cut lines (which I extended on the blanks including vertical to the table) could be lined up exactly and made cleanly


    The angles on the ends were made using the saw's miter fence; 15º on one end and 24.5º on the other. (yea, I know...that last one is a bit strange)


    Last edited by Jim Becker; 01-03-2017 at 9:34 PM.
    --

    The most expensive tool is the one you buy "cheaply" and often...

  3. #3
    Join Date
    Mar 2003
    Location
    SE PA - Central Bucks County
    Posts
    65,854
    And as before, the shoulder cuts for the half-laps were made using a jig to hold the material at the cut line


    Followed by removing the waste at the band saw


    Meanwhile, I did the majority of the sanding of the case and set it aside so my bench would be free to assemble the legs


    At the bench, I used hand planes to clean up the surface of the half-laps including using some scrap at exactly 7/8" thickness to true things up. While the cut on the band saw was surprisingly clean...new blade...the thickness wasn't perfectly even and I had allowed for that in the cut. It's better to have to take a little off than find a way to put a little back on...wink, wink...nod, nod...


    Ah...pretty darn nice...


    I then match up the two best combinations and marked them with tape for both pairing and "front"


    Before glue-up, all the surfaces needed to be smoothed and partially sanded


    The tapers were then cut at the bandsaw "freehand along the line" and then cleaned up with hand planes and sanding


    You can see the tapers here prior to glue-up and after the edges were rounded over at the router table


    Speaking of glue-up...ye olde benche participated in that operation


    Some slight cleanup at the glue line with a plane and it was time to move on from there


    A bit of sanding and it was time to return to the mockup to ascertain what was required to true-up the leg assemblies so they were exactly identical. Both were 1/16" to 1/8" taller than specification...again, better to be able to remove than have to put back.


    Another quick and dirty jig took care of that...indexing off the bottom of the legs
    Last edited by Jim Becker; 01-03-2017 at 9:48 PM.
    --

    The most expensive tool is the one you buy "cheaply" and often...

  4. #4
    Join Date
    Mar 2003
    Location
    SE PA - Central Bucks County
    Posts
    65,854
    Rather than just bolt the legs to the sides without any other support, I felt it important to embed a ledge that would duck under the case and provide additional points of fastening. To accomplish that, a groove needed to be routed horizontally across the leg assemblies such that the ledge would be exactly 6" below the top of the legs. Yup...another quick and dirty jig from scrap that would guide the router along the line...


    I chose to do this groove with a 5/8" cutter as it would allow for a slight shoulder on the 3/4" thick ledge for additional gluing consideration. The depth is 1/2"


    Here, the ledge is being test fit and marked so that the ends could be cut at the CMS to a 15º angle to match the taper of the legs


    Once that was done and some pocket holes were cut, the ledge was glued into the slot and cranked down with the pocket screws


    And then it was time for some fun...locating the legs and drilling for fasteners. All with only two hands.


    Clearly, I managed and got things where they needed to be...which was 1" back from the center line for the leg structures. That move the leg center toward the balance point without making the rear legs extend beyond the limit of the case. Only the screws through the ledges are installed here and I marked on the case the outline of the legs so I could calculate the position for the two horizontal fasteners that would hold the bulk of the weight


    After measuring and marking out for those horizontal fasteners, the case was drilled for 1/4" bolts and the legs put back on temporarily so that a brad-point bit could mark the position on the inside, hidden portion of the legs for those fasteners. The rear fastener would be hidden under the rear bottom; the front fastener would be visible in the outside, front bin. For the former, a normal 1/4"x20 bolt with a big washer would do the job. For the latter, I selected a "prettier" and flatter connector bolt that uses a hex wrench. It's also 1/4"x20. These bolts would screw into embedded nuts in the legs. Here, the holes were drilled for those captive threaded inserts. Because this is maple...and I'm glad I tested this on scrap first...I had to essentially step drill the hold to avoid stripping out the threaded inserts when they were rotated into place


    The back bolt...


    And the front bolt...this one isn't the "real one", but is the same type. I didn't want to scratch up the "real ones" at this point


    Oh, my...it lives!


    Time to finish...after thorough sanding and cleaning, the legs get a could coats of flat black from a spray can as the first step


    And then they were hung for clear coating with water borne satin at the same time the case gets sprayed with the same


    Last edited by Jim Becker; 01-03-2017 at 10:13 PM.
    --

    The most expensive tool is the one you buy "cheaply" and often...

  5. #5
    Join Date
    Mar 2003
    Location
    SE PA - Central Bucks County
    Posts
    65,854

    Unhappy

    The legs get installed in final assembly. In theory, I can remove them if necessary for transport, but I'm hoping that's not required


    The bins will get some self-adhesive felt in the bottom of the bins as soon as it arrives from the supplier, but this project is essentially complete


    Last edited by Jim Becker; 01-03-2017 at 10:16 PM.
    --

    The most expensive tool is the one you buy "cheaply" and often...

  6. #6
    Join Date
    Mar 2003
    Location
    SE PA - Central Bucks County
    Posts
    65,854
    My client...a family friend...picked up this unit yesterday and presented it to her husband as his Christmas present. While I fully admit it's "not my style" in many respects, after seeing the photo below, I understand the appeal relative to functionality and am glad I was able to create what they wanted that's more or less exactly like the tiny illustration they provided to me to work from. Quite often, media storage is such that one cannot easily browse through what's available, but this "record store" type rack makes browsing albums and album art really easy. So while I don't want one of these for "my" house, I'm appreciative that they got what they asked for and like it!

    --

    The most expensive tool is the one you buy "cheaply" and often...

  7. #7
    Join Date
    Mar 2006
    Location
    SoCal
    Posts
    22,510
    Blog Entries
    1
    What a cool and fun project. Great choice on the leg joinery. The two-tone finish and styling really gives it the retro feel while allowing the album covers to make a splash.
    "A hen is only an egg's way of making another egg".


    – Samuel Butler

  8. #8
    Join Date
    Feb 2003
    Location
    In the foothills of the Sandia Mountains
    Posts
    16,641
    I love the retro look! The legs look like they could dance away.
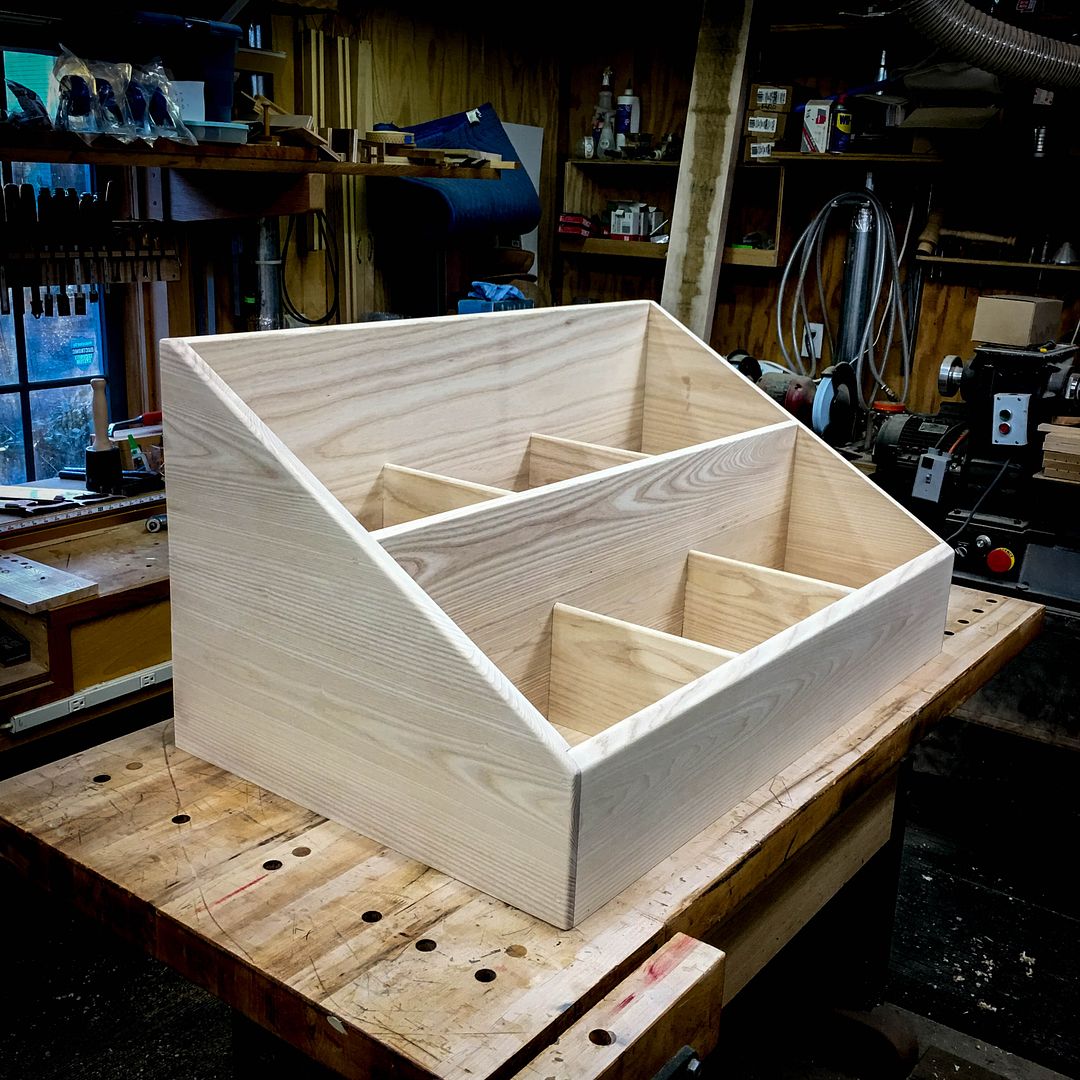
    Please help support the Creek.


    "It's paradoxical that the idea of living a long life appeals to everyone, but the idea of getting old doesn't appeal to anyone."
    Andy Rooney


  9. #9
    Join Date
    Mar 2003
    Location
    SE PA - Central Bucks County
    Posts
    65,854
    Thanks, Glenn and Bruce. The legs were an exercise but a rewarding one relative to thinking through the process and working out the steps. (Not to mention actually accomplishing them without too many bad words) I think the original in the illustration had some more contouring, but I didn't want to invest more time trying to discern from a tiny picture was showing in bad shadow. Frankly, I'm happy it's 100% stable and balanced.
    --

    The most expensive tool is the one you buy "cheaply" and often...

  10. #10
    I collect LPs and have always wanted a large, dedicated man cave/listening room with an entire wall of racks like this. Enough storage for thousands of LPs. The worst part about storing records stacked beside each other like books on library shelves is that you can't see the great covers. You have to squint and turn your head sideways to read each spine when all you really wanna do is flip through stuff when you go to pick out a record. Super cool project and it looks awesome.

  11. #11
    Join Date
    Mar 2003
    Location
    SE PA - Central Bucks County
    Posts
    65,854
    Phillip, what you mention is the one really nice thing about this particular type of design...album art is easily accessible. A similar setup could be used for CD/DVD type media.
    --

    The most expensive tool is the one you buy "cheaply" and often...

Posting Permissions

  • You may not post new threads
  • You may not post replies
  • You may not post attachments
  • You may not edit your posts
  •