Results 1 to 14 of 14

Thread: Hand finishing water-based poly.

  1. #1
    Join Date
    Feb 2004
    Location
    Perth, Australia
    Posts
    9,491

    Hand finishing water-based poly.

    The decision was made to use Hard Maple for the kitchen doors and drawer fronts because the wood was light in colour and the figure was gentle. With very little experience in working with this wood (imported from the USA), I decided to use a USA-made finish, since this appeared to be recommended as the best way to retain its light colour. That's where I ran into the first hurdle.


    General Finishes water-based poly received the top rating a few years ago in a FWW comparison, however it is best sprayed, and I do not have spray equipment.


    I looked into brushing on the finish. General Finishes recommend using a foam brush. However, all the reviews and videos I examined complained of brush marks and streaks in the finish, whether by the best brush or foam. This is partly due to water-based finishes drying rapidly. They set in minutes - sometimes seconds! - and there is no time for the finish to be self-levelling.


    To date, my main finishes have been oils and shellac, which I have applied with a rag. I would have liked to have used shellac here, but it is just not durable enough in a kitchen, which will be wiped down frequently. Still, my experience is in wiping a finish, and so I tried this with the GF. It went on well, and it showed promise. The only fly in the ointment was the water-based finish raised the grain, and this would require that the finish was sanded again.


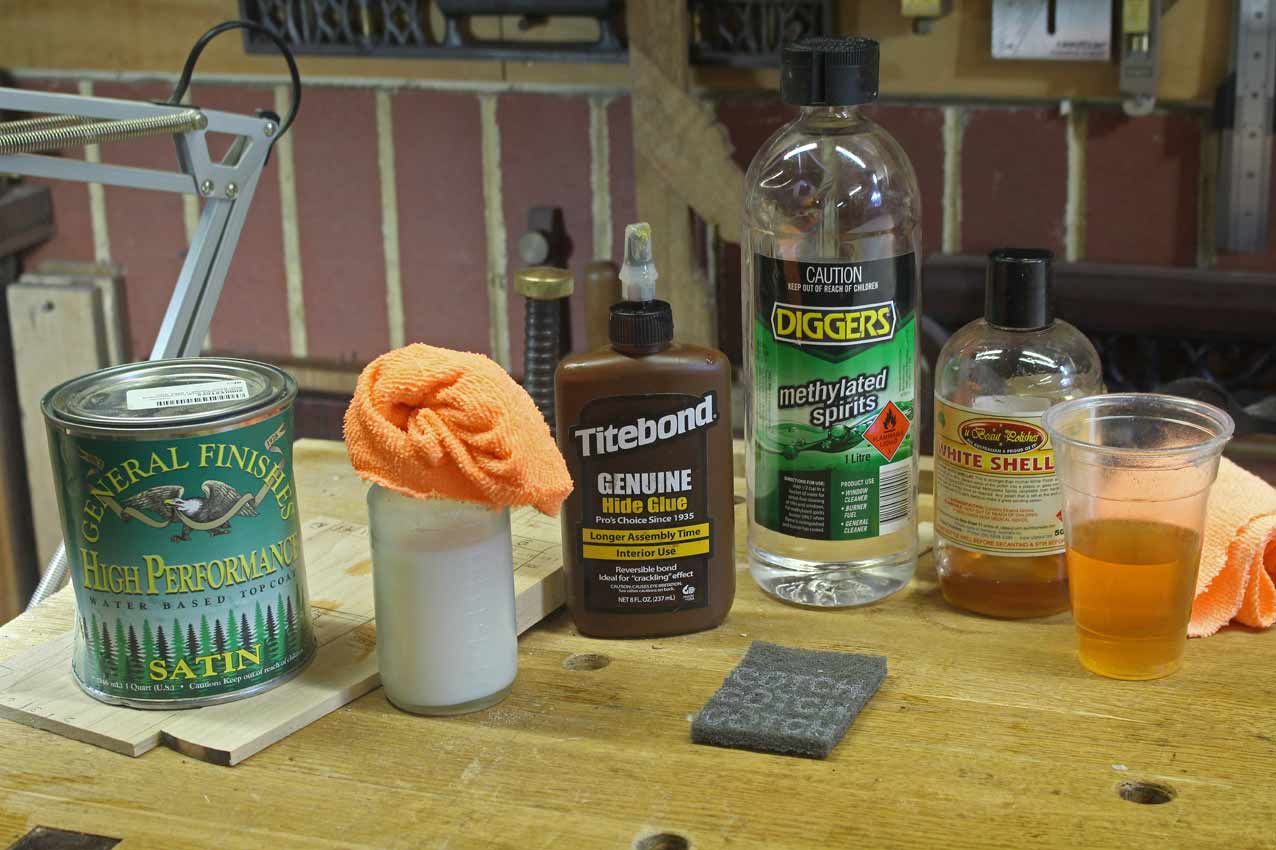
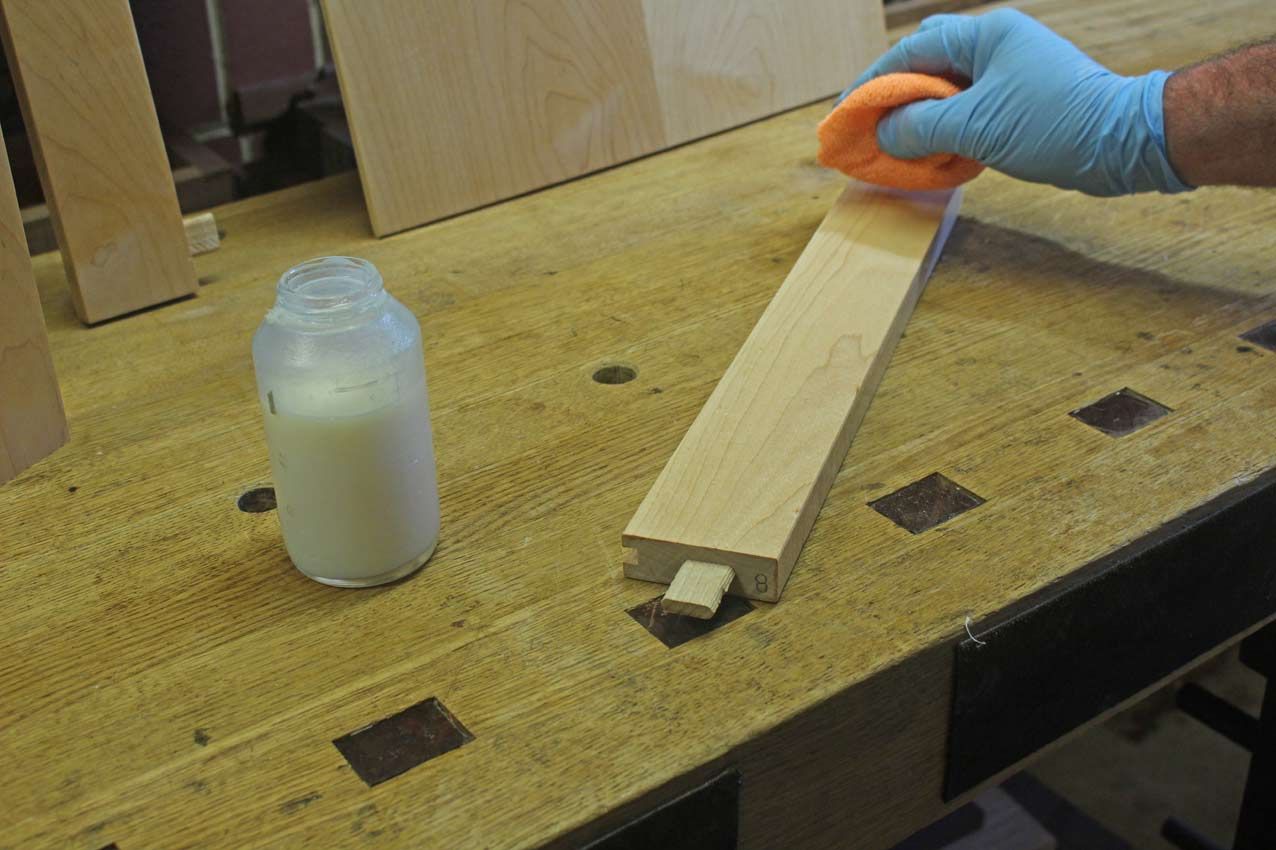
    I decided that I would use a dewaxed, white shellac as a sealer prior to wiping on the poly. My choice here is Ubeaut White Shellac, which is concentrated. It was diluted 50-50 with alcohol (methylated spirits).


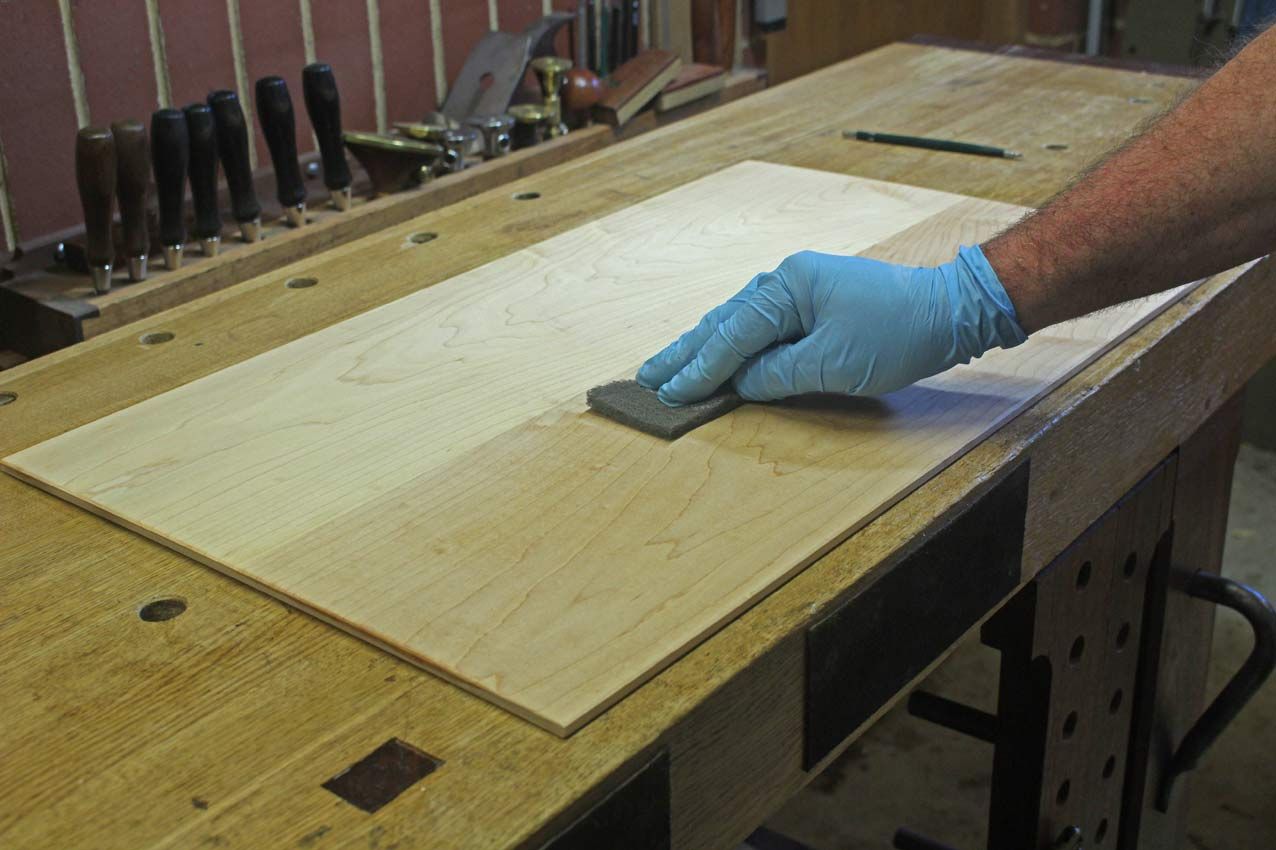
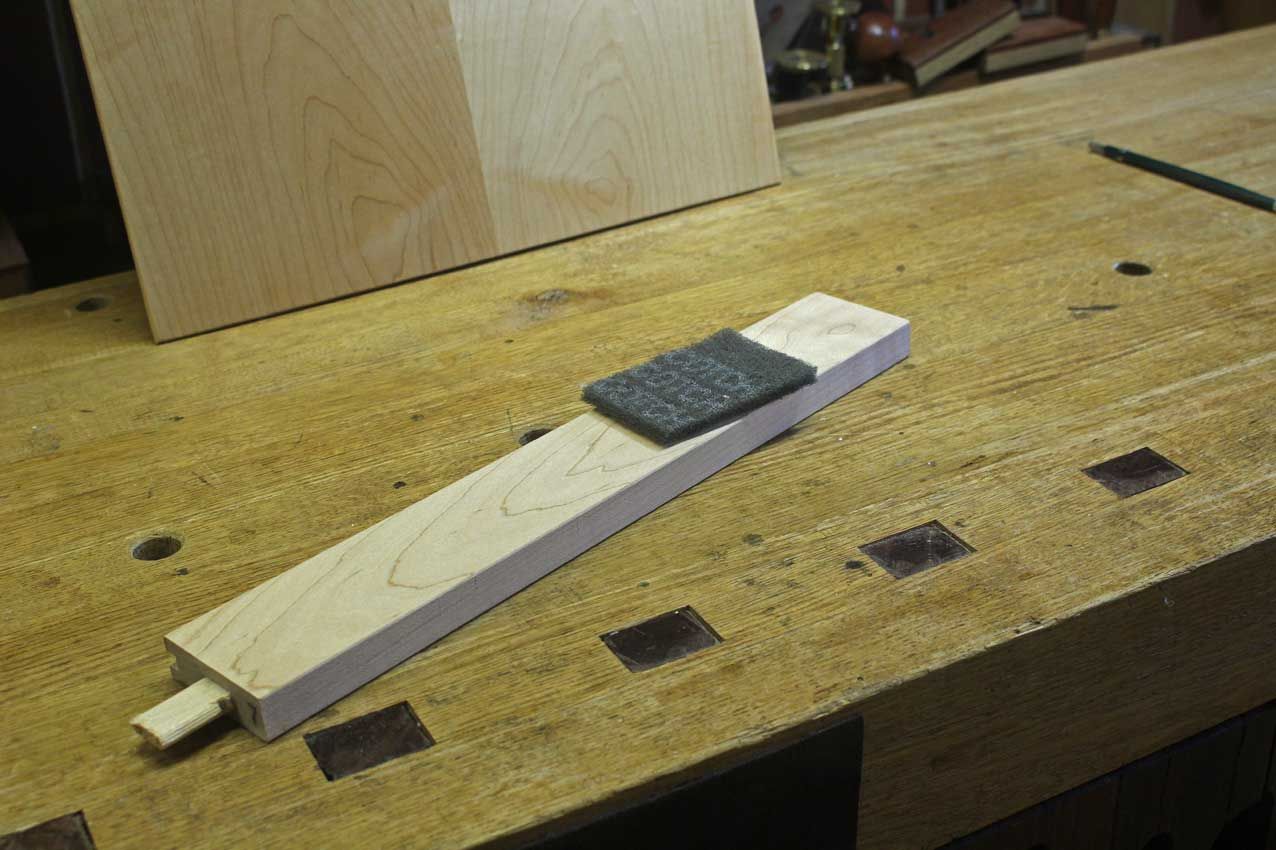
    For rags I used microfibre, and grey Scotch mesh smoothed the surface between coats.


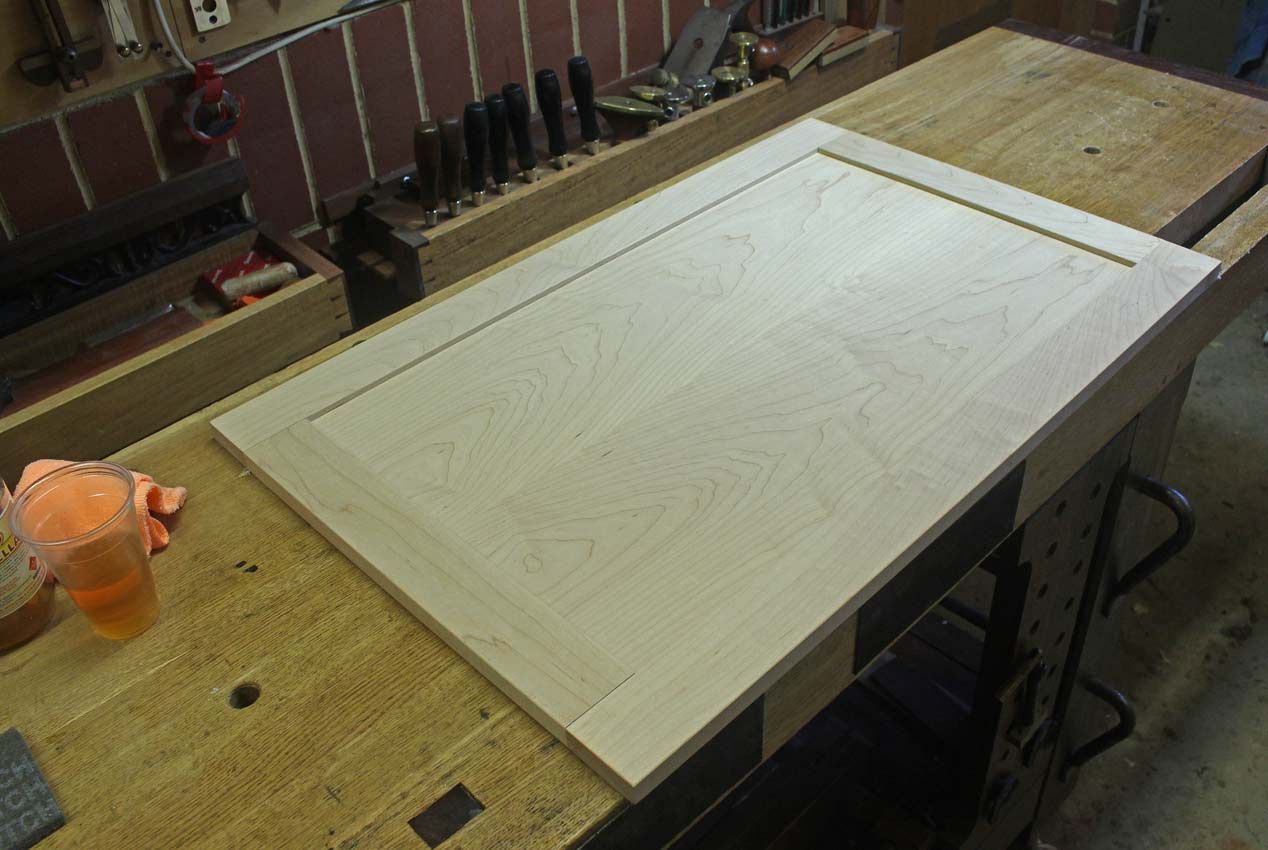
    This is a door pre-finish ...


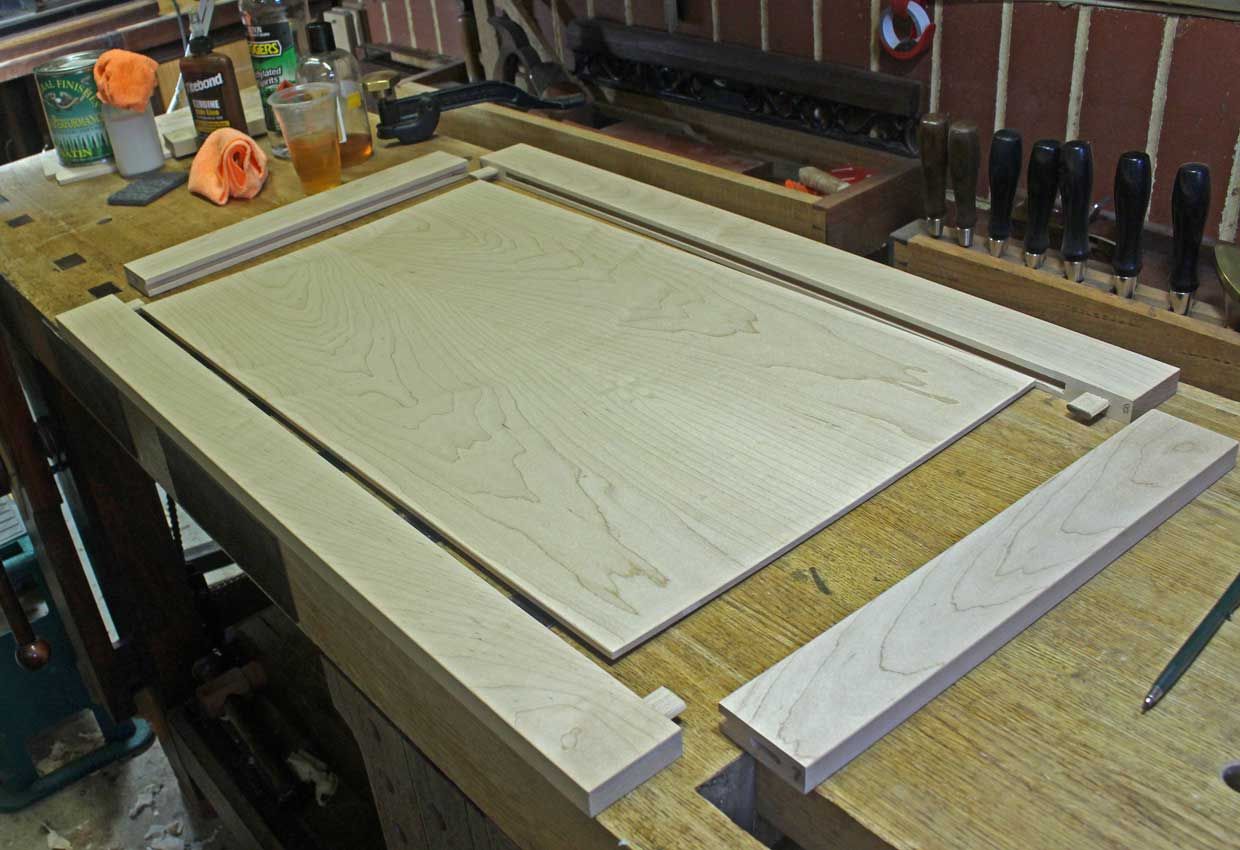
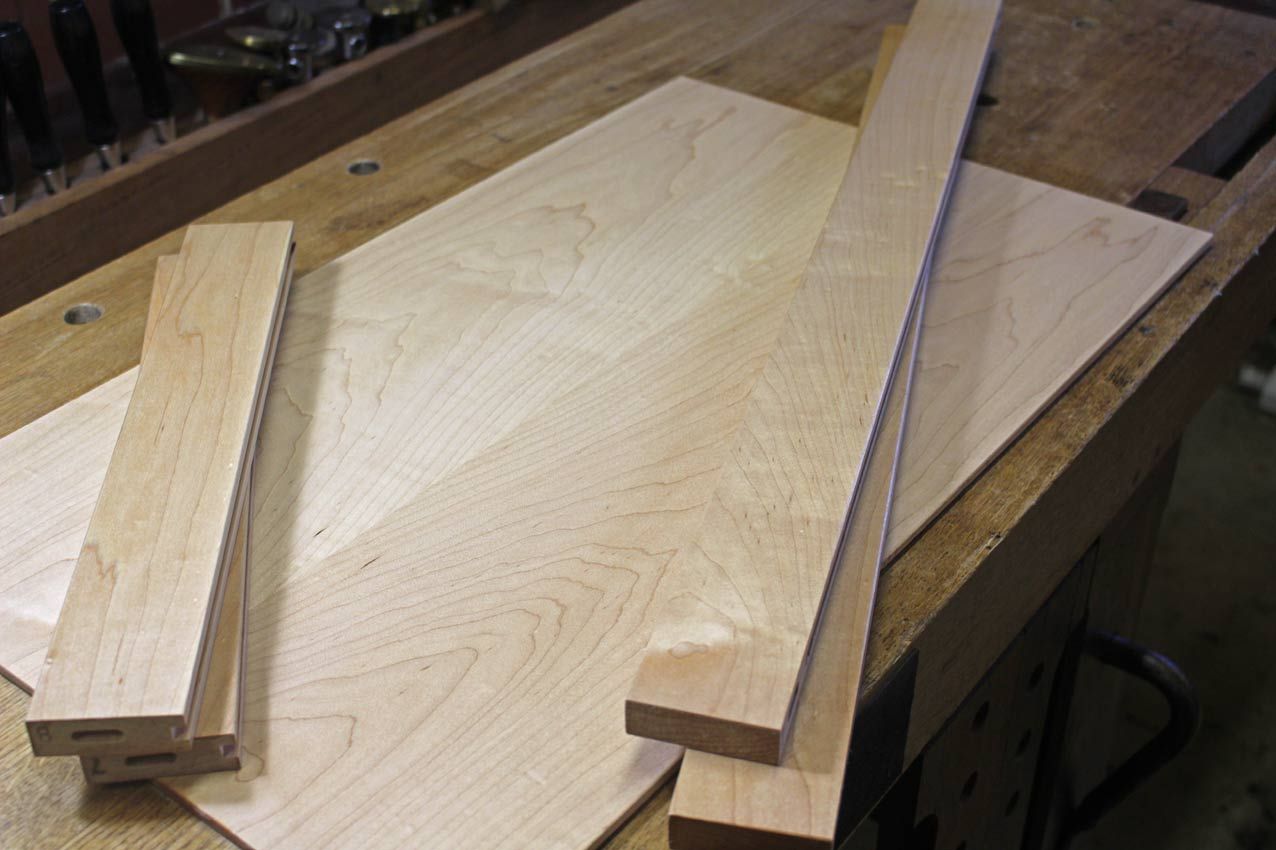
    Pulled apart. Every piece is carefully marked for mating and orientation ...


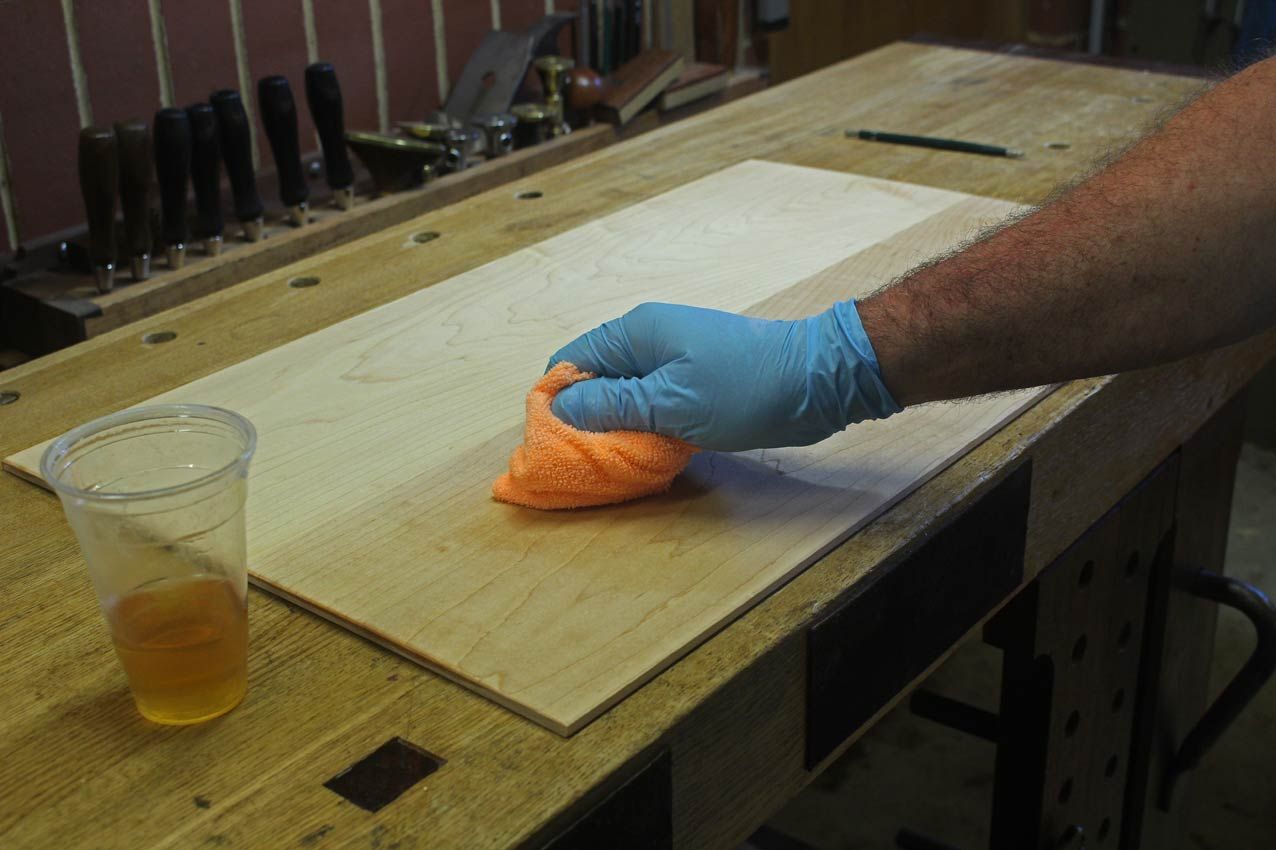
    Each surface was given two coats of shellac (with the grain) ...


    .. followed with a rub down (with the grain) ...


    The shellac does colour the wood, but very slightly - far less than expected from its darkish amber. It dries quickly, and within minutes of each coat one can move onto the next.


    Now it is the turn of the poly. It is white in the decanted bottle. but goes on clear.


    The finish is a little sticky, and it is drying fast. I apply it as if it were polish and I was polishing the surface of the wood. You can do so in small circles, but you must finish (as it dries) by only rubbing along the grain. Using raking light, look for any streaks. Simply rub them out.


    Once dry, use the grey mesh to rub the surface with the grain. It not only removes any streaks, which it blends all together, but it seems to raise a shine.


    It takes at least 2-3 layers before the shine becomes apparent. The poly slowly builds in thickness. Polishing it as done here only adds a thin coating on each occasion. Then suddenly it is there ..


    I stop after 5 coats.


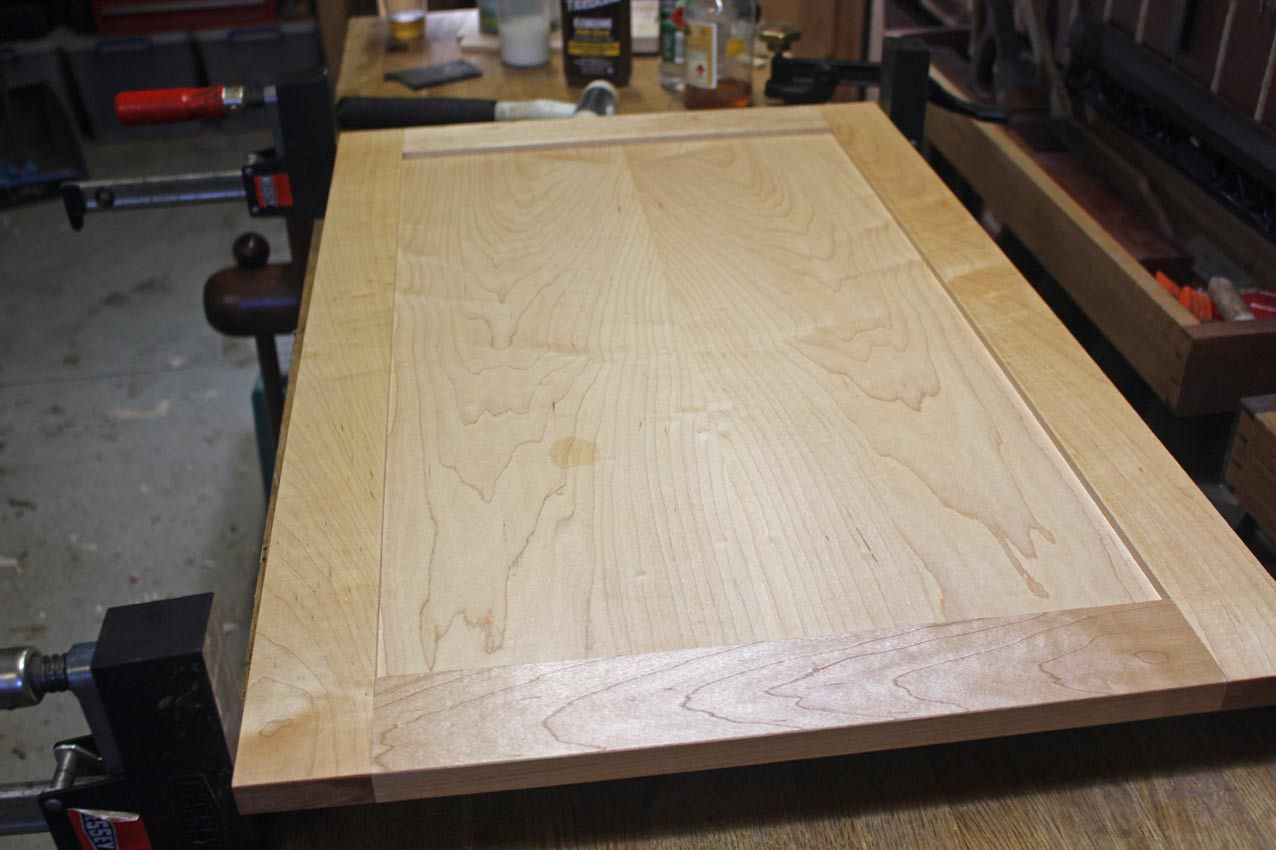
    Now it is time to glue the frame together. The panel floats inside the frame ...


    A note on the glues: I used Titebond lll for the bookmatched panel as it is water resistant. I used Titebond Liquid Hide Glue on the Domino mortice-and-tenon joints as this is reversible and unlikely to affect the finish.


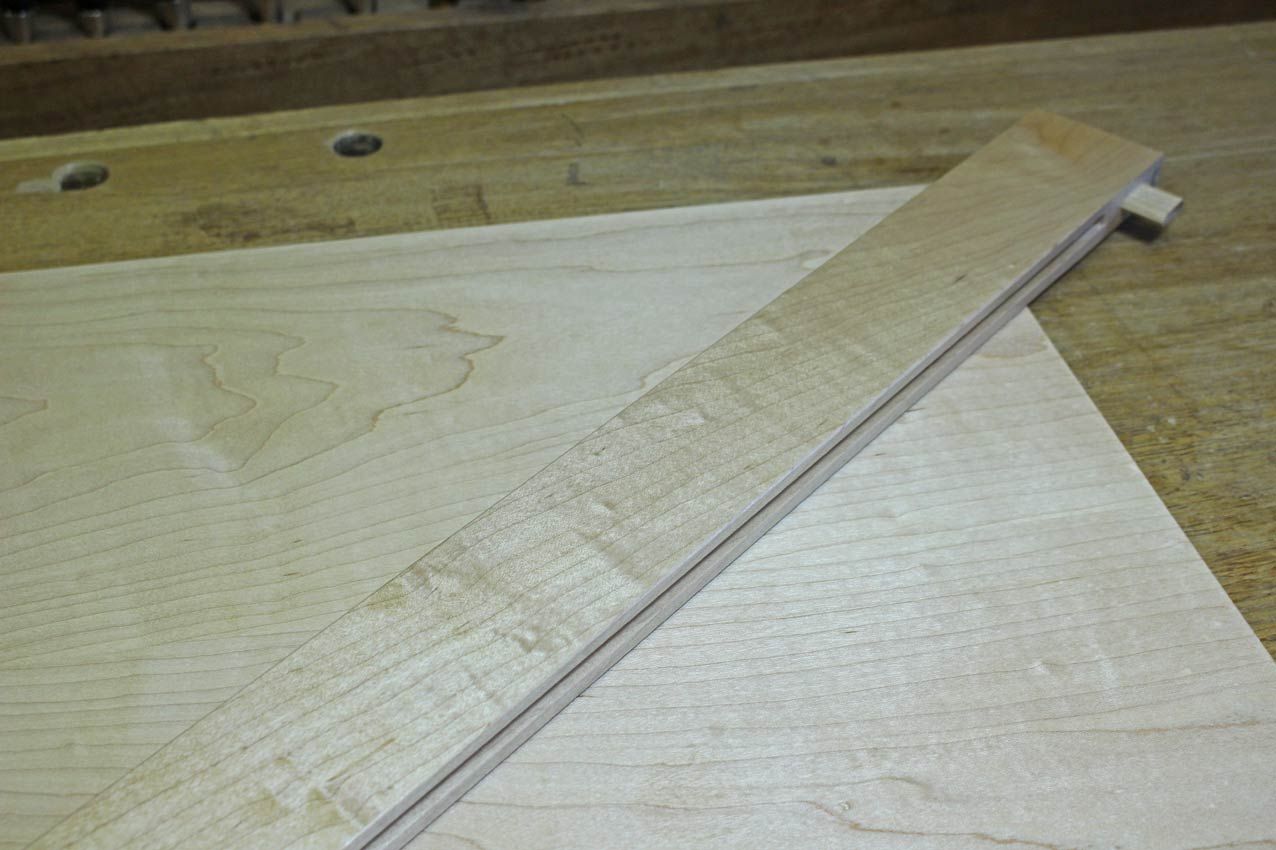
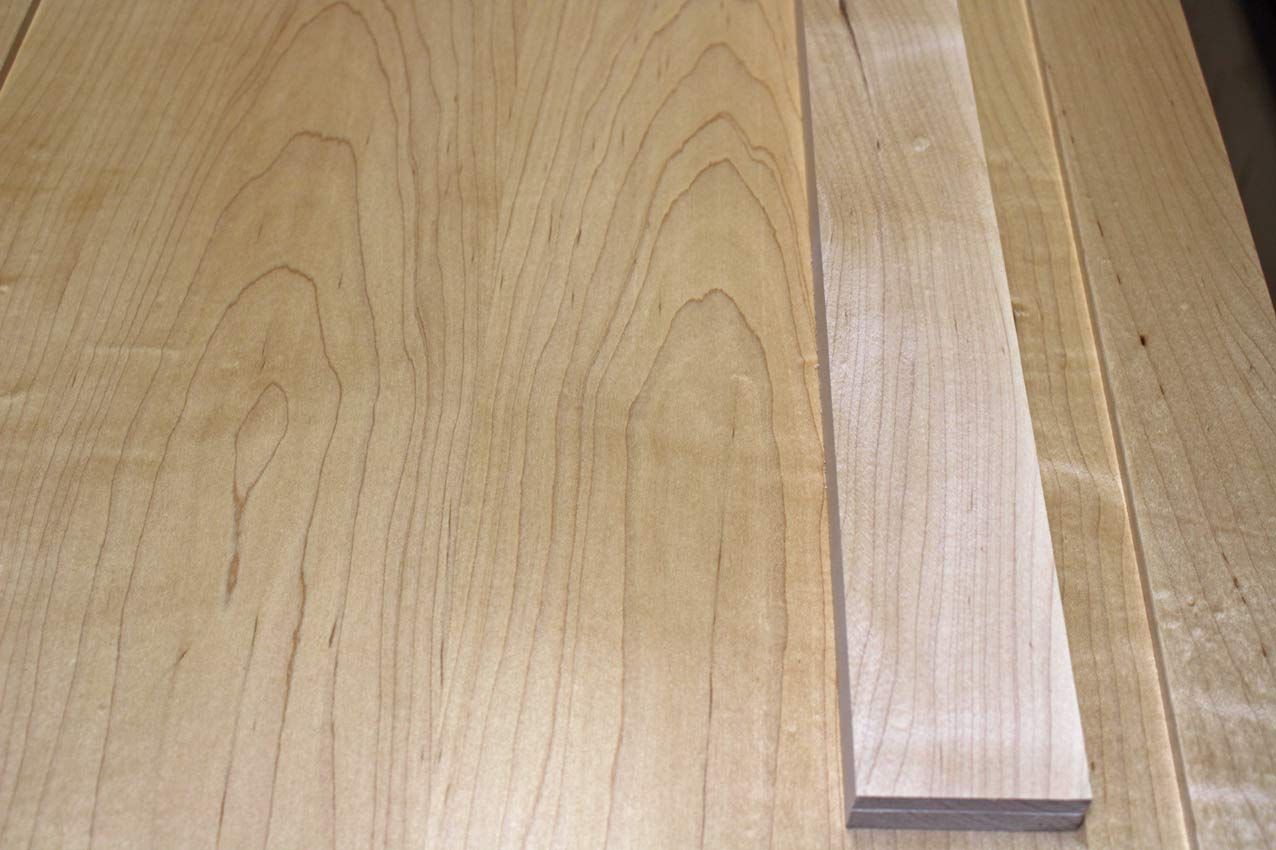
    How much colour change did the finishes add? Here is the completed panel along with a planed but otherwise unfinished board ...


    Regards from Perth


    Derek

  2. #2
    Join Date
    Aug 2013
    Location
    Princeton, NJ
    Posts
    7,293
    Blog Entries
    7
    Derek, that is about the same amount of change I get from natural to finished when I use super blonde shellac. FWIW, I think the very very slight darkening is an improvement with maple.
    Bumbling forward into the unknown.

  3. #3
    Join Date
    Feb 2004
    Location
    Perth, Australia
    Posts
    9,491
    That's my impression as well, Brian. The Ubeaut White Shellac is dewaxed super blond shellac, and that is where the colouring takes place. The GF water-based poly does not add any colour. I like the touch of amber. The Maple alone is a little bland for my taste.

    Regards from Perth

    Derek

  4. #4
    Join Date
    Mar 2006
    Location
    Austin Texas
    Posts
    1,957
    Also agree on the slight ambering effect on maple as being preferable. On its own, maple tends to be too pale, but using a dewaxed shellac as a base coat tends to bring up the grain or figure, then followed by a water based topcoat is a pleasing look to my eye. Also, one can add a few drops of Transtint Honey Amber dye to the topcoat to affect the end coloring of the finish. The Transtint liquid dye products are easy to use with shellac and water based top coats and offer an array of results.
    David

  5. #5
    You have found a technique that is common in the boat building and maintenance community but seems largely unknown to woodworkers: apply and tip/bush and tip/roll and tip and sometimes (but very very rarely) spray and tip.

    The gist of the technique is to apply by whatever method is best for you, followed IMMEDIATELY by tipping. Tipping is to lightly brush over the surface with a dry brush, either a fine bristle brush or a foam brush. By lightly, the brushing is only enough to level any brush marks/roller pimples/spray orange peel and NOT A BIT MORE. Even the full weight of the dry brush may be too much pressure, so a very light touch indeed is required.

    For an extremely fast drying medium like the aqueous polyurethanes, a bit more is required, since the coating is too fast to permit the customary tipping action. On the other hand, the stuff doesn't fully cure for several days and remains fairly soft for a short time. The (almost equivalent) prompt rubdown with a non-abrasive non-woven pad (Scotchbrite white or equivalent) will do much the same job, with one exception: there will be less gloss in the finished coating. Since very high gloss is rarely wanted by furniture makers and cabinet makers, in the end it comes out just fine. After about a week the polyurethane will be fully hard and the Scotchbrite white won't do anything more than dust off the surface.

    If you ever truly want a coating with no color, you can use the polyurethane without the shellac sealer, rub the raised grain down after about half and hour (or more) with very fine paper (say 320 grit) or a fine Scotchbrite pad and go ahead with second coat with no more grain raising. In this case, I - like everyone else - prefer the tone added by the shellac. But since you started looking for no color, I thought I'd mention it. (Sort of a "be careful what you ask for moment?")
    Fair winds and following seas,
    Jim Waldron

  6. #6
    Join Date
    Feb 2004
    Location
    Perth, Australia
    Posts
    9,491
    James, thank you so much for your post. It is extremely interesting.

    Regards from Perth

    Derek

  7. #7
    Join Date
    Feb 2011
    Location
    Carlsbad, CA
    Posts
    2,229
    Blog Entries
    2
    Derek,


    I admire your courage and fortitude.


    Building kitchen cabinets is in and of itself a significant project with finishing requirements that for me are not typical for most other furniture projects. That said, there also something we can enjoy on a daily basis.


    Finishing is by far my least favorite part of woodworking and an area where I consistently experience the biggest screw ups that have the most visible impact . I have zero advice to offer, although I'm following your posts with great interest.

    Best wishes for much success! – you're clearly a better man than me!


    Warmest regards, Mike

  8. #8
    Join Date
    Feb 2004
    Location
    Perth, Australia
    Posts
    9,491
    Thanks for your very kind words Mike.

    I, too, find finishing a chore. On the other hand, there is nothing like a rub of oil over the completed piece and then to watch amazing figure come to life!

    I would love to just wipe something simple like oil or shellac over these doors. Not that simple. First, all must be done dissembled, otherwise expansion/contraction will show up as uncoated panel edges. The parts are all sanded (after planing) because raking light will show up any plane tracks, and I cannot have that on kitchen doors (unlike furniture). This goes hand-in-hand with creating the best finish possible, which takes time and perseverance (which is not my strong suit).

    But it is looking good so far (done about half), and this strengthens me to continue.

    Regards from Perth

    Derek

  9. #9
    To show (off) an example of a roll and tip finish, I did a small dinghy with a two part polyurethane, inside and out. Rolled on with a 9 inch foam roller and tipped with a three inch foam brush, dried overnight and repeated after scuff-sanding with 320 grit paper. Substrate is 4 ounce fiberglass over marine plywood with West epoxy resin.

    IMG03.jpg

    In this instance, high gloss is wanted and serves as well to show how effective the roll and tip procedure can be. For the clear coat interior, the polyurethane has an ultraviolet light inhibitor to protect the wood and the epoxy under the coating. On the outside, the pigmented polyurethane doesn't need that, as the pigment blocks uv quite effectively.

    In boat interiors, high gloss brightwork is often not wanted, but most experienced folk have learned to use gloss on all coats up to the very last finish coat. For high-end "cost is no object" work, the gloss coat is hand rubbed with pumice followed by rotten stone. For more price sensitive cases, a finish coat of a "rubbed effect" varnish, a marine varnish with a suitable amount of very fine silica added.
    Fair winds and following seas,
    Jim Waldron

  10. #10
    Join Date
    Dec 2016
    Location
    South West Ontario
    Posts
    1,503
    A colleague with lots of money put such a kitchen in a residence in the very far north of Ontario. Light maple cupboards, black granite counter tops, and a shaped island in black granite that took 7 men to lift. The large kitchen was TV studio quality in an area so remote you can't get there by vehicle, just train or plane. I spent many months at different times cooking there. It remains my favourite kitchen. Maple with UV will patina with time so just Tung oil rubbed would end up the same shade you have now.

    The look on any visitors face as they walked in was priceless.

  11. #11
    Join Date
    Feb 2004
    Location
    Perth, Australia
    Posts
    9,491
    Thanks William.

    Our kitchen is smallish, and lies at the rear of an open plan living room. This looks out on three walls into a garden. While we have a lot of sunlight, it does not reach the kitchen. Consequently, I believe that UV is not a factor to consider.

    My concern with tung oil is that it would darken the wood and I understand that it is not water resistant.

    Regards from Perth

    Derek

  12. #12
    Join Date
    Dec 2016
    Location
    South West Ontario
    Posts
    1,503
    I just splashed water on some cherry veneer finished with Tung oil and solid cherry furniture I oiled a week ago. It beads up and sits there, no sign of soaking in. However 2 weeks ago it would have soaked in. So it does 'resist' water but not like a polyurethane. The re-finishing process is trivial with Tung oil however. I find Tung oil develops maple grain with minimal darkening compared to the patina that develops with time.

    Your varnish will no doubt have UV filters and preserve the shade for much longer. Fashion seems to be a kitchen's greatest enemy.

  13. #13
    Derek,

    Can you comment on the hardness / toughness?

    I applied Minwax's Polycrylic water-based finish on our interior trim and found it to be rather soft compared to an oil-based polyurethane. (I've used Pratt & Lambert #38 varnish on tabletops with good results, but pretty smelly in a closed winter basement shop).

    Thanks,

    Dave Lewis

  14. #14
    Join Date
    Feb 2004
    Location
    Perth, Australia
    Posts
    9,491
    Dave, FWW magazine completed an extensive comparison of water-based poly finishes in the Nov 2006 edition. You need to be a member to read it on-line. The bottom line was that GF rated much higher ("medium" - highest rating) than Miniwax ("soft") for toughness/hardness. The GF was the top finish overall.

    Regards from Perth

    Derek

Posting Permissions

  • You may not post new threads
  • You may not post replies
  • You may not post attachments
  • You may not edit your posts
  •