This is the last post of a mostly Neander build of a mahogany Bompe chest Im building to house some hi-fi components. Earlier parts of the build are in previous threads for those interested.
I left off the last post with the carcass assembled and ball and claw feet completed. This post covers horizontal dividers/shelves, molding, attaching B&C feet and finishing. Personally I always enjoy build pics so consequently Ive probably include too many here my bad.
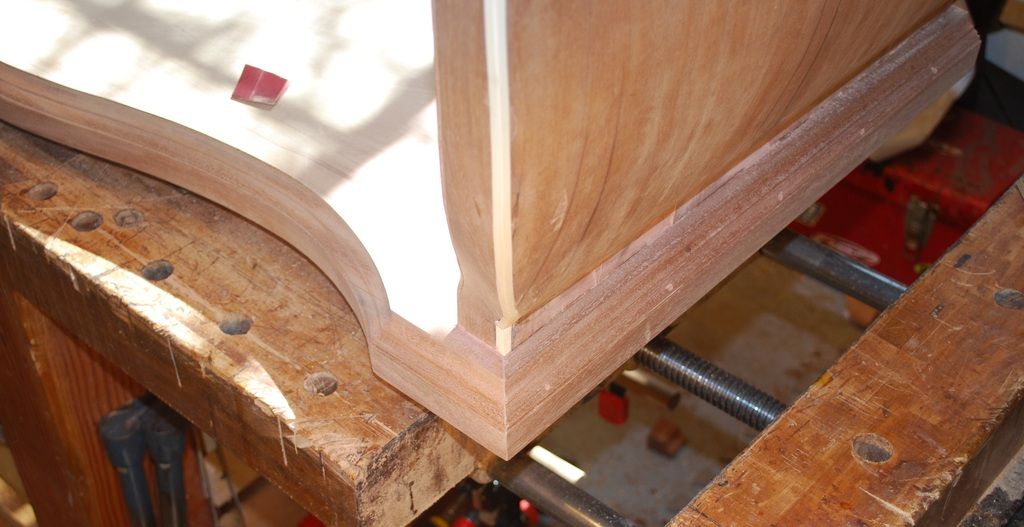
The front edge of the carcass bottom mimics the curve on the top and sides of chest and extends beyond the carcass sides so it can be mitered with side moldings.
I did this as a separate piece to be added after the through dovetails joining the rest of the carcass bottom with the carcass sides were glued up. My reasoning is the final inside dimensions of carcasses I build rarely end up exactly as planned. Adding this piece after glue up gave me a better chance of getting a tight fit.
I use the same template for the carcass top to layout this curve. Because I shape the curves with hand tools, I dont need a template to act as a guide for a bearing guided router bit, consequently I prefer to make templates out of poster board/paper that is faster/easier to cut than Masonite/MDF.
I saw out rough outline of the curve with portable electric jigsaw and shape to the layout line with spoke shave and card scraper. Pic of the piece dry fit to the carcass.
With the piece dry fit into position, Im able to layout, saw and shoot the miters that will fit to the side moldings. My LV shooting plane is probably the extravagant hand tool purchase I use most often. Although pricey, it does a fantastic job of a fundamental hand tool task (shooting edges), that I wouldnt know how to do otherwise with a power tool. Unlike some other tools I bought, I dont regret this purchase at all.
I like to make moldings with hollow/round planes. Because the front is curved, I used an electric router. Here are some pictures of completed molding.


 Reply With Quote