Results 1 to 7 of 7

Thread: Stupid Question, rewire a tool light that is on only when tool runs.

  1. #1
    Join Date
    Apr 2010
    Location
    Springfield MO
    Posts
    64

    Stupid Question, rewire a tool light that is on only when tool runs.

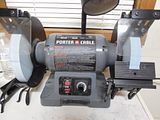
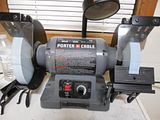
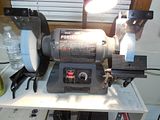
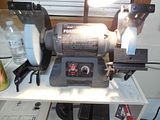
    I've got one of those cheap Made in China bench grinders. Fairly happy with it but the light only works when the grinder is running. Not a big deal but it has it's own switch. Is there a safe way to rewire it so it will turn on/off without running the motor on the grinder? Would think it's be simple to bypass the main switch. But don't wanna disable the grinder or worse.

    You'd also think this would be something, someone has already done but google has been getting less helpful these days.

    Thanks.

  2. #2
    Join Date
    Feb 2008
    Location
    E TN, near Knoxville
    Posts
    12,298
    Quote Originally Posted by Ray McCullie View Post
    I've got one of those cheap Made in China bench grinders. Fairly happy with it but the light only works when the grinder is running. Not a big deal but it has it's own switch. Is there a safe way to rewire it so it will turn on/off without running the motor on the grinder? Would think it's be simple to bypass the main switch. But don't wanna disable the grinder or worse.
    Ray,

    This is by no means a stupid question. It's a simple fix, but...

    I hesitate to describe how I would approach this without knowing your level of experience since the danger from a mistake is real. Just by asking this question indicates you might not have a lot of experience. But here are some thoughts - you'll have to decide if you want to tackle it or find someone who will. In general, something like this is almost trivial if you know what to look for and how to manage the wiring. You are unlikely to damage the motor unless you connect something that shouldn't be connected, then it may pop the circuit breaker or electrocute someone. No problem!

    I'm assuming that with its own switch the light comes on only when the grinder starts and then can be turned off or on while the grinder is running. In that case, a hot wire from the load side of the switch most likely feeds the switch to the light. It would be a simple matter of disconnecting that wire from the load side of the motor switch (the side that feeds the motor) and connecting it to the line side of the motor switch (the side that goes to the power cord).

    However, with who-knows-who wired it and in what way, it is better to assume nothing. For example, some doofus could have run line voltage directly to the bulb then switched the common - who knows.

    The first thing I would do is trace out the wiring and make a diagram, noting the color of the wires. I would use a continuity or ohm meter for this unless everything was easily visible. If the same color, unless it is very clear what goes where, mark the wires with some color of tape or something. Then it will be easy to see which wires are common and which wires feed the light. It is important to know exactly what each wire does. When moving a wire it is very important to make a good electrical connection and be certain all conductors are insulated from the grinder body. Some times these have push-on connectors and if you are lucky you might be able to pull the wire off one terminal on the switch and push it on the other. Otherwise it might take some soldering or crimping. (both of these may require special tools too do right) It is hard to say without seeing it.

    BTW, I simply remove any lights that come on my grinders. The gooseneck is always too short and the lights are never bright enough. I like to use LED lights with magnetic bases better. (I put all the lights on on my sharpening station on the one switch so I can flip them all on at once.) The last one I did just had wire nuts - I just removed a plate from the bottom, disconnected the obvious wires from the light, removed the light, and retightened the wire nuts.

    If working with wiring is somewhat new to you I suspect you could find someone nearby who could do it quickly. At worst case, any motor shop could do it quickly and for not much money, unless they are rip-off artists. If you lived nearby, I'd say bring it over and we'll do it - should take 10 minutes. Like my piano teacher always said, everything's easy once you know how! (Everything except piano...)

    JKJ

  3. #3
    Join Date
    Jan 2010
    Location
    LA & SC neither one is Cali
    Posts
    9,447
    I agree with John. This is the type of thing that if you understand electricity and are comfortable working with it then the light would already be wired to your satisfaction and you wouldn't need to ask a broad question.

    Best case is to find someone you know to help you, learn and get the outcome you want. Next case is pay someone. Or follow the everyone has to start somewhere and go ripping into it, thats what I have done all my life, well before youtube tutorials. I am not going to tell you to do the latter but I won't tell you not to either, you know your own deductive skills and risk level you are willing to accept. In the end all you need to do is find the wires that feed the grinder from the wall, determine which is the switched hot wire and run another wire from that hot wire pre-switch either directly to the light or through a separate switch. You could also simply wire the light separate from the grinder with a switch cord.
    Of all the laws Brandolini's may be the most universally true.

    Deep thought for the day:

    Your bandsaw weighs more when you leave the spring compressed instead of relieving the tension.

  4. #4
    Join Date
    Apr 2010
    Location
    Springfield MO
    Posts
    64
    Thanks for the replies guys. I live in an area where.. well let me put it this way. We hired a pest control place to spray for ants and the guy that came didn't bother to bring any screw drivers. He had a buck knife instead. I had to find one to keep him from damaging my outlet covers. And yes the company was bonded and licensed, somehow.

    Figured it was a simple switch setup. If that's the case why in the world would they not wire the switch separately? Just seems like a dumb design choice. Grrr. I should just take it apart and do it but wanted to see if someone had any experience first. Going in half-cocked is what gets you in trouble. Don't know if the switch is rated for 120v or not or if it could create a shock hazard for example. Maybe it's grounded through the motor? How much money could it really save to wire it that way? Just seems like they might have a good reason in the first place but can't find it.

    I guess I'll play with it and post up the result.

  5. #5
    Join Date
    Feb 2008
    Location
    E TN, near Knoxville
    Posts
    12,298
    Quote Originally Posted by Ray McCullie View Post
    Don't know if the switch is rated for 120v or not or if it could create a shock hazard for example. Maybe it's grounded through the motor? How much money could it really save to wire it that way? Just seems like they might have a good reason in the first place but can't find it.
    If you want more comments and directions, state the brand and model and post some photos of the grinder, light and switch. Unplug, take covers off if possible and get photos of the inside. Describe everything you see, both what you think you understand and what you don't. Note the wire colors - usually ground is green, hot is black, and neutral (return) is white. Take note of the kinds of connections at the switches. Try making a sketch of what wire connects to what. Sometimes wires disappear into holes but if the color is not the same you can sometimes determine which is which by holding each end and tugging.

    If you don't have a simple volt/ohm meter (often called a multimeter) you can find one at any auto parts store or Walmart. Any cheap meter will work but a good one will last forever. One with a continuity setting that beeps is helpful. You will need one later to check your work before plugging the grinder in.

    If the light is wired directly to the motor switch the light switch will be OK for 110v. The current in a small light is very low. If the light switch something like a little rocker switch on the head of the light (most likely), it should be fine and the wiring change should be simple - moving one wire. The metal body of the grinder is probably grounded and there may or may not be a separate green ground wire to the light.

    The thing about working with wiring is without experience it is easy to do something like make a connection or insulate in a way that could come lose cause a problem or hazard years later. If you want to become educated on this (a great idea!) there are many resources. I have a book on appliance repair from the 70s that is still relevant. A friend or even a semi-conscious brother-in-law might be a useful resource. I'm sure there are many how-to/fix-it web sites and YouTube videos. Stay away from videos by the guy with the buck knife.

    JKJ

  6. #6
    Join Date
    Apr 2010
    Location
    Springfield MO
    Posts
    64


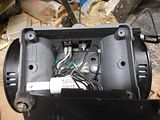
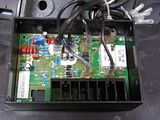
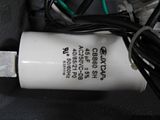
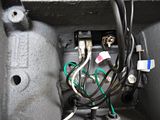
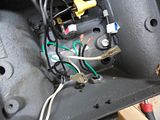
    Well, deed is done. One thing surprising but I guess not is this grinder has a PCB inside. it seems to run the variable speed control for the motor. The space inside was fine but working with the existing wiring was tricky. Everything came apart easily except the factory strain relief. I didn't want to damage the cord to free it, also didn't feel like crimping new push on connectors since I didn't have any around. Disconnected the light from the motor. Interesting to note the wiring to the motor is 18 AWG, 600v 105c, but the crimp nuts from the factory look like copper to copper only. Who knows. Anyway replaced with wire nuts listed for the wires. Next cut the mains wire about half way to the switch, should have left a little more from the switch but it was done. These were copper stranded wire but I could not find a rating on the wires going to the light. The wires coming from the plug are normal hot/black and neutral/white. But after that all wires are black.


    I connected the mains hot with the switch hot and a wire from the light, then did the same with the neutral wires. The light works and the motor works. Only problem is I need the double check that I haven't reversed polarity on the light.


  7. #7
    Join Date
    Apr 2010
    Location
    Springfield MO
    Posts
    64
    Yup, reversed the polarity on the light socket so had to take it apart again and switch the wires around. At least it's marked now.

    Just an FYI for those playing along at home. The outside sleeve of a light socket should be neutral, and the tab in the bottom is hot/switched. Get out your multimeter and set it to Ohms to check which wire is connected to what BEFORE you reconnect it. Saves a little hassle. And despite what people think, polarity does matter, if you reversed the socket every bulb change would mean you're almost touching a live wire, neutral side is not switched.

Posting Permissions

  • You may not post new threads
  • You may not post replies
  • You may not post attachments
  • You may not edit your posts
  •