


Hi guys I frequently browse the forum. Mostly for sharpening stone threads since I am a straight razor user I had a problem buying thousands of dollars worth of stones... kept my favourites and sold the rest and now I want to make some boxes for them. I read Paul Seller's article about making a box and thought it seemed simple enough.
So I picked up a couple old pieces of hard wood and borrowed a few planes. 1 block plane and another bench plane. I borrowed these from my uncle. They are complete crap but I don't have the money for a new one. Anyways they are plastic handled metal ones from china. The base (sole?) of the plane wasn't flat so I ran it on my DMT until it was. Took down the high spots. I then turned my attention to the blade (iron?). Forgive me I know very little. I flattened the back 1" from the edge of the bevel back. I didn't bother flattening the whole blade as it was terribly out of flat. I tried though but my elbow is hurtin'. That should be enough anyways I think right?
I proceeded to flip the blade around and take out the machine marks from the factory on the bevel. I did this with a DMT C. Proceeded to norton fine India. Worked the bevel. Flipped it over and worked the back and be then alternated strokes for a few passes. Stropped on some green paste and then clean leather and the blade is sharp now. Quite a process actually just to flatten the blade...
Here is what I am wondering... how far out of the bottom of the plane should I set the blade? I'm trying to plane wood that is already relatively flat. It's finished too, I am mostly trying to take that off and make it flatter if possible. I might be chasing my tail but I'm having one hell of a time trying to get the plane to take material off. Trying to find a medium between biting into the wood, leaving me with gouges and doing nothing.
I can add pictures if it will help.
Please simplify any woodworking terms that I do not know, so I can understand better.
-Scott

 Reply With Quote
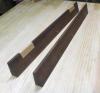


")


