I think that it is roughly 1/2 to 5/8" thick. In other words, not much thickness to be putting in a tenon.Originally Posted by Derek Cohen


 [OP]
Contributor
[OP]
Contributor
I think that it is roughly 1/2 to 5/8" thick. In other words, not much thickness to be putting in a tenon.
 Contributor
Andrew
I would use a 1/4" spiral upcut router bit to create a mortice. Fill with a floating tenon.
Even a 6mm Domino would do the job.
Easy peasy.
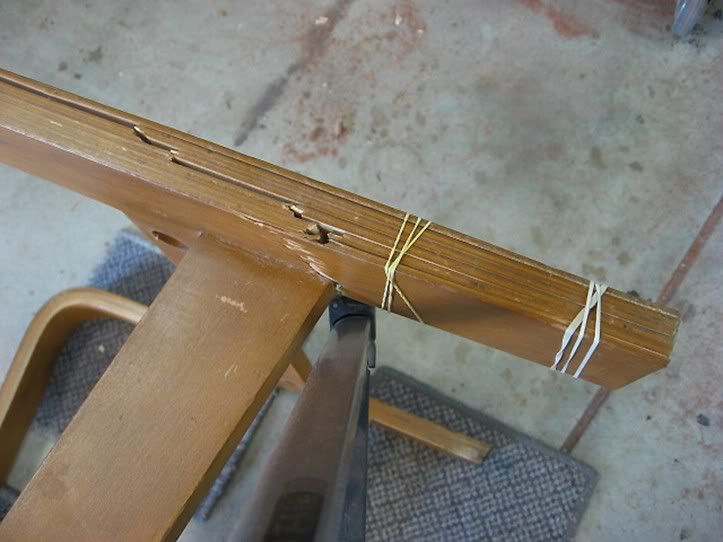
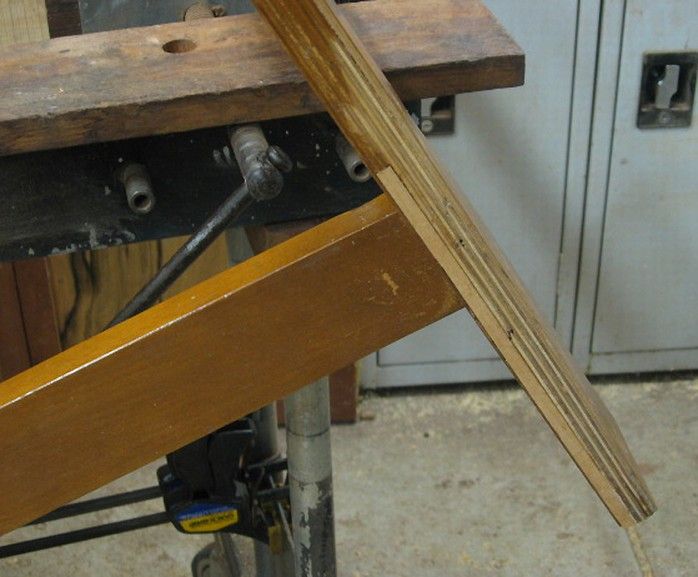
Here is a 3/4" wide chair leg that delaminated after 60 years.
After epoxying the pieces back, there was an obvious weak point ...
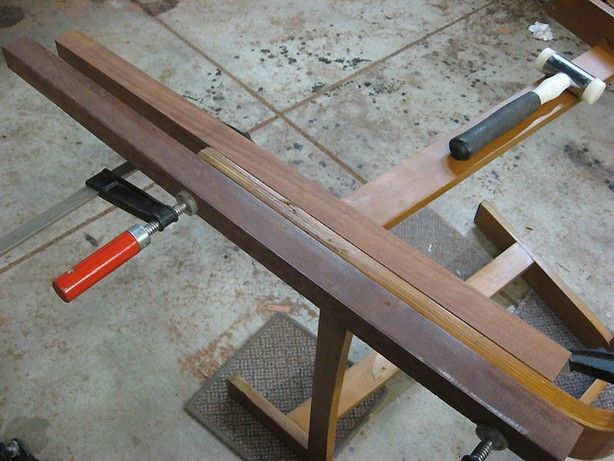
The leg was sandwiched between two straight lengths ...
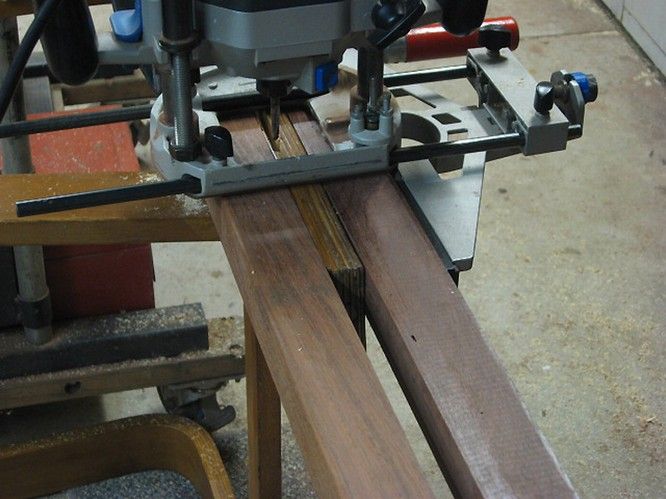
... and a 1/4" mortice routed ...
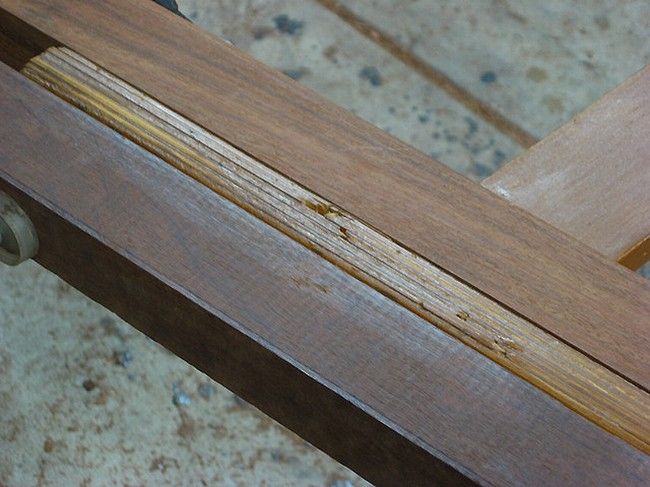
... about 2mm in from the one side. This was filled with Beech ...
The finished repair is today not noticeable ..
Regards from Perth
Derek
[OP]
Contributor
Thanks Stewie, that is right on target!
[OP]
Contributor
Thanks Shawn,
I am doing this for free (because it is a friend). It is from a relative, so there is some attachment.
[OP]
Contributor
I took some time and pondered the fastest way for me to fix this given time, skill set, and capabilities.
I wanted to use a loos tenon and to repair some wood. I did consider rebuilding the broken part, but there is some raised detail that I don't want to attempt to learn..... but a friend did offer to help me cut out a replacement piece on his band saw (and it should probably be bent, another skill I don't really have).
So, since I could not get the piece apart easily, I spoke with the chair owner and.... I decided to drill a hole by hand through the side of the chair and into the top portion. It felt dangerous to me, but, i did it.
First, i used a very sharp chisel to remove things like wax and old glue from previous repair attempts. I removed a small nail put in place to hold this together as a fix. And then I drilled both sides. I did this by eye, and I nailed it on both sides. For me, this was the most difficult part for this particular repair. That is a 1/4 inch hole into a 5/8" wide board.
chair_001_drilled_by_hand.jpg
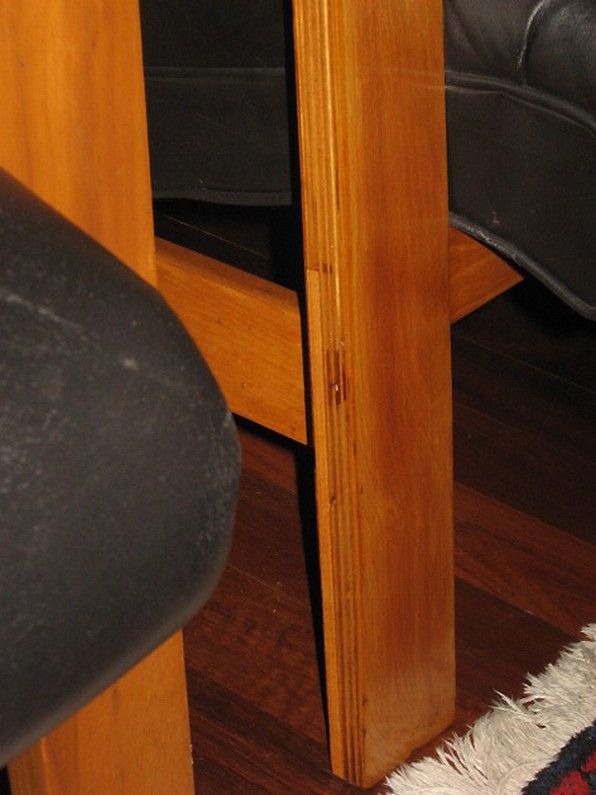
Now, lets put this into perspective, this is how it looks from the back. A more appealing repair might have been to cut that piece out entirely and replace it, but end grain to end grain repairs are always tricky, so I just went with it. Notice how much of the back is simply ripped out. I considered repairing this with putty, but, I decided to simply epoxy the entire joint together, including that large open area.
chair_002_back_view_one.jpg
There seemed to be a lot of built up wax, so I am not really sure what was used to finish this old chair. This is a view from the top of this same joint (no pictures of the other side). You can see where the nail went into the wood.
chair_003_top_view_one.jpg
With all that wax, not much was likely to stick where it did not belong, but, I oped to cover it up anyway. I used a 5 minute epoxy that I felt would be able to handle gaps, and similar.
Chair_004_ready_for_epoxy.jpg
I used a flush cut saw and a sharp chisel. So, here is one side ready for some finish. I think that the entire chair could be refinished, but that would be a lot of work. I mixed some maple and some dark Java, sorry, no pictures of how well it blends, or does not.
chair_005_ready_for_finish_side.jpg
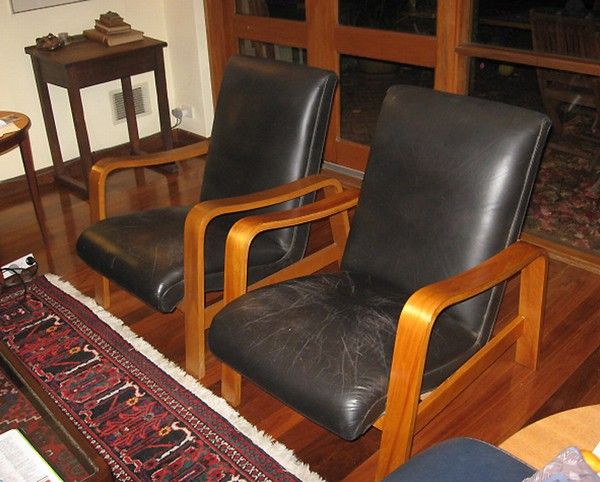
And this is generally how this looks from the front when I was finished.
chair_006_final_fix_front.jpg
It feels very solid, I hope that it holds. The wood was very soft, I hppe that the 1/4" oak dowel, when mixed with the epoxy, is sufficiently stable and that the wood does not blow out the back of the chair.
Thanks to all for the advice.
 Contributor
Thanks for the follow up on this Andrew.
Repairing abused heirlooms is always tricky. Especially chairs that the youngest generation will sit in and then lean back to sit on two legs.
The difficulty always seems to be compounded by someone else's earlier attempt at a quick fix.
jtk
"A pessimist sees the difficulty in every opportunity; an optimist sees the opportunity in every difficulty."
- Sir Winston Churchill (1874-1965)
Member
Looking at the last picture I couldn't tell which one you fixed.
Good job.
Rick
[OP]
Contributor
Thanks.... turns out I fixed both since they were both broken! With one of them, you can tell by looking at the back. The wood for the chair was very soft. I mean scary soft. While dealing with the wood for that back piece, it felt to me to be similar to Poplar. It was scary soft in my opinion for something that is a support structure.
I was really surprised at how strong it felt when I was finished.
 Posting Permissions

 Reply With Quote