


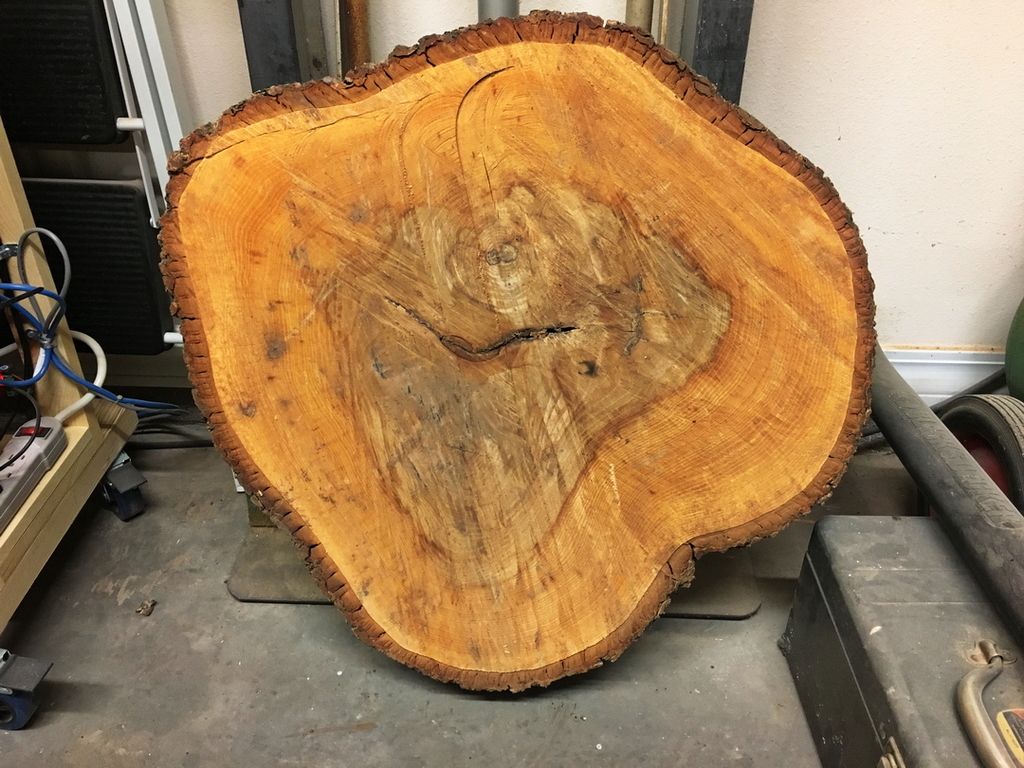
Late last year a friend asked if I could cut a sign for his son-in-law's new business. I was more than happy to do that so he brought the piece of wood by the house and it's been sitting in the shop since then because there were quite a few projects ahead of it (the Curly Maple and Walnut cross being one of them). So yesterday I put the Pecan slice up on the work table to begin mounting it on the CNC.
The piece of wood is from a Pecan tree that had to be cleared from the property before the building could start so this has a bit of sentimental value for them, maybe more nostalgic than sentimental, but either way I have one shot at this. When we first talked he just wanted the name engraved into the Pecan slice. The second time we talked they decided they wanted the logo as it is on the business card and for that to be raised from the surface. Now, in concept anyway, I understand what needs to be done to accomplish that but I had never done it.
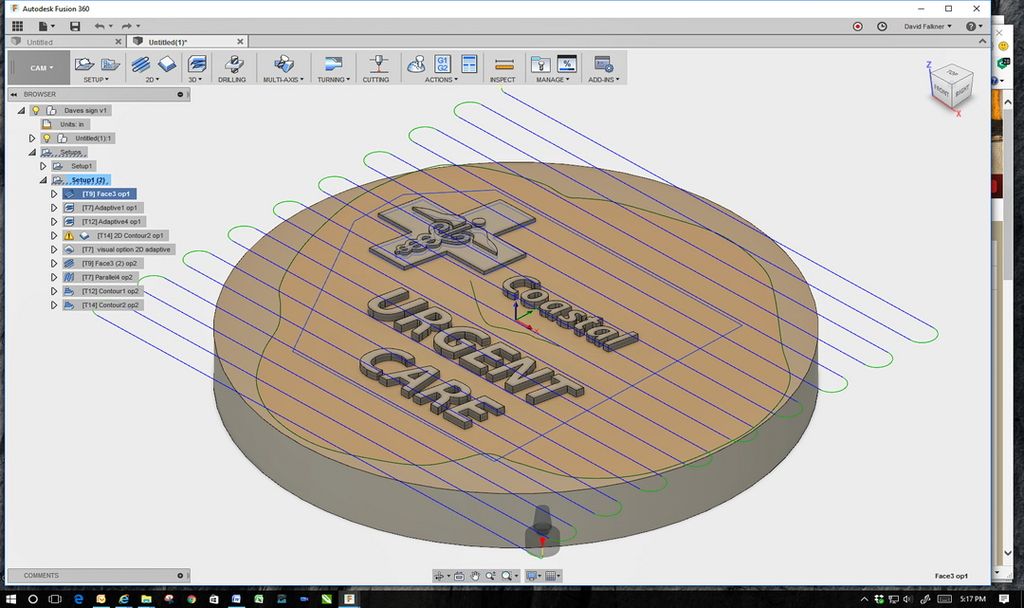
I worked through setting this up in Fusion 360 for what seemed like days - an hour here, two hours there, etc. - and never got comfortable with the generated toolpaths. In the setup for cutting this was leveling the face with a 1.5 bottom clearing bit, about 6 minutes, and from there it got complicated and difficult. In Fusion 360 when I set up the next bit, a 1/2 flat bottom bit, to begin cutting away everything except the logo and letters I never could get the geometry correct. When I got it to a point where it was acceptable the cutting time was over 2 hours and I just didnt think it should take that long.
When I switched to a 1/4 bit to cut what the ½ bit couldnt get to the time doubled over 4 hours. No matter how I set the parameters I couldnt get it set to only cut what the 1/2 bit couldnt get to even though I had from previous operation selected. It wanted to cut the entire piece as though the 1/2 bit was never involved. When I switched to a 1/8 bit the time was truly ridiculous!
I finally turned to the Fusion 360 community where I gave them my files and noted the issues I was having. A gentleman there took the project, reworked my files, and sent his version of how the CAM portion should be set. He did some things in the setup that I still dont fully understand but they seem like theyre going to work.
So here are some photos and minor progress; this is the slice as delivered -
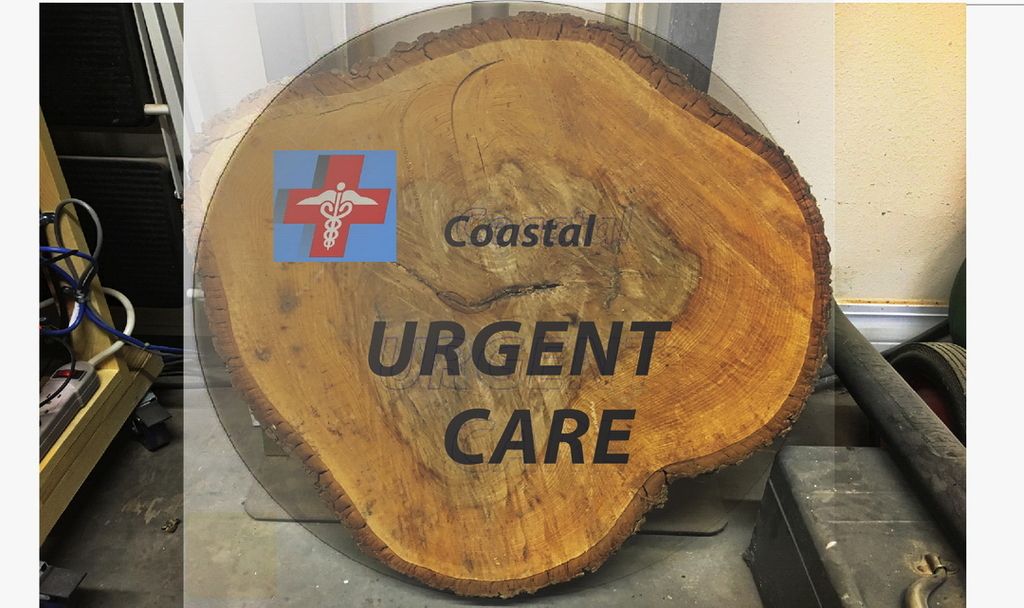
Logo and name from their web site -
I used CorelDraw to overlay the proposed letters and logo for approval. One thing I had to work around is the void in the center -
The initial toolpath for the 1/2" bit follows the approximate outline traced from the photo. Turns out this isn't entirely accurate but at this point, since I didn't draw that outline (the guy from the Fusion 360 community added that and I can't seem to edit it), what this doesn't cut will be a tiny bit on the perimeter so I'll just finish this by hand when it comes off the CNC machine -
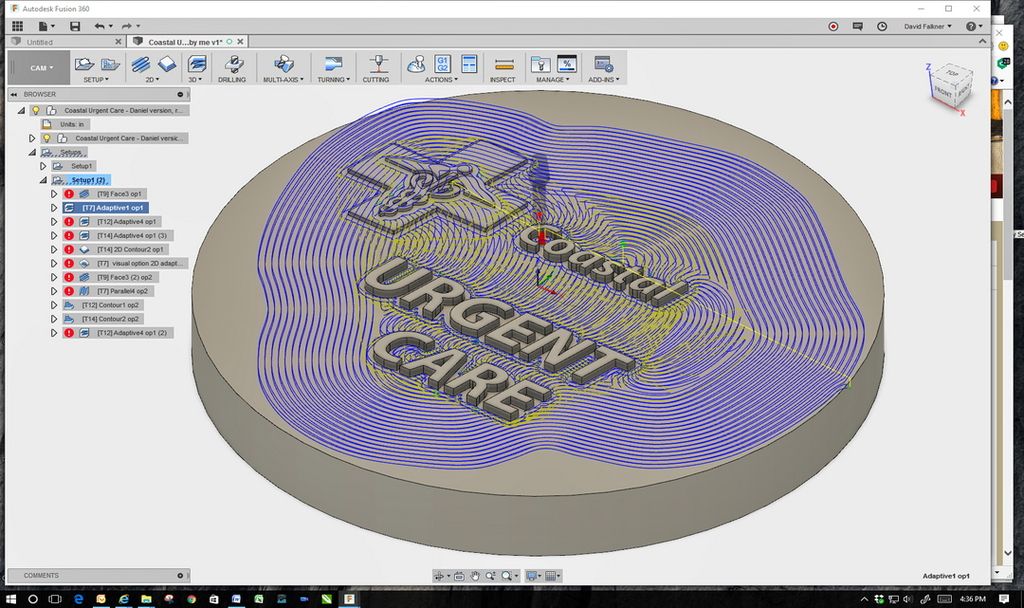
Here's the toolpath for the 1/4" bit, cutting only what the 1/2" bit can't get to -
And ditto for the 1/8" bit, cutting what the 1/4" bit didn't -
One step that was necessary from the start is that I had to draw the logo. I drew this in CorelDraw and exported it as an svg file to import into Fusion 360. I had to keep modifying it because even a 1/8" bit wouldn't get to the entire logo. As it is I'll finish the tiny openings near the bottom with a Dremel, 1/16" bit, and router base. I can control that pretty easily but don't want to risk breaking my 1/16" bit for two little holes.
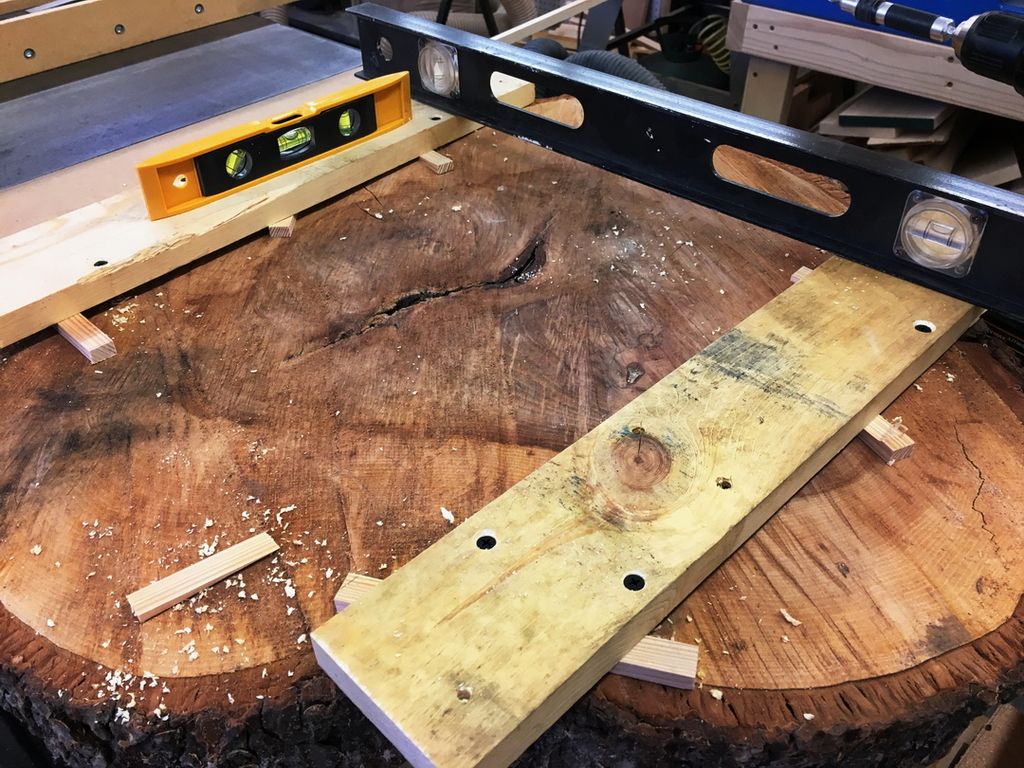
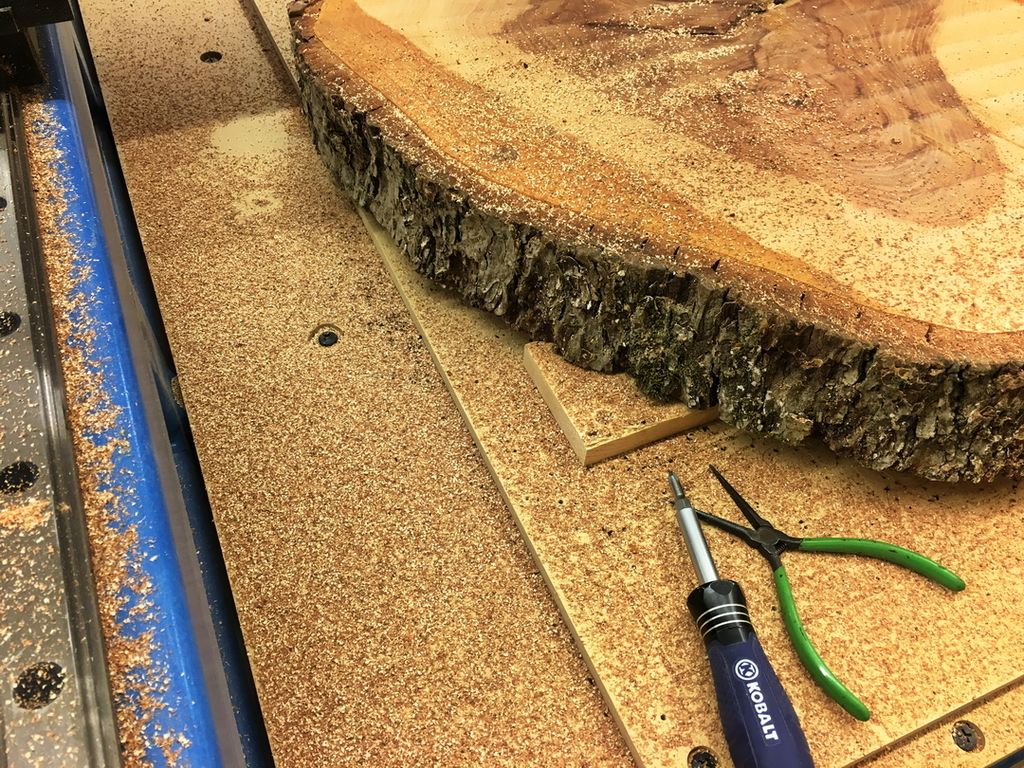
Fixing mounting boards to the bottom of the Pecan slice -
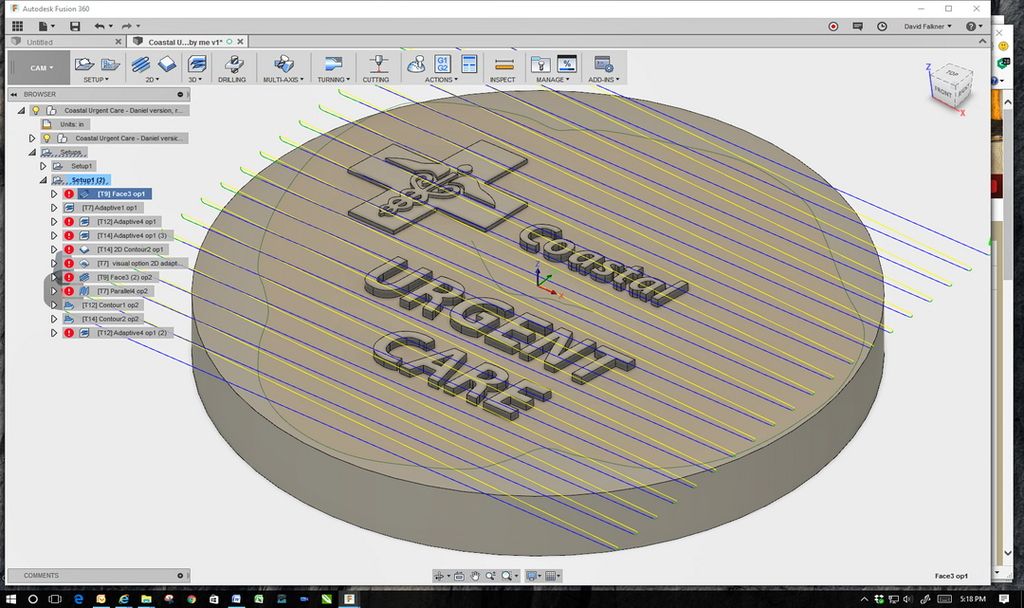
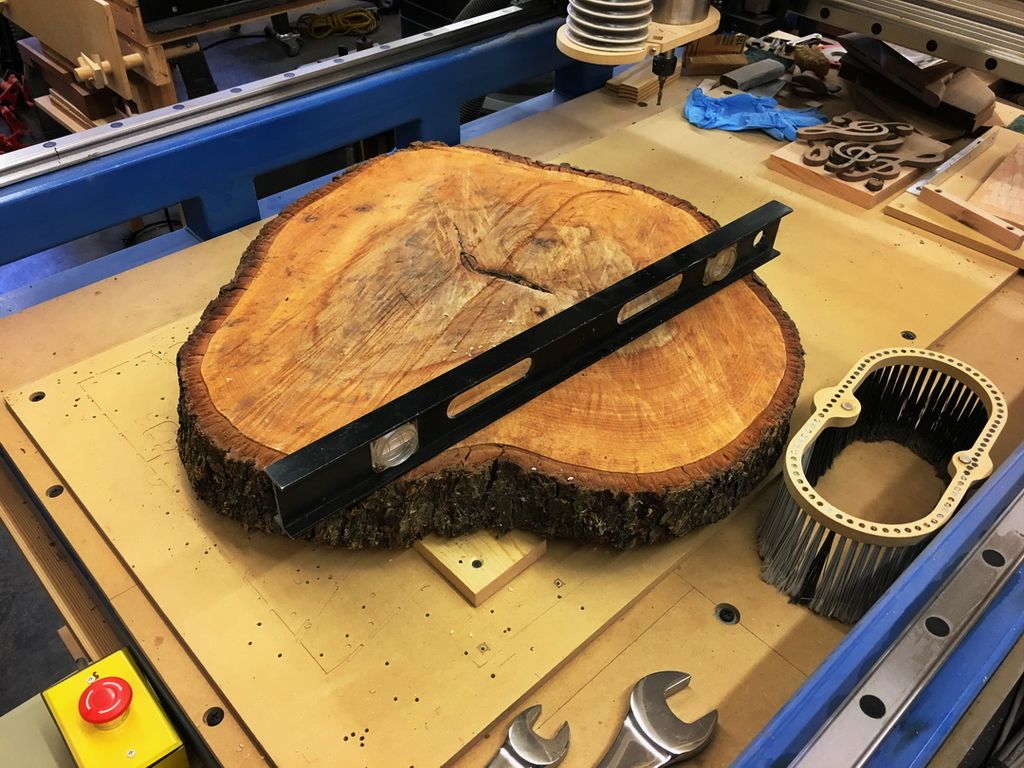
Verifying it is close to level so I wouldn't have to take much off for surfacing -
You can see how large this is relative to the CNC. The CNC frame is a Saturn 2' x 4' from Fine Line Automation but the actual cutting area is 26" x 50". The Pecan slice is 25 7/8" across at the widest point. No problem, right? Wrong! When I did the surfacing profile in Fusion 360 I didn't count on the machine needing turn around room a the end of each pass. The loops at the end of each pass pushed the X axis right into the bumpers and tripped the sensor. So I moved the starting origin point for X about 1/2" to the left but it made no difference. Fortunately the sensor stopped it before crashing into anything at 600 ipm. I toyed with it for a while and finally had to go back into Fusion 360 and tell it the piece was only 24 3/4" wide and then it cleared by 1/8". Since it was only the facing operation and I could see it was going well past the perimeter and it wasn't going to be a big deal, I would just change it back for the letters and logo.
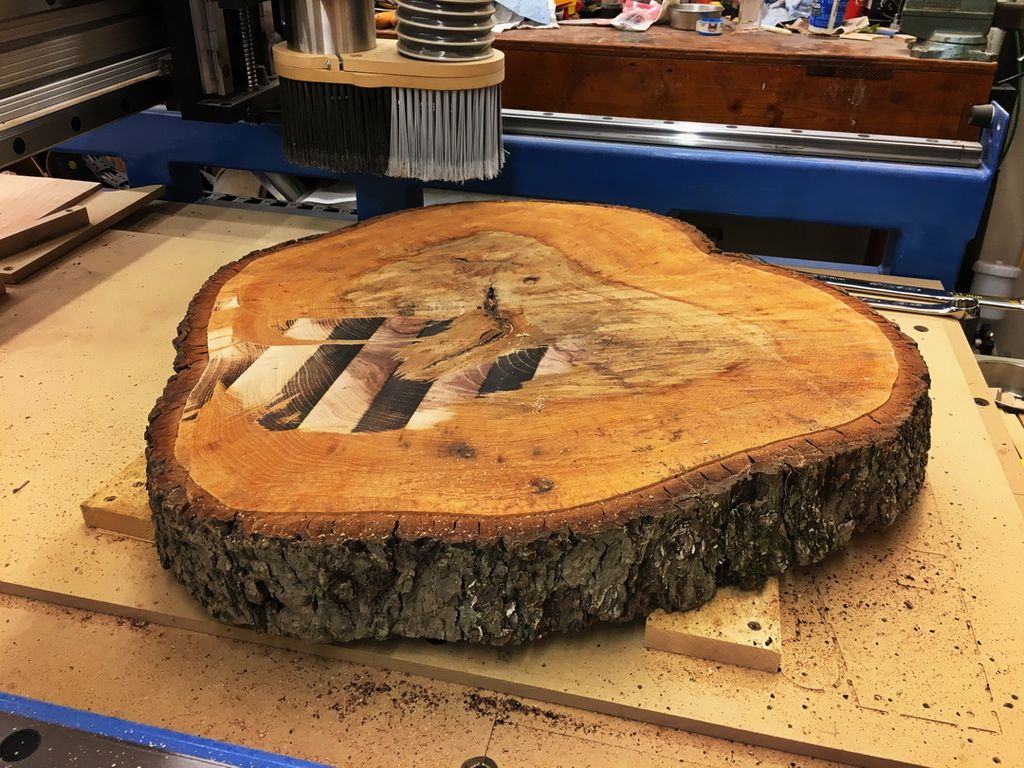
Once I was comfortable with the clearance, having run it about an inch above the Pecan slice to make sure, I set zero, fired up the spindle, and hit go. Two things became apparent right away - 1) even though I had the dust shoe on and DC going, tiny Pecan chips were going everywhere and, 2) the large flat bottom bit didn't like climb cutting at all. It was burning on each pass that was climb cutting but clean on the conventional cutting.
Back to Fusion 360 to change the toolpath to only cut conventional (no loops at the end, rather it raised the Z axis and went back to the other side to cut in one direction only for each pass) -
These tiny little Pecan chips were all the way to the window 15' away, down my shirt, in the keyboard, even under the CNC machine!
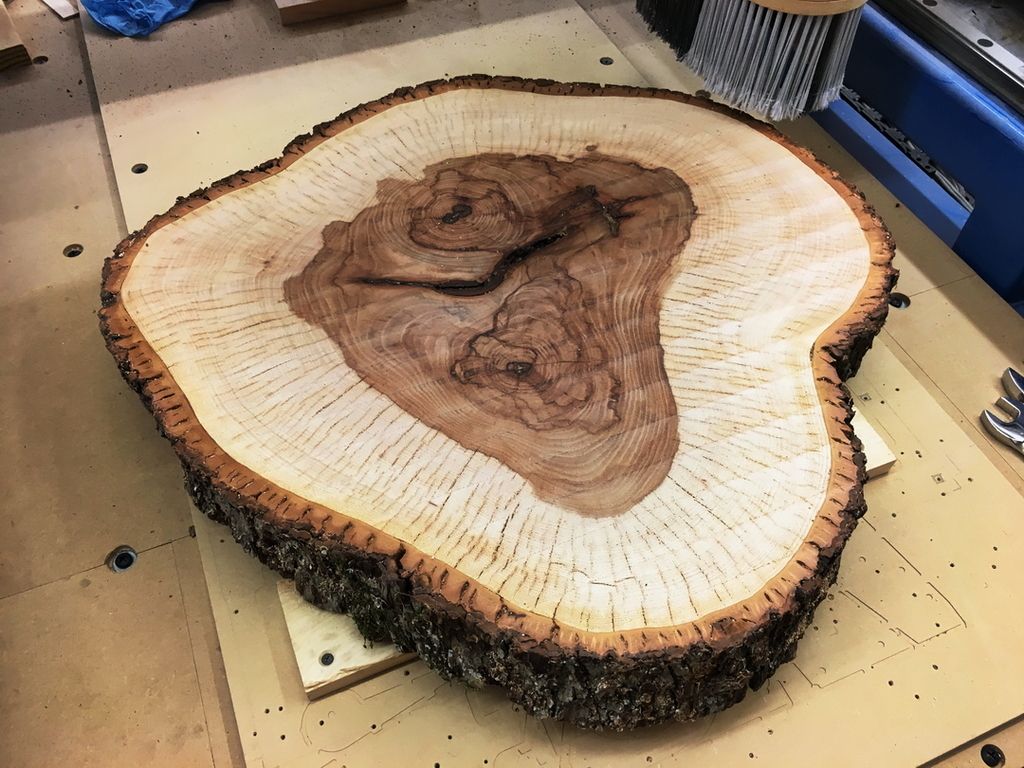
This came out much better and took a few passes but it cleaned up nicely. You can see the lines along the X axis but it is very smooth. It will all be cut away in the next step anyway -
I think it's a pretty piece of wood and with a little sanding should look pretty nice. I have two other jobs that need to be finished by Tuesday so I may pull this off and move on to those, then mount this again for the letters and logo. At this point it won't matter if I take it off but once I start the letters and logo I can't move it, so instead of getting backed into a corner this will probably come off tonight.
More later -
David


 Reply With Quote