Page 1 of 2 12 LastLast
Results 1 to 15 of 30

Thread: Walnut Secretary Build

  1. #1
    Join Date
    Feb 2011
    Location
    Carlsbad, CA
    Posts
    2,229
    Blog Entries
    2

    Walnut Secretary Build

    I was motivated to build this project because I like to look through woodworking books to steal ideas when designing a new project. My intent is to build a sort of “desk” with a bookshelf on top that would allow me to pull out books and lay them open to compare various ideas.

    I’m terrible at design. I like to use the biggest graph paper I can find to layout rough dimensions etc. Most will change during the course of the build, but I like having a visual idea of what I’m going for.
    The most difficult part of the design for me is the shape of the Cabriolet legs supporting the desktop. In a perfect world I’d find a template and use a copy machine to expand it to the size I need. Regrettably, that rarely works out proportionally, which requires me to try and design a template on my own.


    Lumber for this project was waaaay over budget so first step is trying to squeeze as many parts possible out of the available stock in the layout process.


    In the hardwood desert of Southern California where I live the best lumber is in the thickest pieces. This is 8/4, 16’ long piece of Walnut that I’m hoping I can squeeze many of the showpieces of the project out of. First step is crosscutting to rough dimension. As a hand tool woodworker, this 5 PPI crosscut D8 is one of my most valuable tools.


    When I win the lottery, my first purchase will be a nuclear powered bandsaw with maximum re-saw capacity. Until then I’m stuck with my cheesy 14”, under powered bandsaw with shop built table/fence with max re-saw capacity of 5”. It’s by far the most finicky tool in my shop. Seems like I always have to readjust everything to get decent resaw results. Realistically my best bet is just to use some kind of a “point” fence and manually steer the work piece on the layout line because my fence doesn’t work worth a darn.


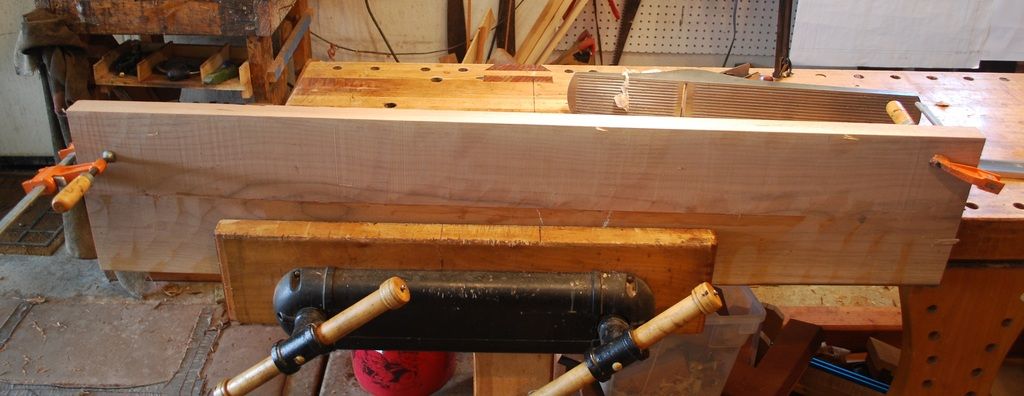
    After re sawing I joint edges for gluing up into a larger panel.


  2. #2
    Join Date
    Feb 2011
    Location
    Carlsbad, CA
    Posts
    2,229
    Blog Entries
    2


    One of my favorite parts of hand tool woodworking is dimensioning rough stock – simple use of saws and planes to hit the layout lines. I like to crosscut, shoot the end grain and then rip to final width. A panel gauge for laying out panel width parallel to a reference edge is one of my most valuable tools. I used to use a cutting blade, but have gradually evolved over time to a 9 mm pencil. For me less likely to follow the grain and at least I have a remote chance of being able to see the lay out line.


    Once I have cut work pieces to final dimensions, one of my favorite things is finish planing the surfaces. Over time I’ve come to appreciate wooden planes (thank you Steve Voight), in my old age their much easier to push.


    The bookshelf portion has 2 vertical dividers. A sector and dividers are easier for me to use to get 3 equal divisions – I suck at math.

    Last edited by Mike Allen1010; 05-19-2017 at 9:11 PM.

  3. #3
    Join Date
    Feb 2011
    Location
    Carlsbad, CA
    Posts
    2,229
    Blog Entries
    2
    Horizontal and vertical dividers have a combination of simple rabbits and sliding dovetails. Here’s the layout for the rabbit.


    LV rabbit plane is one of my best tool investments. Although it takes a little effort to align the knicker and blade, once you get it right it delivers terrific results.


    I typically leave the depth the rabbits a little shallow and use a rabbit plane on the shoulders to get to final dimensions.


    Here’s planning the male sliding dovetails. Sliding dovetails are one of my favorite joints and I wouldn't know how to make them other than using a plane to sneak up on the final dimensions to get to a friction fit.


    Once rabbits/sliding dovetail joinery is done for the vertical and horizontal dividers, a final cleanup of the show surface. Again one of my favorite parts of the build. When gluing up wide panels I always have a few shallow parts that are best cleaned up with a card scraper.


    Here’s pics of the always anxiety provoking glue up. I struggle with whether it’s better to glue up sub-components final to prior assembly, or just do it all at once. My screw up potential is probably the same either way so this time I went for the “all at once” approach.

    Last edited by Mike Allen1010; 05-19-2017 at 9:14 PM.

  4. #4
    Join Date
    Feb 2011
    Location
    Carlsbad, CA
    Posts
    2,229
    Blog Entries
    2


    With the rough casework assembled, next step is 1/4" thick vertical dividers for the bottom section, with rabbits for joining to the adjacent horizontal parts.


    Cross cutting at the bench stop


    I’ve been avoiding what probably should’ve been the first step of making the Cabriolet legs because I have zero confidence the template I’ve laid out will look good in the end. Legs are 12/4 riff sawn. I try and lay them out so grain runs corner to corner, which theoretically will make for a pleasing grain pattern on the show corner. Period examples also have the alternative vertical grain orientation.


    Since my cheesy bandsaw is completely incapable of sawing straight line, getting the leg blanks square requires some pretty significant planing. Here’s a pic of a shop made Jack plane with a fairly pronounced radiused blade, which is helpful in removing thick shavings to get to the final square dimension.


    Thanks for looking. I’ll post more pictures as the build progresses.

    All the best, Mike
    Last edited by Mike Allen1010; 05-19-2017 at 9:27 PM.

  5. #5
    Join Date
    Apr 2013
    Location
    Issaquah, Washington
    Posts
    1,320
    Mike,
    Please continue to post. I really enjoy seeing how others work.
    Mahalo - Bill

  6. #6
    Join Date
    Feb 2017
    Location
    Ramona, CA by way of Phliadelphia
    Posts
    270
    WoW!

    That is great looking, wish I had the patience and talent.
    Please keep the pictures flowing.

    Rick

  7. #7
    Join Date
    Mar 2006
    Location
    SoCal
    Posts
    22,510
    Blog Entries
    1
    Wonderful ride-a-long. Looking forward to more. Beautiful panel BTW.
    "A hen is only an egg's way of making another egg".


    – Samuel Butler

  8. #8
    Join Date
    Sep 2007
    Location
    Longview WA
    Posts
    27,428
    Blog Entries
    1
    Good looking project, looking forward to more.

    jtk
    "A pessimist sees the difficulty in every opportunity; an optimist sees the opportunity in every difficulty."
    - Sir Winston Churchill (1874-1965)

  9. #9
    Join Date
    Feb 2004
    Location
    Perth, Australia
    Posts
    9,491
    Simply magnificent in all respects, Mike! THIS is the stuff fora beg for!

    Many thanks!

    Regards from Perth

    Derek

  10. #10
    Love it Mike.

  11. #11
    Join Date
    Mar 2006
    Location
    Austin Texas
    Posts
    1,957
    Thanks for the update Mike. How are you cutting the sliding dovetail groove?
    David

  12. #12
    Join Date
    Nov 2015
    Location
    Freiburg, Germany
    Posts
    223
    Very nice Mike, thanks for taking the time to document and put your build up in this thread!

  13. #13
    Join Date
    Aug 2013
    Location
    Princeton, NJ
    Posts
    7,293
    Blog Entries
    7
    Awesome! Very excited to follow along with this build Mike!
    Bumbling forward into the unknown.

  14. #14
    Join Date
    Feb 2016
    Location
    Edmonton, Alberta
    Posts
    350
    Beautiful Mike, simply wonderful. I've bookmarked this thread and will be following along and learning lots I'm sure. I love hand tool build photos!

  15. #15
    Join Date
    May 2015
    Location
    NJ
    Posts
    1,389
    Hi Mike, it seems I'm always subscribing to your threads - looking forward to the rest of this one; thanks.
    "The reward of a thing well done is having done it." - Ralph Waldo Emerson

Posting Permissions

  • You may not post new threads
  • You may not post replies
  • You may not post attachments
  • You may not edit your posts
  •