Page 1 of 3 123 LastLast
Results 1 to 15 of 41

Thread: Sliding dovetails. A botched job.

  1. #1
    Join Date
    Jan 2008
    Location
    The Netherlands
    Posts
    2,457

    Sliding dovetails. A botched job.

    Of course I should have used buttons and screws or something simple like that, but I decided that it would be nice to attach the top to my cabinet with sliding dovetails. This would be the goal of this operation (but in this picture the top is lying loose).

    IMG_3943.JPG

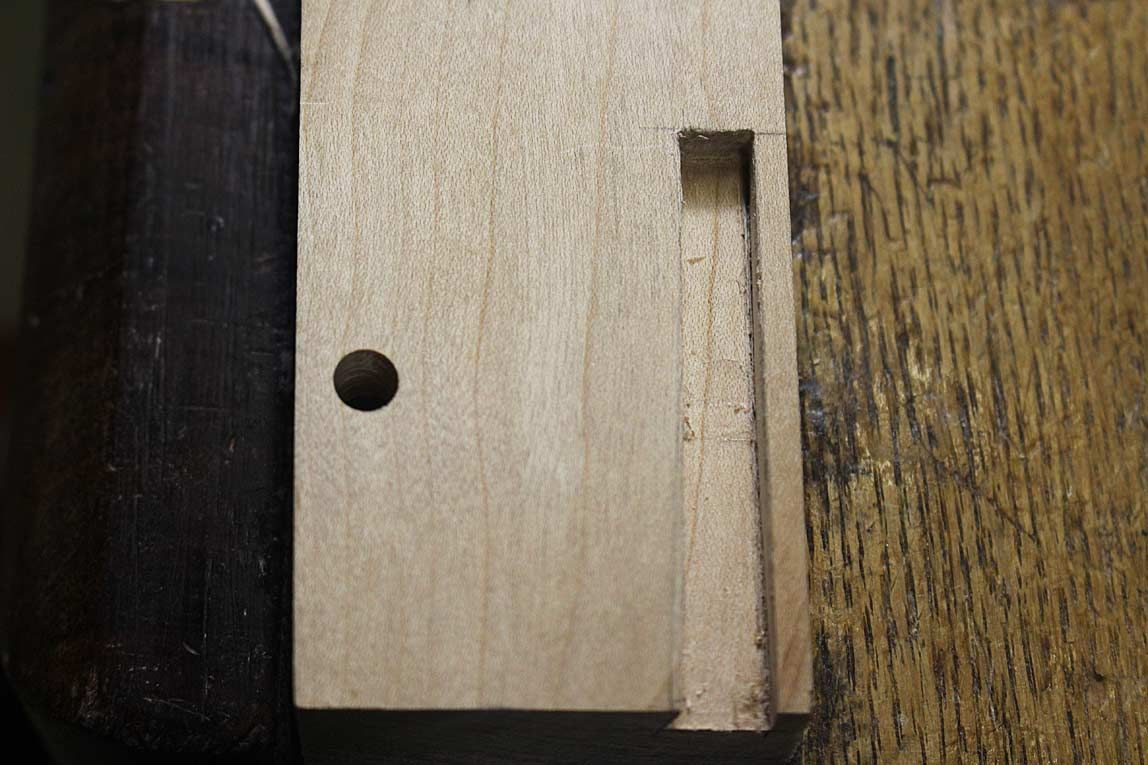
    So I made the first dovetail socket. Cut with a handsaw along a beveled batten.

    IMG_3952.JPG

    Then chop out the waste in between. You can see a third sawcut in the middle, very usefull to get the chips out of the groove!

    IMG_3956.JPG

    Plowplaning to final depth (plus a little extra so the dovetail doesn't bind on the bottom of the groove).

    IMG_3957.JPG

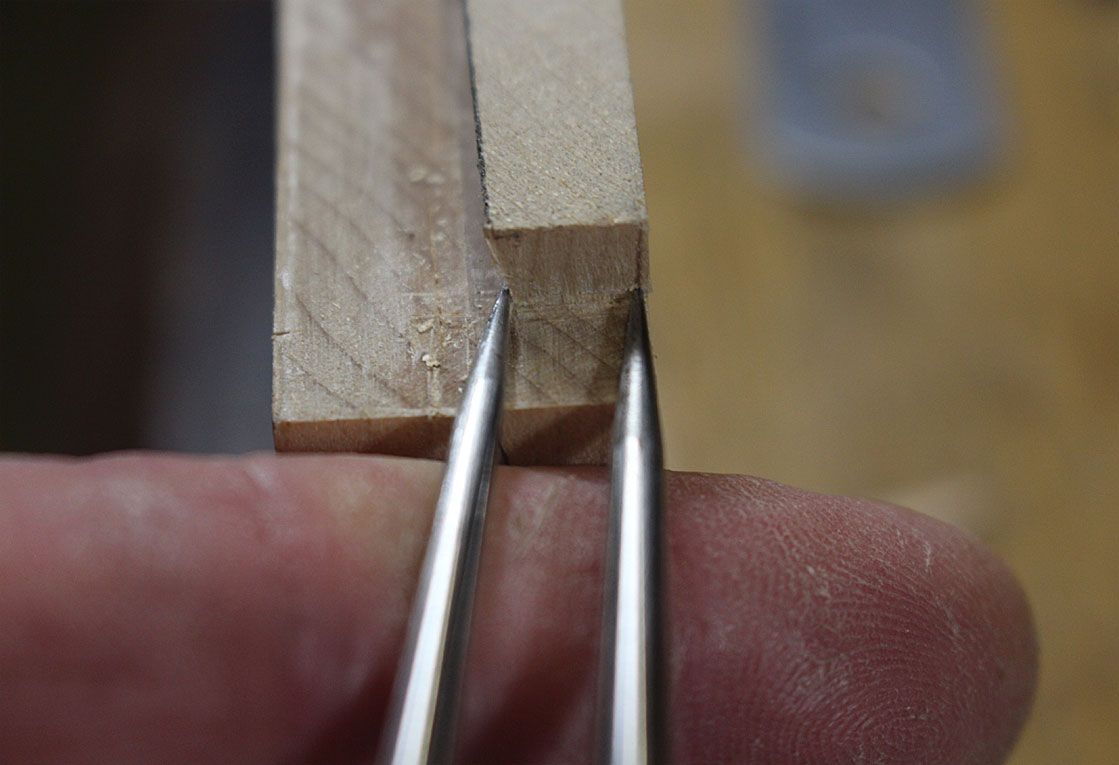
    Then I used my dovetail plane to adjust the width of the tail until it fitted into this groove precisely.

    Next issue was determining the exact postion of the second groove at the other end of the cabinet. This should be positioned very precisely. After much turning around in bed at night I came up with this system to mark the exact position of the second dovetail.
    A story stick is clamped to the cabinet and I mark the exact position of the bottom of the dovetail with the help of this ruler. I do this on both ends of the dovetail. Then the story stick was used to mark the top.

    IMG_3955.JPG

    So, full of pride and fully confident I proceeded to slide the top in place. But low and behold, it doesn't fit at all!

    After much head scratching I found that the front of the cabinet is about 2mm wider then the back. No idea how that happend, I thought I had marked the shoulders of all 4 rails at the same time. But this is now what I am looking at. Wise lesson: When you want to slide a top on two sliding dovetails, then those two should run parallel. They shouldn't diverge, not even by these two miserable milimeters.

    It's easy to adjust the width of the front of the cabinet. Just resaw the tenon shoulders. Not so easy though to decide what to do with the diverging grooves in my top. Starting all over with new wood is NOT an option (the damned thing was expensive enough). I think I am going to glue in a filler piece in the crooked groove (taking care of the correct grain direction) and resaw and chisel the groove. Luckilly it will be the underside so my botch job isn't going to be very visible.

  2. #2
    Good looking Table!

    By sharing your "design opportunity," you've encouraged me to plunge ahead in various projects. Human error is inevitable, and learning from it, diagnosing resolution, and implementing corrections is a far better path than immobilization induced by fear of failure.

    Look forward to hearing how your resolution works out.

  3. #3
    Join Date
    Feb 2004
    Location
    Perth, Australia
    Posts
    9,491
    I think I am going to glue in a filler piece in the crooked groove (taking care of the correct grain direction) and resaw and chisel the groove
    Yes.

    Kees, I always make the male section first, and then mark the socket from this. That is the same as "tails first".

    Anything 2" and shorter I leave the sides parallel. Longer than this and I create a tapered sliding dovetail.

    It also pays to measure the base of the male section with dividers to ensure that you get the dimensions correct.


    The base points are plotted on the surface of the wood. The angled wall is created from that (i.e. inside the "dado").


    Regards from Perth

    Derek

  4. #4
    Join Date
    Jan 2008
    Location
    The Netherlands
    Posts
    2,457
    Yes Derek, I did that too. And that works perfectly. The exact position of the second groove makes things harder, but I managed that one too. But getting the two grooves parallel, that's where things went wrong.

    And yes my sliding dovetails are tapered too. There are two tapered sliding dovetails that need to run parallel.

    Our antique coffeetable has a system of two parallel grooves for sliding dovetails. I am now in awe how they pulled that of, it's not as easy as it looks.
    Last edited by Kees Heiden; 06-21-2017 at 6:53 AM.

  5. #5
    Join Date
    Mar 2015
    Location
    Virginia
    Posts
    1,211
    I think I see the problem. You were using the story stick instead of all of the tools you listed in your "Essential Tools" thread. If only that story stick were ANSI something or other compliant. Oh well, nothing a large credit card can't fix I am sure.

    Seriously though, errors of this sort have certainly happened to me. When I get time to resume work on my office table, item of business No. 1 will be to shorten one of the rails because it "somehow" ended up longer than the other, and I did not notice it until I put all of the parts to the base together for a dry fit.

    The only real advice I can offer is not to make the fix in haste: I have done a couple of fixes when I was angry at myself over the original error, and ended up compounding the error, or creating a new problem somewhere else.

    And I agree when it is done it will look very nice.

  6. #6
    Join Date
    Feb 2004
    Location
    Perth, Australia
    Posts
    9,491
    Ahha!

    Yes, that is harder. And these were the first you made!

    Regards from Perth

    Derek

  7. #7
    Join Date
    Jan 2008
    Location
    The Netherlands
    Posts
    2,457
    I made some small sliding dovetails before for drawer dividers.

    No worry, I am not angry (anymore). I don't think I'll get much work done the next few days and in the weekend I will be in Belgium. So, no hurry.

  8. #8
    Join Date
    Jan 2008
    Location
    The Netherlands
    Posts
    2,457
    Funny thing is, i made a critical mistake waaaay earlier. The two long rails you can see in the top picture are just a bit longer then the equivalent rails in the back. Those should have been the same length. Something which is easilly accomplished when marking all 4 together with a large square. I don't remember what I was smoking back then.

  9. #9
    Join Date
    Aug 2013
    Location
    Princeton, NJ
    Posts
    7,293
    Blog Entries
    7
    Kees, in future situations like this you might consider single sided sliding dovetails. This will allow you to knife the outside edge of each DT.

    Mind you, dovetails holding a top down need to be exceptionally tight. So normally the type of thing where you would fit the batten first, then attach the batten to the cabinet. Knocking together two large sliding dovetails which fit tightly into a top in the way you have arranged to do so requires one of those timber framing mallets and likely will not go well.
    Last edited by Brian Holcombe; 06-21-2017 at 7:45 AM.
    Bumbling forward into the unknown.

  10. #10
    Join Date
    Jan 2008
    Location
    The Netherlands
    Posts
    2,457
    Hmmm, you give me another nightmare Brian.

    At the other hand, it might be a solution too. Rip the dovetail from the top. Fit the now loose dovetail tightly to the groove. Then somehow reattach it in the right spot. Hmmm, need to think this over further.

    Thanks anyways.

  11. #11
    Join Date
    Aug 2010
    Location
    USA
    Posts
    5,582
    Quote Originally Posted by Kees Heiden View Post
    It's easy to adjust the width of the front of the cabinet. Just resaw the tenon shoulders. Not so easy though to decide what to do with the diverging grooves in my top. Starting all over with new wood is NOT an option (the damned thing was expensive enough). I think I am going to glue in a filler piece in the crooked groove (taking care of the correct grain direction) and resaw and chisel the groove. Luckilly it will be the underside so my botch job isn't going to be very visible.
    This should be a fine enough fix for this problem. Verify front and back spacings to the cabinet dovetails are the same AND that the sides are perpendicular to the front as well (at least close enough so that the tabletop overhang is enough to hide any lack of squareness.

  12. #12
    Join Date
    Aug 2013
    Location
    Princeton, NJ
    Posts
    7,293
    Blog Entries
    7
    There is a steep learning curve with sliding dovetails. When I was starting out I had one set which quickly turned to a dado, haha.

    Make two (per side) tenons with dovetails on their ends, fit them in the grooves then mortise them into the batten. Pin them into place. Likely you won't be able to draw bore them, so just clamp and pin.
    Bumbling forward into the unknown.

  13. #13
    Join Date
    Aug 2013
    Location
    Princeton, NJ
    Posts
    7,293
    Blog Entries
    7
    Quote Originally Posted by Pat Barry View Post
    This should be a fine enough fix for this problem. Verify front and back spacings to the cabinet dovetails are the same AND that the sides are perpendicular to the front as well (at least close enough so that the tabletop overhang is enough to hide any lack of squareness.
    The patch is fine, but you can't cut back into it since you would be creating a short grain situation.
    Bumbling forward into the unknown.

  14. #14
    Join Date
    Jan 2008
    Location
    The Netherlands
    Posts
    2,457
    Many thanbks for the ideas. I was also thinking about squaring the existing groove (making it into a wide dado. Glue in a patch. Then moving my attention slighty inwards (towards the inside of the cabinet). Cut a new dovetail groove there, single sided this time. Then I can make a loose dovetail and somhow attach that to the inside of the top rail.

    But your solution brian has the advantage of making use of the existing groove and it will be totally invisible, apart from the pins.

  15. #15
    "two miserable millimeters."

    I feel your pain.

    Please post the fix. I find this valuable.

    Beautiful cabinet.


Posting Permissions

  • You may not post new threads
  • You may not post replies
  • You may not post attachments
  • You may not edit your posts
  •