Page 1 of 2 12 LastLast
Results 1 to 15 of 28

Thread: Sofa Table VI – all the way to completion

  1. #1
    Join Date
    Feb 2004
    Location
    Perth, Australia
    Posts
    9,492

    Sofa Table VI – all the way to completion

    We begin the final session with the table top being glued up. The timber is West Australian Sheoak, and this promises to be something special. When finished, it is a rose gold in colour, darkening over time to a rose-gold-brown.


    While the panel is drying, I get on with finishing the drawer. So far it has been fitted to the table with an extra divider attached with a through mortice-and-tenon …


    We move on to attaching the slips …


    The drawer bottom is trimmed to fit, and then rebated for the slips …


    Here is the completed drawer. Note that the drawer bottom rests below the slips (rather than at the same height). This was to save a few mm of height …


    The rear of the drawer …


    The end of the drawer has a fitted section that serves to prevent the drawer bottom expanding to the rear. Instead, it will expand into a deeper groove at the front of the drawer. The reason for this less typical construction will be clearer later.


    The drawer sides require a little tuning to slide smoothly. The drawer front at the legs was very tight (so that the drawer front appears to be a solid join), and it was necessary to remove some thickness from the drawer sides. This was done with a scraper for control, to avoid planning into the drawer front …


    Here is the fitted drawer …


    …and here is the drawer front …


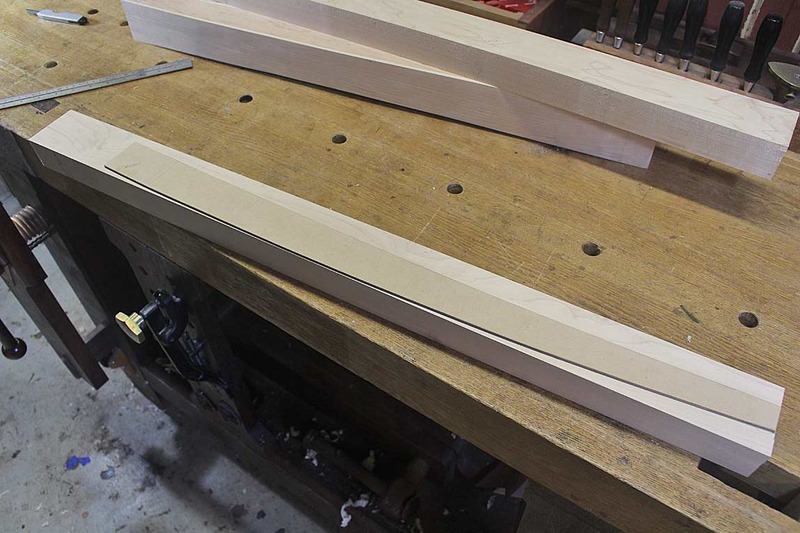
    The table top is ready for shaping. It has been book matched to create a pattern in the figure of a slight boat. This will enhance the outline of the top …


    The top is marked out with the template I made early on, and then bandsawed to shape. Below the ends are planed …


    … and then the sides receive their final shaping with a Mujingfang double iron woodie. The advantage of this plane here is that it can take a thick shaving without tearout regardless of grain direction …


  2. #2
    Join Date
    Feb 2004
    Location
    Perth, Australia
    Posts
    9,492
    The top is smoothed with my favourite Veritas Custom #4 …


    Time to shape the underside of the table ends. The plan is a long chamfer. This is roughed out by traversing with a Veritas LA Jack, using a low cutting angle ..


    When traversing, the far end is bevelled to avoid spelching. However, as on gets to the line, it is safer not to plane over the far end. As a result, a slight wedge is created. This is smoothed down with a skew block plane …


    Finally, the surface is finished with a cabinet scraper. At the same time the inside of the chamfer is fared into the underside of the table top.


    Having spent a little time with the table top on the base, I decided that the curved front could be a little deeper. This was done before proceeding further …


    Time to attach the top to the base. I had earlier cut slots for the buttons with a Festool Domino, and had planned to use the dominos as buttons. In practice the dominos were too short, and so I cut out sections in Maple to the desired length.

    Note in the picture below that I have also attached cross pieces at the inside ends of the base. These were to ensure that the to does not move. They are cross grain to ensure what little movement runs to the inside …


    The final construction is to add a Quaker Lock for the drawer. This is a simple stop that prevents the drawer being extended further than desired. It is attached using the same screw …


    But, since it is spring-loaded, it can also be pressed in and the drawer opened up fully (if you know to do this). This will reveal the hidden drawers behind the hidden drawer J


    Finally!!!! All is completed. The base has been finished in two coats of dewaxed white shellac (Ubeaut), and then received three coats of General Finishes water-based poly, which was hand rubbed. This is to retain the light colour. The top has been finished in Livos Universal Wood Oil. This is a green oil made largely from cold pressed flax seeds. It adds a slight amber sheen to the wood.

    This is two coats. I plan on a few more.


    From the front …


    Here is a side elevation of the shaped ends …


    The drawer slides out this far …


    Thanks for the support along the way. Please ask any questions you like. All discussion welcomed.

    Regards from Perth

    Derek
    Last edited by Derek Cohen; 07-08-2017 at 2:30 PM.

  3. #3
    Join Date
    Sep 2007
    Location
    Longview WA
    Posts
    27,441
    Blog Entries
    1
    Impressive work as we have come to expect Derek.

    The top has been finished in Livos Universal Wood Oil. This is a green oil made largely from cold pressed flax seeds.
    Does this differ much from other linseed oils?

    jtk
    "A pessimist sees the difficulty in every opportunity; an optimist sees the opportunity in every difficulty."
    - Sir Winston Churchill (1874-1965)

  4. #4
    Join Date
    Feb 2004
    Location
    Perth, Australia
    Posts
    9,492
    Does this differ much from other linseed oils?
    Jim, I don't know. I've used Livos for a few years now, and it is brilliant on hardwood with figure. It builds slowly, but never looks plastic. Ends up with a soft but clear finish.

    Regards from Perth

    Derek

  5. #5
    Just outstanding work! And you accomplish this in a 2 car garage, to boot. Impressive, as always.

  6. #6
    Join Date
    Sep 2008
    Location
    N. Idaho
    Posts
    1,621
    Fabulous Derek. I especially like the Quaker lock and am a bit jealous of your access to she-oak, it looks to be a lovely wood. The grain matching for the top and legs are a superb use of 'grain graphics' to compose a piece that is more than it's parts.

    I do wonder what will live in the secret drawer? Oh, nevermind, we must all have a few secrets, no?

    Best,
    Chris
    "You can observe a lot just by watching."
    --Yogi Berra

  7. #7
    Join Date
    Sep 2008
    Location
    N. Idaho
    Posts
    1,621
    Also, I did notice you cut the rabbets on the drawer bottom with the LV large plow plane? Rather than a skew rabbet? Any reason (other than 'new tool in the shop' syndrome)?

    Best,
    C
    "You can observe a lot just by watching."
    --Yogi Berra

  8. #8
    Join Date
    Aug 2012
    Location
    Missouri
    Posts
    2,152
    Derek your work is impeccable. I like everything about your table except the splay of the legs. I like the curve but the splay seems to be a bit too much to me. It may just be the photo and how it shows some of the rear legs and the inside edge of the front legs that makes it appear that there is more curve at the bottom of the leg. Great work.
    Jim

  9. #9
    Join Date
    Feb 2004
    Location
    Perth, Australia
    Posts
    9,492
    Thanks Archie. While I would love a dedicated, large shop where I could swing a cat, I am also aware that I have more space than some. With my car backed out, there is enough space. You should read the latest blog on Lost Tools by Nancy Hillier - then you will see a small workshop!

    Regards from Perth

    Derek

  10. #10
    Join Date
    Feb 2004
    Location
    Perth, Australia
    Posts
    9,492
    Quote Originally Posted by Christopher Charles View Post
    I do wonder what will live in the secret drawer? ...

    Also, I did notice you cut the rabbets on the drawer bottom with the LV large plow plane? Rather than a skew rabbet? Any reason (other than 'new tool in the shop' syndrome)?

    Best,
    C
    Hi Christopher

    In this now not-so-secret-drawer will go all the spare house-car-office keys that one ends up searching for when forget where you store them! Oh, and spare reading glasses! Can you think of more?

    I used a plough plane for the rebate as it was easier to set up accurately for such a small rebate. It is only 3 mm down and across. Both the Small and the Large Plows do rebates really well. The Large has a depth stop with a screw-in-out adjuster, and this makes it easy to dial in the depth. I always plough a shade off the lines and finish with a shoulder plane. In this case, the 1/2" Veritas Small Shoulder was very controllable to use.

    Regards from Perth

    Derek

  11. #11
    Join Date
    Feb 2004
    Location
    Perth, Australia
    Posts
    9,492
    I like the curve but the splay seems to be a bit too much to me.
    Thanks for the kind words, Jim.

    The curve in the legs was created bending a metre long steel rule, and so the curve is actually symmetrical. There is a splay of 1" top-to-bottom, and then a tapered curve. The insides of the legs also have a straight taper. I suspect that the camera distorts this a little. I found it very difficult to photograph accurately. The curve changes in photos (not in person) depending on the height and angle of the camera.

    Regards from Perth

    Derek

  12. #12
    Join Date
    Aug 2012
    Location
    Missouri
    Posts
    2,152
    Thank you for the reply Derek. As I indicated in my post I thought it was camera or shadows. Glad to know it is better in person. Could be my old eyes looking thru trifocals too.
    Jim

  13. #13
    Join Date
    Jun 2008
    Location
    So Cal
    Posts
    3,767
    Nice work Derek,I like the curve if the legs and the flow of the grain lines.
    Very pleasing to my eyes
    Aj

  14. #14
    Join Date
    Feb 2004
    Location
    Perth, Australia
    Posts
    9,492
    Thanks Andrew. Time was spent arranging the legs to folllow the grain. If this was not done, the run out would not only weakened the structure, but would have made the legs look wierd.


    Regards from Perth

    Derek

  15. #15
    Looks like another triumph, Derek! It's beautiful! I love the curve of the legs and the way you tapered the top near the ends. That's another one you really should submit to FWW.

    Fred

Posting Permissions

  • You may not post new threads
  • You may not post replies
  • You may not post attachments
  • You may not edit your posts
  •