Results 1 to 12 of 12

Thread: Mike's Shop is Underway

  1. #1
    Join Date
    May 2017
    Location
    Germany
    Posts
    610

    Mike's Shop is Underway

    It has been a long journey, but it is finally drawing to a close. This project started in March 2017 when I decided to build a shop. It started in half of our two-car garage with a couple of work benches, a contractor saw, router table, and my collection of Bosch tools. Eventually, the shop expanded to most of the garage, which meant the cars were banished to the driveway. It was okay when it was my car out in the elements, but when my wife had to leave her car out, something had to change, and would change. Eventually, we decided I should build the shop in the basement, and that is when the project really took off.

    The shop walls, electrical distribution, and dust collection system are now complete. I contracted out the drywall construction and door installation, but did the rest of the work myself. My friends from work helped move the equipment to the basement before the wall construction began to minimize the chances of damaging the new work. I wish I had taken photos of the stairwell preparation and equipment move.

    I am now ready for the SCM technician to finish the assembly of the Minimax SC2 and commission it. I bought the saw in May 2017, but my basement shop wasn’t ready for it, so I had it delivered to my garage. I told the salesman that the saw was going down a flight of stairs into my basement, so it had to be disassembled as much as possible so it would make the turns and still be manageable by two or three people.

    The shop technician removed the bulky items, like the outfeed table, rip fence, and slider, but left the rest of the saw mostly intact. Even then, the saw proved to be too heavy for us to manage down the stairs. I wasn’t worried about the stairs taking the weight, but there wasn’t enough maneuvering room to make the move safe.

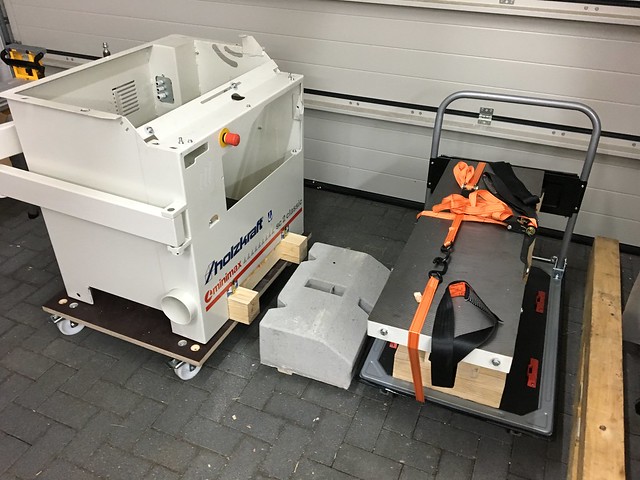
    I decided to disassemble the saw more, and removed the main saw assembly and the very heavy concrete counterbalance. This made three manageable pieces. Here is an image of the three items in my garage waiting to be moved to the basement. I do not have a scale, but the concrete counterbalance was almost as heavy as the cast iron table and motor assembly.


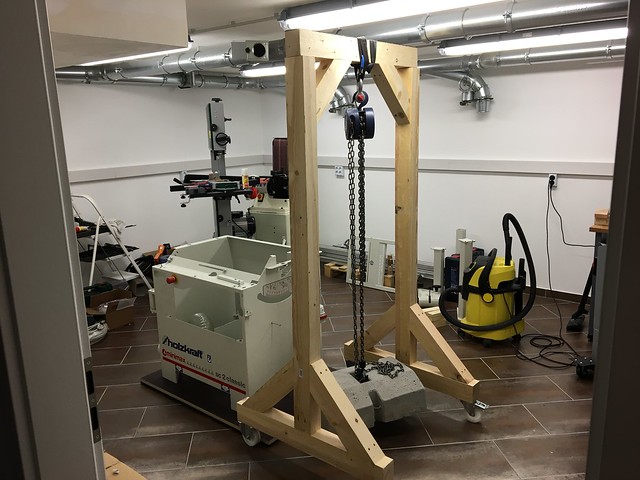
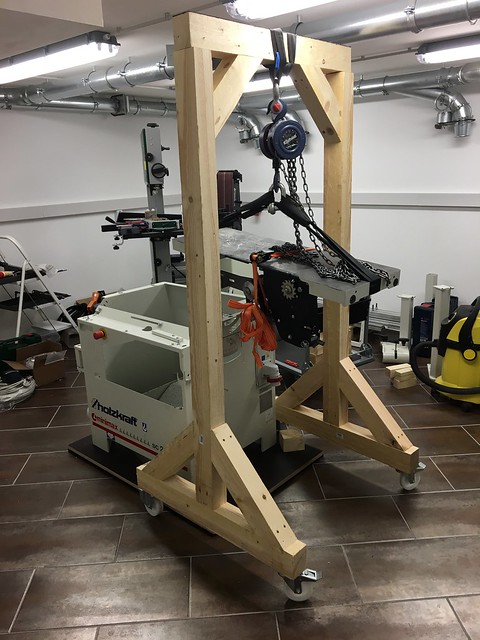
    With the dust collection system and electrical distribution complete, now is the time to place the saw and put it back together as much as I can so the technician can do the rest. I used timber to shore up the stairs while moving the shop equipment to the basement. I salvaged some of the timber, and the casters from the cart I made to move the equipment around, and made this hoist. It is very stable and has two steerable casters on the rear. The concrete counterbalance is ready to hoist.


    Now it is moved into place and ready to be lowered into the saw chassis.


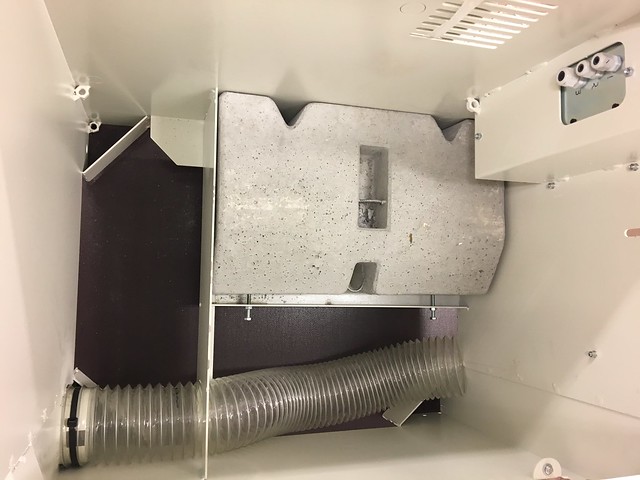
    All secured in place and ready for the next step.


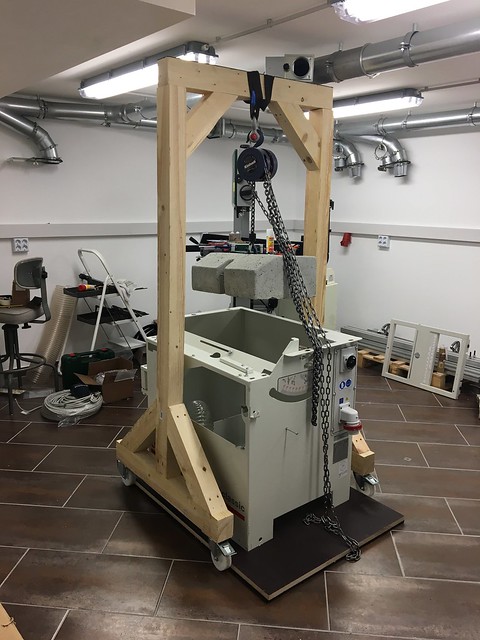
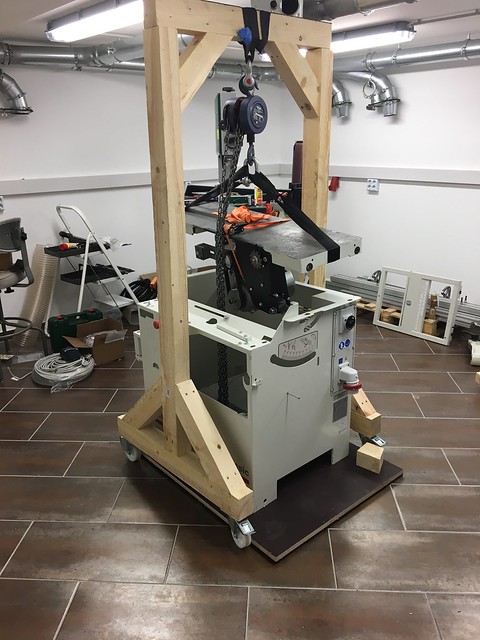
    The main saw table and motor assembly ready to move into place.


    Holding it above the chassis while I reconnect the electrical cables, limit switch, emergency switch, and dust extraction hose.


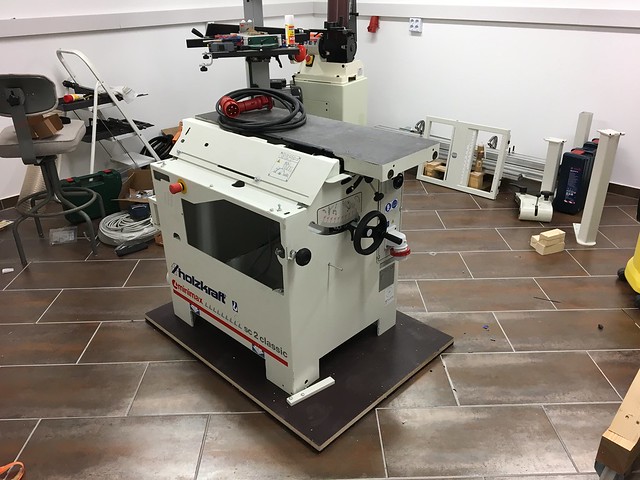
    Finished, sort of. This is how I received the saw and I will let the technician finish the installation. I installed a blade and powered it up to make sure the electrics work, and it works perfectly. Some of the other parts are behind the saw against the wall. The slider is on a pallet. It might be a few more weeks before the technician can visit, but this will give me time to finish assembling the jointer/planer, move a few more tools to the basement, and give half of the garage back to my wife.


    To minimize the vibration of the saw and protect the ceramic tile floor, I used a sheet of 21mm dense plywood as the base for the saw. I glued 15mm rubber insulation mats to the bottom of the plywood. These mats are 60cm x 60cm and are normally used to dampen the vibration from washing machines and dryers. It was not practical to remove the existing tiles or add another covering to the floor, so the next best solution for me was to make a pad for the saw.
    Last edited by Mike Kreinhop; 10-07-2017 at 8:51 PM.

  2. #2
    Join Date
    Sep 2016
    Location
    Modesto, CA, USA
    Posts
    9,976
    I like the idea of a concrete counterweight. I may use the idea for my bandsaw and drillpress. probably not make a full counterweight but just add cans full of old nuts/bolts sitting on a plywood base bolted to the frame base.
    My old drillpress sat up on a small box so it was a comfortable height. I kept the box full of at least 100 pounds of old motors and nails..
    Bill

  3. #3
    Join Date
    Mar 2003
    Location
    SE PA - Central Bucks County
    Posts
    65,850
    Thanks for that! Not only was it a nice chance to share the process, but it also gives a glimpse inside one of these machines that few get to see. Good call on the way you're handling the base and vibration, too.

    BTW, with that tile floor, if you have not already done so, make sure you get a good non-slip coating on it because it's potentially going to be slippery once some sawdust hits it!
    --

    The most expensive tool is the one you buy "cheaply" and often...

  4. #4
    Join Date
    May 2017
    Location
    Germany
    Posts
    610
    Quote Originally Posted by Jim Becker View Post
    BTW, with that tile floor, if you have not already done so, make sure you get a good non-slip coating on it because it's potentially going to be slippery once some sawdust hits it!
    Yes, it is very slippery when anything hits it. I will put some non-stick antistatic runners along the benches unless I can find some decent coating for the tiles.

  5. #5
    Join Date
    Mar 2003
    Location
    SE PA - Central Bucks County
    Posts
    65,850
    I know there are clear, non-slip coatings available for floors...it's just a matter of, um...finding them.
    --

    The most expensive tool is the one you buy "cheaply" and often...

  6. #6
    Join Date
    Oct 2006
    Location
    Bloomington, IL
    Posts
    6,009
    Great saw and lift idea!
    Glad its my shop I am responsible for - I only have to make me happy.

  7. #7
    Join Date
    May 2017
    Location
    Germany
    Posts
    610
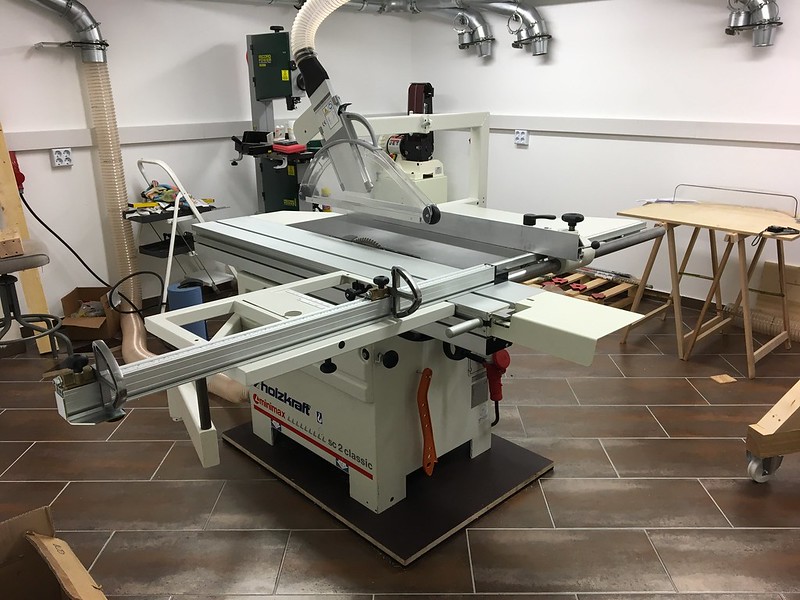
    The technician arrived this morning to finish assembling my saw. As soon as he looked inside, he smiled and told me I had done a good job of taking it apart and putting it back together again. I didn't tell him how I took it down the stairs, but he told me later that the wiring harness had different tie wraps and was neater than SCM does it. Fortunately, this didn't affect what he had to do to commission the saw. Aside from a small break for coffee and pastries, he spent over five hours assembling the other components, making all of the adjustments, making dozens of test cuts, and showing me how to use the saw.


    The technician also brought the optional overhead blade guard and dust extractor (a €700 option) that was in the shop. He found it while rearranging stock and no one in the store could remember why they had it, so they gave it to me. He thinks it was part of a demo unit that was sent back to SCM, but the kit fits several models, including the SC2 Classic. How could I say no?

    The dust collection system works great and there was no residue in the internal 120mm ducting after all of the test cuts, and only a little dust when the guard was not in place to check the cutting action. I checked the trash can and the filter pans to make sure the system worked as expected. I didn't expect to see any residue in the filter pans because he didn't cut that much, and they were clean. The trash can appears to have received all of the dust created by the saw.

    The rest of the shop is still in mild chaos, but now I can start on building cabinets and shelves. This will have to wait until after my next trip to Italy.

  8. #8
    Join Date
    Feb 2003
    Location
    Pleasant Grove, UT
    Posts
    1,503
    That's a beaut of a machine you've got there, enjoy.
    It came to pass...
    "Curiosity is the ultimate power tool." - Roy Underhill
    The road IS the destination.

  9. #9
    5 hours of set up and a free overhead blade guard? What good service!

  10. #10
    Join Date
    Aug 2011
    Location
    New York, NY
    Posts
    2,203
    I think the machine delivery and setup service is pretty typical in Europe. Not so much here in the US unfortunately...

    That blade guard they threw in is pretty stellar. Certainly nicer then the stock one I received with my SC2.

  11. #11
    Join Date
    Mar 2016
    Location
    Florida
    Posts
    1,950
    Want an awesome saw. Anyone wanna buy a PM66 so I can get one of these. LOL.

  12. #12
    Join Date
    May 2017
    Location
    Germany
    Posts
    610
    I'm very happy with the service from the dealer. I bought all of the Schuko ducting from the same dealer, as well as the three blades for the SC2, and the commissioning technician lives two towns away (about ten miles). In addition to SCM, the dealer is also a stocking distributor for Altendorf, Mafell, Festool, and Bosch, so if I get another itch...

    I'm in Italy now, and working about 20 km from the SCM Group production facility in Thiene. I'm going to make some time next week to visit the plant.

Posting Permissions

  • You may not post new threads
  • You may not post replies
  • You may not post attachments
  • You may not edit your posts
  •