Page 2 of 3 FirstFirst 123 LastLast
Results 16 to 30 of 31

Thread: Slab Flattening Router Sled

  1. #16
    Join Date
    Jul 2012
    Location
    Punta Gorda, FL
    Posts
    3,028
    Thanks, John. I made the sides of the sled tall to minimize sag. I suppose I could do what you suggested and double laminate one side. The reason I didn't question the Offerman method of holding the top of the router is I thought there would be times I would be unable to reach the two handles on the router. I thought that's why Offerman used the top hold method.

    When the sled is close to the end, I am able to get my hands on both router handles but once I'm about two feet from the end, I can no longer do that. I could lower the legs on the sawhorses. Will have to do a dry run and see how that goes. But you make a great point the router will catch at some point. Better safe than sorry.

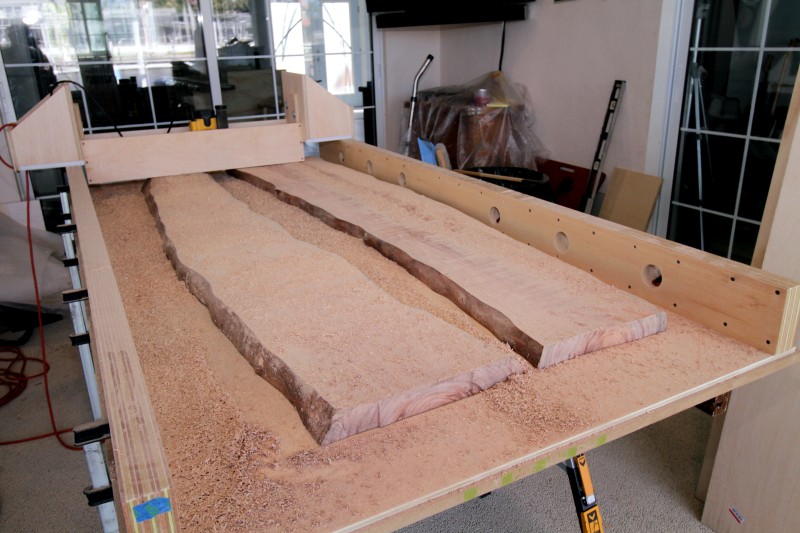
    I was going to make the wing box with a bottom but I didn't think the plywood would slide all that well, even with a few coats of poly. What I was thinking was putting plywood on the bottom and covering it with a sheet of 1/4" UHMW. The reason I made the wing box so wide is I wanted to reduce transferring any imperfections in the rail onto the slab.

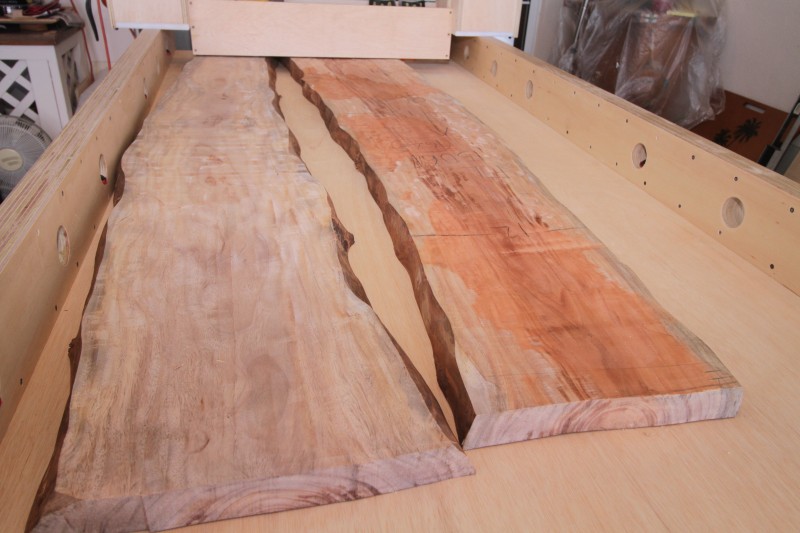
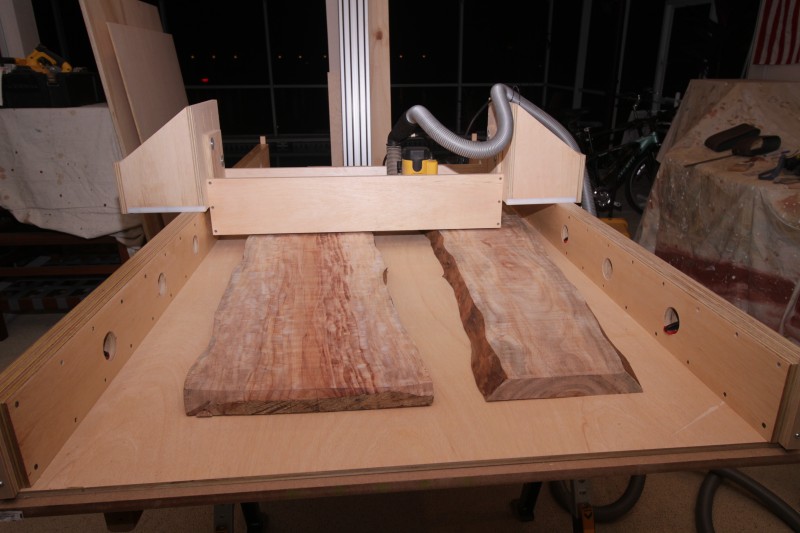
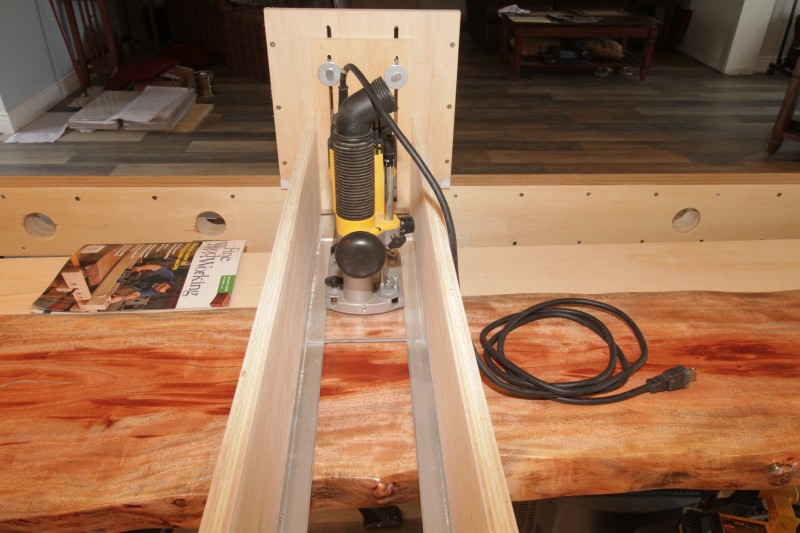
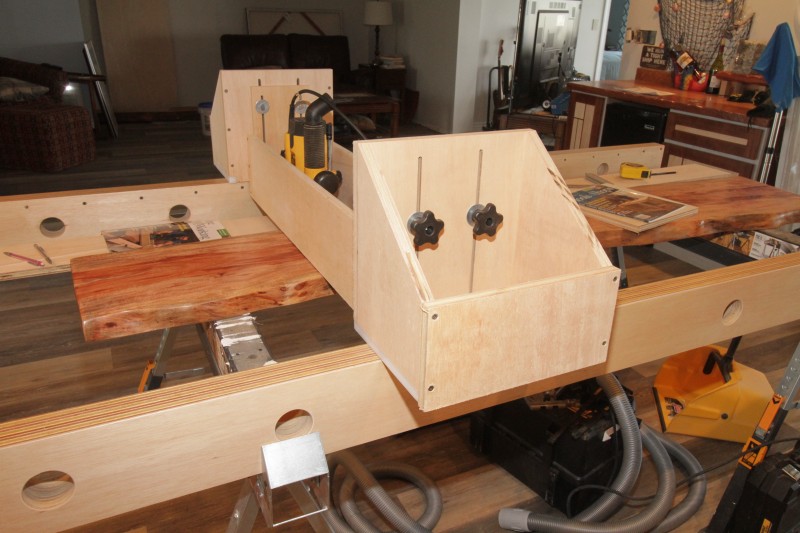
    Anyway, here's what it looks like now:

    The UHMW are only 3/4" wide so that kind of defeats that transfer issue I was trying to address. And it doesn't slide nearly as well as when the UHMW was parallel to the rail.

    One thing I do like is there is plenty of room to tighten the knobs

    But dialing in a precise elevation will be tricky.

    And I will have a good view of the work being done
    “Travel is fatal to prejudice, bigotry, and narrow-mindedness..." - Mark Twain

  2. #17
    Join Date
    Dec 2010
    Location
    WNY
    Posts
    9,715
    Julie, if you go back and look at my crude router sled above you will see that the bottom of the gantry is just a piece of 1/2" plywood. It slides like a dream on the jointed 2 x 4 rails. Flat wood on flat wood. Your laminated plywood rails will have a lot more friction, that's why I suggested putting some flat grain plywood on top of them. Offermans's gantry has a lot of flexibility, but that comes at the price of not being nearly as easy to set up as a simple 3 sided box. You don't need vertical adjustment. You shim the slab up to whatever height needed. From there, adjusting the router bit for depth of cut is all that's needed. And you are already finding out that you can't reach very far across a slab to hold the router, and then have to hold it in one position laterally as you slide the sled down the length of the slab. I would re-engineer that design so that the router can be locked laterally so that all you have to do is push/pull the sled down the length of the slab; make a pass, return, index the router laterally, repeat.

    John

  3. #18
    I agree with John - this design seems overly and unnecessarily complicated. I have spent well over 40 hours in the past couple weeks flattening slabs, and I think your design might hurt you more than it helps. On my sled a couple of posts above, it is about as simple as can be, and I wouldn't want it any more elaborate. I made a couple modifications to my design after using it for a while. First, I stiffened the bottom -- I originally had 1/2 solid wood, then swapped it out for 7/8. I was noticing sag in the base when the router was located in the middle. Second, I cut out reliefs for the router handles on the ends of my box. Third, I added a set of guides to run along the right hand rail because with all the wax, the sled would slip, and almost slipped off the rail. This last modification made a huge difference in my control of the sled. A John mentioned, the only adjustment should be shims for the slab, and dropping the bit at the router. This thing is going to vibrate incessantly, and will likely loosen your settings. And making multiple parallel (coplanar) adjustments will take forever. All of my slabs have been relatively uniform in width (16-22), so I did not build in a lock for the router to the box, just a strong grip. Also, I noticed that when I lowered the bit near the limit in its travel, I noticed that the vibration would loosen the set screw and I would lose my adjustment, so I now set the slab up on a sheet or two of 1/4" hardboard when needed as to limit the compression on the plunge spring.

  4. #19
    Join Date
    Nov 2013
    Location
    Leland, NC
    Posts
    476
    Certainly one way to do it and it will work. But I dunno, there is a lot of construction and it just seems to me that with a few more bucks and a little more time you could build yourself a cnc machine? A cnc would be much more useful down the road for lots of other projects.

  5. #20
    I don't mean to poo-poo the design. I am sure the flexibility of vertical movement is nice in theory. However, in my couple times doing this, the hardest part is insuring the rig is entirely level. Just getting the two rails level was an effort.

    How will you easily keep the gantry level across the width during each adjustment, and how will you insure it does not slip, vertically. (Having not tried your design) I wonder if you'd be better off having a carriage that's vertically fixed. You can just shim the underside of the slab to raise or lower the entire slab as necessary.

    I just used the depth adjustment on my router to affect depth (which also requires attention to avoid any kind of slippage of the bit.

  6. #21
    Join Date
    Jul 2012
    Location
    Punta Gorda, FL
    Posts
    3,028
    While the sled is initially being built for flattening three (3) slabs to the same thickness, I plan to use it for other reasons, like doing stumps.

    With my setup I can raise and lower the sawhorse legs, as well as make adjustments with the sled. I should be able to do a stump like the one above without a lot of additional jig work. Time will tell.

    I agree there will be some things that will need corrections and I'm prepared for that. But the basic concept has been used by someone who has already flattened more slabs than I will ever do and he has not abandoned this concept. I cannot ignore that.

    At about 1:30 into this video, you can see how Offerman deals with areas of the slab that do not allow both hands to be on the router.


    I'll let you know how it goes...
    “Travel is fatal to prejudice, bigotry, and narrow-mindedness..." - Mark Twain

  7. #22
    You are right. I think some of us tend to think our way is the most successful way.

  8. #23
    Join Date
    Feb 2003
    Location
    Conway, Arkansas
    Posts
    13,182
    This is a very good thread!!! Love the content!!!!
    Thanks & Happy Wood Chips,
    Dennis -
    Get the Benefits of Being an SMC Contributor..!
    ....DEBT is nothing more than yesterday's spending taken from tomorrow's income.

  9. #24
    Join Date
    Mar 2005
    Location
    Spokane, Washington
    Posts
    4,021
    I know you are well into your project and may not want to deviate from your plan at this stage, but I was looking through some old Wood Magazine issues the other day, and recall seeing an unusual router sled that took a different approach than most. Rather than providing a track for the router to slide in, this one has the router fixed, and the whole sled moves. Here is a link to a picture of the sled in use. It solves the problem of how to get a good grip on the router as it moves across the board.

    Thought this might give you some additional ideas. If interested, you might be able to find a copy of the magazine at your local library. This sled has a clear acrylic base to let you see what you're doing. Everything else is clearly visible in the picture, so no need to buy the plan, what you see is what you get.

    5 Workshop Projects from 3 Shop-Smart Pros Downloadable Plan | WOOD Magazine

    Dan
    Eternity is an awfully long time, especially toward the end.

    -Woody Allen-

    Critiques on works posted are always welcome

  10. #25
    Join Date
    Mar 2003
    Location
    SE PA - Central Bucks County
    Posts
    65,850
    Quote Originally Posted by Dan Forman View Post
    Rather than providing a track for the router to slide in, this one has the router fixed, and the whole sled moves.
    I was actually just remembering that design right before I started reading your post. 
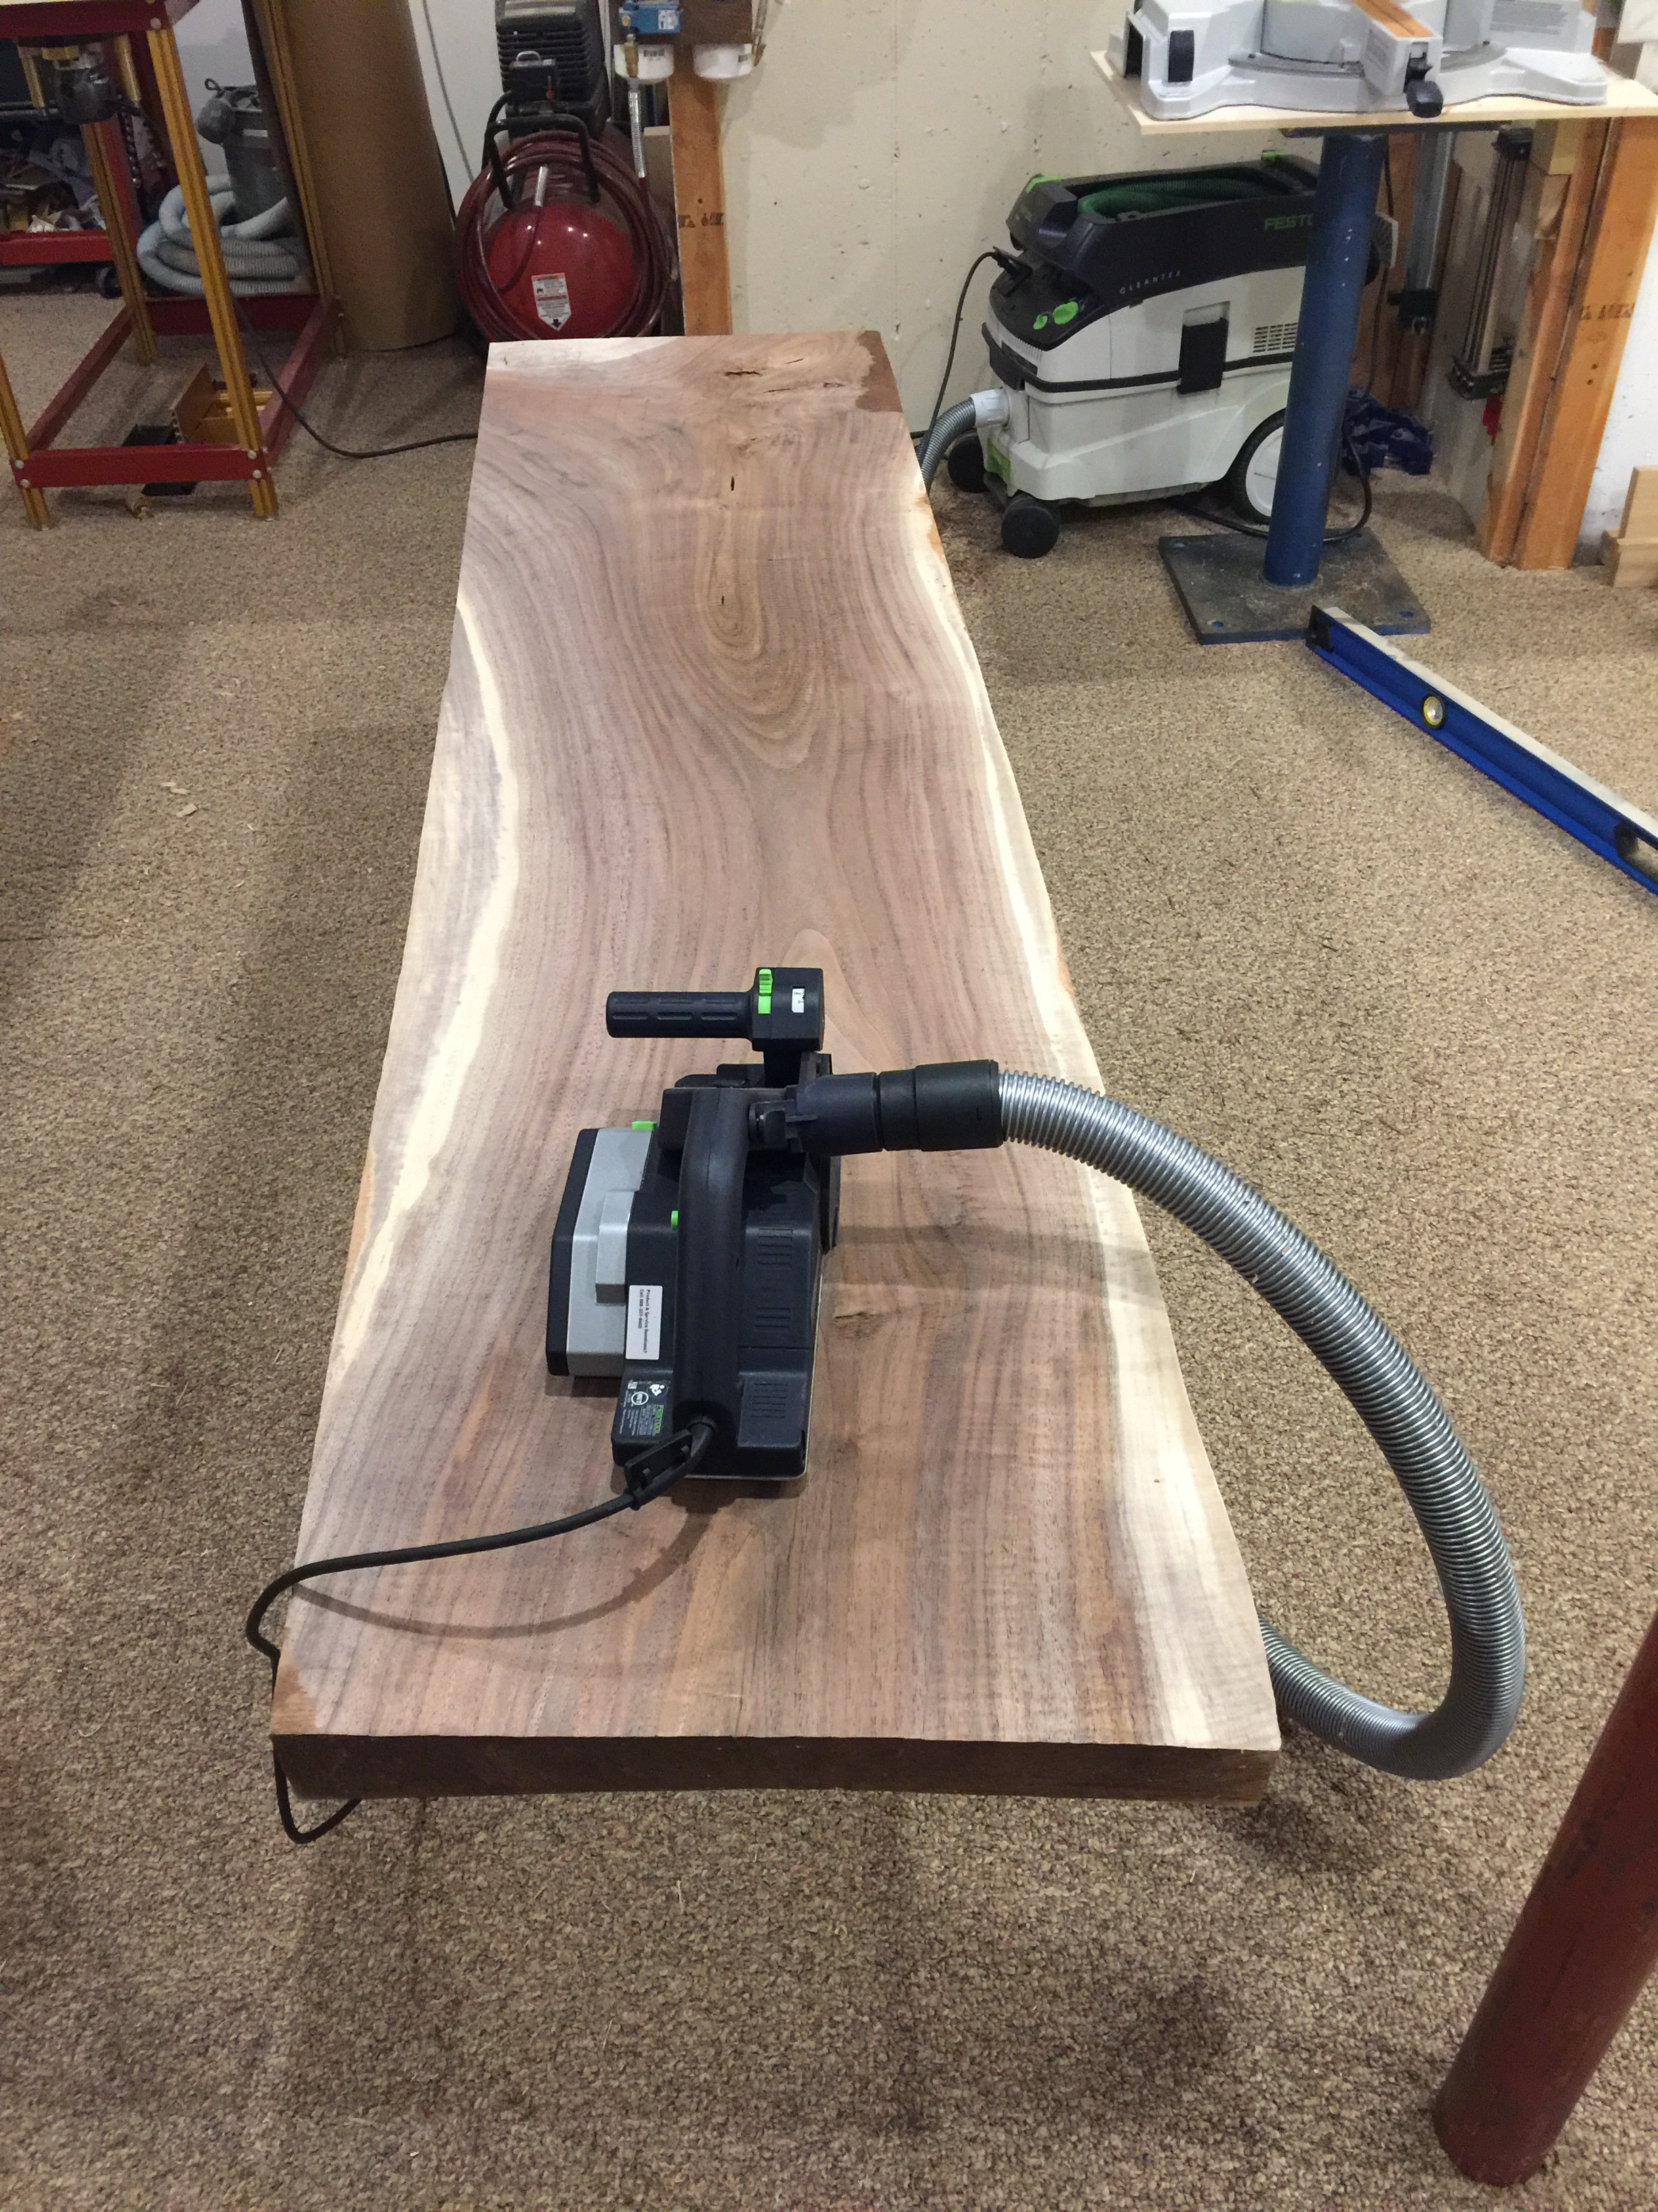
As long as one has the shop space to accomodate the overhang on each pass, things couldn't be simpler and the router is absolutely fixed with no reaching required to "do the deed".
    --

    The most expensive tool is the one you buy "cheaply" and often...

  11. #26
    Join Date
    Feb 2003
    Location
    Yorktown, VA
    Posts
    2,755
    Lots of ways to skin this cat. Here's one in metal, using aluminum extrusions.

  12. #27
    Join Date
    Jul 2012
    Location
    Punta Gorda, FL
    Posts
    3,028
    That's some pretty awesome engineering, Ted! I love it! What I'm doing looks like the Flintstones' version.

    I've been looking at more videos of the Offerman sled and I got to thinking I'm using a smaller router, a Dewalt 621, which is certainly lighter and would therefore be more prone to jumping up. But because it is a lower HP router I plan on taking very light passes. Hopefully that will reduce or eliminate jumping.

    What I'm working on now is creating a method for setting a particular depth so I can easily repeat a given depth in successive slabs. Now it's back to the Laboratree. Igor is waiting...
    “Travel is fatal to prejudice, bigotry, and narrow-mindedness..." - Mark Twain

  13. #28
    Join Date
    Jul 2012
    Location
    Punta Gorda, FL
    Posts
    3,028
    The slab flattening went pretty well. I started by taking about 1/16" at a time. The most I took in any pass was probably less than 1/8”.


    I found I couldn't do both slabs simultaneously because of the width of the sled and the bow of the slabs. The slab on the left was about 1/4” thicker so I took that down first. Then I switched back and forth. Before moving the slabs into place, I made sure the table was perfectly clean.


    The sled rails served to contain much of the waste but dust still got on everything. I found setting the X and Y axis fairly easy by measuring the four corners of the sled off the plywood. The Z axis was a bit trickier. I got it close, but not perfect. It left some track marks. I did a small section running the sled parallel with the grain of the wood and the track marks pretty much disappeared. If I had the help of an assistant I would have run the sled parallel with the grain.
    After the sled work was done, I switched to a belt sander with a 80 grit paper. Then I switched to a 6” RO sander and took that from 80 to 240 grit. From there I went to the card scraper. It took me about a day to do the card scraper work. That wood is so hard it work the hook out on the scraper pretty quickly.


    The above is just before skip planing the bottoms. I flipped the slabs once they were reasonably flat on the tops and knocked down the bottoms so they laid flat on the plywood table. You'll also notice the dust collection hose attached to the router. It picked up all the fine dust and some of the chips. But I didn't start using it until the final passes on the tops. On the third slab I'm going to hook up the Dust Deputy to the vacuum and use dust collection for the entire job.
    Overall I'm pretty happy with how the sled performed. If I were to make a production out of this I would install some means to fine tune each axis. Maybe screw-type adjusters could be incorporated.
    “Travel is fatal to prejudice, bigotry, and narrow-mindedness..." - Mark Twain

  14. #29
    Join Date
    Mar 2006
    Location
    SoCal
    Posts
    22,510
    Blog Entries
    1
    Quote Originally Posted by Ted Calver View Post
    Lots of ways to skin this cat. Here's one in metal, using aluminum extrusions.
    I was hoping Ted would chime in. Love that thing Ted.
    "A hen is only an egg's way of making another egg".


    – Samuel Butler

  15. #30
    Join Date
    Aug 2013
    Location
    Princeton, NJ
    Posts
    7,294
    Blog Entries
    7
    There is another way to do this kind of work. I have done this by hand for years now but needed to step up the pace for a kitchen design that required me to move along a bit faster than I normally do.

    I work a slab by first creating a reference face, I do this by planing it flat. I plane it flat using winding sticks and a straight edge to determine when the surface is first free of twist then flat.

    The most recent slab had a pretty decent cup to it, but light on the twist. I removed material from the center of the board first to bring down the hump. Doing this usually allows the board to relax a bit and the opposite side becomes less cupped as material is moved (not dramatically but a measurable amount).


    Once the reference face is created I can use that to either mark off of (for a very wide board) or for a narrow board it can be sent through a thickness planer. Once the opposing side is finished I flip it over again and remove material from the original face. The result is near perfect.

    If a thickness planer is not wide enough I can simply plane to my mark, then take over with hand planes.

    Without rushing this remains and exceptionally fast process that is highly accurate. The board is checked numerous times throughout the process for twist, bow and cup.

    [img]
    Bumbling forward into the unknown.

Posting Permissions

  • You may not post new threads
  • You may not post replies
  • You may not post attachments
  • You may not edit your posts
  •