Page 2 of 2 FirstFirst 12
Results 16 to 29 of 29

Thread: Anyone Ever Built The FWW Miter Saw Station?

  1. #16
    Join Date
    Jul 2012
    Location
    Punta Gorda, FL
    Posts
    3,028
    Close to done. Doors and drawers need to be made. I'm thinking instead of two large doors and adjustable shelves, to add more drawers below. Then a few tweaks to the alignment and it should be good to go.


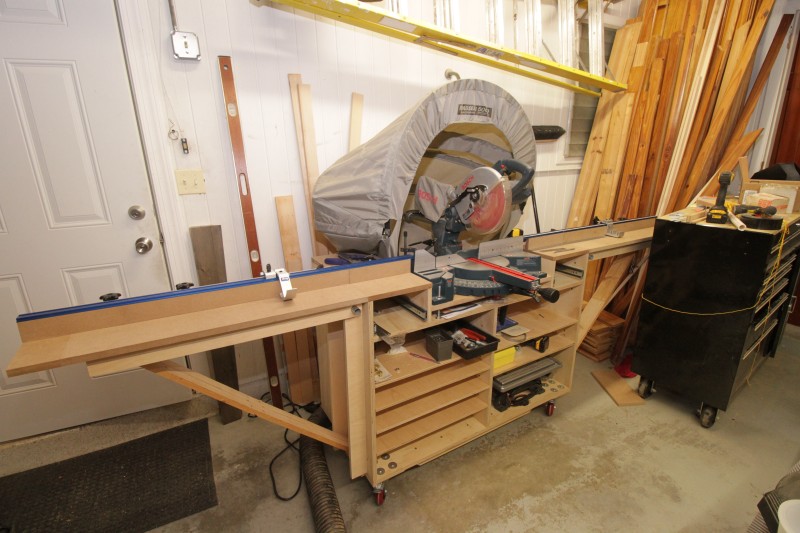
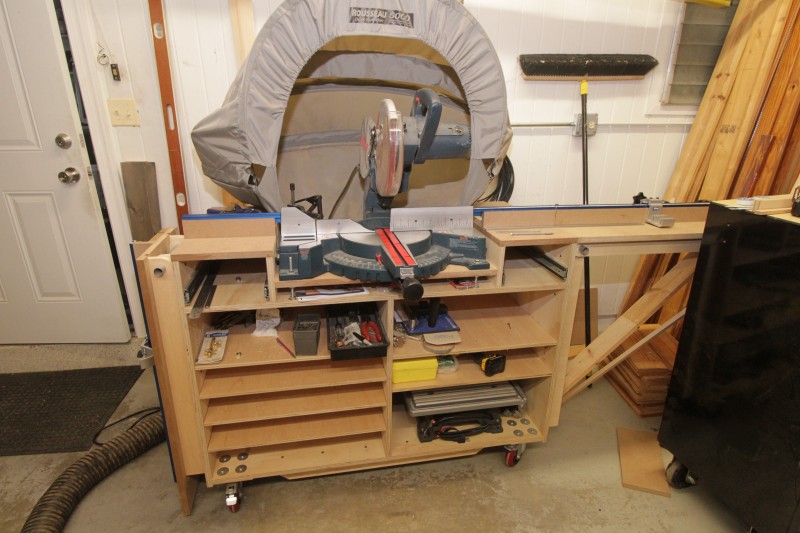
    The two short wings on either side of the saw (above the small drawers) are adjustable. I allowed for adjustments to be made wherever possible.


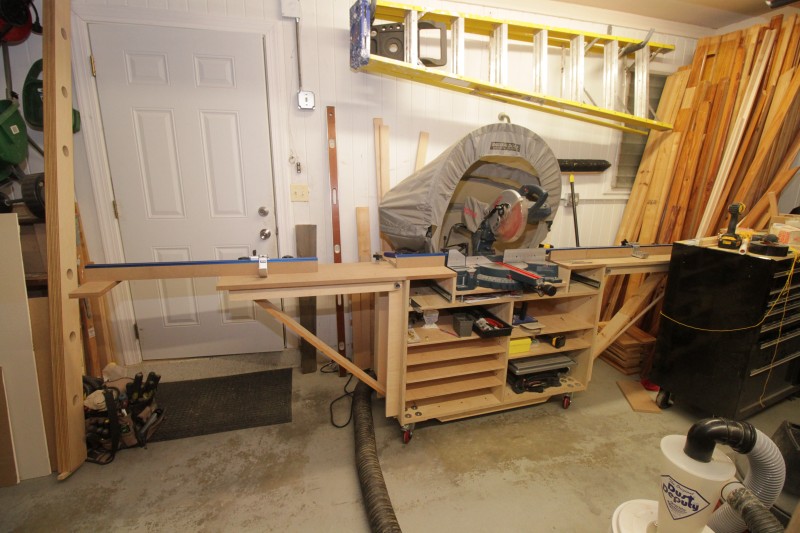
    After I clear out that pine in the corner, I'll run some duct to the DC so I won't have 4" hose laying on the floor. Connected to the DC, it does a pretty good job of pulling in the dust while cutting.


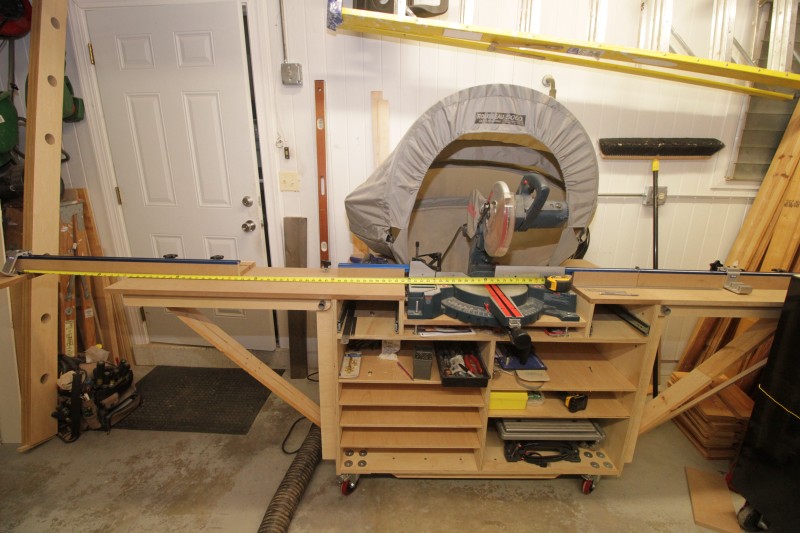
    Fully extended, it's a bit over 6' from the stop to the blade. The extension adds 15".


    With the wings folded down, it's about 60" overall.

    I goofed up on setting the tape rule, neglected to recheck the instructions and had the 3/8" set back reversed. Trying to get the fold-away braces perfect - so they are hinged at both ends - defeated me. So I opted for a wood brace at the bottom, like I had on the last one. Other than that, it wasn't bad. When I have more time, I'll glue up some laminate to the wings and dress it up a bit.
    “Travel is fatal to prejudice, bigotry, and narrow-mindedness..." - Mark Twain

  2. #17
    Join Date
    Mar 2003
    Location
    SE PA - Central Bucks County
    Posts
    65,827
    That looks really great!

    Personally...it would be all drawers for me. Easier access and easier organization. IMHO...
    --

    The most expensive tool is the one you buy "cheaply" and often...

  3. #18
    Join Date
    Dec 2016
    Location
    South West Ontario
    Posts
    1,503
    The bottom of the cabinet is a poor design with the wheels. The added bracing may be adequate but building a braced box even 4" high and moving the wheels outside the box would be far more rigid. You can avoid dado joints altogether. I build lots of cabinets.
    Build two 4" inch fully enclosed braced boxes with one face of each having an overhang. The vertical members abut the back & sides constrained by the overhang. No dadoes. No flex. Your cabinet will be rock solid. Yes you loose some 'shelf' space but that should be very secondary to the fundamental design.
    The bottom overhang can be doubled up at the sides and the wheel stance widened for stability.
    Last edited by William Fretwell; 12-13-2017 at 8:50 AM.
    ​You can do a lot with very little! You can do a little more with a lot!

  4. #19
    Join Date
    Jul 2012
    Location
    Punta Gorda, FL
    Posts
    3,028
    Quote Originally Posted by Jim Becker View Post
    Personally...it would be all drawers for me. Easier access and easier organization. IMHO...
    I agree, Jim. Since the cabinet is almost two feet deep, drawers make the most sense. But I have some things, like that tile saw, I have no place for and it has squatted on the bottom of that cabinet. Squatter's Rights demands at least one door!
    “Travel is fatal to prejudice, bigotry, and narrow-mindedness..." - Mark Twain

  5. #20
    Join Date
    Mar 2003
    Location
    SE PA - Central Bucks County
    Posts
    65,827
    Yes, for the tile saw, a door would make sense.

    Of course, my tile saw is in it's original box in the upstairs of my shop. I actually used it a year ago when I renovated my older daughter's bathroom. I probably should just sell it since I don't see any potential need for it in this house ever again...
    --

    The most expensive tool is the one you buy "cheaply" and often...

  6. #21
    Join Date
    Jul 2012
    Location
    Punta Gorda, FL
    Posts
    3,028
    Quote Originally Posted by Jim Becker View Post
    Of course, my tile saw is in it's original box in the upstairs of my shop. I actually used it a year ago when I renovated my older daughter's bathroom. I probably should just sell it since I don't see any potential need for it in this house ever again...
    IMHO, the best place for a tile saw is on the store shelf, out of reach for people like me who hate doing tile work.

    I've had the chance to use the miter saw setup and it sure is nice to be able to easily cut pieces to the exact same length. I made some cuts with the old portable stand, which had a stop feature, and they were off by 1/16" to 1/8". That portable stand was sold the other day.
    “Travel is fatal to prejudice, bigotry, and narrow-mindedness..." - Mark Twain

  7. Julie: You have about 9 months of use of the mobile stand so how about an update. The lessons learned are always of value to those of us that are considering going down the same path. I have never seen the tent hood to capture the saw dust. What was your source for this? How do you adjust things so that the left/right wings are co-planar with the miter saw? If you only use it as a cut off saw, this may not be important. If you want to produce finish quality cuts, then alignment is very important.

  8. William: I am not sure I followed your suggestions on increasing strength of cabinet. Is this what you had in mind? I obviously left out some joinery details. Clarification would be appreciated.
    sample cabinet.jpg
    Attached Files Attached Files

  9. #24
    Join Date
    Jul 2012
    Location
    Punta Gorda, FL
    Posts
    3,028
    Quote Originally Posted by bennie blackwell View Post
    Julie: You have about 9 months of use of the mobile stand so how about an update. The lessons learned are always of value to those of us that are considering going down the same path. I have never seen the tent hood to capture the saw dust. What was your source for this? How do you adjust things so that the left/right wings are co-planar with the miter saw? If you only use it as a cut off saw, this may not be important. If you want to produce finish quality cuts, then alignment is very important.
    While I've used the miter cabinet seen in the last picture I posted countless times, I have not done anything yet with drawers or doors. That being said, there have been a few times I've used the slide feature but for the most part the length the drop down wings add have been sufficient for most all the cuts I've made. I think maybe twice I've used the slide out extensions.

    The Kreg miter saw fence kit is dead-on-accurate but the drop down wings caused me to cut the steel tape and that tiny gap can cause measurements on either side of the break to be inaccurate. I decided to make the wing section the accurate side and measure inside of that.

    The dust hood is something typically used on the jobsite. I decided to see how it works in my shop. It's MUCH better than anything I had before. To capture more of the dust, I clipped canvas on either side the dust hood, from the MS. That really helps keep dust contained. I still don't have the DC ductwork piped to the MS. So sometimes I do without the DC. The dust hood still works pretty well.

    As for co-planar, a little rap here or there get things in place.

    The most practical and often used feature for me has been the wings. The ability to place long boards on the table and cut them easily is something I can't live without. I've cut 8/4 x 12 hardwood over 9' long and 5/4 x 14 hardwood 8' long and those wings made my work so much easier. I just had to flip the latter to finish the cut. Really, all the rest is just fluff.
    “Travel is fatal to prejudice, bigotry, and narrow-mindedness..." - Mark Twain

  10. #25
    Join Date
    Mar 2009
    Location
    central tx
    Posts
    592
    Quote Originally Posted by Jim Becker View Post
    That seems to be a nice setup, especially when portability is required. Clearly, it's easy to customize, too. I think what you're doing with yours is great.

    I built the more fixed Chris Gochenour cantilevered miter station from FWW a number of years ago. After watching the Timothy Wilmots videos that show his shop setup, I'm now honestly considering "re-skinning" it with a Festool MFT style top for more versatility. I'd still keep the miter saw in the same position, but change the tables to incorporate the 20mm hole setup as well as the clamping setups. It's only money... heh...heh...
    Hey Jim - old thread but do you have a link to the cantilevered station? Considering doing this instead of the roll around cart.

  11. #26
    Join Date
    Mar 2017
    Location
    La Mirada, CA
    Posts
    35
    Here’s the link to the FWW mag. The plans start on page 52.

    http://wood.woodtools.nov.ru/mag/fww/fww_2010_209.pdf

  12. #27
    Join Date
    Mar 2003
    Location
    SE PA - Central Bucks County
    Posts
    65,827
    Quote Originally Posted by Thomas Crawford View Post
    Hey Jim - old thread but do you have a link to the cantilevered station? Considering doing this instead of the roll around cart.
    I'm sorry, but I don't have a link to the original article, but I believe it was in FW.
    --

    The most expensive tool is the one you buy "cheaply" and often...

  13. #28
    Join Date
    Mar 2009
    Location
    central tx
    Posts
    592
    Quote Originally Posted by Jim Becker View Post
    I'm sorry, but I don't have a link to the original article, but I believe it was in FW.
    Thanks, I found an old copy on Amazon to order for a few bucks.

  14. #29
    Join Date
    Mar 2003
    Location
    SE PA - Central Bucks County
    Posts
    65,827
    It's a great setup, Thomas, and having the free space under it with the ability to support shelving and lumber storage up above is excellent.

    "That said"...over the years, my needs have changed and I've occasionally had thoughts of removing it to better accommodate more shop space. I only use the miter saw for rough cutting to length most of the time since I have my slider for precision stuff. Otherwise, I mostly "put stuff" on the surfaces, such as the CNC cutters I'm using, my sander, my hand-tool chest, etc. Lumber storage moved upstairs long ago. The only thing that's kept me from operationalizing that change has been a reluctance to tear out something that I put a lot of myself into early on in my shop and woodworking experience. At this point, I could likely be better served by a smaller more portable miter saw setup that I can tuck out of the way and have that space back for assembly and finishing since the CNC machine usurped some of the space I previously dedicated to that kind of thing.
    --

    The most expensive tool is the one you buy "cheaply" and often...

Posting Permissions

  • You may not post new threads
  • You may not post replies
  • You may not post attachments
  • You may not edit your posts
  •