Page 1 of 3 123 LastLast
Results 1 to 15 of 42

Thread: G0490 Jointer - Initial Impression with PICS

  1. #1
    Join Date
    Sep 2005
    Location
    Sacramento California
    Posts
    332

    G0490 Jointer - Initial Impression with PICS

    I have been lusting after a larger jointer for a while now. When I got into
    woodworking a year and a half ago I bought a 6" GI which, while it served its
    purpose well, I often found myself ripping boards then prepping them and gluing them
    back up. I always figured one day I would get a 10" (perhaps an Oliver or such),
    but when the Grizzly came out with the 586 last year it got me thinking. Then
    when I saw the 490 I couldn't resist and ordered one at the beginning of this year.

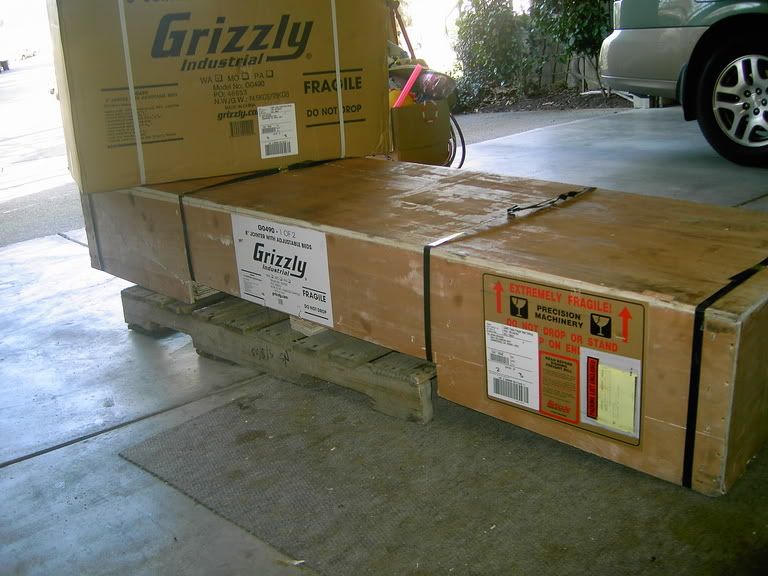
    It arrived late Wednesday. It was delivered by Fedex who were
    great. They had a pallet jack and wheeled it right into my garage.


    The jointer arrived in 2 boxes. A cardboard box contained the base (with motor attached,
    pedestal switch, and wheel assembly. The other was a solidly built wooden crate, with the jointer
    bed bolted to the bottom and the fence and the rest of the parts packaged securely in thick
    styrofoam. The first thing I noticed was that this seemed to be packaged very well.

    Now before I go on (and people see the rest of the pictures) let me explain. LOML agreed that one
    of the cars would now go outside and free up shop room so I didn't have to wheel this beast
    around. 2 nights before the jointer arrived a neighbors car was broken into during the night,
    so LOML insisted that I put the car back in the garage for a few nights. But it is headed back
    outside very soon.

    After putting the base together and opening up the crate I tried to lift the bed to see how heavy
    the bed assembly was and was shocked that I could not lift it on one side by myself (no I did not lift
    from the end of the table), so I started walking the neighborhood to enlist the neighbors for help.
    I found 2 other dads (who were kinda excited to check out the new toy) and we tried to lift. That is
    when one of them noticed that the bed was bolted to the bottom of the box (which I was standing on
    when trying to lift it initially), boy did I feel like an idiot. After removing the shipping bolts the
    three of us were easily able to lift the bed onto the stand (2 relatively strong people should have no
    problem with this).

    Putting the jointer together was a very simple and straightforward process which should take about an
    hour and a half working at a moderate pace. All of the predrilled holes were right on the money and all of
    the attachments were accurate and easy to align. After an hour or so everything was assembled and
    with only the wiring left to do, at which point my services were required elsewhere for dinner with the
    family, correcting homework, bedtime stories etc. so the final wiring had to wait until last night (the
    kids bedrooms are directly above the garage so once they are in bed work in the shop has to cease.

    During assembly I noticed the following -
    The finished parts of the castings looked good. The bed had a few (very small)
    cosmetic scratches, but the fence was very nice. By cosmetic I mean that you couldn't see any gaps under
    a straightedge and you could not feel the scratch with your finger, it was only visible, the bed in general
    has been ground to a very nice smooth flat finish.

    The bed and fence were dead on true (as checked with a straightedge not a dial indicator). It was nice
    to see that the fence was very true when set at 90 degrees along its entire length. My previous jointer
    (which was a very nice machine for a 6") had a first fence which was not true. If I set it to 90 at the middle
    with a square, the ends of the fence were out of alignment by about 1/16th of an inch. General replaced
    that fence with one that was better but it was still not completely true. It is nice to see that Grizzly
    produced such a large fence that is true across its entire length (oh yeah did I mention how tall the fence is,
    this will be REALLY nice when edge jointing). The unfinished parts of the casting on the sides of the bed
    are comparable to other machines in this class that I have seen, however, the unfinished parts of the fence casting
    were a little rougher,


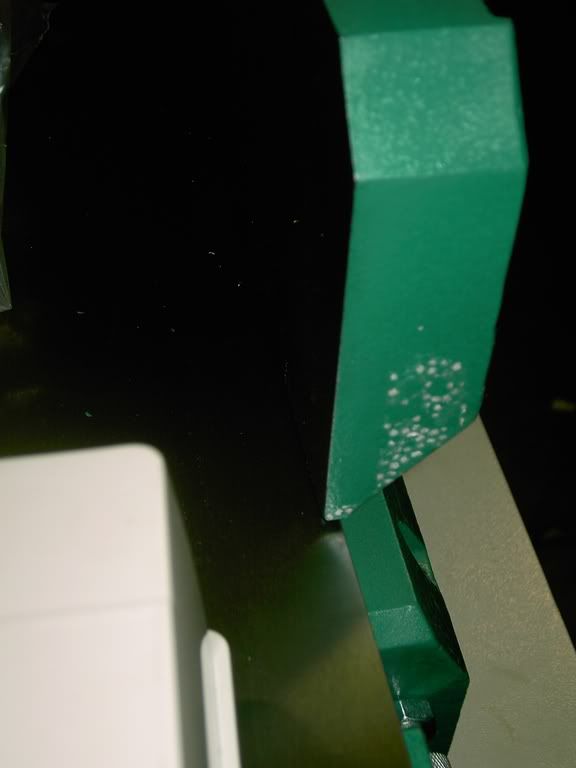
    Also one of the sides of the fence looked like it had an impression of the styrofoam on it. Not sure how
    concerned I should be about this. Probably just contact Grizzly for some touch up paint. Just curious as
    to how it got like that though.


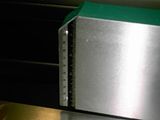
    The fence had some nice touches also which I cannot remember if they were also included on the DJ20. First is a
    height scale on the outfeed side of the fence. Not sure how useful this is, but it will show the dimensioned height
    of the board after a jointing pass, so nice touch Grizzly.


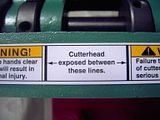
    Also a decal is attached to the top of the fence which indicates where the cutterhead is. Again not sure
    if this is a carryover of the DJ20 but this is a useful touch for me as I marked the top of my old fence
    with a pen so I knew where to start applying pressure when switching over hands on a longer jointing operation.


    Overall, the Fence assembly is exactly like the DJ20 in respects to how it is adjusted and tightened. Not sure
    how much I like this over a more traditional fence setup, only time will tell. The one thing I immediately noticed
    is that when I use the adjusters to set it back to 90 it is dead on (this is nice). The sliding mechanism is very smooth.
    Since I leave the fence at 90 deg most of the time and just slide the fence back and forth, I am very pleased with the
    smooth sliding action. One last note when attaching the fence to the bed assembly. When attaching the fence base
    sliding support be sure to make it level with the table on both sides before tightening the screws. If you just attach it
    before looking at how the slider mounts to it, you will probably set it too low and have to redo it (DAMHIKT).

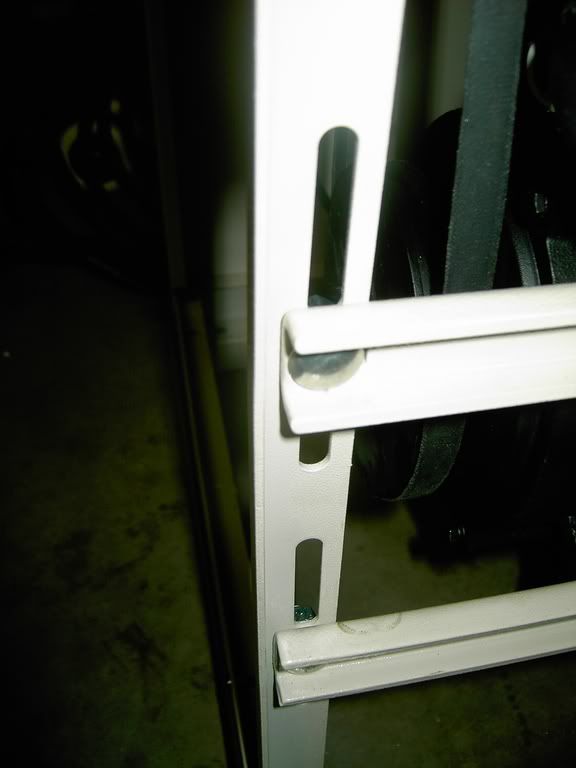
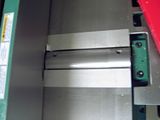
    Another word about assembly is when you put the belt on. The vertical mounts for the motor have 3 or 4 long slots predrilled
    into the rails (see below). When mounting the belt you are supposed to loosen the screws which hold the horizontal motor
    mount bars to the vertical ones, then push the motor up, loop the belt onto the flywheel and then lower the motor. The
    problem is that the motor comes mounted so that the cross members are bolted into the vertical supports at the top of
    one of the slots, so it cannot be raised without moving the horizontal mounts to the next slot on the vertical support.
    However once the belt is on you need to slide it down so it is positioned on the lower slot to properly tension the belt.
    So I had to leave it in the lower slot and muscle the belt around (and this took some serious effort) then adjust the horizontal
    mounts downward. My advice would be to just buy a link belt and size it so it is easy to attach the belt when the
    horizontal mounts are at the top of a vertical slot and then adjust downward. The other thing I noticed was that the vertical
    supports had a slight bow to them. Not sure if this is intentional as both sides looked like they had the same amount of bend,
    and the top of the stand is level, but it does look strange.


    On the Bed Assembly the book list some steps which involve attaching parts which are already attached
    at the factory, like the rabbetting ledge, which was a nice surprise.

    One other surprise during assembly was that the unit came with a preattached cord. Usually units running on 220 do not
    have this, and in fact when I talked to a Grizzly rep on this before ordering he checked and informed me that it would not
    come with a cord. I had to detach the cord anyway to attach a longer one I had already made to fit the twist lock plug I had
    installed, so this did not matter, except that I was able to see how the old one was wired into the magnetic switch box. That
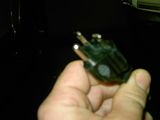
    was nice and reassuring when you are as electrically inept as I am. For anyone wanting to use the stock plug, I have attached
    picture below (sorry bout the low quality photos, as my good camera is having trouble, so I had to use our lower quality "travel"
    camera). The plug has 2 horizontal prongs and a ground.


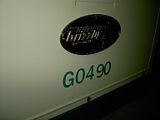
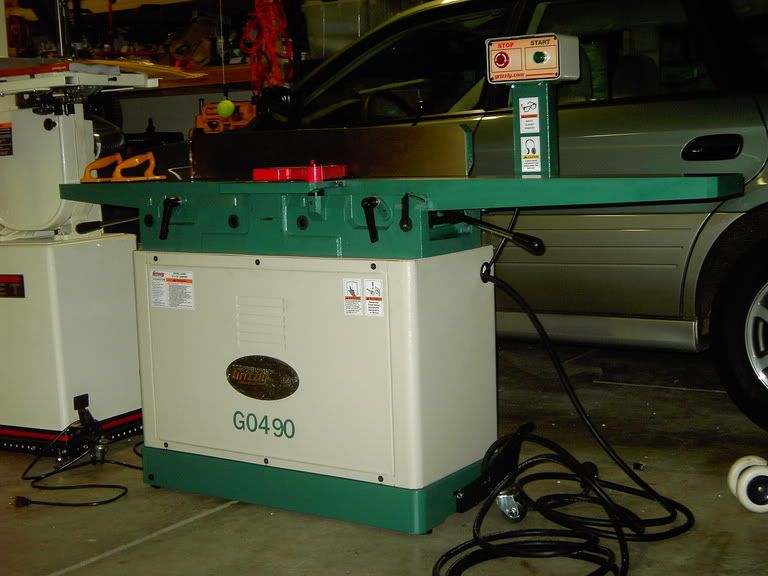
    To complete the talk about fit and finish there were a few other points. Everything looked and felt very nice. However, the
    stickers which spell out the model number were not even. Note the offkilter 9. Again this is nothing that will affect the
    performance of the unit, so I really dont care. The attachment of a real plackard for the Grizzly monogram was very nice
    in light of how most manufacturers just attach stickers these days.


    All the handles and knobs are big and easy to grab. This is an area where Grizzly really did a nice job of keeping
    with the DJ20's good points.

  2. #2
    Join Date
    Sep 2005
    Location
    Sacramento California
    Posts
    332
    Another nice feature were the pushblocks which are offset and very comfortable in the hand and seem very durable. Again
    not expected and a very nice touch.


    The cutterhead guard is easy to attach and very heavy duty (again kuddos to Grizzly on this, as I have heard Oliver 10" jointers
    are coming with rather flimsy guards). While the guard is nice and heavy the spring action is a bit lazy for my taste. I
    much prefer a guard return with a little more snap. It is very much like the action on the DJ20's I have played with in
    the stores.

    A quick note about the built in casters. These are a nice feature on this machine, it still takes some oomph to change
    directions when moving this machine but I think that has to do with something called momentum. One issue I have is that the
    retractable wheel is easy enough to activate with the foot, but the only way to disengage it is to put your toe under it and
    push up. The result on a machine this heavy is a big THUMP when the adjustable feet hit the ground, so I have taken to
    reaching down and gently lifting the lever by hand to avoid this.

    One last note is that the bed material around the cutterhead is a different metal than the cast iron on the rest of the bed (as
    shown in the picture below). Not sure why they did it this way, or if this is how the DJ 20 is, but it is just something
    I thought I'd mention.


    Something that really jumped out at me when assembling this machine is the massive size of the cutterhead.
    It is listed at 3 and 3/16 inches, the 586 is listed at 3". From what I understand this should provide a very smooth
    cut as the knife will approach the wood at a less steep angle. One note which I thought was interesting was that the
    DJ20 cutterhead is listed at 3 3/8 (slightly larger). I wonder if their measurements take into account the knife
    projection above the head or not.

    Now onto the important stuff. I only had a few minutes before work this morning to finally fire this sucker up and run
    a few boards. I plugged it in and turned it on, and to my surprise nothing blew up (guess my wiring job was OK). Immediately
    I noticed that the machine is not a soft start motor (ha ha) cause the thing gave a bit of a jump with the 3hp motor and then
    settled nicely into a smooth low hum. No I didn't balance a nickel on the table, maybe I'll remember next time, but I will
    say there wasn't any noticable vibration. The noise level was pleasantly quiet. It was much less noticable than my old
    6" 1hp motor, but that may be because the noise was lower in tone. I could not hear the machine over my DC which is a fairly
    quiet one. I may install some rubber grommets to the motor mounts to reduce the jump at startup and replace the stock belt
    with a link belt (as stock belts tend to obtain memory which can lead to future vibration), but there is no real need to do either.

    Next (with the depth scale set to 1/16ths I ran an 8" wide piece of cherry through and the thing didn't wince. Next I set the
    scale to 3/16ths and ran a 7.5" wide piece of hard maple through with the same result. I noticed that if I went at a very fast
    pace I would get a very slight visual ripple (couldnt feel it though), but if I went to a moderate pace the result was a very
    nice finish, that may require a quick pass with a ROS (not used to that kind of finish from a jointer).

    Next I edge jointed the 2 boards and (OOOOOOOOOOOO MAN) that tall fence was nice for support. I am reeeeaaallly gonna like that
    feature.

    Anyway these were just some notes from the setup and initial impressions, your mileage may vary, but I am initially very
    impressed with the performance and value of this machine.

    As I said I haven't had a chance to put it through it's paces yet, but it's handled everything I've thrown at
    it so far (sorry couldn't resist that one)


    Just wish I had this before I did my last project, cause I sure could a used it on the posts.


  3. #3
    Join Date
    Feb 2004
    Location
    Modesto, CA
    Posts
    2,364
    VERY nice John....and VERY cool. Congrats on the new tool.. Great job with the review. Thanks very much.

    I really like the Grizzly logo plates too. I wish I could have removed one from one of my machines before I sold them.

    WTG!!!
    Mark Rios

    Anything worth taking seriously is worth making fun of.

    "All roads lead to a terrestrial planet finder telescope"

    We arrive at this moment...by the unswerving punctuality...of chance.

  4. #4
    Join Date
    Mar 2003
    Location
    SE PA - Central Bucks County
    Posts
    65,827
    Thanks, John. Great initial review!
    --

    The most expensive tool is the one you buy "cheaply" and often...

  5. G0490

    Wow, thanks for the review you did a super job. Do you work for Grizzly 
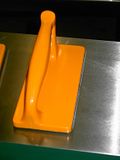
Just kiddin!! Hey how smooth did the infeed table go up and down, was it as smooth as the DJ 20? Also, what are your thoughts about that sweet infeed table length? Boy, I can't wait for mine. You guys on the west coast have it made being so close to China

    Michael

  6. #6
    Join Date
    Apr 2005
    Location
    Splendora, TX
    Posts
    703
    Good job on the review John and I'm not talking about all the good comments on the Griz, you have made an honest attempt to give your appraisal of the machine and I appreciate that. I've been contemplating a new jointer but never have used one that much because all I have is a 6" Cman and don't get the quality I want, you have given me something to think about.

    Thanks again
    David

  7. #7
    Join Date
    Sep 2005
    Location
    Sacramento California
    Posts
    332
    No don't work for Grizzly, if I did I'd probably have a lot more tools. I have always been leary of mail order tools from a support standpoint so this is my first Grizzly tool, but probably wont be my last. The table adjustment is exactly like the DJ20, super smooth and easy to adjust. As far as the infeed table length, this seems to be a matter of opinion. On my last few projects, particularly on the bed I just finished, I really noticed the need for longer support on the infeed side, whereas the outfeed side was not as important. So for me that is a great feature of this design (especially with limited shop space. Others will disagree that the tables should be symetrical. Oh well thats why there are multiple jointer types on the market.

  8. #8
    Join Date
    Dec 2003
    Location
    West of Ft. Worth, TX
    Posts
    5,815
    Thanks John! That is a great review on the assembly. Very detailed. I appreciate the time it took for you to put this together. Make some dust, man and have fun!! Jim.
    Coolmeadow Setters...Exclusively Irish! When Irish Eyes are smiling....They're usually up to something!!
    Home of Irish Setter Rescue of North Texas.
    No, I'm not an electrician. Any information I share is purely what I would do myself. If in doubt, hire an electrician!
    Member of the G0691 fan club!
    At a minimum, I'm Pentatoxic...Most likely I'm a Pentaholic. There seems to be no known cure. Pentatonix, winners of The Sing Off, s3.

  9. #9
    Join Date
    May 2005
    Location
    Charlotte, NC
    Posts
    126
    That was a really great review. Thanks a lot for posting. Make sure to keep us informed as you get more use out of it.

  10. #10

    Thanks

    John,
    I'll echo what others said--suberb review, and thanks for taking the time to write and post it. I'm waiting for mine, and your notes will be very helpful to me--I always find putting these things together takes a lot more time than I think it should. There's always one thing I end up doing in the wrong order that makes me have to undo stuff.

    Your piece about not being able to lift the bed is classic and precisely the sort of thing I would do.

    Thanks again.
    Rob

  11. #11
    Join Date
    Dec 2004
    Location
    NW Indiana
    Posts
    1,050
    Thanks John, for a great review. I can't wait now till mine gets here.

  12. #12
    Join Date
    Oct 2003
    Location
    Vero Beach FL
    Posts
    594

    Thanks for the review

    John

    Thanks for the great review, I've got one on order and am "just waiting for the call" Grizzly replied to an email inquiry regarding the status of the order and said that stuff would be shipped on Feb 23! Guess you're one of the lucky ones and got your machine quickly.

    I went back and forth on whether I should but a DJ20 or the Grizzly clone, your review has helped calm my jitters about buying a new design/new production machine.

    Jay

  13. #13
    Join Date
    Feb 2003
    Location
    Prescott, AZ
    Posts
    120
    I checked with Fedex in Phoenix about an hour ago and my G0490 is on a truck somewhere around Prescott this afternoon. Supposed to be delivered yet today.

    Keeping my fingers crossed since it isn't that easy to find this place.

    Howard

  14. #14
    Thanks John, you obviously went to a lot of trouble to tell us all those important details. ( I am a Feb. 23rd guy too) I too agonized over the DJ20 vs the Griz and you, combined with some out of control bidding on Ebay have made me feel better about my decision.

  15. #15
    John,
    Very detailed as I would expect from an engineer Thanks for the Grizzly story and photos. Looks like a great new tool.

    Given that your from Sacto, ever hear of Robert E. Young Engineers? My father and Bob started the business after he retired as City Engineer of Sacto.

    Cheers,

    Kent

Similar Threads

  1. My Redemption... PICS of the new 12" jointer
    By Jim DeMarco in forum General Woodworking and Power Tools
    Replies: 28
    Last Post: 01-19-2006, 6:06 PM
  2. Still looking for a big jointer... anyone know this model (pics)
    By skip gleichman in forum General Woodworking and Power Tools
    Replies: 4
    Last Post: 11-08-2005, 6:50 AM
  3. Pics of new TS and jointer
    By Larry Browning in forum General Woodworking and Power Tools
    Replies: 18
    Last Post: 03-28-2004, 7:49 PM
  4. Grizzly Jointer Problems/Outcome
    By Mike Scoggins in forum General Woodworking and Power Tools
    Replies: 11
    Last Post: 01-23-2004, 3:50 PM

Posting Permissions

  • You may not post new threads
  • You may not post replies
  • You may not post attachments
  • You may not edit your posts
  •