Page 1 of 2 12 LastLast
Results 1 to 15 of 25

Thread: Picture framing with combination planes.

  1. #1
    Join Date
    Jul 2006
    Location
    Kyogle N.S.W Australia
    Posts
    245

    Picture framing with combination planes.

    Hello,

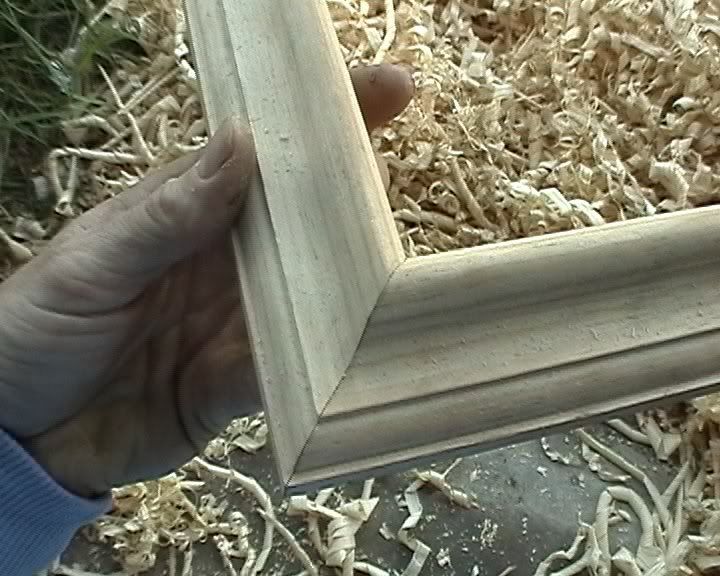
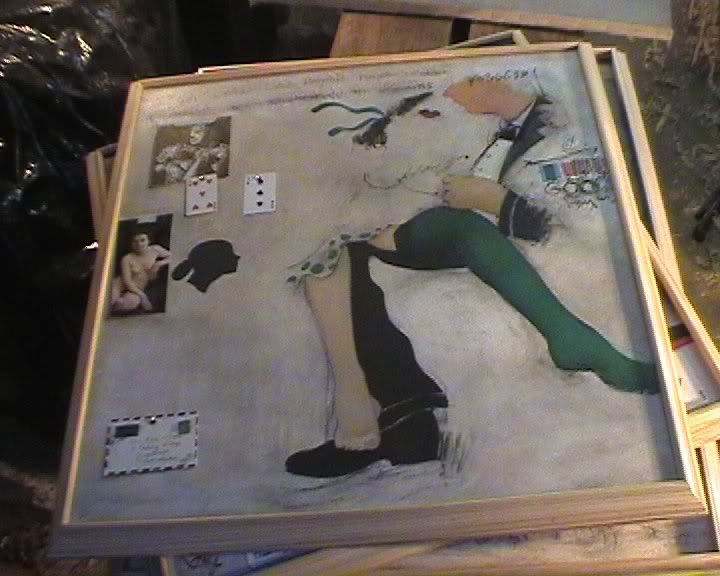
    Here's some photos of how I made up some picture frames for my father in law. He stretches his own canvas and asks me to frame them on occation.

    I've just made these out of pine. I went for the cheapest planeable pine I could find to keep the cost down. Normally I buy that M12 stuff. Just regular construction grade stuff. $3/m at bunnings. Full of knots though. So you have to be pretty selective. Cut it out between the knots.

    See, my father in law likes to paint his frames to ensure the colours work well with the painting etc. Subtle arty stuff I don't really understand very well. But, it means that it doesn't really matter what wood I use since it will be painted.

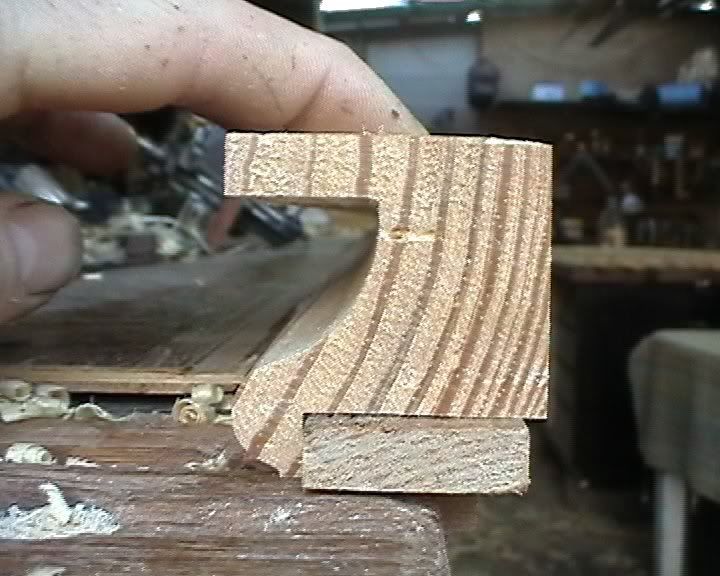
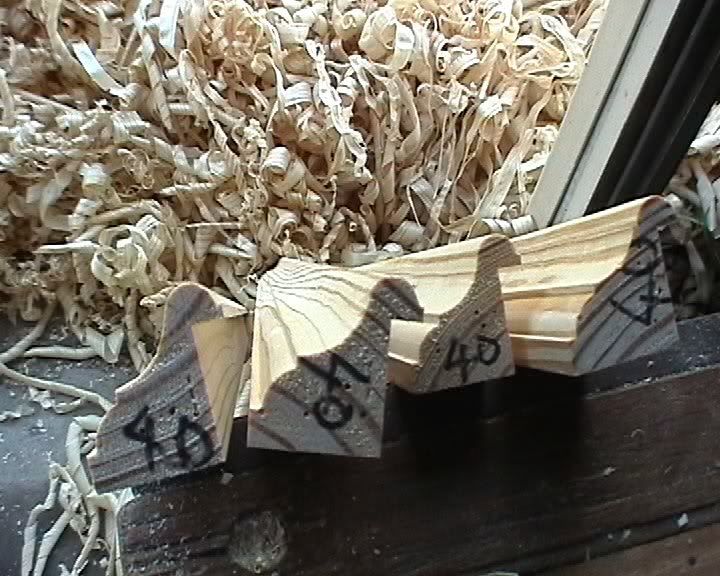
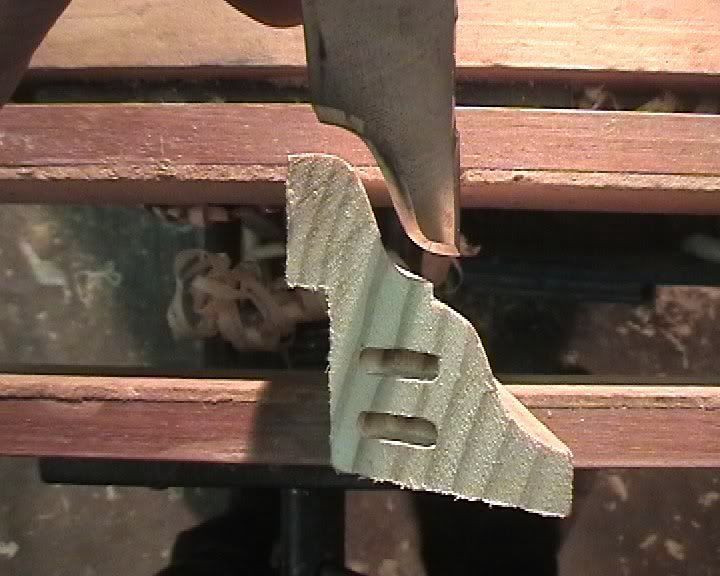
    This ones been cut from thicknessed stock about 52x40.


    Fillet at the top. Then a couple of ogees seperated by another fillet. Don't ask me whats its proper name would be.

    I'm not overly keen on it myself, but my FIL thinks it suits his painting. So alls well. He'd know.

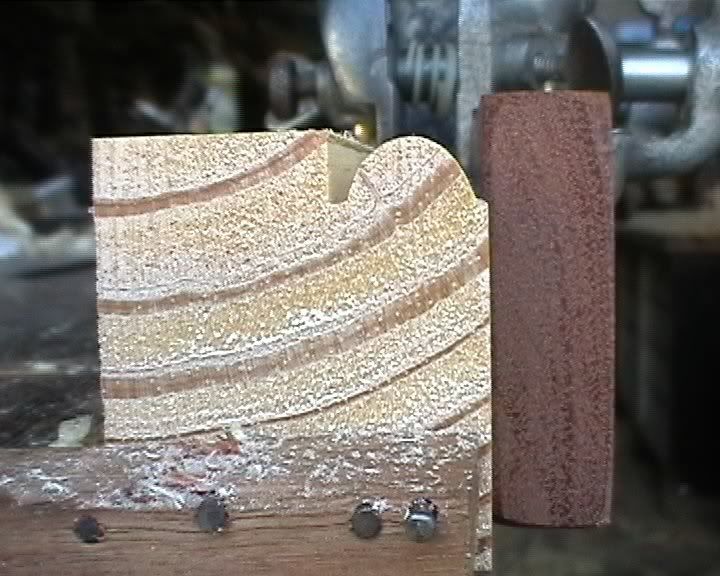
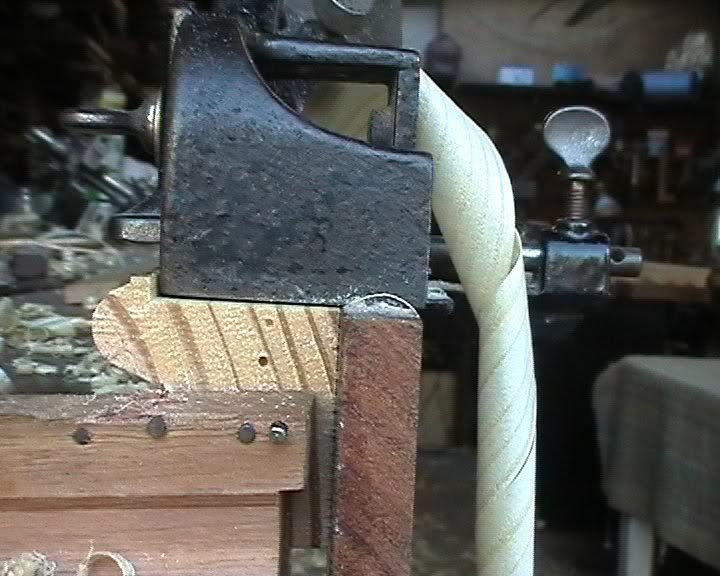
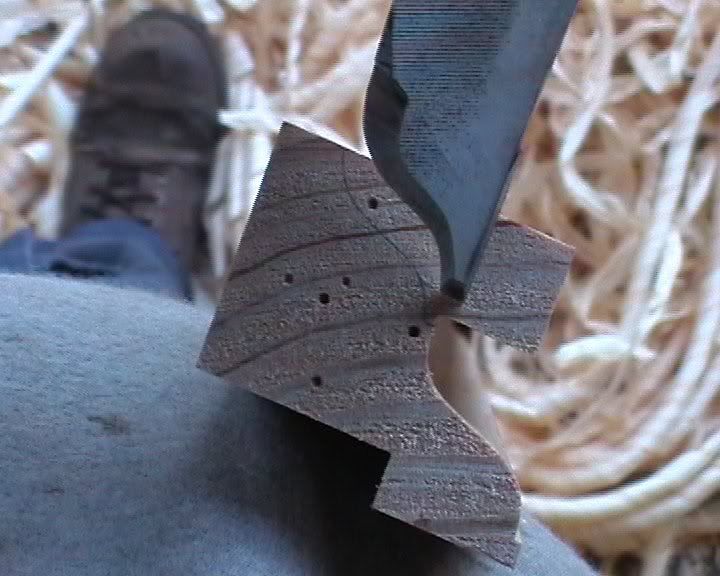
    This profile was made with a couple of blades in a stanley 55.

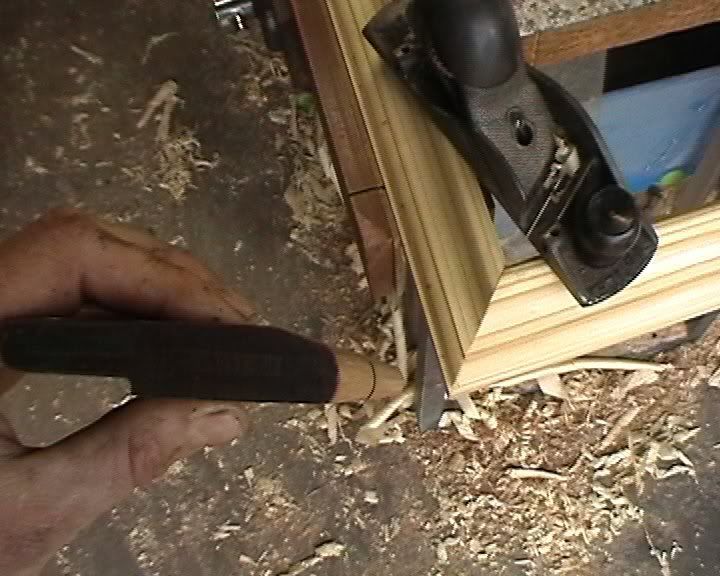
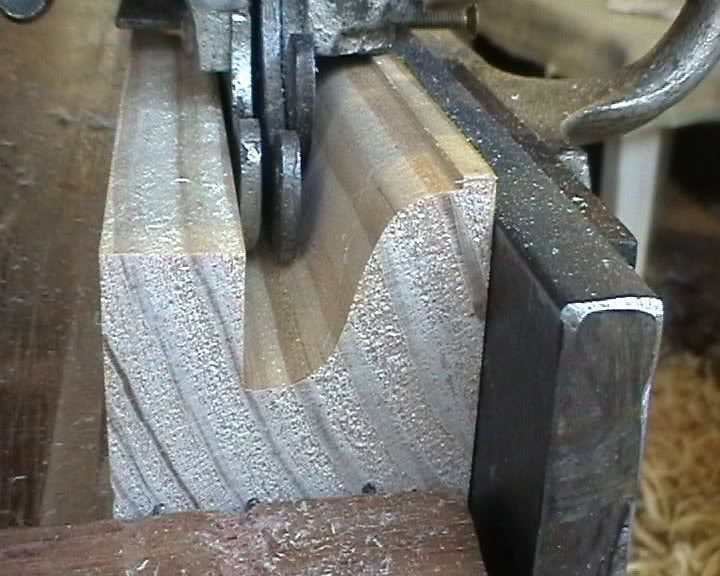
    The first blade drops down like this.


    Lot of stock to remove as you can see. Cut needs to drop something like 25mm. So coarse shavings a must, or else it'll take too long. Left hand depth stops and reverse profiles allow that. As coarse a shaving as you can go whilst maintaining control and finish. For those who like to measure shaving thicknesses with calipers, for this frame I had the blade set to take 0.4mm shavings. Any more and she got too hard to push.

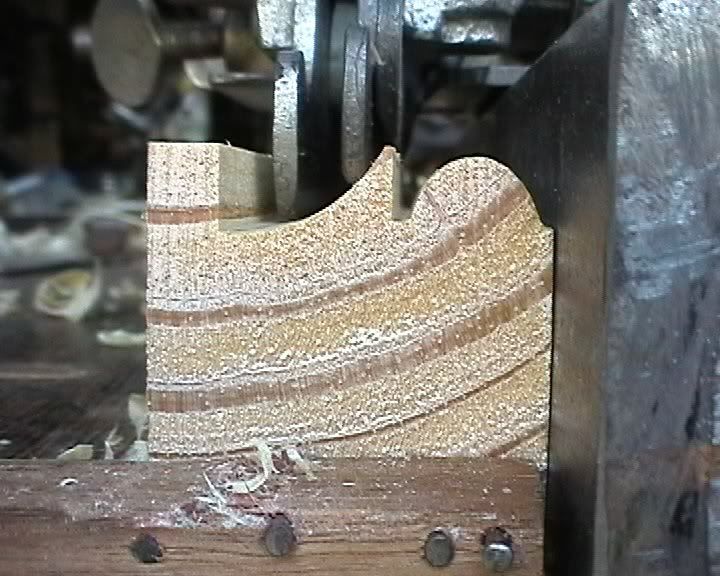
    You can try and speed up the process with plough cuts first to take out most of it. Ripping through on the table saw quickist I've found. But, I've found its actually quicker avoiding all that and just drop the cut with the blade set for a coarse shaving. Less stuffing about.

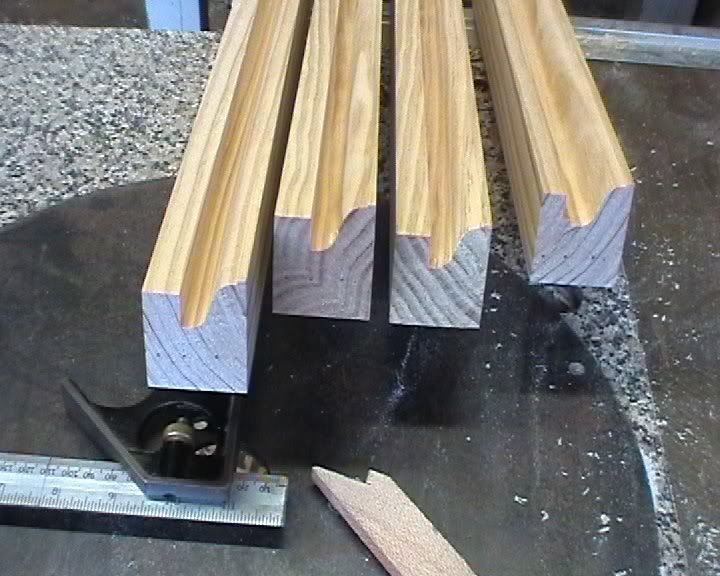
    Since I have to change the blade latter, I put this cut into all the pieces now.


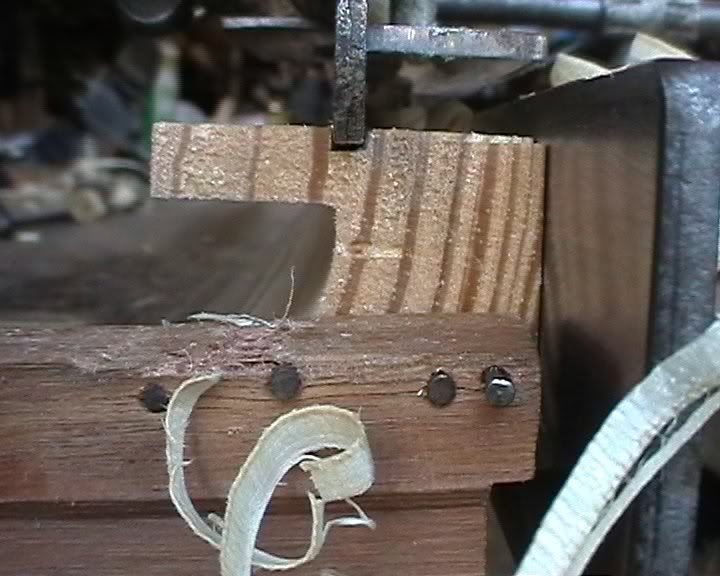
    I now cut the rebates for the canvas to sit in.


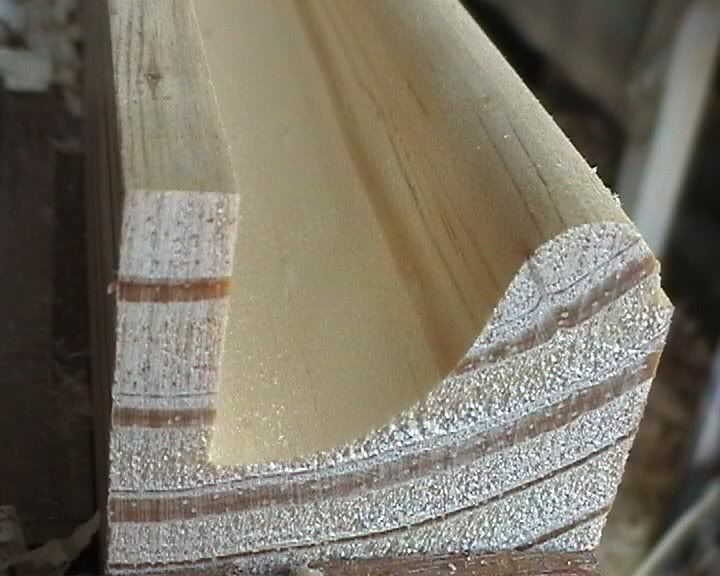
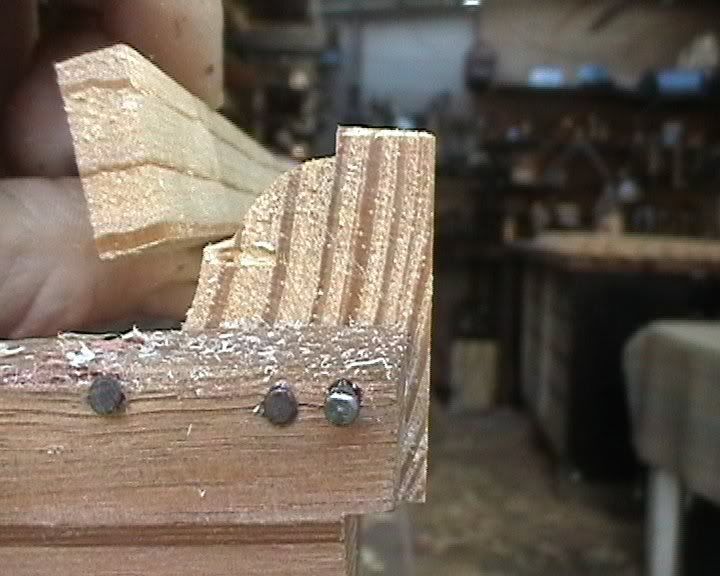
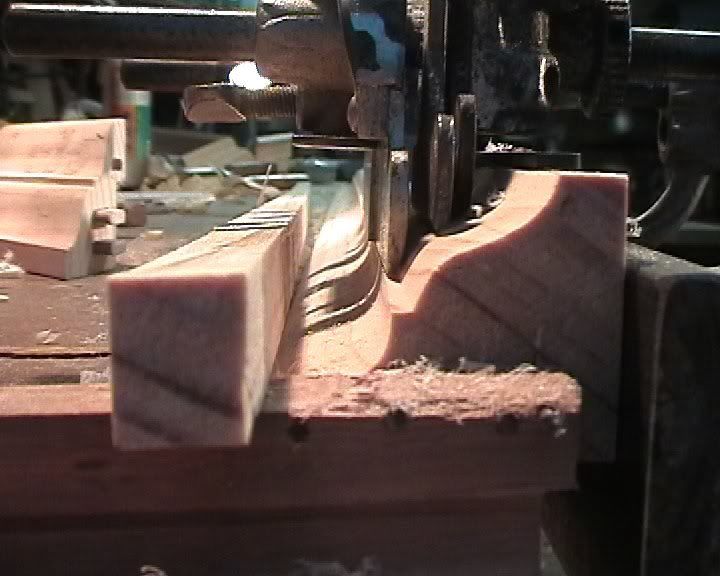
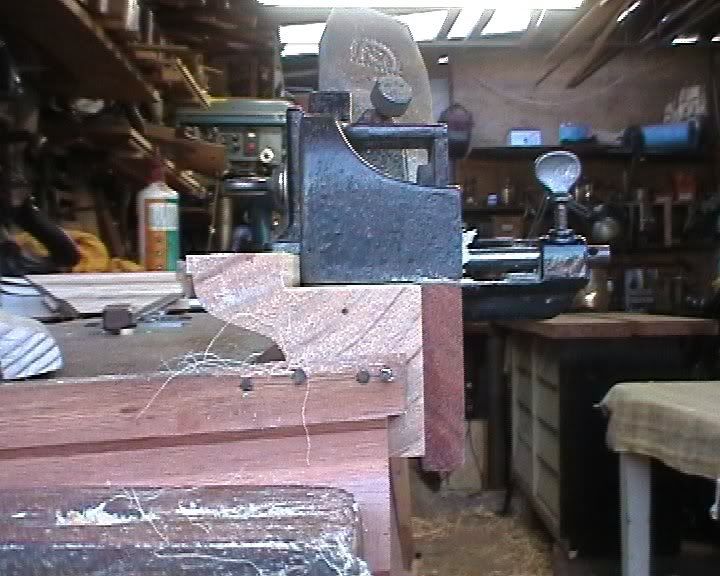
    With that done, I switch to another blade that intercepts the other cut. Comes down like this sort of thing.


    Leaving an offcut, which will probably end up being used for stirring paint.

  2. #2
    Join Date
    Jul 2006
    Location
    Kyogle N.S.W Australia
    Posts
    245
    Here's another profile.


    The previous profile sat quite high off the the canvas to meet a special situation where he had moulding actually glued onto the canvas midway (a window sort of effect he had going).

    This ones more standard I suppose, with a bead rising only a little off the canvas before it comes down, which I like. But I don't like the ovolo, which I think would look better without the fillet right on the edge.

    Anyway this is how this was made. Similar process. Little smaller. From 40x40mm stock.

    Bead first.


    Then you intercept this one with a cove. Have to creep that depth stop just right.


    Rebate.


    To keep the timber stable for the next cut I sit the rebate on a bit of thicknessed scrap (did that in the previous profile as well. Forgot to mention). Like this.

  3. #3
    Join Date
    Jul 2006
    Location
    Kyogle N.S.W Australia
    Posts
    245
    Ovolo intercepting cut.


    The finish is generally pretty good as long as your blades are razor sharp, and you've chosen your timber well. I get a bit of tearout sometimes which I try to plane out with a couple of hollows and rounds first(can plane the opposite direction with them you see). Failing that, out comes the sandpaper.

    My mitrings not always as gapless as I'd like it to be unfortuneatly. But I've found this little round and a small rebate plane brilliant to tidy up the mitres. Rebate planes sharpens up those fillets nicely I thought after any sanding. Use a wax stick I'm affraid to say on occation.


    Michael Taylor his name. Lovely English fella, well known around here. He's having a exhibition soon in Brisbane. This one I like in particular. Sorry, I should have taken a better photo of it.

  4. #4
    Join Date
    Sep 2003
    Location
    South Carolina
    Posts
    1,429
    Thanks for the tutorial Jake. I have often wondered about this process and what order the profiles would be cut. Looks like I'm going to have to keep my eye out for a 55.

  5. That is really cool, I like how you broke down the whole process.

  6. #6
    Join Date
    Mar 2003
    Location
    SE PA - Central Bucks County
    Posts
    65,885
    Thanks for such a great tutorial, Jake!

    The interesting thing is that what you show relative to building the profile in steps is something that even non-Neanders need to learn. Too many folks think that an entire profile needs to be cut with a single "cutter" (tethered, or untethered) and that certainly limits flexibility and profile size. I'm going to link to this thread from the General Woodworking Forum because I really do feel there is huge value in your examples!
    --

    The most expensive tool is the one you buy "cheaply" and often...

  7. #7
    Join Date
    Jul 2006
    Location
    Kyogle N.S.W Australia
    Posts
    245
    Thanks. appreciate your comments. I enjoy putting these things together. Editting photographs etc.

    Have a good week.

  8. #8
    Join Date
    May 2007
    Location
    Yardley, PA
    Posts
    98
    Jack,

    That was an awesome example of how to use a 55 to make complex moldings. The final profile is amazing. Art for art.

    I'm sure you just inspired a bunch of people to try this technique. The prices for good old 55's just doubled on ebay!

    Very nice work!
    The day you think you know everything will be very same day you stop learning.

  9. #9
    Jake - another fellow and I are guessing how you jointed the miters. Are those domino slots? The miters look like they really line up nice and tight.

    Very nice work - inspring for novice wanna be neanders.

  10. #10
    Join Date
    Jul 2006
    Location
    Kyogle N.S.W Australia
    Posts
    245
    Ta.

    they do resemble those domino slots alright. But no, I don't have a domino.

    I just have an old shopsmith combination machine that I've set up as a horizontal mortiser. I've got a picture here from another conversation.

    Its nothing flash. But its accurate enough. The tables height is adjustable by turnscrew and can be locked off tight. I bought a chuck to fit right on the spindle. Which is not how its supposed to be. The chuck just takes normal router bits.

    And I replaced the existing pulley on the motor with this huge one I found from the tip. Which doubled the spindle rpm at least.....Higher the speed the more control.....less chatter etc. The spindles probably not designed for that sort of speed. But its all I've got.

    There's a technique to learn though. You just push them in by hand and cut up to lines you've marked off previous. I had a few mistakes before I clued onto it. ......... It cuts cleanly when clearing the mortise when stroking from right to left only.....not from left to right. So you have to withdraw the timber at the left, line it up on the right again, and stroke left...when you get a routine happening it cuts clean mortises quite quickly. Do a whole heap all at once. And there really strong joints, especially handy when your stocks quite thin and biscuit slots won't fit. And the process is appealing to me, because the machine doesn't cut as aggressively as a router does. Not as loud and uncompromising if you know what I mean. Feel I can take my time with it and get it just right.

    I make the floating tenons to fit those mortises as well. I started a thread on that . Here it is.
    http://www.sawmillcreek.org/showthre...loating+tenons

    Hope that helps. Have a good weekend eh.
    Attached Images Attached Images
    Last edited by Jake Darvall; 06-15-2007 at 6:12 PM.

  11. #11
    Join Date
    Jul 2006
    Location
    Kyogle N.S.W Australia
    Posts
    245
    Minding kids this morning. Sneaked out and took a couple more photos.

    first two's the old shopsmith. In the second you can see that big pulley I put on there.

    Third photos a joint from a couple of displays I'm making at the moment. 4mm slots. Just use regular router straight bits. Probably should have taken a photo of another joint. Made a mistake on that one. I overshot the line a bit. ....the tenon looks a little sick as well. No matter the fits are good.
    Attached Images Attached Images
    Last edited by Jake Darvall; 06-15-2007 at 6:47 PM.

  12. #12
    Jake - thanks for the explanation. I had guessed that it was a domino, and my buddy had guessed (get ready to gasp) that you were setting them up to do something with screws.

    Looks like a nice setup, and I agree - its nice to have things that cut a little slower and feel more like shearing than beating (like a router does sometimes at high speed).

    We use a multi-router to do similar work, but it is a bit of a pain to set up if you aren't going to do more than one joint/mortise/miter...

  13. #13
    Join Date
    Jul 2006
    Location
    Kyogle N.S.W Australia
    Posts
    245
    Pleasure David. Glad you made sense of it.

    I'm not sure what you mean by multi-router.

    I've never really embraced routers much. Though I should have by now. I work in a joinery building windows and doors mostly. Some days all I do is round edges with trimmers and cut slots. Noisey buggers that leave me covered in dust.

    I have a router table at home too, but don't use much. Prefer my planes. But my planes only move straight. So, when I want a curve thats normally when the router comes out.

    Good to talk to you mate.

  14. #14
    Jake - the multi-router is sourt of a man-controlled wanna-be cnc machine. The router sits with a milling bit (or dovetail bit if that's the flavor of the event) parallel to the ground. Stock sits on table in front of the milling bit, the surface of the table is machined flat, and can be tiled up to 45 degrees.

    There are three handles on the whole apparatus to move the platform holding the stock in three dimensions, and a large array of options to set up the machine for small runs of similar things.

    As a novice, I rely on the multi-router and router tables to do a lot of the things I want to do, but I'm trying to move toward handwork for the same reason you specified - routers are loud, dusty, and can be violent sometimes.

    I don't know if it's OK to post a link to the multi-router, but I suppose I'll wait to be corrected by a moderator if it isn't. It simple looks are deceptive in how accurate it is and how much you can do with it.

    http://www.djmarks.com/multirouter.asp

    I am not affiliated with JDS manufacturing, and I don't even own a multi-router, but my WW buddy does (but is also unaffiliated with JDS).

  15. #15
    Join Date
    Jul 2006
    Location
    Kyogle N.S.W Australia
    Posts
    245
    Gotcha. Ta for the link. See what you mean.

    Sounds like a machine like that will spoil you though. Good accuracy straight off.

    Not trying to put a damper on hand tools but....your going to have to find lots of patience for it. Could be weeks/months before you really feel confident with say a stanley 55. But there definetly more rewarding.

    The stanley 55 has a bad rep and for good reasons. I fear that one you bought recently just going to be gathering dust.

    There's some cuts its just not good at doing. There's some cuts you can do, but it could take a while to learn how.

    You'll need to think up a good clamping system that holds the stock locked whilst leaving the cutting and fence sides clear of clamps. Very important. You won't get a feel for the plane if it feels like your stocks going slide of the bench all the time. I use a simple clamping system that actually bites your work. But its very effective and speeds the whole process up. I wrote a thread on it somewhere here. If interested I'll find it for you. You may find a better way.

    There's a few other tricks. But make sure you learn how to sharpen the blades, so there quick to bite into your finger nails. Catch your finger prints. etc ....else, don't even bother. The planes naturally unstable. So, it demands razor sharp blades.

    I've gota go. But good luck with it.

Similar Threads

  1. Rehabilitating Old Planes (Big File)
    By Bob Smalser in forum Neanderthal Haven
    Replies: 18
    Last Post: 12-14-2011, 12:43 PM
  2. more advice on planes, please
    By Margaret Imber in forum Neanderthal Haven
    Replies: 9
    Last Post: 01-25-2006, 1:39 PM
  3. Picture Framing joining tools???
    By John Miliunas in forum General Woodworking and Power Tools
    Replies: 46
    Last Post: 11-19-2005, 3:43 PM
  4. The Trio of planes
    By Mark Singer in forum Neanderthal Haven
    Replies: 15
    Last Post: 10-18-2005, 11:16 PM
  5. New Stanley planes - what's different?
    By Perry Schmidt in forum Neanderthal Haven
    Replies: 2
    Last Post: 09-12-2003, 2:41 PM

Posting Permissions

  • You may not post new threads
  • You may not post replies
  • You may not post attachments
  • You may not edit your posts
  •