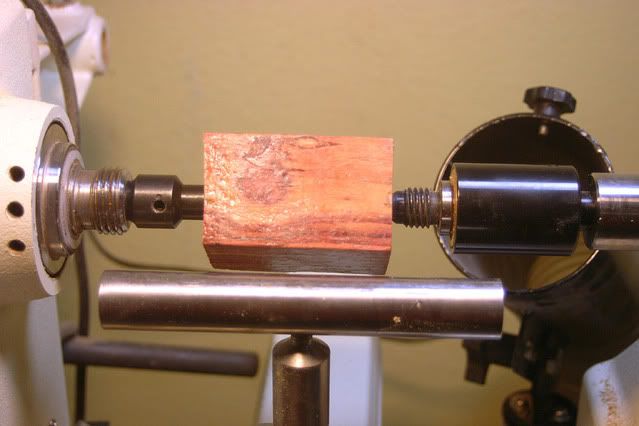
Page 1 of 2 12 LastLast
Results 1 to 15 of 26

Thread: Making a wooden egg tutorial with pics.

  1. #1
    Join Date
    Jun 2007
    Location
    Palmdale CA
    Posts
    434

    Post Making a wooden egg tutorial with pics.

    Wooden Eggs


    The eggs are roughly 1”5/8 by 2”3/8 which is about life size depending on the egg. The one dimension that is important to keep about the same on all eggs is the diameter since this is how the egg is grabbed later to turn the ends and the ID of the chuck I made is 1”5/8. It gives some latitude either way but not a whole lot, so diameter is important.
    The first thing is cut a blank to fit the size of the project and turn round between centers.


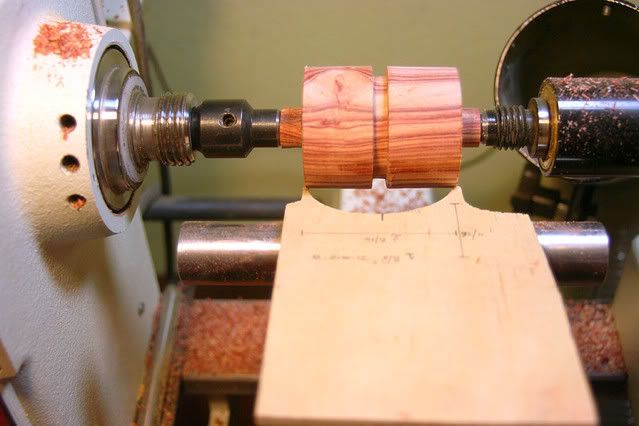
    Once this is done mark a line on the widest part of the egg and both ends. With a parting tool turn the center line close to the final diameter and turn down the waste at the ends. It is a lot easier to make a few templates with the contour of the egg. This will save a lot of time getting to the right shape. I suggest 4 templates one for each end and two for the center, one with a partial part on the center top and the other one close to the full shape but not all the way since the ends are still thicker.


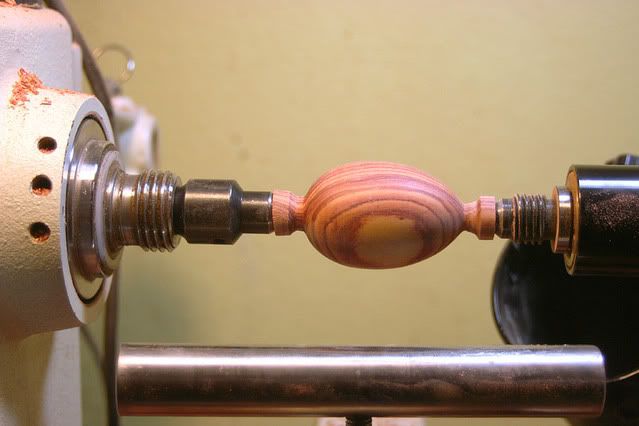
    Once happy with the looks sand and finish the egg, make sure not to part off the ends since the ends are going to aid to get the egg to run true when mounted on the chuck.


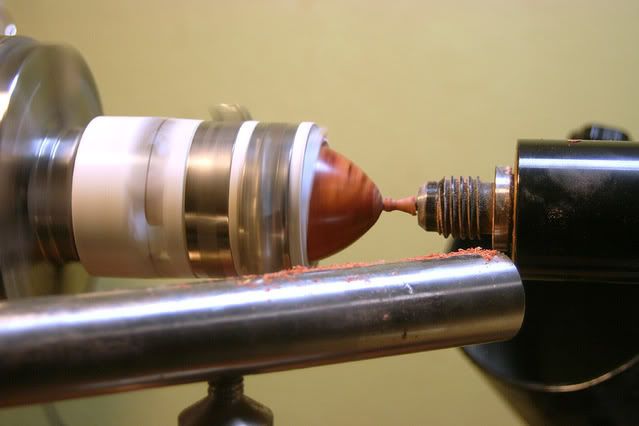
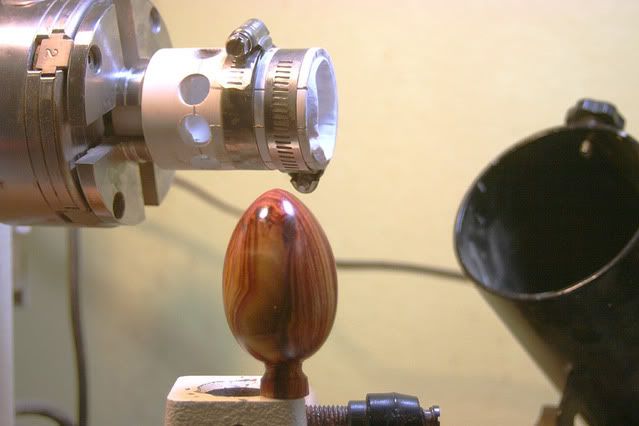
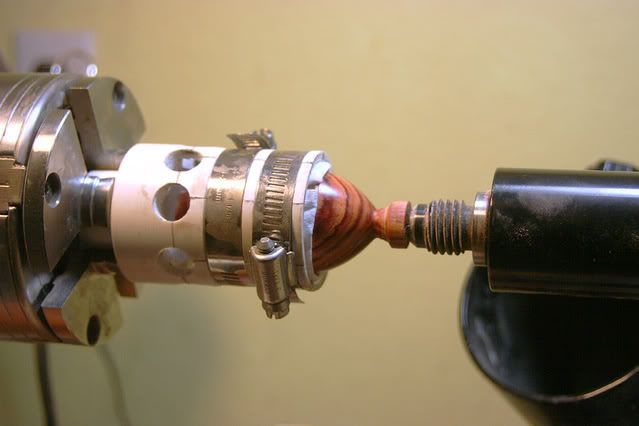
    Mount the chuck and put the egg inside, if the fit is a bit loose put some paper towel around the egg. Bring the tail stock and position the point on the dimple, lock the tail stock bring the end of the egg tight against the live center and then tighten the hose clamps. Make sure they end runs true and turn the first end to shape. (MAKE SURE THE HOSE CLAMPS CLEAR THE TOOL REST AND KEEP YOUR HANDS FAR FROM THEM. THOSE CLAMPS ARE FEARLESS OF YOUR FLESH. I SPEAK BY EXPERIENCE)


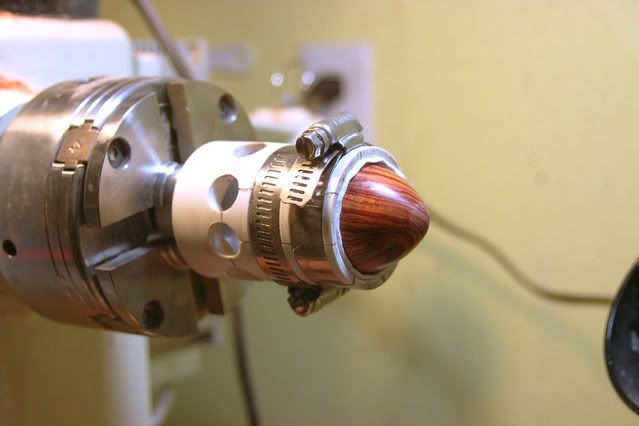
    Once one end is finish sand and finish it, turn the egg around and repeat the process on the other end.


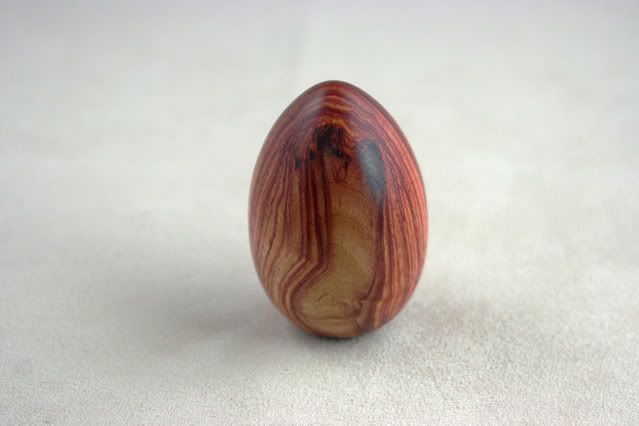
    And then after the efforts comes the rewards. This will be buffed in a few days to bring a nice shine to it. One more for the collection.


  2. #2
    Join Date
    Nov 2006
    Location
    Georgia
    Posts
    461
    Alex, thanks. That is a very nice tutorial and looks like a fun project.
    Ben

  3. #3
    Join Date
    Dec 2006
    Location
    Webster Groves, MO
    Posts
    655
    Blog Entries
    10
    Great Tutorial!!! I imagine a catch on the hose clamps would do some major damage to one's fingers. Ouch!

  4. #4
    Join Date
    Apr 2003
    Location
    Grove City, Ohio
    Posts
    226
    Thanks Alex. I have been wanting to turn a few of these and now with Easter getting near it would be a good time.
    However, the hose clamps are a bit scary!

  5. #5
    Nice little tutorial. Wouldn't it be easier to turn a wooden chicken then have it lay the eggs.
    Mike Vickery

  6. #6
    I had some chicken that tasted like wood ..... does that count????

    thanks Alex. So scrambled egg/s would be like segmented ????? I know , nuf smarties in the world.
    ok ok ...sry
    Bad day at work.

    Thanks for the tutorial , I was wondering how to hold the egg. I like your idea way better than mine.....
    Last edited by Paul Engle; 01-08-2008 at 5:06 PM.
    John 3:16

  7. #7
    Join Date
    Nov 2007
    Location
    Akron Ohio
    Posts
    147

    Very clever

    It is now on my ever growing list of new challenges.
    Thank you so much for shareing the Knowledge !!

  8. #8
    Join Date
    Aug 2006
    Location
    Johnson City, Tennessee
    Posts
    141
    Beautiful Alex, very ingenius!

    I would be interested in how you made the holder?

  9. #9
    Join Date
    Jan 2007
    Location
    43 Norway Spruce Street, Stittsville, Ont, Canada
    Posts
    64
    Great tutorial!!

    Thank you for posting this - it is very clear and orderly. I would like to make a safety suggestion if you don't mind. In your photos you show the clamps with the band facing in the direction of rotation. If you turn the clamps around, then when you get hit by the clamp, you'll get hurt a bit, but you won't have the end of the steel band slicing into you tearing out great chunks.

    cheers

  10. #10
    Join Date
    Dec 2005
    Location
    Texas Hill Country, USA
    Posts
    1,967
    Very helpful and appreciated! Thank for taking the time to post it.

  11. #11
    Join Date
    Jun 2007
    Location
    Palmdale CA
    Posts
    434
    Quote Originally Posted by John W. Willis View Post
    Beautiful Alex, very ingenius!

    I would be interested in how you made the holder?
    The idea of the holder wasn't mine. It is Dick Sing the one I got it from. The holder was made with 1 1/2" PVC coupling from Lowes, on one end I glued a reducer or something of that nature so I could turn a tenon to grab with the chuck. With the chuck on the expanding mode I turned the tenon on the oposite end and 2 shallow grooves for the hose clamps, Then put the jig on a V block and drill the holes I think I drilled 8 holes and last thing cut the slots. That will serve sort of like a collet chuck.
    That is the whole secret.
    I'll change the hose clamps the other way you guys are right about it. It looks scarry.
    Make sure you post your eggs if you make any.

  12. #12
    Very nice, those clamps do instill some fear

  13. #13
    Join Date
    Feb 2006
    Location
    Mason Michigan
    Posts
    1,949
    When I use something protruding like that I cover it with Nike wrist bands.
    A few hours south of Steve Schlumpf

  14. #14
    Join Date
    Dec 2007
    Location
    Louisville, KY
    Posts
    30

    Thanks Alex

    Thanks Alex,

    I'm inspired and looking forward to attempting an egg. Let's hope I don't end up with egg on my face or worse like humpty dumpty

  15. #15
    Join Date
    Feb 2003
    Location
    Conway, Arkansas
    Posts
    13,182
    Thanks Alex for the tutorial.! Much appreciated.
    Thanks & Happy Wood Chips,
    Dennis -
    Get the Benefits of Being an SMC Contributor..!
    ....DEBT is nothing more than yesterday's spending taken from tomorrow's income.

Similar Threads

  1. I wanna make some simple wooden boxes
    By Dee Dee Martin in forum General Woodworking and Power Tools
    Replies: 15
    Last Post: 04-15-2009, 2:10 PM
  2. Wooden plane questions
    By Bill Antonacchio in forum Neanderthal Haven
    Replies: 17
    Last Post: 10-19-2005, 11:46 PM
  3. Another wooden boat inspection (pics)
    By Kent Parker in forum General Woodworking and Power Tools
    Replies: 19
    Last Post: 05-16-2005, 6:41 PM
  4. Posting Pics To Another Thread
    By Kevin Herber in forum Forum Tech Support
    Replies: 1
    Last Post: 05-12-2005, 11:02 AM
  5. Saw mills pics
    By Doug Jones in forum General Woodworking and Power Tools
    Replies: 0
    Last Post: 07-29-2003, 9:15 PM

Posting Permissions

  • You may not post new threads
  • You may not post replies
  • You may not post attachments
  • You may not edit your posts
  •