Page 1 of 2 12 LastLast
Results 1 to 15 of 22

Thread: It's gonna be a Wixey Weekend

  1. #1
    Join Date
    Jan 2005
    Location
    Waterford, MI
    Posts
    4,673

    It's gonna be a Wixey Weekend

    I've had a couple boxes of Wixey stuff sitting around for way too long due to being busy on other projects and I'm planning on getting these put on this weekend. Haven't made it through the past post searches on both units but:

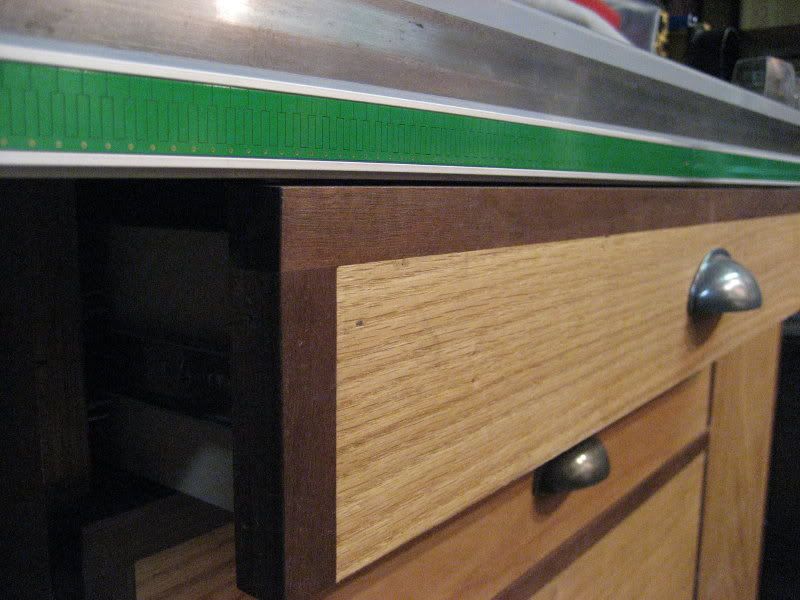
    Fence Readout bought back in November and is finally going on my PM66.
    Posts I've seen say:
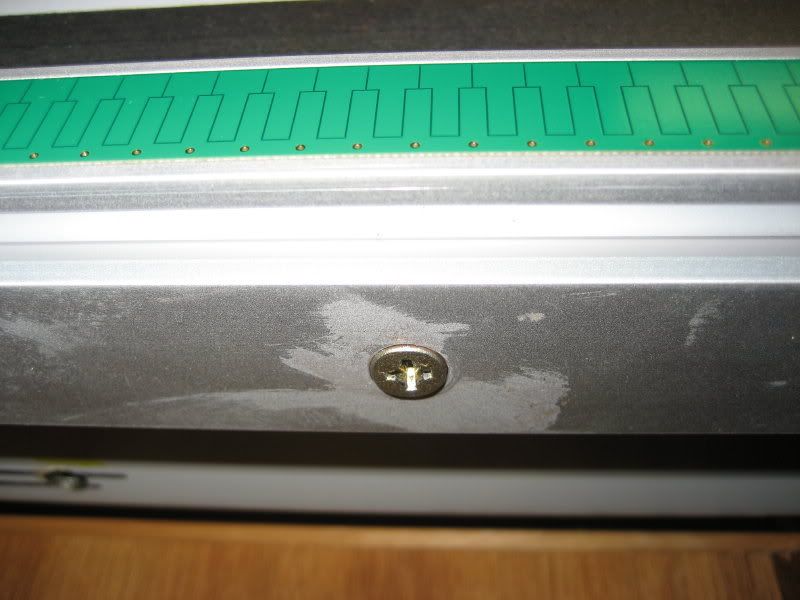
    - Forego the self-tapping bolts and tap your holes (no problem as I've got a metric tap/die set).
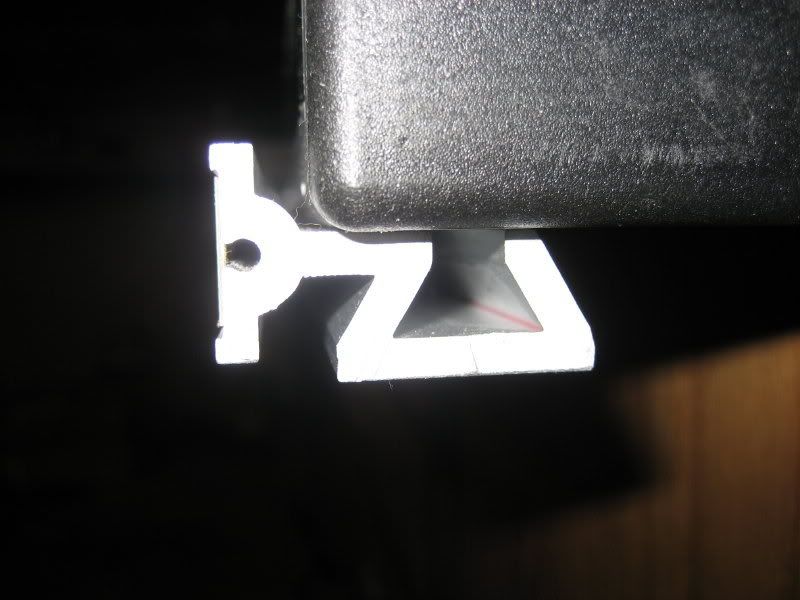
    - Might need to file a bit on the wedge setup to get the 2 track pieces aligned.
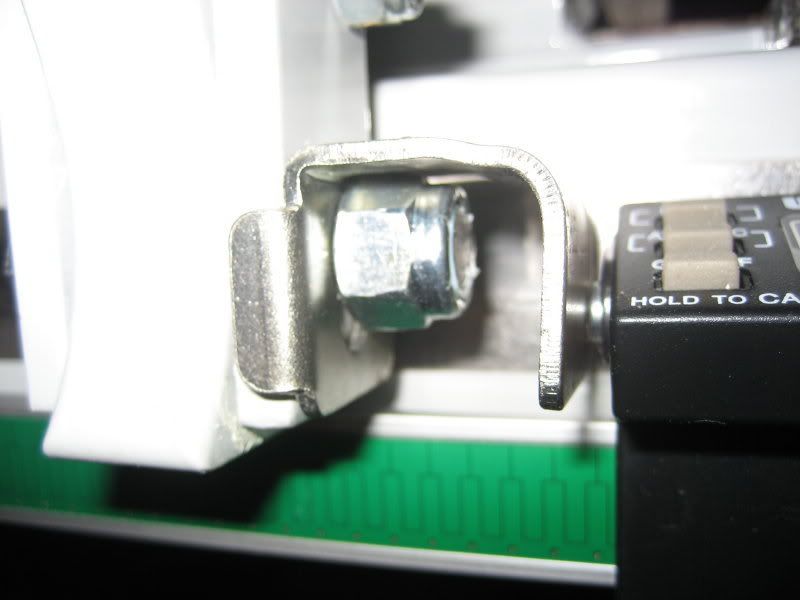
    - Might need to loosen some small jewelers size screws to get the readout to slide smoothly then re-tighten.
    Anything else for a PM66 install that I might have missed?

    Planer readout received 2 Christmases ago (I know, I know) is finally going on my DW733.
    Haven't weeded thru enough Wixey posts yet to find anything specific to the DW733. Any surprises there that aren't mentioned in the instructions?
    Use the fence Luke

  2. #2
    Join Date
    Mar 2003
    Location
    Monroe, MI
    Posts
    11,896
    Doug, too bad you are almost 2 hours away as we could have gotten together to do the planer--I just got a Wixey for my DW733 tonight. If I get it installed before the weekend, I'll report back here on how it went. I got the angle gauge too.


  3. #3
    Join Date
    Jan 2006
    Location
    Chicagoland
    Posts
    2,801
    I put one on my Uni-Biese during the big $99 sale. I came up with a super compact way to attach it. I needed to since I have a drawer that comes clost to the fence rail (I ended up removing the walnut trim from the top drawer since it would hit the gauge):


  4. #4
    Join Date
    Mar 2003
    Location
    Monroe, MI
    Posts
    11,896
    Hartville Tool still has them for $99, plus free shipping for the rest of this month. I was tempted but for the planer, I was bordering on need since the factory scale on mine is messed up.


  5. #5
    Join Date
    Feb 2003
    Location
    Washington, NC
    Posts
    2,387
    Doug,

    Too bad your planer unit is so old. The new model has a slanted readout. The good news is you can buy the new readout from Wixey to upgrade your old unit for only $20. The slanted readout is much easier to read than the older vertical readout.


  6. #6
    Join Date
    Jul 2006
    Location
    Tampa Bay Area of Florida
    Posts
    867
    Has anyone come out with an affordable, workable, reliable, durable digital scale for a Euro slider?

    While my MM combo is very accurate using its manual readout, I'm a sucker for any new toys and the added precision and ease-of-use would be nice.

  7. #7
    Join Date
    Jan 2005
    Location
    Waterford, MI
    Posts
    4,673
    Quote Originally Posted by Alan Schaffter View Post
    Doug,

    Too bad your planer unit is so old. The new model has a slanted readout. The good news is you can buy the new readout from Wixey to upgrade your old unit for only $20. The slanted readout is much easier to read than the older vertical readout.
    There ya go - costin me money agin
    I'm ordering that today. Hopefully it'll arrive before the weekend.
    You can always count on Creekers to help you spend your money on tools
    Use the fence Luke

  8. #8
    Join Date
    Oct 2005
    Location
    Helensburgh, Australia
    Posts
    2,710
    I did exactly what Mike G. did and for the same reason, much neater and a far better result than using the stock brackets. The stock brackets on mine used the existing bolts holding the rails onto the angle iron they sit on and I had no need to drill new holes.
    Chris

    Everything I like is either illegal, immoral or fattening

  9. #9
    Join Date
    Nov 2007
    Location
    Lawndale, CA
    Posts
    16

    Wixey Readout is Accurate Fence Tapes aren't

    I just installed mine on my saw this past week and had a heck of a time. I have the Vega fence with a micro adjust so I had to get creative to figure out how to mount it, I even ended up putting a few needless holes in the fence . I guess I have to fill with epoxy now and bust out the sharpie . One thing to expect is possibly finding out that the tape on your saw fence isn't accurate. I was going crazy when I started trying to dial it in after installing it. At first I thought mine was defective so I gave up for the day and decided to email Wixey. The next day I got a response. Turns out that quite often people think the same, Barry Wixey informed me it was probably my saw fence tape and gave me a few pointers to get it dialed in. That's one great thing about Wixey is that they stand behind their products and are quick to reply to your emails. After spending more time with mine and coming back fresh to finish the install it works great.

  10. #10
    Join Date
    Mar 2003
    Location
    Monroe, MI
    Posts
    11,896
    Update: I just installed mine. Took about a 1/2 hour, and probably 10 minutes of that was finding a screw to attach the bracket to the electronics box since it was missing from the package.

    I didn't bother with the self-stick tape as I might not keep this planer too much longer. Just the two screws. The pictures on the package of mine were of a Dewalt so it was really easy to do.


  11. #11
    Join Date
    Jan 2005
    Location
    Waterford, MI
    Posts
    4,673
    Mike/Chris
    I'm having a tough time figuring out how Mike's pics and Chris' description differ from the illustrations in the instructions and from each other. Mike's pics look like the track is directly screwed to the fence rail without brackets (I'm going by the pic of a screw thru the dovetailed part of the extrusion)? But Chris post says you're still using the stock brackets just not the same way as the instructions? Are your installs the same? And I think I'm seeing Mike's readout put on to the side of the fence lock rather than beneath as the instructions show? So does that mean you can only use the readout with fence to the right of the blade or isnt that affected by the location? It's not normally to the left on mine, but has been known to happen for a few special cuts.


    Quote Originally Posted by Matt Meiser View Post
    Update: I just installed mine. Took about a 1/2 hour....
    Sounds good to me.

    ...I might not keep this planer too much longer.
    That's actually the main reason I hadn't installed this yet after more than a year. Kept thinking I might upgrade to a DW735 or maybe Delta 2-speed. But the 733 keeps chugging along no matter how crotchety it's getting, so I'll hang on for a while.
    Use the fence Luke

  12. #12
    Join Date
    Mar 2003
    Location
    Central Illinois
    Posts
    297
    You may have difficulty duplicating what Mike did on a PM66 if you have the Accufence. I tried it that way first, but I ended up mounting it per the instructions. To the left of the blade it would just read a negative position provided you reset your zero. On the accufence the sensor buts right up against the fence with out the use of any of the extraneous brackets supplied with the unit.

    Mike

  13. #13
    Join Date
    Oct 2005
    Location
    Helensburgh, Australia
    Posts
    2,710
    My apologies for the confusion. I initially installed it using the stock brackets but when I built a cabinet to install between the rails I had to re-install it without the brackets. I simply clamped it up flush under the rail and drilled straight through the aluminium extrusion from underneath and tapped holes in the rail. it is a much neater solution than brackets but has one draw back, that being sawdust gets trapped between the rail and the Wixey extrusion.
    Chris

    Everything I like is either illegal, immoral or fattening

  14. #14
    Join Date
    Jan 2006
    Location
    Chicagoland
    Posts
    2,801
    Mine was done w/o the brackets. I did get an alternative sketch from Barry Wixey that may help:


    Also, I had to modify the bracket to make my mod work. Guess you could make another bracket if you need to use it on either side.

    Mike

  15. #15
    Join Date
    Oct 2005
    Location
    Helensburgh, Australia
    Posts
    2,710
    It is a pity that the instructions do not match the performance of the product. The best I can say about the instructions is that they are woeful and that is being kind. If there are two ways they recommend to mount the product then both should be in the instructions. Having said that they may be but I can't tell by reading them.
    Chris

    Everything I like is either illegal, immoral or fattening

Similar Threads

  1. Beall Tilt Box Angle Gauge Review
    By Bruce Benjamin in forum General Woodworking and Power Tools
    Replies: 60
    Last Post: 11-01-2007, 6:31 PM
  2. Creeker's Weekend Accomplishments....
    By Dennis Peacock in forum General Woodworking and Power Tools
    Replies: 11
    Last Post: 05-30-2006, 2:44 PM
  3. Weekend doings
    By Julio Navarro in forum General Woodworking and Power Tools
    Replies: 13
    Last Post: 03-13-2006, 2:06 PM
  4. So What's this Weekend Accomplishments "thing"....
    By Dennis Peacock in forum General Woodworking and Power Tools
    Replies: 25
    Last Post: 02-07-2006, 11:25 PM
  5. Creeker's Weekend Accomplishments....
    By Dennis Peacock in forum General Woodworking and Power Tools
    Replies: 25
    Last Post: 06-21-2005, 8:49 AM

Posting Permissions

  • You may not post new threads
  • You may not post replies
  • You may not post attachments
  • You may not edit your posts
  •