Results 1 to 14 of 14

Thread: African Mahogany End Table

  1. #1

    African Mahogany End Table

    My wife asked me to make a round end table for the nursery that would match the Cherry and African Mahogany crib that I made for our daughter http://www.sawmillcreek.org/showthread.php?t=91289. So I decided to make a 22" round table with double tapered legs out of matching African Mahogany. The design and proportions were my own and I'm really pleased with the results, but more importantly so is the wife.

    Couple of more firsts for me:
    - First design of my own without any plans.
    - First round table top (made a jig to cut on the BS)
    - First use of floating tenons (stupid error on my part cutting the aprons to the final dimension without accounting for the tenon length required it).
    - First double taper on legs (made a simple tapering jig for the TS)
    - First use of figure-8 fasteners to attach the top
    - First use of my (finally setup) Unisaw

    Sanded to 220 and finished with 1 coat of Seal-a- Cell and 3 coats of Arm-r-Seal, buffed in between coats with 0000 steel wool.

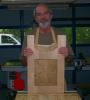
    Sorry for the bad lighting...the flash makes it appear a little redder and shinier than it is in person.


    I'm really happy with the grain matching on the top with four 6"wide boards


    Thanks for looking,
    Michael

  2. #2
    Nice looking table, and some beautiful wood.

  3. #3
    Join Date
    Mar 2007
    Location
    Stony Plain, Alberta
    Posts
    2,702
    Great to get a few more firsts out of the way....

    And congrats on getting to use your uni.

    As Norman said, nice looking table. Whats next on the agenda.

  4. #4
    Join Date
    Nov 2006
    Location
    Fallbrook, California
    Posts
    3,562
    Simple, but elegant. Michael, that's a beautiful table. Congratulations on all those "firsts." The top is in fact, well matched.
    Don Bullock
    Woebgon Bassets
    AKC Championss

    The man who makes no mistakes does not usually make anything.
    -- Edward John Phelps

  5. #5
    Join Date
    Feb 2008
    Location
    Stanwood, WA
    Posts
    3,059
    Nice table and wood choice.

    I hope you love your UNI as much as I love mine. That thing is an absolute dream compared to my old contractor saw.

    You know you are taking your woodworking to a new level when you are able to overcome mistakes such as your use of the loose tenons. We would have never known unless you told us.
    Dewey

    "Everything is better with Inlay or Marquetry!"


  6. #6
    I like it!! Nice job.

  7. #7
    Join Date
    Mar 2003
    Location
    SE PA - Central Bucks County
    Posts
    65,842
    Excellent work!
    --

    The most expensive tool is the one you buy "cheaply" and often...

  8. #8
    Join Date
    Nov 2007
    Location
    Saratoga Springs, Utah
    Posts
    863
    Very Nice - Simple Lines! Impressive Work!
    Sawdust is some of the best learning material!

  9. #9
    Join Date
    Dec 2006
    Location
    Atlanta , Ga.
    Posts
    3,970
    Well done, Michael. And nice hard-wood floors it sits on also.

    Sarge..

  10. #10
    Very nice. Nice tapers. How'd you do yr floating tenons?

  11. #11
    Thanks for the kind comments everyone. The simple design was twofold, easy to build and fits the decor of the nursery. Next I'm thinking about building a hall table (but don't have a design yet) or a writing desk similar to a David Marks design here in black walnut and curly maple top and a different handle design.

    As for the pictures, that room gets tons of daylight so we unfortunately have put off adding extra lights in there. I took the picture in the evening in near darkness and I was too lazy to go get extra lights....thus the need for the flash.

    Dewey: The Uni is several classes above the BT3100 that I had been using. Way more power, far more stable, much more accurate when setup properly, WAY better fence (have the unifence) and more work surface with the 52" fence. I also have the uniguard which I'm kind of ambivalent about, but I really like the uni-splitter.

    Shawn: I made the mortises with a plunge router, edge guide and a 3/8" spiral up-cut bit a little more than 1/2" deep on both sides. I clamp the piece in my front vice, raised above the bench top about 2" (enough clearance for the edge guide) and then use a 2" think piece of wood placed on the top of the bench to add more surface for the router to sit. The tenons were made from the same African Mahogany, planed down to 3/8", rounded with a beading bit and cut into 1" lengths. Really is pretty simple to do and not much pre-planning or calculations involved.

    Thanks again,
    Michael

  12. #12
    I like that Marks table too. I read somewhere here, though, to be careful of the fully enclosed top. Not sure how that design allows for movement of the top.

  13. #13
    Quote Originally Posted by Shawn Patel View Post
    I like that Marks table too. I read somewhere here, though, to be careful of the fully enclosed top. Not sure how that design allows for movement of the top.
    The top would be veneered ply to alleviate any movement.

    Michael

  14. #14
    Join Date
    Dec 2004
    Location
    NW Indiana
    Posts
    1,050
    Most excellent. Well Done.

Similar Threads

  1. New Guy Needs Help With First Router Table
    By Kevin W Brown in forum General Woodworking and Power Tools
    Replies: 19
    Last Post: 03-03-2010, 11:26 AM
  2. finishing African Mahogany
    By harry boyer in forum Project Finishing
    Replies: 2
    Last Post: 05-01-2008, 6:32 PM
  3. Router Table Quest
    By Maurice Ungaro in forum General Woodworking and Power Tools
    Replies: 15
    Last Post: 09-17-2004, 12:23 PM

Posting Permissions

  • You may not post new threads
  • You may not post replies
  • You may not post attachments
  • You may not edit your posts
  •