Page 1 of 2 12 LastLast
Results 1 to 15 of 28

Thread: Beaded Face frames

  1. #1
    Join Date
    Jan 2007
    Location
    Dayton, Ohio
    Posts
    291

    Beaded Face frames

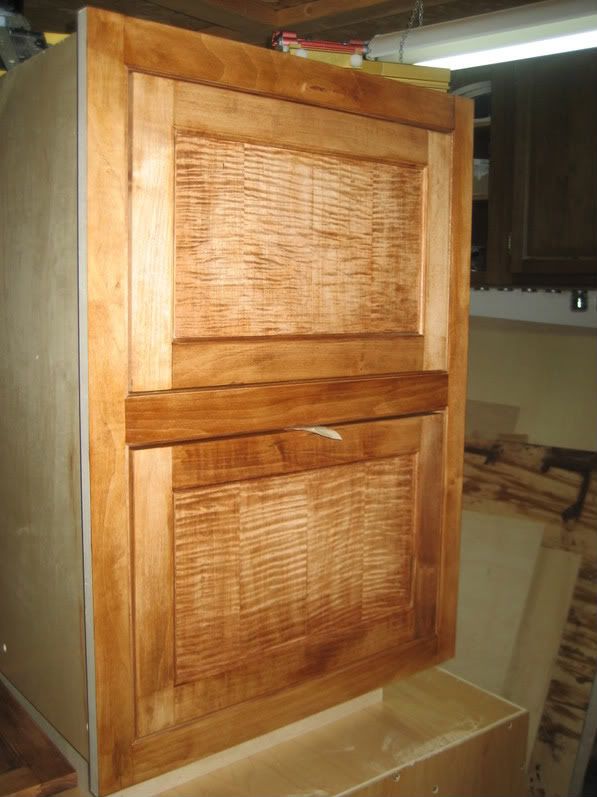
    Today I practiced beading and jack mitering some poplar for the upcoming laundry room cabinet project.

    Let me tell you...this is going to be a hair pulling experience. Getting them exactly perfect to my eyes was not an easy task. I'm thinking it may actually be worth it to buy the chamfer bit and grind off the bearing post like Gary Katz and others advocate. Admittedly these will be painted, so there can be some fudge factor but I'd rather do it with the tablesaw. Norm makes it look so easy!

    Anyway..just a vent post. Thanks for letting me whine!

  2. #2
    Join Date
    Feb 2008
    Location
    Northfield, Mn
    Posts
    1,227
    If its painted, and you don't see the joint anyway. Why not just apply the bead to the inside of a standard face frame? Its not the journey, it the end result.

  3. #3
    Join Date
    Jan 2006
    Location
    Mt. Pleasant, MI
    Posts
    2,924
    I'm with Karl, for a paint project applied beads are the way to go.

    I'm playing with a method of doing them on the CNC with a chamfer bit with no bearing and a set of stops.

    They are certainly not as easy as they appear.

    Joe
    JC Custom WoodWorks

    For best results, try not to do anything stupid.

    "So this is how liberty dies...with thunderous applause." - Padmé Amidala "Star Wars III: The Revenge of the Sith"

  4. #4
    Join Date
    Jan 2007
    Location
    Dayton, Ohio
    Posts
    291
    Quote Originally Posted by Karl Brogger View Post
    Its not the journey, it the end result.
    I disagree. Otherwise I would label it work!

  5. #5
    Join Date
    Feb 2007
    Location
    Colorado Springs, CO
    Posts
    428
    I am doing some beaded face frames for kitchen cabinets and I add the bead as a separate piece using a pin nailer. I bet you cannot tell. The bead is small so you may not see it in the pictures

    America is great because she is good. If America ceases to be good, America will cease to be great.
    Alexis de Tocqueville

    You don't have a soul. You are a Soul. You have a body.
    C. S. Lewis

  6. #6
    Join Date
    Mar 2003
    Location
    SE PA - Central Bucks County
    Posts
    65,901
    Yes, this is more difficult work, but...make jigs to hold your workpieces for the intricate cuts. These are not "hard to do"; rather, they are hard to do the same multiple times. Jigging solves that. Yes, it would be easier to do it with applied moldings, but this is a great opportunity to learn the task on a painted project so that you can do it again when paint is not involved in the future.

    As an aside, the double beaded trim in our entire addition (and that I carried into the previously existing house) had to have this done at every door opening, etc. The trim carpenters who worked on the addition were so good at this, they were doing it with a miter saw. (Don't ask...I couldn't watch...LOL) When I duplicated the task into the existing house, I used hand tools...and I still have my fingers!
    --

    The most expensive tool is the one you buy "cheaply" and often...

  7. #7
    Join Date
    Jan 2007
    Location
    Dayton, Ohio
    Posts
    291
    Quote Originally Posted by Jim Becker View Post
    Yes, this is more difficult work, but...make jigs to hold your workpieces for the intricate cuts. These are not "hard to do"; rather, they are hard to do the same multiple times. Jigging solves that. Yes, it would be easier to do it with applied moldings, but this is a great opportunity to learn the task on a painted project so that you can do it again when paint is not involved in the future.

    As an aside, the double beaded trim in our entire addition (and that I carried into the previously existing house) had to have this done at every door opening, etc. The trim carpenters who worked on the addition were so good at this, they were doing it with a miter saw. (Don't ask...I couldn't watch...LOL) When I duplicated the task into the existing house, I used hand tools...and I still have my fingers!
    Thanks Jim, That's my line of thinking as well. Eventually this style will find it's way to a cherry bath vanity and a couple other projects I have in mind.

    If I wanted to take the easy road and apply the molding I should have just bought RTA cabinets and not be building them myself. Just my opinion, but woodworking is a hobby, and thus I can take the time and enjoyment to learn difficult techniques that some don't wish to. It's not for everyone, some get to the point where they are pressured to finish stuff and take shortcuts, and to me this is the point it's no longer a hobby, but a second job.

  8. #8
    Join Date
    Nov 2008
    Location
    Saugus, Kelpafornia
    Posts
    607
    Not sure what you are looking for, Justin, but face beading shouldn't be that hard to do.
    I used a Craftsman molding head on my old Craftsman 100 table saw to do these (and it is a 3 bead cutter if I remember right) :
    Damn! They still sell them! Glad to see that!


    __________________________________________________ ____________
    This one is 10' 6" tall. I had to splice lengthwise pieces to make the blank long enough from standard 97" MDF. That was fun to figure out with a locked miter bit.


    And I agree, if you can't have fun doing it, then why bother?
    I recommend you get a feeder if you plan to venture far into making your own moldings. It will be sooo much easier and consistent.

  9. #9
    Join Date
    Jan 2007
    Location
    Dayton, Ohio
    Posts
    291
    Quote Originally Posted by Sonny Edmonds View Post
    Not sure what you are looking for, Justin, but face beading shouldn't be that hard to do.
    I used a Craftsman molding head on my old Craftsman 100 table saw to do these (and it is a 3 bead cutter if I remember right) :
    Damn! They still sell them! Glad to see that!


    __________________________________________________ ____________
    This one is 10' 6" tall. I had to splice lengthwise pieces to make the blank long enough from standard 97" MDF. That was fun to figure out with a locked miter bit.


    And I agree, if you can't have fun doing it, then why bother?
    I recommend you get a feeder if you plan to venture far into making your own moldings. It will be sooo much easier and consistent.
    Nice, but I'm referencing a different type of bead applied to a face frame tha requires jack mitering so that the bead looks continuous around the perimiter of the square.

  10. #10
    Join Date
    Mar 2003
    Location
    SE PA - Central Bucks County
    Posts
    65,901
    I just remembered I had this picture online of the miter work on our trim in the addition...


    The bead is integral to the base and door trim, so each joint had to be carefully prepared with the bead mitered.
    --

    The most expensive tool is the one you buy "cheaply" and often...

  11. #11
    Join Date
    Mar 2008
    Location
    Beantown
    Posts
    2,831
    If you have a decent sliding jig or a sliding attachment for your tablesaw that's the way I do them. Makes for a very clean and fairly easy cut. You have to be organized though and have everything ready to go at the same time. otherwise your going to be pulling your hair. I do both angled cuts first then clean out the center with a dado blade. If it needs any fine tuning then the chisels come out.
    I've read about the other technique you refer to and it seems pretty clever, but since I've had good luck with the tablesaw I've never tried it.

    good luck,
    JeffD

  12. #12
    Join Date
    Jan 2007
    Location
    Dayton, Ohio
    Posts
    291
    Quote Originally Posted by Jeff Duncan View Post
    If you have a decent sliding jig or a sliding attachment for your tablesaw that's the way I do them. Makes for a very clean and fairly easy cut. You have to be organized though and have everything ready to go at the same time. otherwise your going to be pulling your hair. I do both angled cuts first then clean out the center with a dado blade. If it needs any fine tuning then the chisels come out.
    I've read about the other technique you refer to and it seems pretty clever, but since I've had good luck with the tablesaw I've never tried it.

    good luck,
    JeffD
    Planning is the biggest thing I realized when I was just messing around with these joints. Instead of the dado blade, I just used a bottoming router bit in the table to clean out the rest. That part worked really well. It was the exacting miters that killed me.

    Overall the messing around really helped me see things for myself how they should be. It's one thing to see them on TV or the internet, but a completely different thing to try them yourself.


    I think I will try and make some jigs for the tablesaw to cut the miters exactly where I need them. I've been meaning to make an auxillary fence with stop block for my my miter gauge for a long time anyway.

  13. #13
    Join Date
    May 2005
    Location
    walnut creek, california
    Posts
    2,347
    justin, i tried cutting beaded face frames with the chamfer bit grounded off at the bearing and i gotta tell you that building the jig takes a fair amount of time and testing plus using a miter saw or tablesaw to chop off that tiny piece on the rails seems like overkill. i'm just going to build a simple 45 degree hand saw jig in the future and trim them manually. i will add that routing the bead on does make it rather simple once the joints are cut since all you have to do afterwards is pocket screw them together so it's a tradeoff and the grain and color are sure to match as well as opposed to applied beading unless it's paint grade. another thing to consider is flushing the cabinet sides with the inner part of the face frame on base cabinets so that the drawer slides are easier to mount.
    Last edited by frank shic; 01-05-2009 at 1:11 PM.

  14. #14
    Join Date
    Aug 2007
    Location
    Connecticut
    Posts
    307
    IMO jack mitering is too time consuming and its a waste of time especially for large projects like a kitchen or library. I prefer to run it as a moulding and miter it and apply it to the face frame. It's much easier because you can cut them a hair big and snap them in and if you make a mistake it's not a face frame stile or rail its just a small piece of moulding. Glue and 23 ga pin nails works well.

  15. #15
    Join Date
    Nov 2005
    Location
    St. Charles, IL
    Posts
    420

    Here's how I do Jack Miters

    Justin had PM'd me asking how I did this, so I though posting it here would be the easiest way to explain. This method is the easiest I've tried for performing jack miter cuts. You need a small miter gauge with a sacrificial fence.

    I'm sick with the flu today, so please forgive me if what I type here doesn't make any sense. Hopefully the pictures (some out of focus) will make more sense.

    Once you've milled all of your beads, use this stock to set your table saw blade height at 45 degrees. The cutting tip of the tooth of the blade should just graze the shoulder of the bead. This height is critical, so take your time setting it just right.

    P1010619 [1024x768].JPG

    Attach some scrap material to your miter gauge. Here I'm using Incra's v.27 gauge with some 3/4" plywood.

    P1010620 [1024x768].jpg

    Turn on the saw and pass the sacrificial fence through the blade. This will leave a kerf like this...

    P1010621 [1024x768].JPG

    Using a square and super sharp pencil (or a razor blade), transcribe a line from the top point of the kerf to the top edge of your sacrificial fence. This will be the inside reference line for all of your jack miter cuts.

    P1010624 [1024x768].JPG

    Mark your beaded frames where the jack miters occur using a square and then transcribe that line to the edge to you can line it up with your transcribed line on your sacrificial fence. Depending on the cut and the tilt of your saw, you may be to the left of the blade or to the right of the blade.

    P1010626 [1024x768].JPG

    cont'd...
    Last edited by Frank Snyder; 01-05-2009 at 6:42 PM.

Similar Threads

  1. Best Way to Trim Face Frames to Fit Cabinets
    By Adam Slutsky in forum General Woodworking and Power Tools
    Replies: 12
    Last Post: 12-24-2008, 12:20 PM
  2. Built-in Cherry Cabinets with Beaded Face Frames
    By Frank Snyder in forum Woodworking Projects
    Replies: 25
    Last Post: 08-07-2008, 9:50 PM
  3. Milling stock with a combination of hand and power tools
    By Ted Fullerton in forum Neanderthal Haven
    Replies: 14
    Last Post: 03-28-2007, 11:33 AM
  4. Face Frames and Drum Sanders
    By Jay Albrandt in forum General Woodworking and Power Tools
    Replies: 8
    Last Post: 05-24-2006, 11:19 PM
  5. Best way to attach face frames
    By Brad Tallis in forum General Woodworking and Power Tools
    Replies: 18
    Last Post: 04-17-2006, 7:23 PM

Posting Permissions

  • You may not post new threads
  • You may not post replies
  • You may not post attachments
  • You may not edit your posts
  •