A very talented craftsman. Thank you for sharing.


 Member
A very talented craftsman. Thank you for sharing.
[OP]
Member
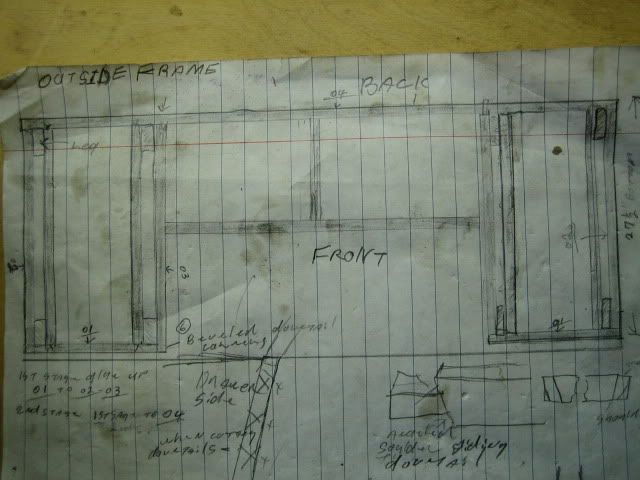
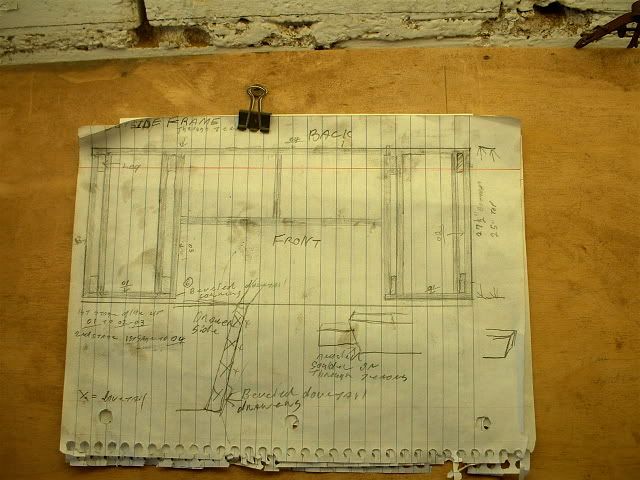
I'm going to back up a bit and show part of how I make a piece--I draw a real size drawing usually on a piece of 1/4" ply-wood--so after I had glued the top up and was sure of the real size I drew the desk from the back-
by working like this it's easy for me to check my work-I keep these drawings on a painters easel next to my work-bench also it's a good place to make notes -cut list etc.-instead of pieces of paper ( me being me I can never find those pieces of paper) now the front of the desk is the same but instead of the panels on the ends there will be four drawers and where the middle panels are -on the front will be where you sit and of course the frame wont go straight across but both top and bottom frame will be like so-
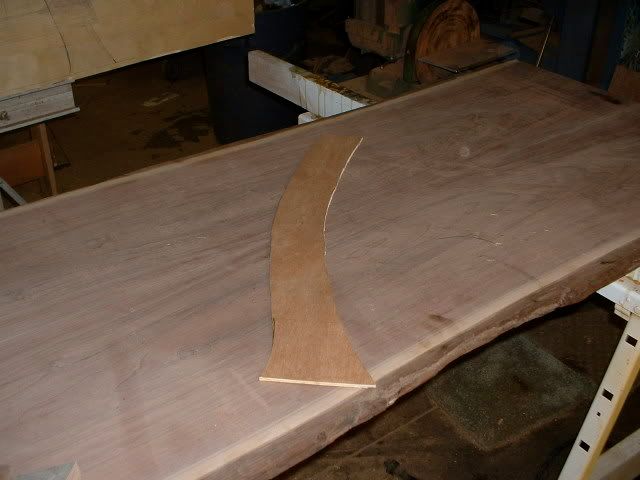
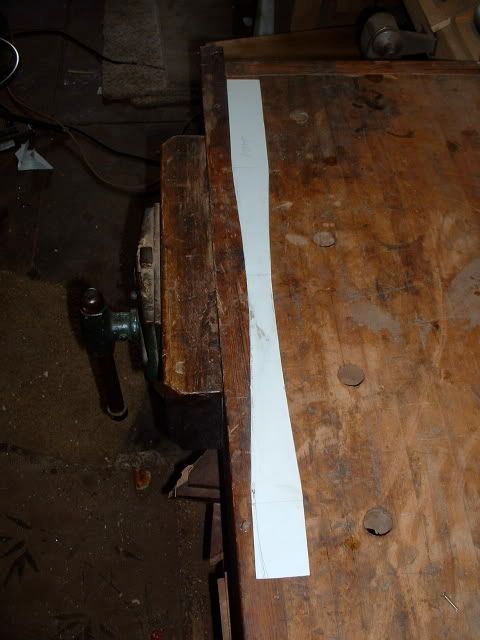
after I had steam bent the frames for the panels and had the true curve I make a templet for the legs-
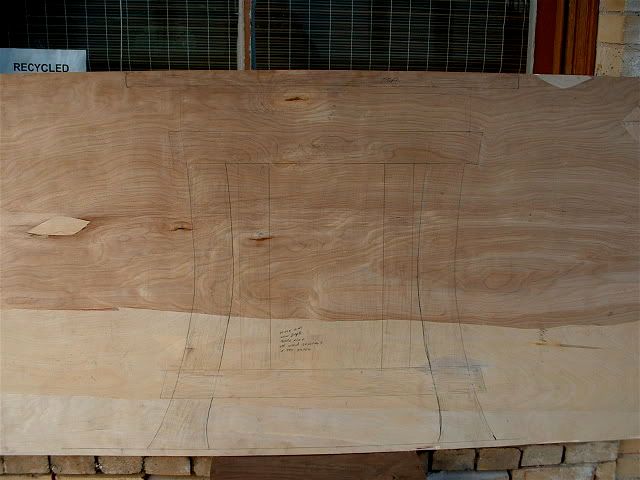
and then made a real size end drawing on the back of the piece of plywood that has the drawing of the back -
I'm working on the legs now and will try and post progress this evening-
alex
[OP]
Member
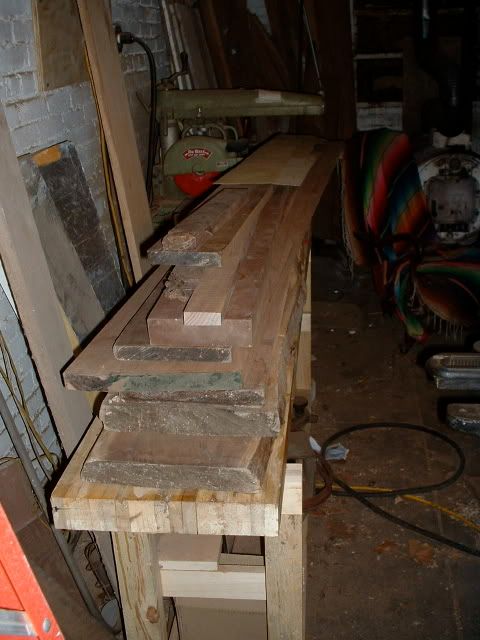
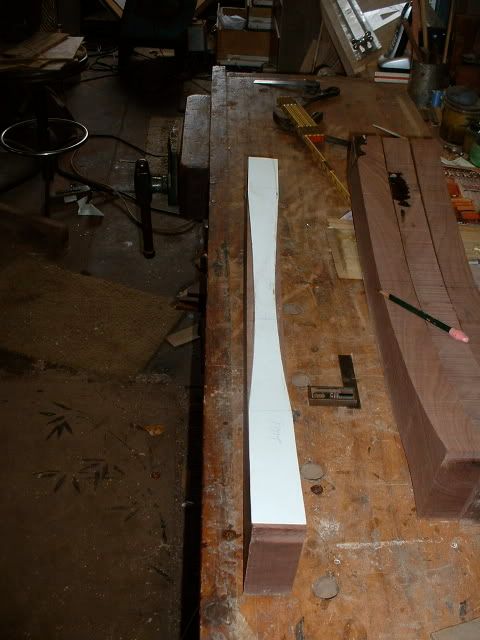
after I make the real size drawings I make a cut list and go into the wood room and find the wood for all the parts-
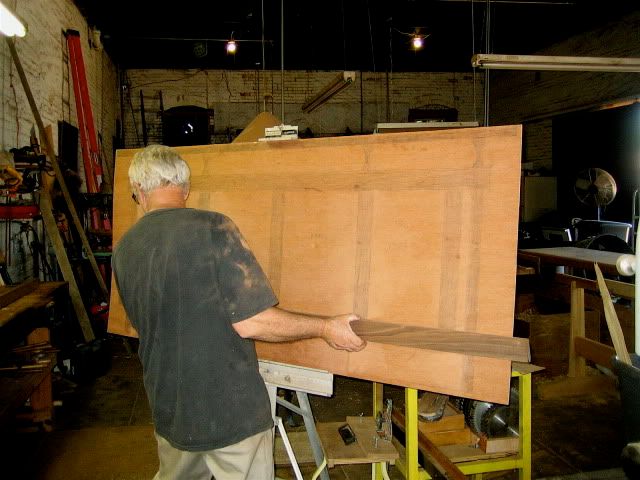
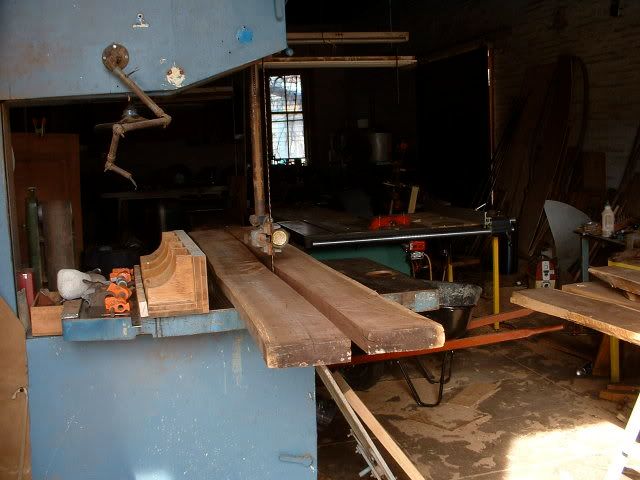
I would like to get the four legs from the same piece so the grain and the color will match-the piece of walnut I will use I split on the big bandsaw-so it's more manageable -
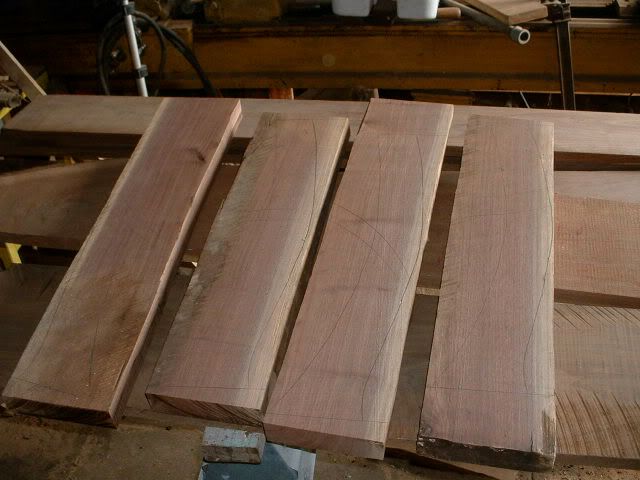
then using the templet I find the four legs-I wont to have sap wood on the back side of each leg-I mark the four legs cut them into four pieces then bandsaw them out-
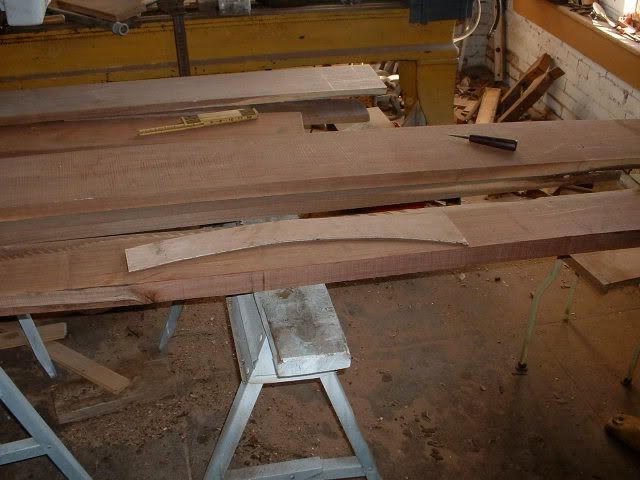
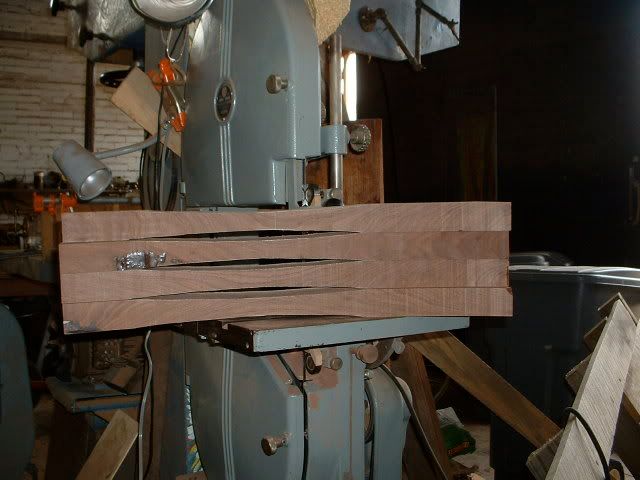
then I make a templet to mark the sides of the legs-mark each leg and cut this out on the little bandsaw-
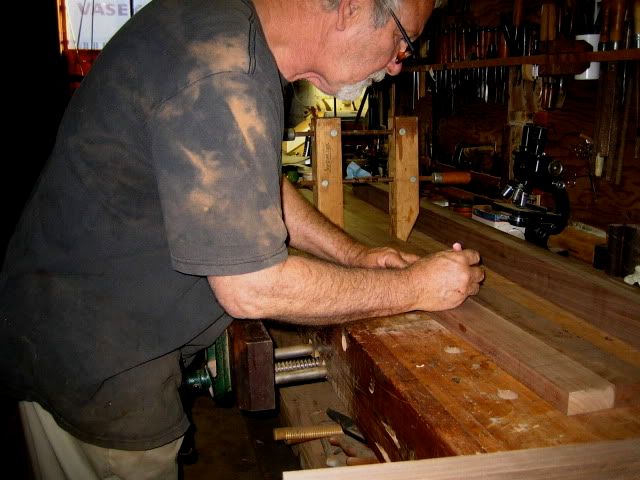
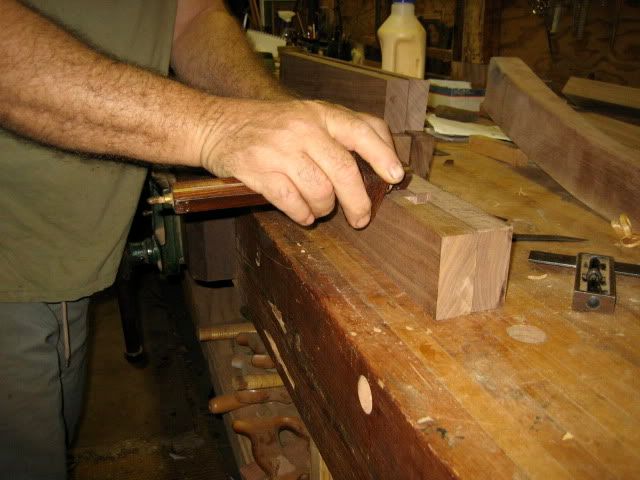
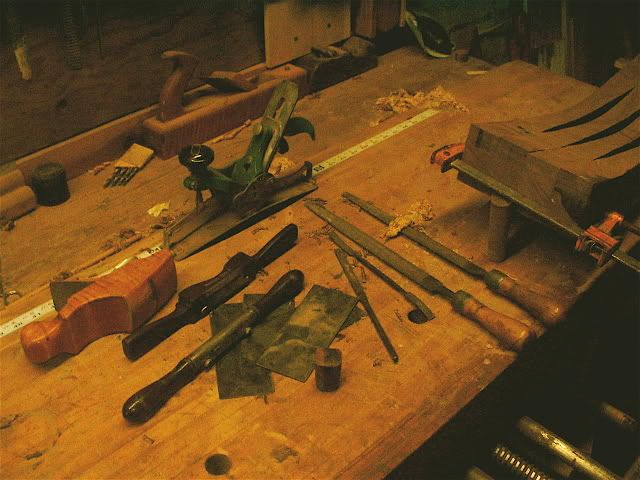
to shape the legs I use a compass plane,rasp , spokeshaves,scrapers and sand-paper-
smoothing out the marks from the rasp-
more to come-
alex
Last edited by edward alexander; 03-30-2009 at 10:22 PM.
[OP]
Member
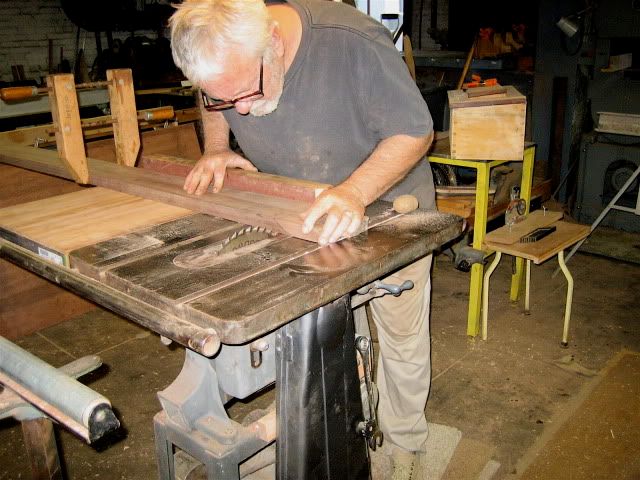
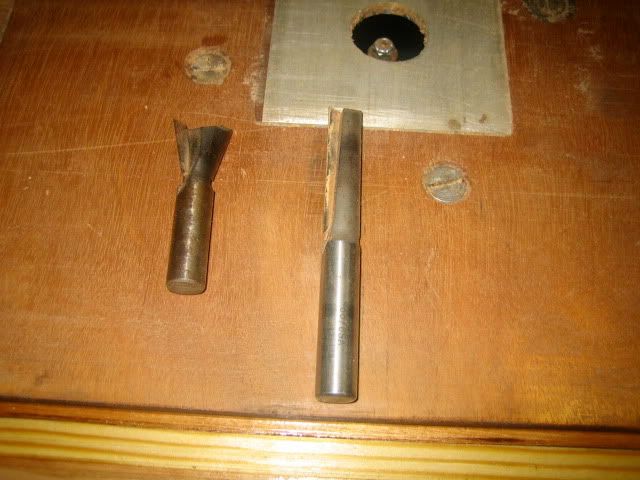
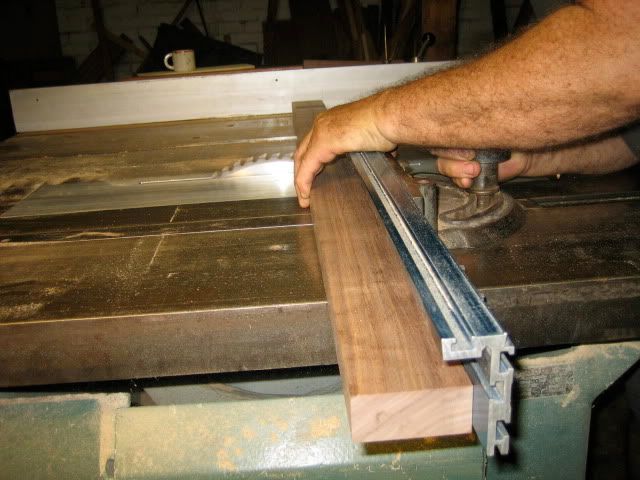
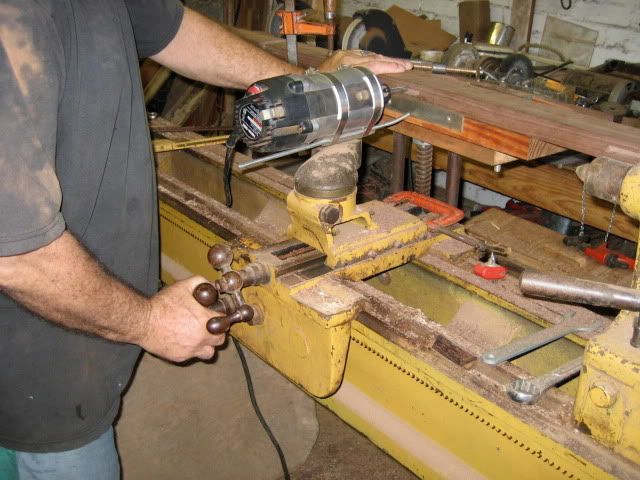
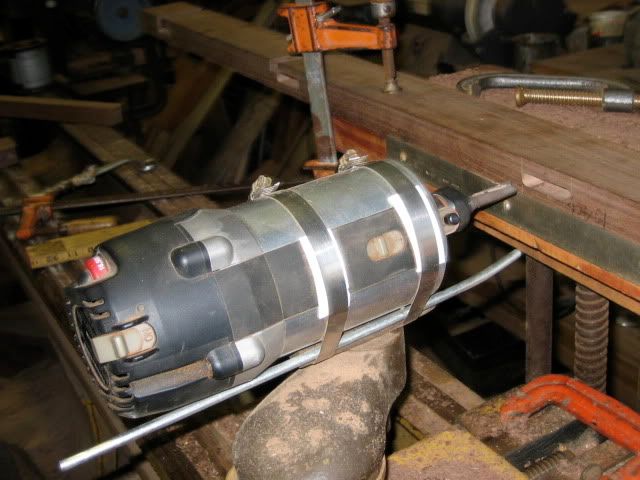
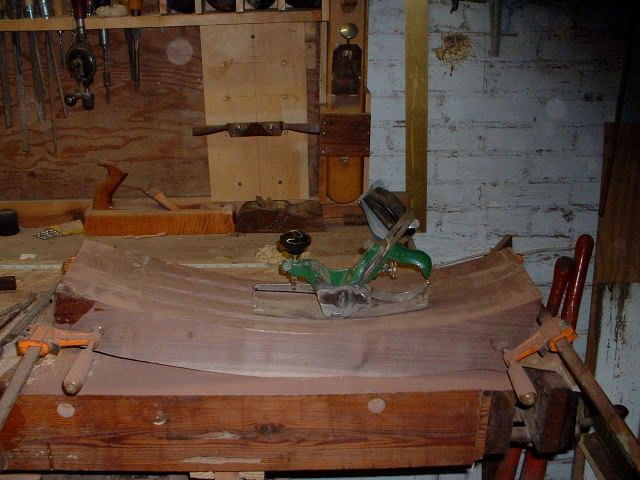
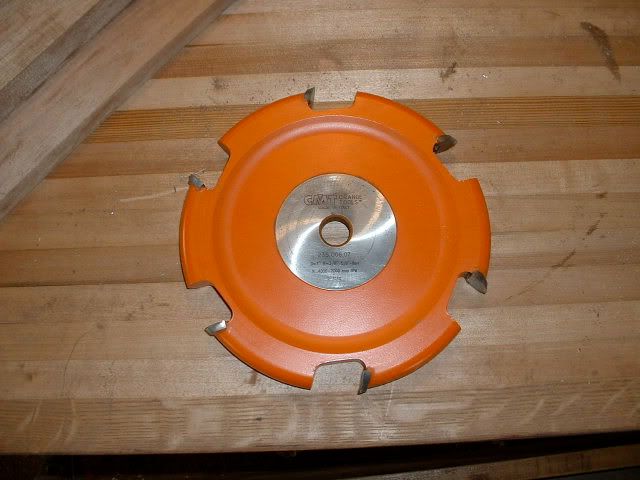
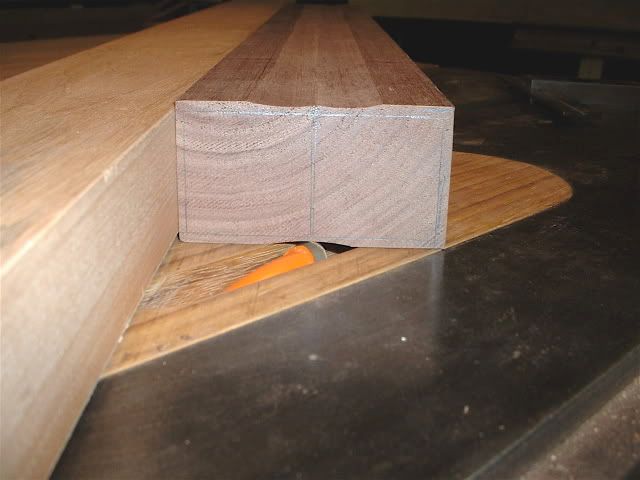
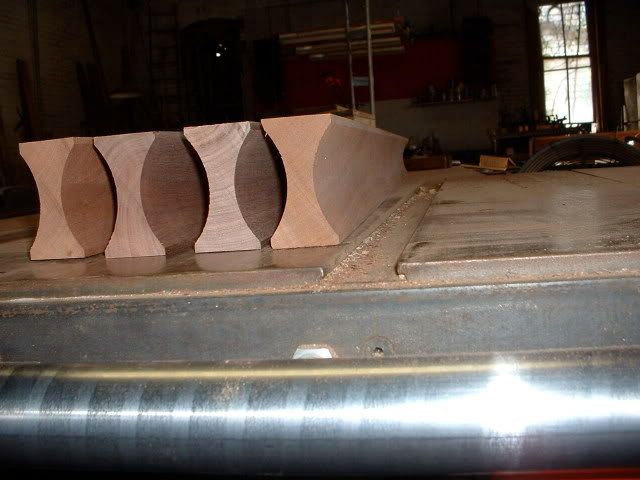
cutting the coves-I use this CMT 6" six knife cove blade-
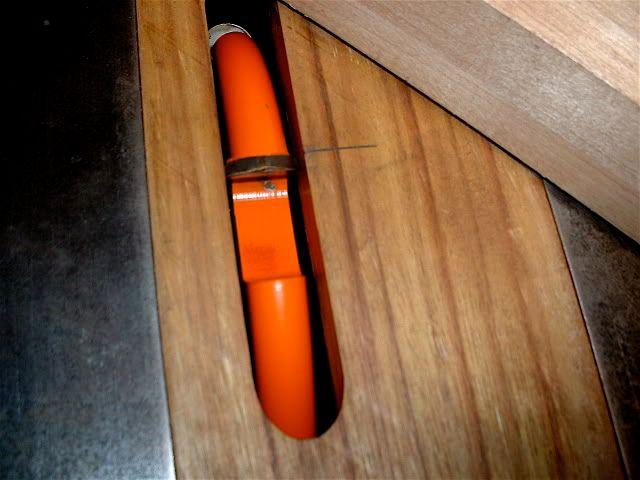
the set-up is a fence at 45 degree to the blade-before anyone ask about the stone on the saw-I keep a stone one each of my machines-it's a safety thing-
I've marked on the insert the high point of the blade-
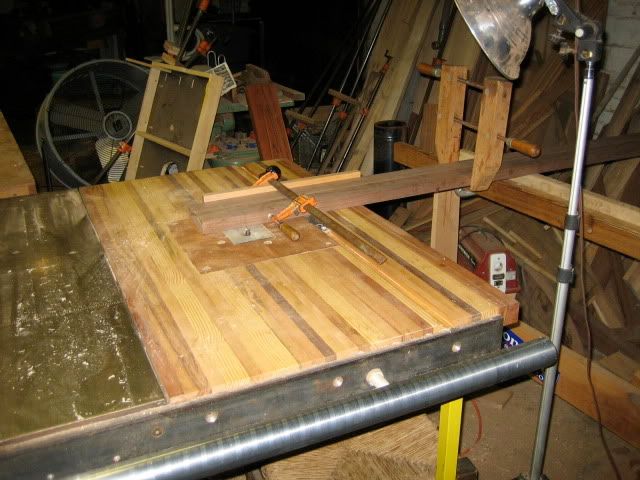
I mark the center of the end of my test piece-then I line a cutter with the mark on the insert with the blade at this place I line the center mark on the test piece with the center of the cutter then bring the fence against the edge of the test piece-clamp it in place and make a cut-you can see from the top of the the test piece that the first time I was off-
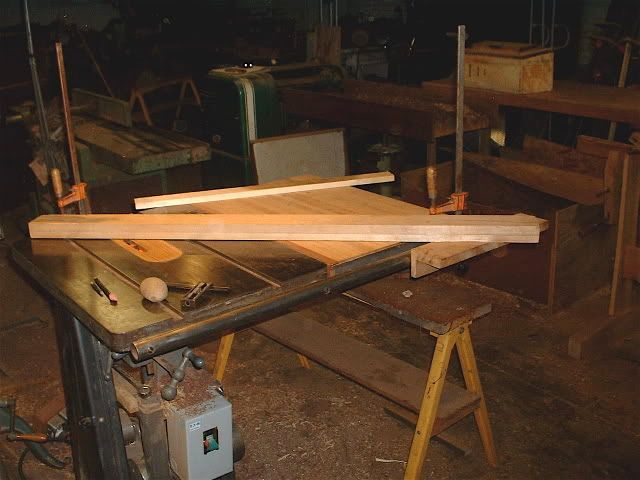
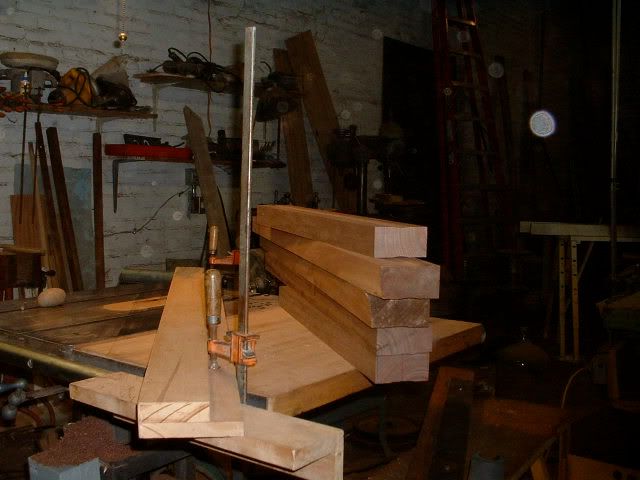
I only need four cove pieces but I cut extra--this wood has a lot of chips and cracks,knots-then there is always the possibility I'll mess one up-
-a feather board is a good idea for this operation though this time I don't use one-
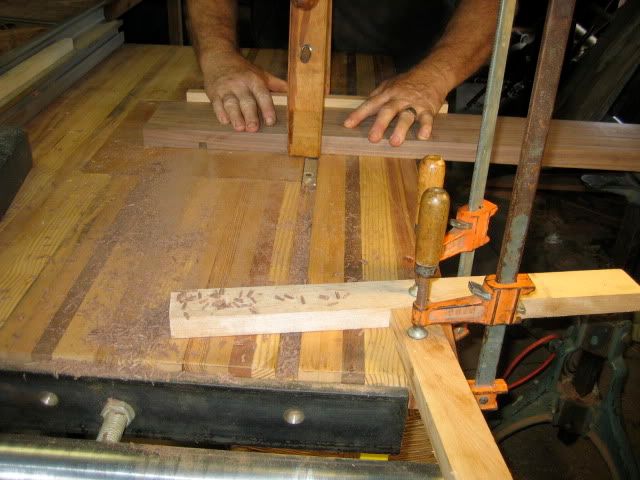
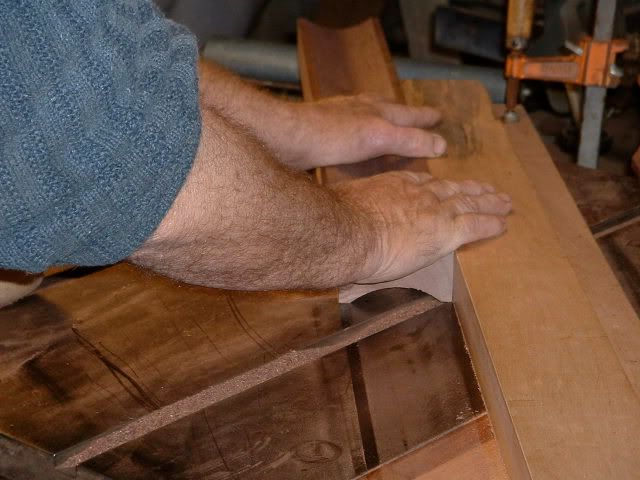
I'm showing this picture to show what not to do-when you finish the cut don't have your hand on the back of the piece being cut--if it should slip off-well after you come home from the hospital you'll have one heck of a mess to clean up also you won't be worried about going blind for awhile--your hand should be up a few inches on the board-
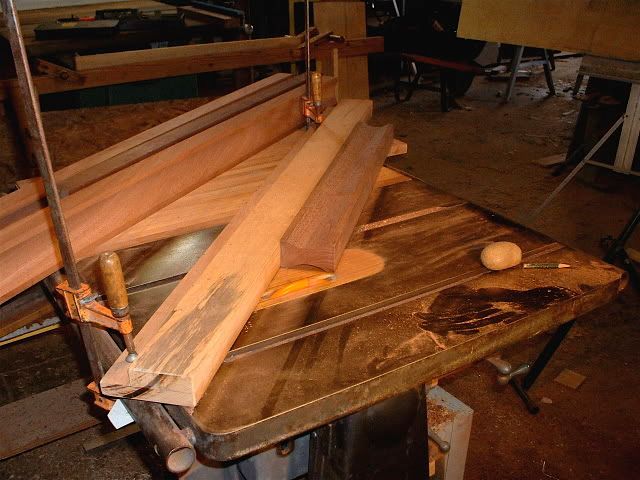
each cut is only 1/16" or less - the way I do it is I'll take a pass turn the board and take another pass with the same side down but the opposite edge against the fence-turn the piece over and repeat-when I get nearly finished I start taking a much smaller cut--just a hair each pass--you'll save time later scraping and sanding
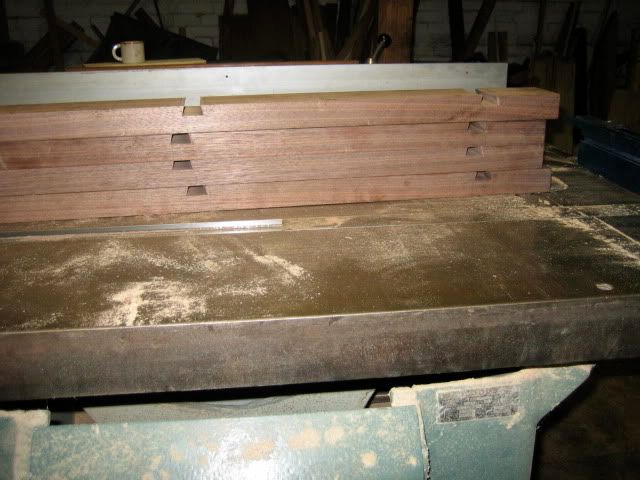
all done-
to finish I'll use this little cove plane, scrapers and sandpaper-I keep about a half dozen goose neck scrapers on my bench-
more to come--
alex
Last edited by edward alexander; 04-01-2009 at 7:18 PM. Reason: change
Member
alex you do vary nice work and i love the desk.one of a kind
 Member
Simply stunning. Would it be possible to one day get a photo tour of your shop?
Dan
A flute without holes, is not a flute. A donut without a hole, is a Danish.
 Contributor
Edward I am in awe of your work...Extraordinary!!!
Jerry
[OP]
Member
Dan- when I get time I'll post pictures of my place-Originally Posted by Dan Mages

alex
 Member
Sorry, I've still gotta ask about the stone... How does that increase safety? Is it a process thing ("when I take the stone off I go through a mental checklist") or something else ("when the bad guys come in the shop, I always have a rock to throw at them")?
Love the thread...
 Moderator
+1...give is the story behind the stone!
[OP]
Member
OK---about the stones,they don't do nothing,just set there--moving them out of the way has become second nature after this much time--an old Apache out in New Mexico told to take special stone (these stones are special,they each one came from somewhere other than the place that the others came from;I think the stone on the little saw I was using for the coves came from a river bed in California--maybe) so anyway this old Apache told me to take special stones and put them by my head when I slept and I would never get headaches , well I don't know why he told me that - I don't get headaches and I had met him there at the foot of the Gila mountains in this old ice cream parlor (it had wooden floors) to find out what the roadrunners were saying to me--no kidding
I go walking in the desert and roadrunners come up and start talking-of course I don't know what they're saying they talk in roadrunner--so that's why I had met that old Apache in an ice cream parlor at the foot of the Gila mountains---and all he said was to put stones by my head and I wouldn't get headaches- couldn't find out anything about the roadrunners-though others have told me it's heavy - maybe it has to do with the trickster-anyway since
I don't get head aches I decided to put a special stone on each of my machines---all I can say is they've been there a long time and so far so good.
--You asked-
alex-
 Member
The desk, the process, the craftsmanship and the wisdom are great learning tools....you truly do have a special gift - thank you for sharing! And thanks for sharing the info about the stones - I, too, was just about to ask!
Member
Thanks for the desk, the photos, and the stone story.
Gifts all.
[OP]
Member
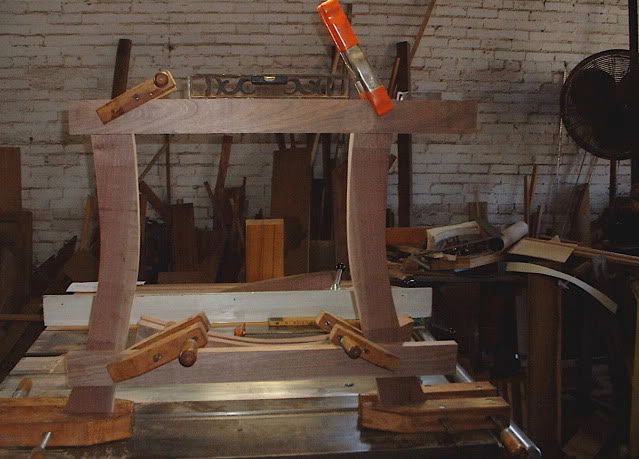
It's been awhile since I posted,I'm working on the frames,there are two,top and bottom - the corners will be dovetailed with angle dovetails the cross pieces will be sliding dovetails-
the walnut is 2 1/4"wide and 1 1/8"thick-I lay out the sliding dovetails,check against the real size drawing,and cut to length-
to cut the sliding dovetails I use the router table-I start with a straight bit to take out most of the cut then finish with a dovetail bit-
now I cut out the middle part of the front two pieces-
more to come---alex
[OP]
Member
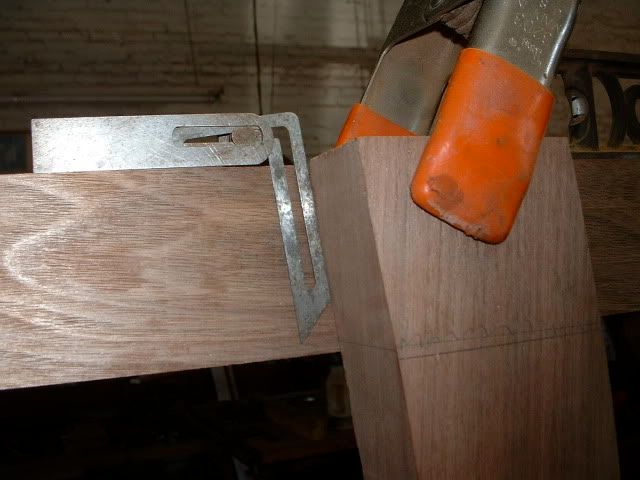
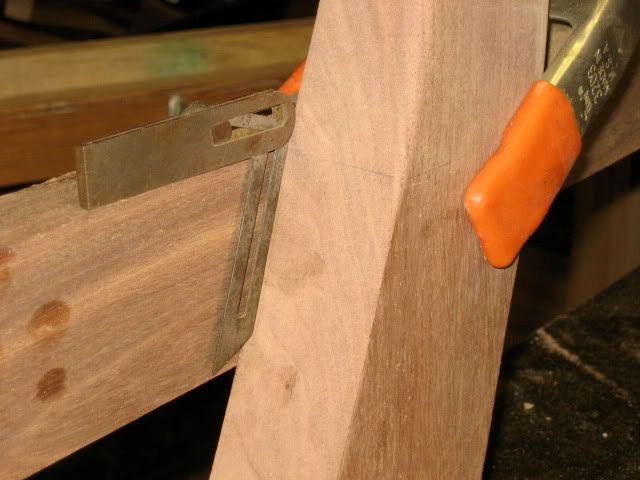
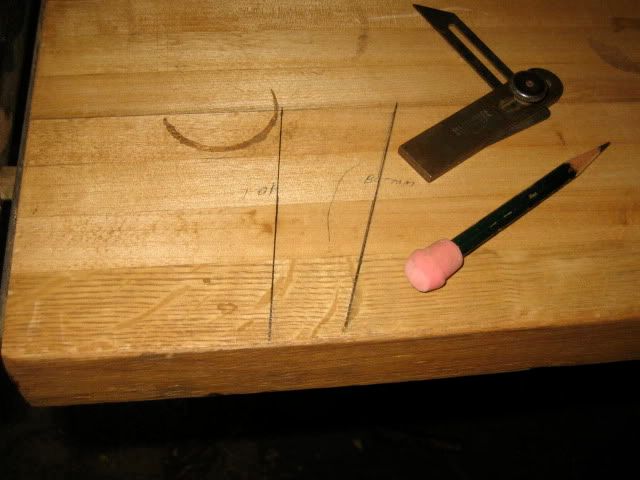
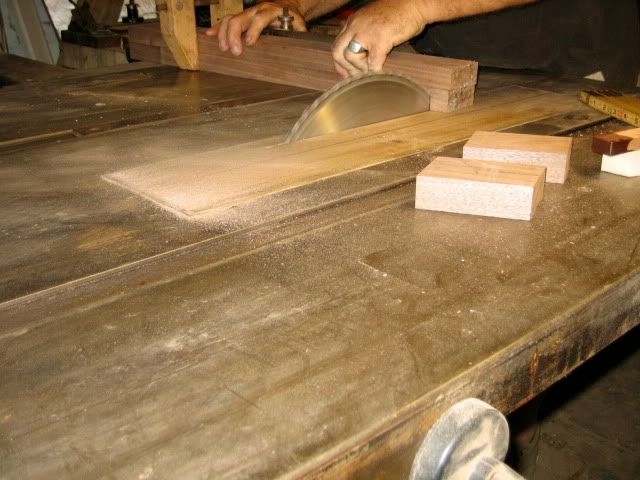
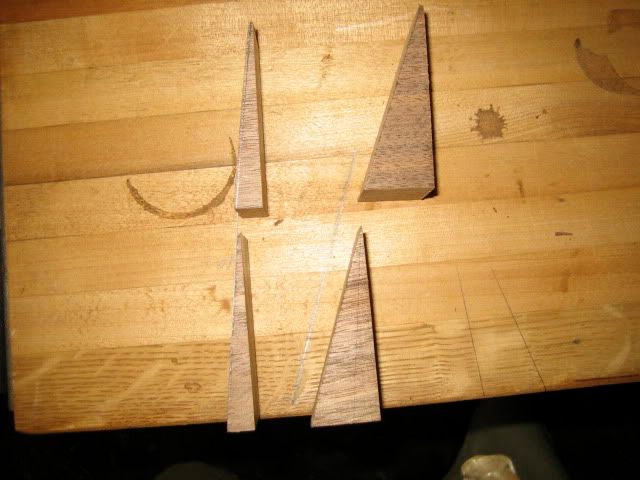
To cut the side pieces of the frames I have to know the angles-I clamp the end pieces in place on the legs set a bevel then transfer to the wooden extension on my #2 table saw-the top frame will have a different angle than the bottom frame-
I cut the angles keeping cut offs from one end,these will be used to lay out the angled dovetails-I only need one of each but it's good to have an extra-
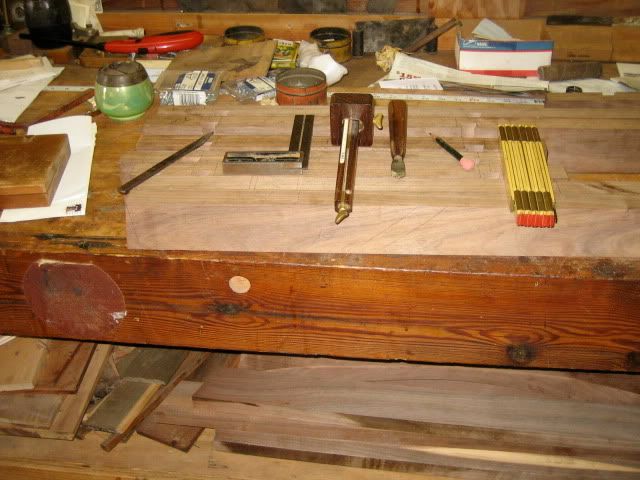
I lay out the mortises,and cut them with my neat red-necked rigged mortiser-
more to come-next cutting the angled dovetails-
alex
 Posting Permissions

 Reply With Quote
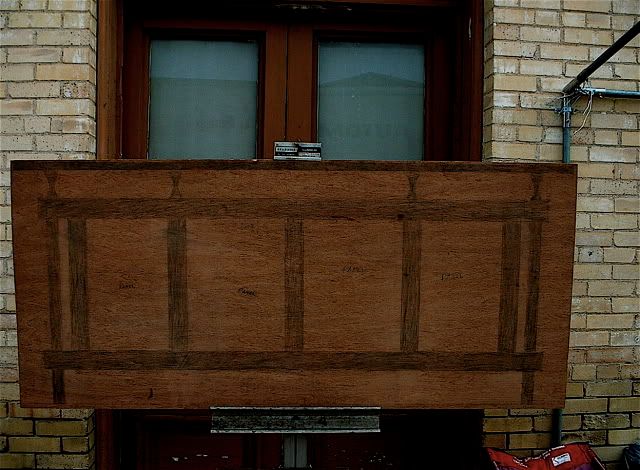

")