That is a beautiful bench! And well crafted to boot! I like the fact that you stained the legs for contrast. It really "sets the top off" (know what I mean?).
I'm sure you are going to enjoy this bench for years to come. You should be very proud.
Good job!

 Reply With Quote
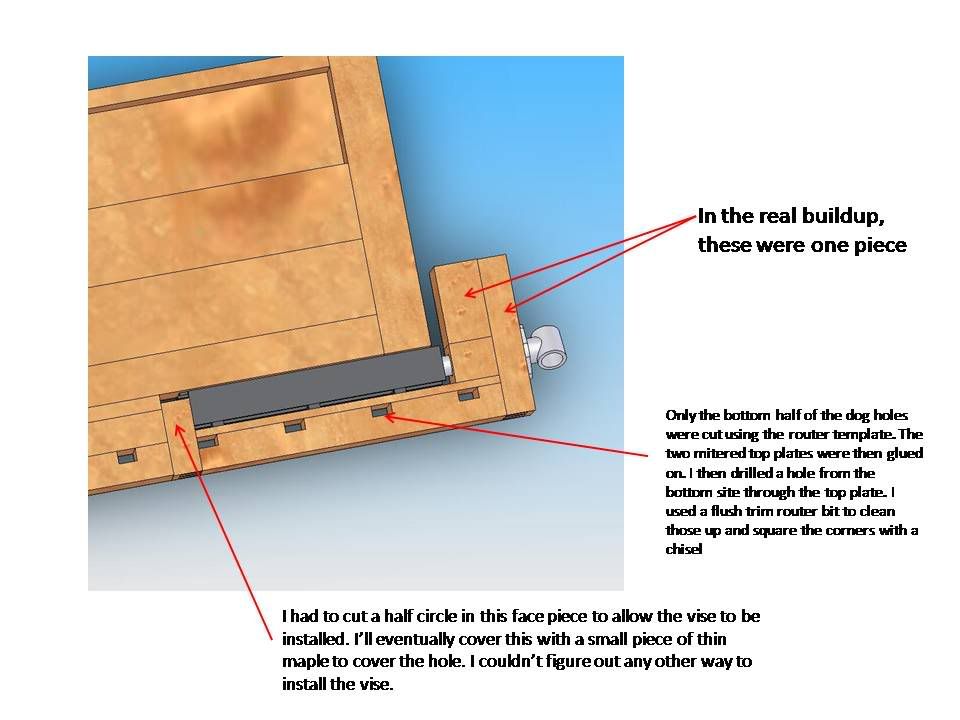
 ).
).