Page 1 of 2 12 LastLast
Results 1 to 15 of 28

Thread: Another Workbench - My First

  1. #1
    Join Date
    Jun 2006
    Location
    League City, TX
    Posts
    8

    Another Workbench - My First

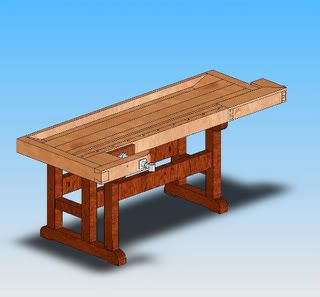
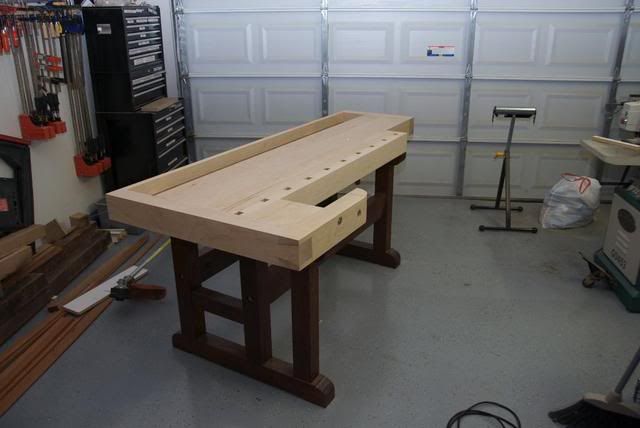
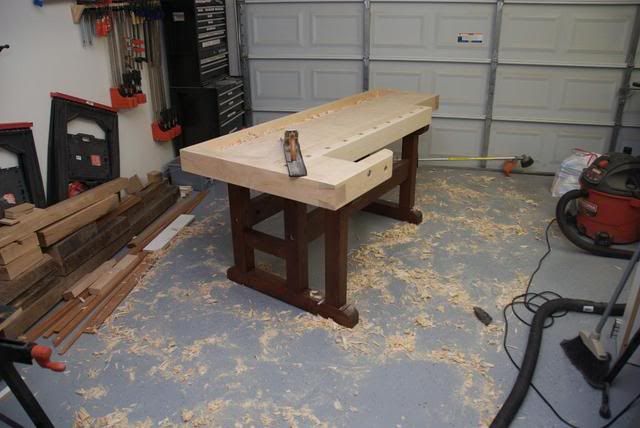
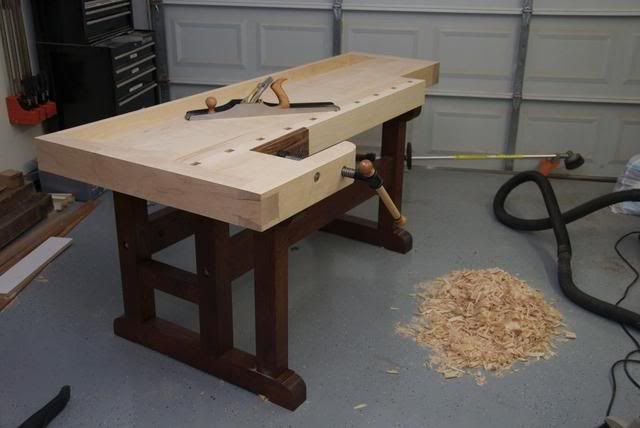
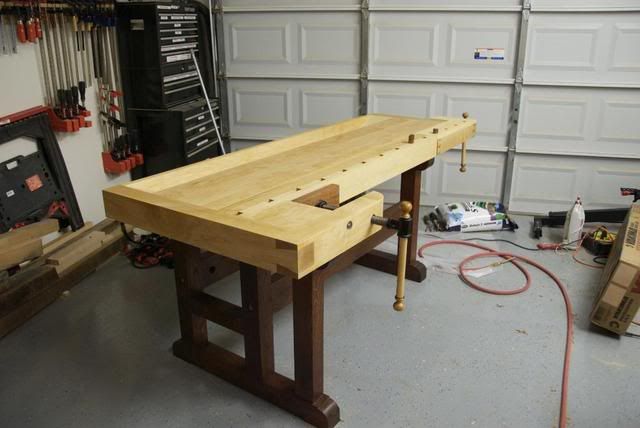
    I don't post often, but thought I would share my latest. I thought about posting as I went along, but decided to wait until the end and show everything at once. This project took 7 months to build start to finish not including research. I studied the numerous magazine articles, The Workbench Book by Landis, and Workbench by Schwarz. I guess it took me about 2 months of research and another month of solid modeling on the computer. I decided to build a Klausz styled workbench. Much of the dimensions are the same, but I did make it longer and thicker by a little. So here we go...
    The original solid model. I used SolidWorks...


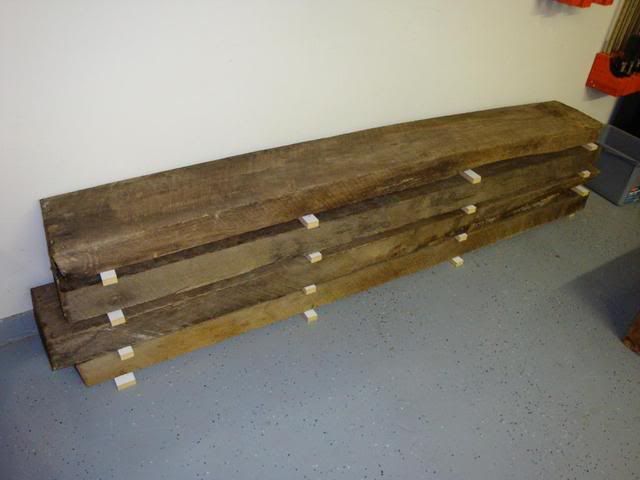
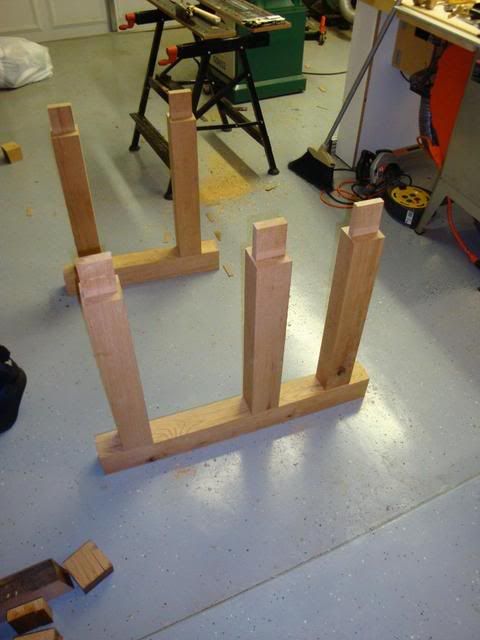
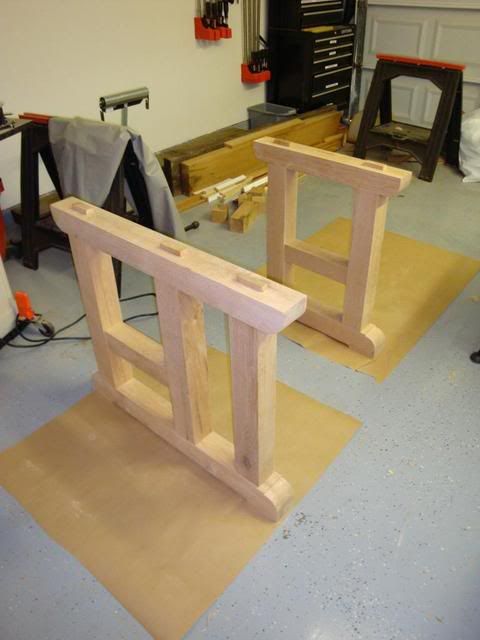
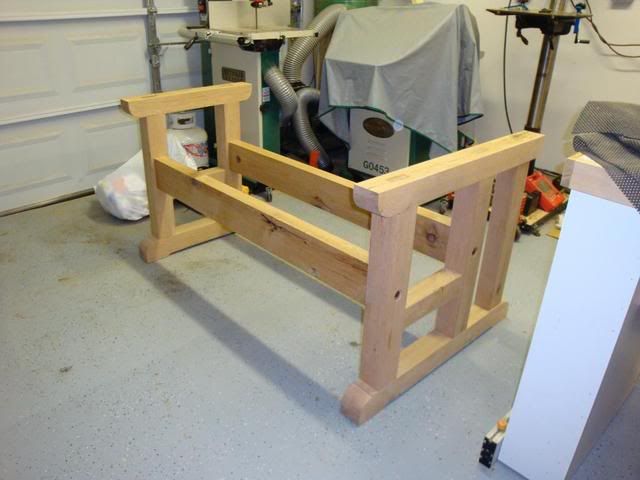
    Next up was finding wood for the base. My dad help me locate some old white oak bridge timbers that were cut down about 40 years ago and have been air drying under tin since...


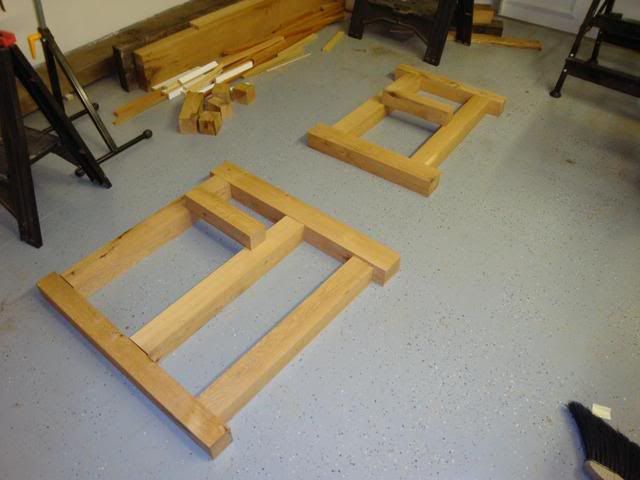
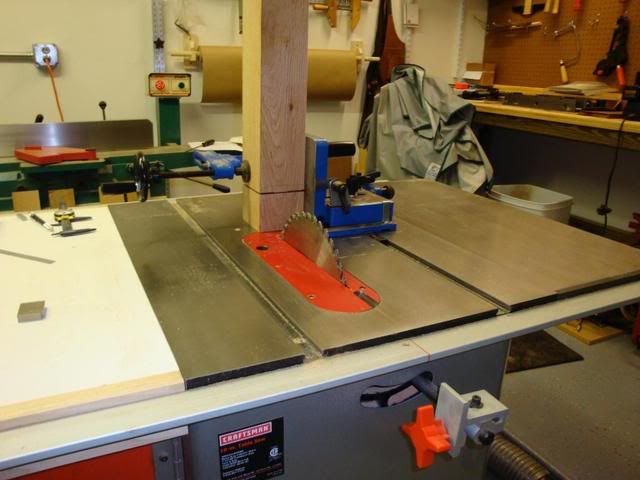
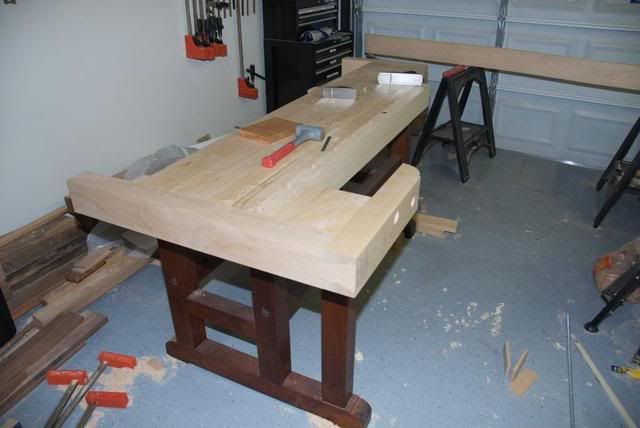
    Milling this into the base was no easy task. Even though I had the tools to do it, I've never worked with large pieces like this. I found out the hard way that your jointer and other tools better be tuned up and ready to go...


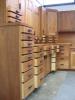
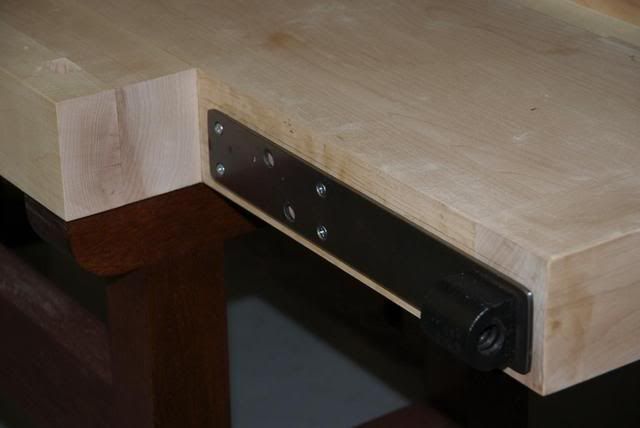
    All the mortices were blind and cut with a drill press and chiseled square...


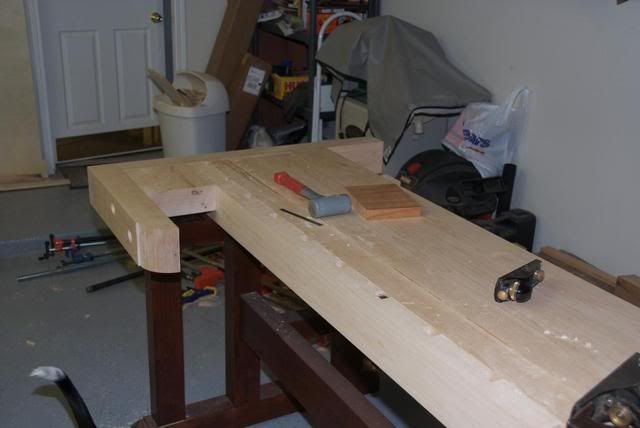
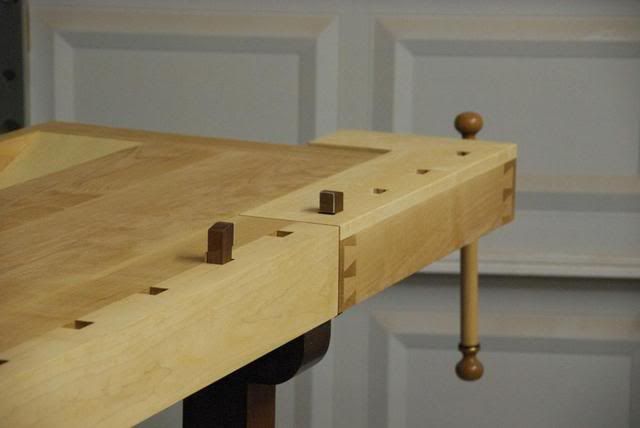
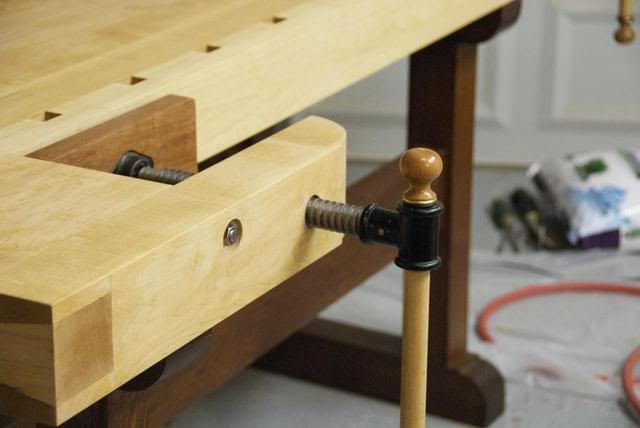
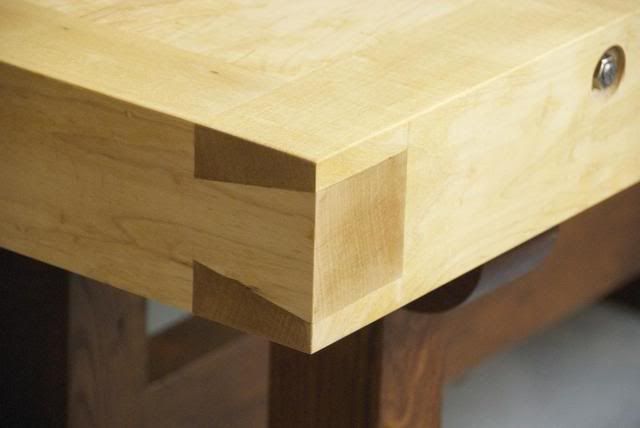
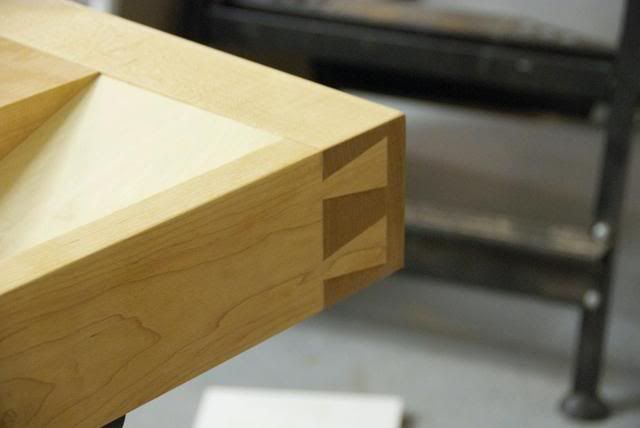
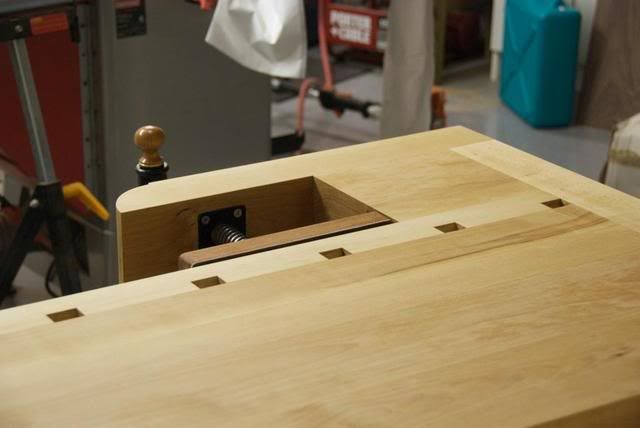
    All the mortices and tenons on the top were wedged...


    ...

  2. #2
    Join Date
    Jun 2006
    Location
    League City, TX
    Posts
    8

    More

    I decided to stain the base and finish with a few coats of waterlox. I figured the stain would contrast nicely with the hard maple top.
    Here I'm starting to glue up with top using plywood splines and plastic resin glue (I later switched to Titebond III due to laziness mostly)...

    Starting to fit together the main pieces. I cut the large dovetail on the bandsaw and routed most of the socket. Glad you can't see the inside of this joint because it is ugly...


    Details of the back side of the bench where it joins main sides. Cut the pins on the bandsaw and cleaned up with chisels. The sockets were cut mostly with a router and cleaned with chisels...


    A pic of the main body completely assembled and glued up...

    Next up was getting the rough flattening done. I had never done this before but found it to be extremely easy (it was a workout on the arms though). Plus the LN No. 8 (stealth Christmas present gloat) made it much easier. :biggrin:


    Next up was the vices. I decided to use LN hardware instead of building my own tail vise.

  3. #3
    Join Date
    Jun 2006
    Location
    League City, TX
    Posts
    8

    And Finally...

    All that was left was the final flattening, sanding, and finishing. I sanded with 120 and left it at that. The finished is used was natural color Watco danish oil.


    The dog holes were cut using a template and a router. The dogs themselves I made from scratch. They are mexican bloodwood w/ hard maple springs.
    Overall the project was very worthwhile. Although I didn't keep track of my hours spent very well, I estimate it to be in the 400 range total. I'd be glad to go into any details if someone is interested. I wish I had taken more pics of progress along the way. All that is left to do now is put the first dent or gouge in the top...

  4. #4
    Join Date
    Jan 2009
    Location
    Williamsburg,Va.
    Posts
    12,402
    Looks like a very well made bench !!! I hope the oak was indeed dry enough from being "under tin". It depends upon if it is now in an air conditioned,or heated space.
    Last edited by george wilson; 04-14-2009 at 11:12 PM.

  5. #5
    Join Date
    Sep 2003
    Location
    Columbia, SC
    Posts
    702

    Fabulous bench!

    Brandon,

    That is a fabulous bench. You did a great job on a classic design. You will not believe how much you will enjoy working on a good bench. Congrats on a job well done.

    Hank

  6. #6

    wow!

    Those are some serious pieces of wood! Really nice job. Thanks for the pics,
    Eric

  7. Wow, that is really nice. Makes me want to upgrade my bench.

  8. #8
    Join Date
    Feb 2007
    Location
    South Dakota
    Posts
    1,632
    now that I like. Gotta find some oak bridge planks!

  9. #9
    Join Date
    Feb 2003
    Location
    In the foothills of the NM Sandia Mountains
    Posts
    16,649
    Excellent post!

    Excellent Bench!!
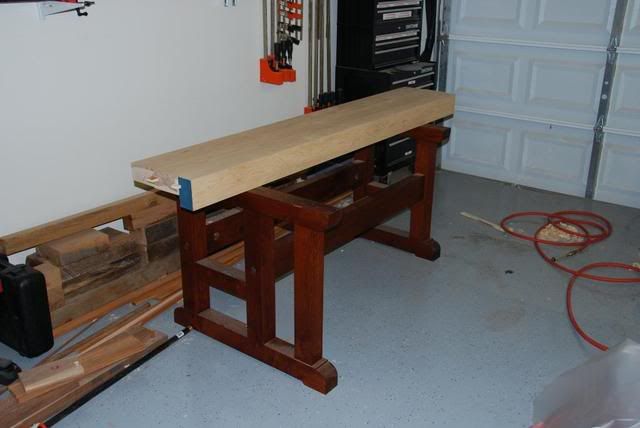
    Please help support the Creek.


    "It's paradoxical that the idea of living a long life appeals to everyone, but the idea of getting old doesn't appeal to anyone."
    Andy Rooney


  10. #10
    Join Date
    Feb 2005
    Location
    a short distance from my body
    Posts
    233
    Another WOW. Very impressive. Great job on the joinery. Thanks for sharing.
    "There is a fine line between hobby and mental illness." - Dave Barry

  11. #11
    Congratulations. That bench is a fine tool that will make the rest of your work better.
    Please consider becoming a contributing member of Sawmill Creek.
    The cost is minimal and the benefits are real. Donate

  12. #12
    Join Date
    Mar 2007
    Location
    Stony Plain, Alberta
    Posts
    2,702
    Beautiful Bench Brandon.

    I'm sure it will give you many years of service.
    Thanks for the post.

  13. #13
    Man I want one of these bad!! Ive been using a two layer MDF bench I built years ago and while its held up nice I just want the features a more traditional bench offers. Mainly the vices.
    This is an excellent job and something you should be proud of everytime you use it. Only thing I see wrong is I would hate to mess it up!!
    If at first you don't succeed, look in the trash for the instructions.


  14. #14
    Join Date
    Feb 2008
    Location
    Stanwood, WA
    Posts
    3,059
    It look very hefty and you spared no details. She should serve you for many years.
    Dewey

    "Everything is better with Inlay or Marquetry!"


  15. #15
    Join Date
    Dec 2003
    Location
    Laguna Beach , Ca.
    Posts
    7,201
    Excellent bench! Fantastic workmanship! Enjoy it every day!
    "All great work starts with love .... then it is no longer work"

Posting Permissions

  • You may not post new threads
  • You may not post replies
  • You may not post attachments
  • You may not edit your posts
  •