Page 2 of 2 FirstFirst 12
Results 16 to 28 of 28

Thread: New Home For Precious Cargo.

  1. #16
    Join Date
    Mar 2007
    Location
    Stony Plain, Alberta
    Posts
    2,702
    The last item to be done on the legs was to cut a 10 degree pyramid on the tops.
    I knew that there would be some tear out on my miter saw.
    Because of this I set up a jig to prevent it.
    Cut one block at 10 degrees and clamped another to the fence.
    Worked pretty slick.

    IMG_0139.jpg

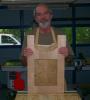
    All my leg assembly pieces.
    Sanded with my new Festool toys.
    Boy somebody should of told me hole steep a slope that stuff is.....
    The corners are rounded over on this cradle.

    IMG_0141.jpg

    And now it's glue up time. I did one side at a time.
    Too many curves to get both done and fitted right at once.

    IMG_0142.jpg

    With the clamps on the second sides I called it a day.....
    Not much more to do and I get to see what this will look like.
    I have to ask John Keeton if I can now join the walnut club.


    .
    Last edited by gary Zimmel; 07-05-2009 at 2:18 AM.

  2. #17
    You have paid your dues!! It is official - you are in Membership card is in the mail.

    Gary, you did a great job on the M&T work, and your little setup to cut the chamfered tops is slick.

    Did you use Titebond III? I have had very good luck with that on the walnut. Makes a nice invisible line.

    Won't be long 'till this one is done!

  3. #18
    Join Date
    Oct 2006
    Location
    Windsor, ON
    Posts
    657
    Blog Entries
    3

    Thumbs up stop cut technique?

    Hi Gary,
    Another great thread and another good looking project.
    Your work and shop look so clean, I wonder if
    elves are actually doing the work overnight?

    Congrats on expecting your second grandchild!

    Would you be so kind, as to explain your stopped grooves/ mortise technique?

    Are you milling them against a fence at the router table?
    And then sharp chisel to square them up?
    What's your trick for the stop cuts? (pencil line... pc of tape?)
    Are you lowering stock onto the cutter to plunge/start the trailing mortises?

    They look tidy and perfect.
    good show,
    Walt
    There are no shortcuts to anywhere worth going! WCC

    Be who you are and say what you feel, because those who mind don't matter and those who matter don't mind - Dr. Seuss

    Crohn's takes guts. WCC

  4. #19
    Join Date
    Mar 2007
    Location
    Stony Plain, Alberta
    Posts
    2,702

    The Parts Are Done

    Good Day To The Creek!

    My clamps are off and the legs are done...
    Well except for the 2 - 3/8" pins that will go at the bottom of each of the legs.
    Spent the early part of this morning getting the stretcher made.
    Now just a quick trip to the borg to pick up a few bolts and lag screws
    and I will be able to see what this cradle will look like off the ground.

    IMG_0148.jpg

    Walt and John.
    Thanks for the comments.
    The mortises were all done with my General mortiser.
    With all the ones we did on the Morris chairs I seem to be able to dial it in quite well.
    Tenons were done on my table saw.
    Titebond iii for the glue.

    The plan called for holes of 1/2" at the top of the legs to accept a 1/2" piece of copper tubing.
    Should of remembered from the first one that 1/2" copper is really 5/8" OD.
    Will have to do a bunch of filing to get them in.
    For sure I will remember for the third cradle when it's built.....

    Hope everyone got some good shop time this weekend.
    And a Happy belated July 4th to all our American friends south of the border.


    .

  5. #20
    Join Date
    Mar 2007
    Location
    Stony Plain, Alberta
    Posts
    2,702

    And So It Comes Together!

    Got my first look at how all this walnut would look like together.

    I am very happy with the joinery and can see the light at the end of the tunnel.
    Geri had a look at it and I have the bosses approval of a job well done!
    (maybe a good time to ask for some new tools)

    IMG_0157.jpg

    The cradle can be knocked down as the legs are attached to the stretcher
    with 5/16" - 3" long lag screws.
    And the ends to the sides with 2" screws.

    IMG_0153.jpg

    With my new lathe I may attempt, and I stress may attempt, to turn the bigger caps and pegs. We will see how that goes....
    Maybe with Walts new lathe he can whip them up for me.

    Now its time for the final touch ups of sanding and get the BLO on.
    Not to sure what the top coat will be as of yet, but that will come.
    This has been a very satisfying project.
    And best thing it looks like it will be done before our next grandchild arrives.


    Thanks for taking a look.


    .

  6. #21
    You gotta love it when all the parts fit!! Lookin' great, and it goes without saying (but I'll say it anyway) the walnut looks fantastic!!

    Honestly, I know there are scores out there that will disagree, but God really didn't make a prettier wood - well, 'cept for maybe curly maple, and.... maybe cherry.... well, then there is......

    What would the pegs/caps look like if they had more of a shallow knob effect so they could be removed without damage if necessary?

  7. #22
    Join Date
    Apr 2004
    Location
    Geneva, Swisscheeseland
    Posts
    1,501
    You have my wife an I drooling over that walnut cradle. Excellent work!

    Dan
    A flute without holes, is not a flute. A donut without a hole, is a Danish.

  8. #23
    Join Date
    Jan 2008
    Location
    Washington, D.C.
    Posts
    70
    Thanks for posting another great project. I can't wait to see it with the BLO on to bring out that walnut.

  9. #24
    Join Date
    Mar 2007
    Location
    Stony Plain, Alberta
    Posts
    2,702

    Pretty Much Done

    Good Day to the Creek!

    Home stretch for the walnut cradle...
    The BLO is on and I get to see what this walnut is all about.

    IMG_5396.jpg

    IMG_5403.jpg

    Pretty happy with the results.
    Only one little snag as I was doing the BLO.
    Got a little ahead of myself and only did the pegs in one leg
    before the BLO went on. It was a ginger process doing it after.

    Here are just a couple of more pics of my latest effort.

    IMG_5402.jpg

    IMG_5397.jpg

    A little hand wipe poly and a few pegs and caps will finish it up.
    Thanks for taking a look.
    And I hope everyone gets a little shop time this weekend..


    .

  10. #25
    Gary, I have to say, the maple one was very nice, but this one is the winner! That walnut has a beautiful color and the whole project turned out well. Excellent result! So, how many grandkids do you think you are good for??

  11. #26
    Join Date
    Dec 2006
    Location
    Atlanta , Ga.
    Posts
    3,970
    As John K. stated.. the maple was very nice but.. this one blows it out of the water even though same design. That is georgeous walnut. I just got a better veiw of the leg connection and I like the look of the attachment.

    Well done... again
    Sarge..

    Woodworkers' Guild of Georgia
    Laissez Les Bons Temps Rouler

  12. #27
    Join Date
    Apr 2004
    Location
    Marquette Heights, Illinois
    Posts
    2,945
    Simply BEAUTIFUL! Only ONE thing wrong! Slats instead of SPINDLES!!!!

    CHICKEN!

    Bruce
    "The great thing about Wood Turning is that all you have to do is remove what's not needed to have something beautiful. Nature does tha Hard work."

    M.H. Woodturning, Etc.
    Peoria, Illinois 61554

  13. #28
    Great work...thanks for taking the time to post.

Tags for this Thread

Posting Permissions

  • You may not post new threads
  • You may not post replies
  • You may not post attachments
  • You may not edit your posts
  •