Results 1 to 9 of 9

Thread: Mr. Sawdust Style Drill Press Table

  1. #1
    Join Date
    Aug 2007
    Location
    Greenville, SC
    Posts
    750

    Mr. Sawdust Style Drill Press Table

    Before getting my 1984 Powermatic 1150 into usable shape I needed a larger table. I have done a lot of research and settled on a Mr. Sawdust-ish table with steel reinforcement to insure that the two layers of MDF won't sag. I started off with a trip to Woodcraft which led me to purchase many pieces made by Incra including T-Track, stops and clamps.

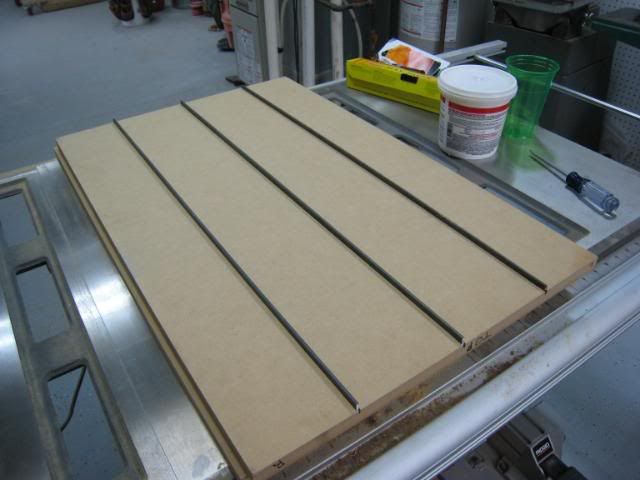
    The table itself is 18"x28" and is two layer of sandwiched MDF, the steel re-inforcement strips are 1/8"x1/2".


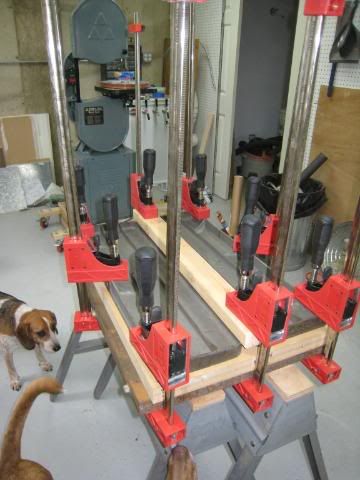
    I finally got to put my 1940's Unisaw to good use by using the table as cauls, restoration to follow. The steel strips were two-part epoxied into place and then the MDF was glued together with regular wood glue. Also, you can see the shop supervisors in this picture!


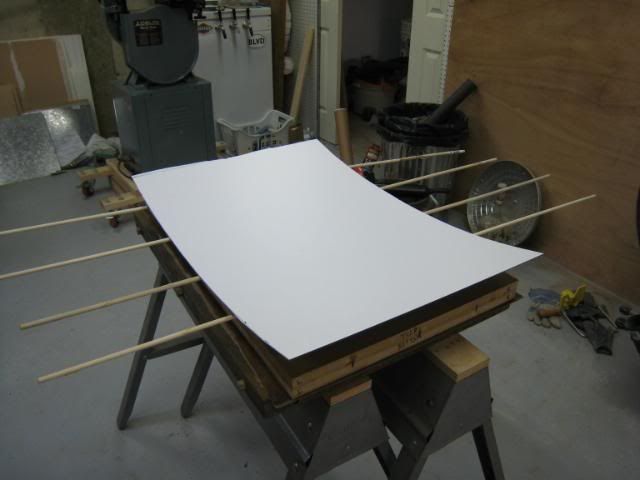
    Next up was covering the top and bottom of the table in formica. The dowel rods are used to locate the formica without it touching the MDF, once they touch there is no getting them apart.


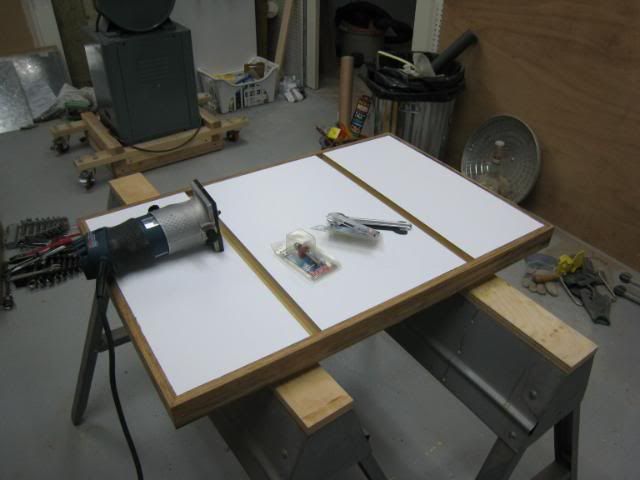
    I then cut dadoes to receive T-Track and trimmed the outside with bamboo left over from the pallet that my homes flooring came in, I rounded the corners to remove all sharp edges.


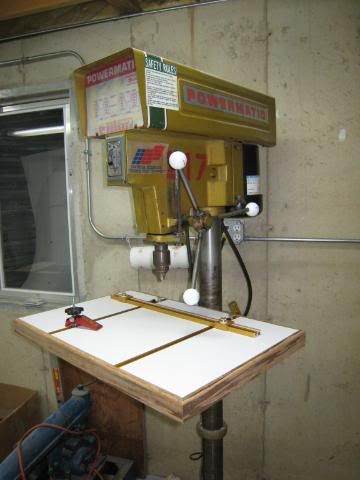
    The final step was getting it installed on my drill press. I still have to use a forstner bit to drill a hole in the table for replaceable ZCI, but I need to go to Woodcraft to buy a circle cutter. Also, you can see what a quick brainstorming session came up with for a turret handle for the drill press, FORE!


    Any comments welcome and thanks for looking!
    Attached Images Attached Images
    Last edited by Ben Martin; 07-28-2009 at 11:45 PM.

  2. #2
    Very nice DP table. I like the large table top and the way that you reinforced the MDF. The wood band around the edges is a nice finishing touch, too! I'm sure that you'll enjoy it for years to come.

    I just finished building my DP table also. Pics coming soon. I know, it didn't happen without pics!
    Stephen Edwards
    Hilham, TN 38568

    "Build for the joy of it!"

  3. #3
    Join Date
    Jul 2004
    Location
    Carlyle IL
    Posts
    2,183
    great pictorial and I like the idea of the reinforcement. thanks joe
    Vortex! What Vortex?

  4. #4
    Great tips an pics

  5. #5
    Join Date
    May 2008
    Location
    Sacramento Area
    Posts
    170
    Great table.

    On one of the RAS forums mentioned a modification to the Mr. Sawdust-style table that is a bit easier to construct but seems equally suitable. It uses "super strut" steel framing stuff (used to hang conduit, available at BORG) as the underlayer on which the MDF then mounts. It is already perforated making attachment easy, and the "u" shape of the stuff allows you to use fender washers or something similar to attach the table to the equipment.

    I've used "super strut" for both an RAS and a drill press table, and they seem to be very flat, durable, adjustable, etc.

    And I know, no pictures, etc... Camera battery is dead this morning. Really.

  6. #6
    Join Date
    Jan 2010
    Location
    Northern Colorado
    Posts
    1,884
    Having done the Mister Sawdust table for my RAS, I truly appreciate what a nice job you did. If I ever need laminate counter tops, for my kitchen, you ARE my guy !

    That said ... the beagle -- while ridiculously cute -- seems to have some concerns about something you were doing, in that picture. Might be worth checking out ....

    Nice job. Thanks for sharing !

  7. #7
    Join Date
    Aug 2009
    Location
    Cedar Park, TX
    Posts
    172
    Nice drill press table! And nice kegerator in the background. Nice to know there are other woodworkers who homebrew as well!

  8. #8
    Join Date
    Aug 2011
    Location
    PALM BAY FL
    Posts
    515
    No doubt that’s a robust table that will serve you well for years. I’ve observed the DeWalt forum’s advice on the Mr. Sawdust table as being the gold standard for surfaces, and wouldn’t argue otherwise, but there are alternatives that can work as well and yet are easier and more economical to construct, especially when using scraps that we all tend to have laying around the shop. The method is shown in a video I upped to Youtube:
    http://www.youtube.com/watch?v=9euQNBStAG8

    - Beachside Hank

  9. #9
    Join Date
    Jan 2010
    Location
    LA & SC neither one is Cali
    Posts
    9,447
    Excellent table! If you want to continue playing with the PM may I suggest a 3 phase motor and a VFD...
    Of all the laws Brandolini's may be the most universally true.

    Deep thought for the day:

    Your bandsaw weighs more when you leave the spring compressed instead of relieving the tension.

Posting Permissions

  • You may not post new threads
  • You may not post replies
  • You may not post attachments
  • You may not edit your posts
  •