Results 1 to 10 of 10

Thread: Outdoor Entertainment Center

  1. #1

    Outdoor Entertainment Center

    OK... so it isn't going outside, but it was built outside in my buddies back yard.

    Since this is my first project post here on SMC I will post a quick back story. I earned my masters degree in architecture a couple of years ago, framed in the summers through high school and college, worked in the school wood shop and a local cabinet shop during the year to help pay for school. I worked in an office for a year and decided I wanted to get dirty again. Spend about a year as a finish/trim carpenter. Got laid off due to lack of work... maybe I should go back to an office job? Can't get an office job... food and rent aren't free so I become a handy man! A lot of kids my age (26 yes I am still a kid!) complain about the economy and how they can't get jobs... I am not above doing drywall patches or painting a bedroom. I took almost anything I could and tried to provide the best service for as cheap as possible.

    As I was really starting to struggle to make ends meet, a friend of mine and his wife bought a house. There were tons of fixes, painting and odds n' ends to keep me busy for the last two months. I did a couple of built in book cases, a pantry and numerous other things that they wanted done. This last project I did for them was a "thank you" for all of their generosity. They covered materials and I built it for them. Out of all the projects I have done, this one has been by far the most satisfying. I was really touched by how they went out of their way to help me when I needed it. I felt this was the least I could do.

    Soooooo the goods...

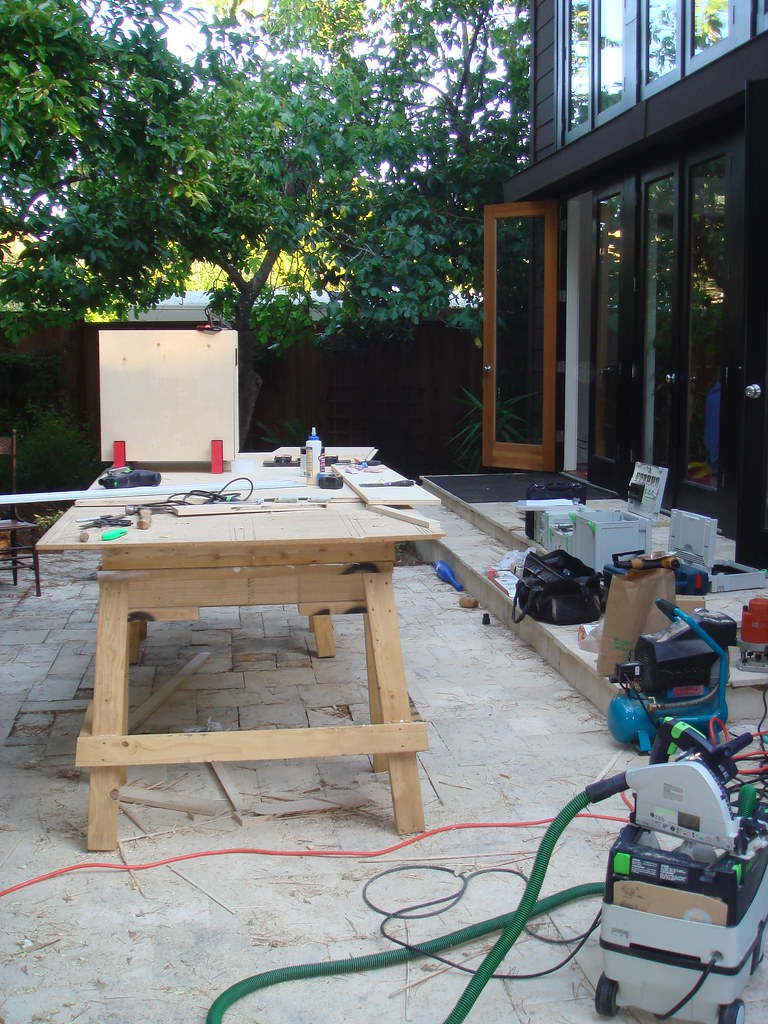
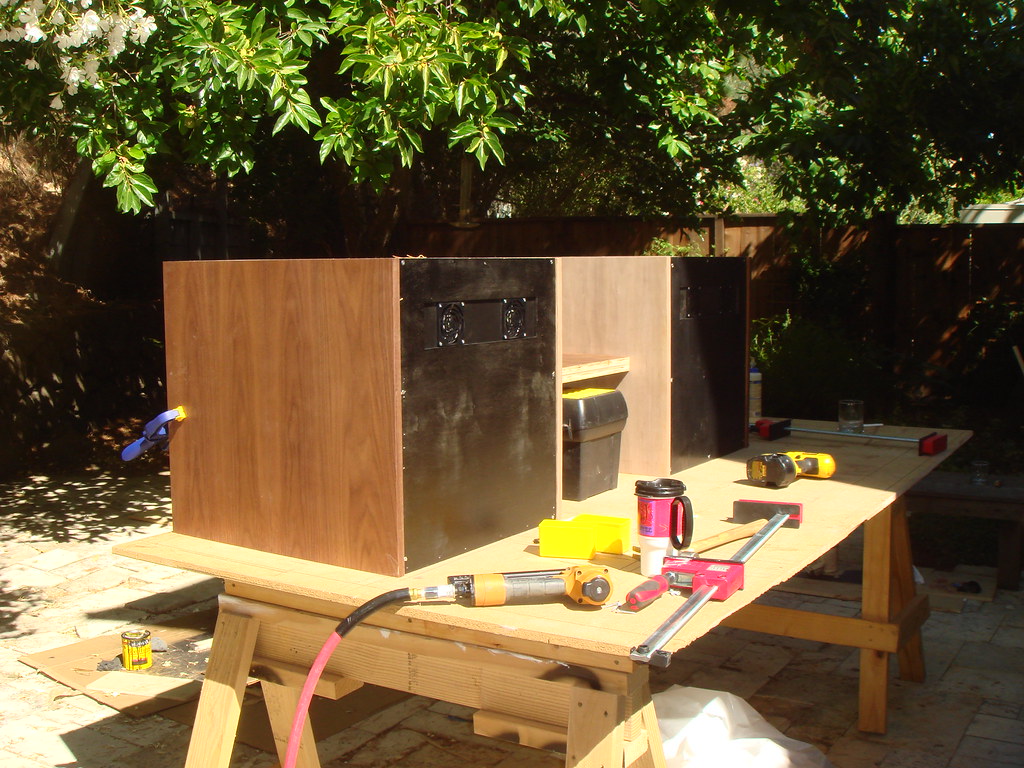
    This was my outdoor workshop. Sunny and perfect NorCal weather made working outside a dream. My bench was two saw horses and some 2x4's with a piece of particle board on top.


    The tools used were my Festool track saw, jigsaw and random orbit sander, a Fein 3 1/4 plunge router, a Dewalt 12" miter saw, and varous hand tools. I was pretty satisfied with the results considering my limited set up. I purchased the wood S4S because I dont have a jointer or planer and used plywood.

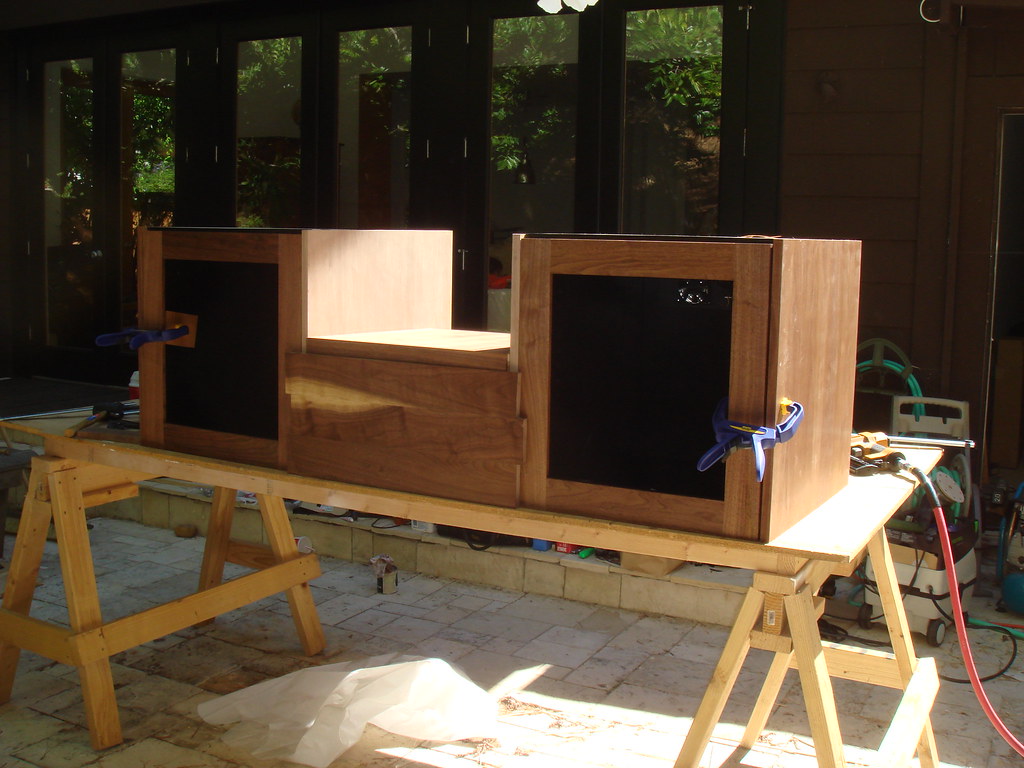
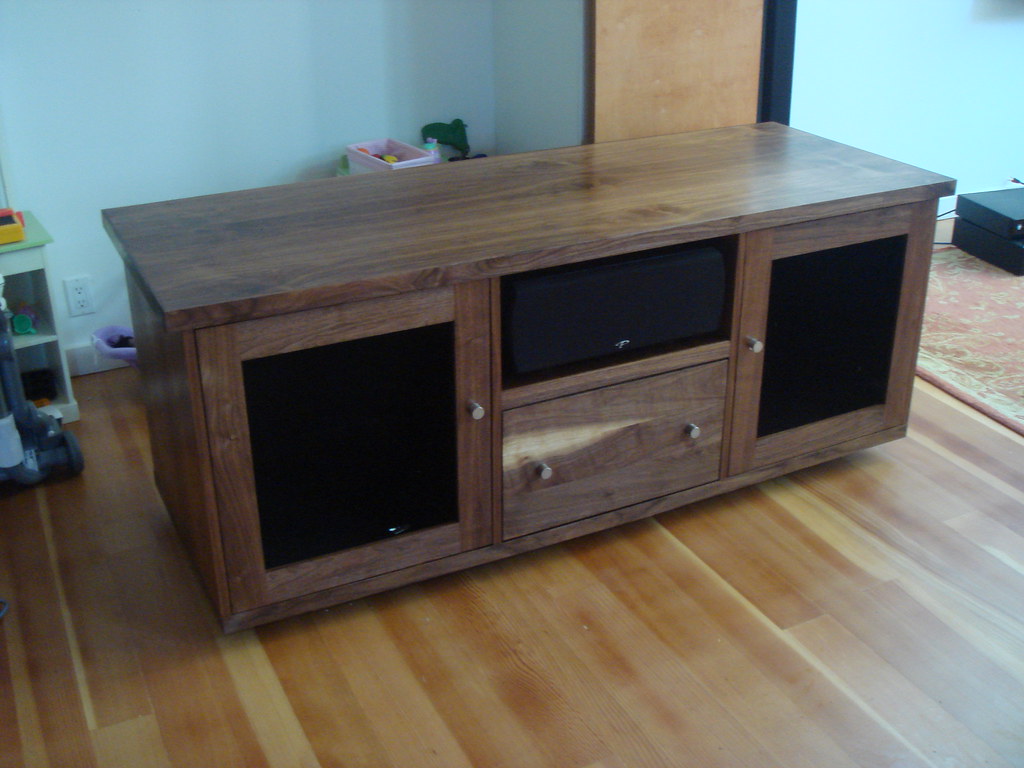
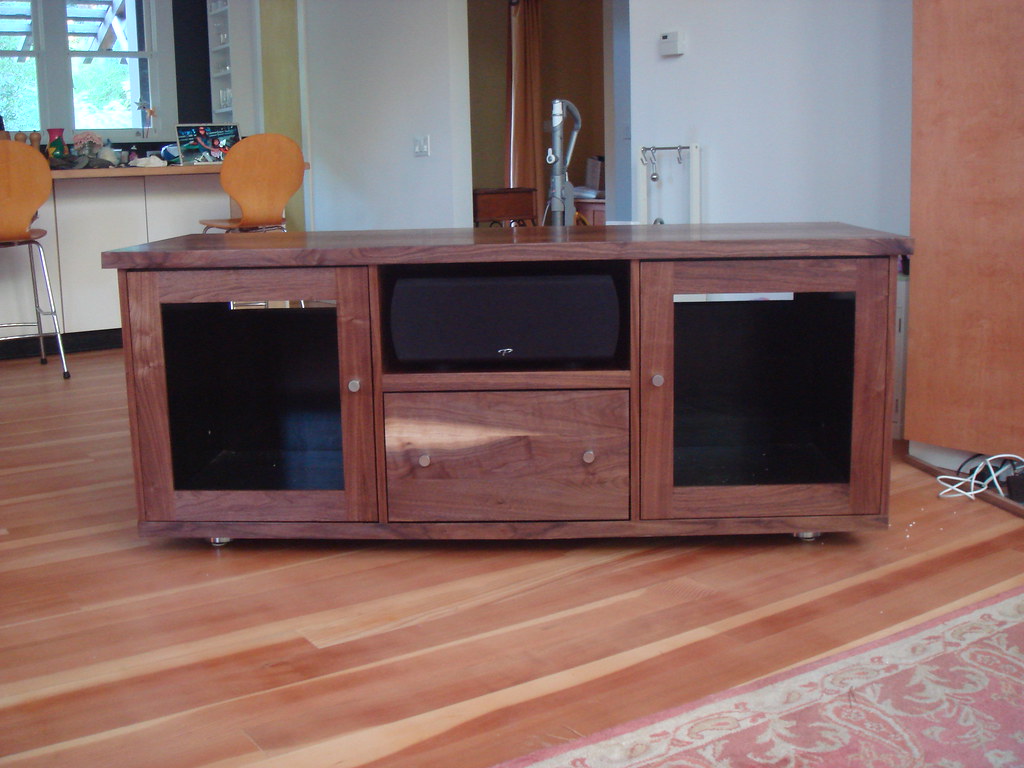
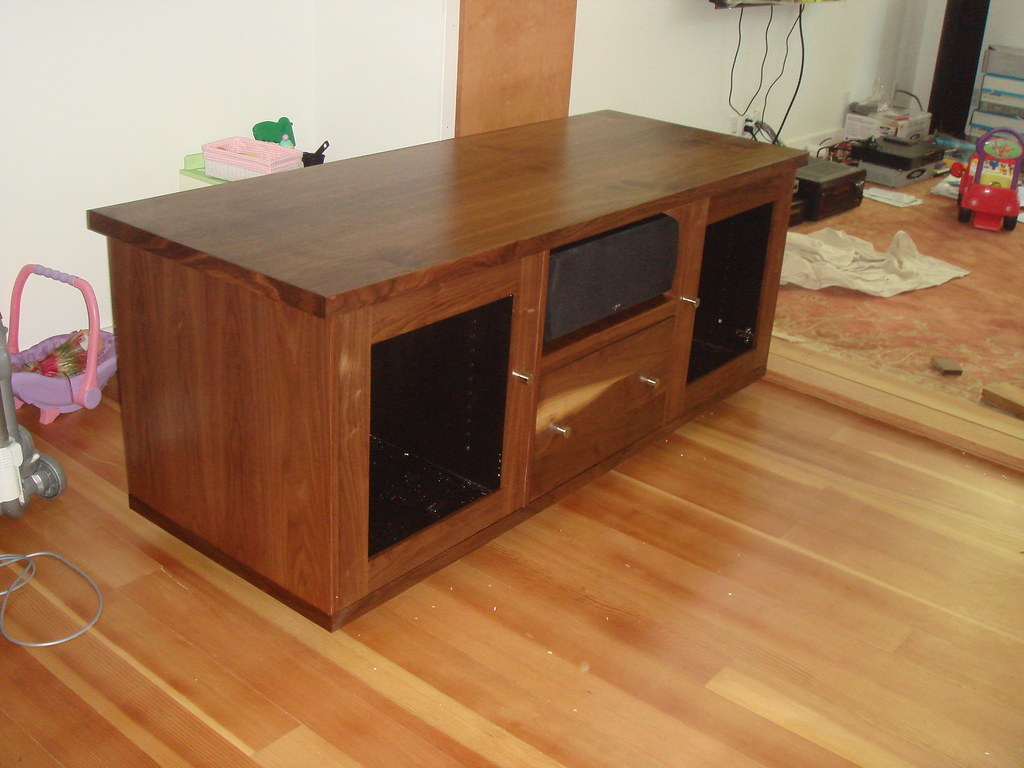
    The boxes are made from birch ply with ebony stain and a satin poly finish. They were then skinned with walnut ply.

    I don't think this buck was too happy with all the racket.


    I bought a cheapie dowling jig at woodcraft and it worked out really well. I almost bought a dowlmax for this project, but I decied I didn't want to live on PB&J for the next month!


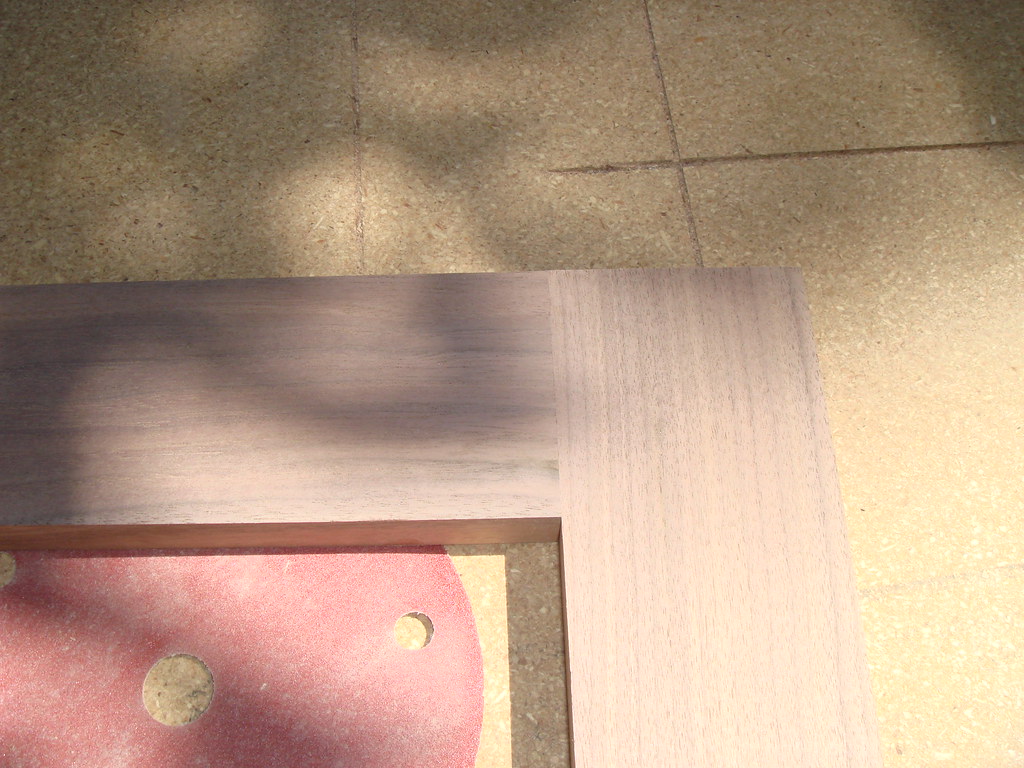
    the joints were tight


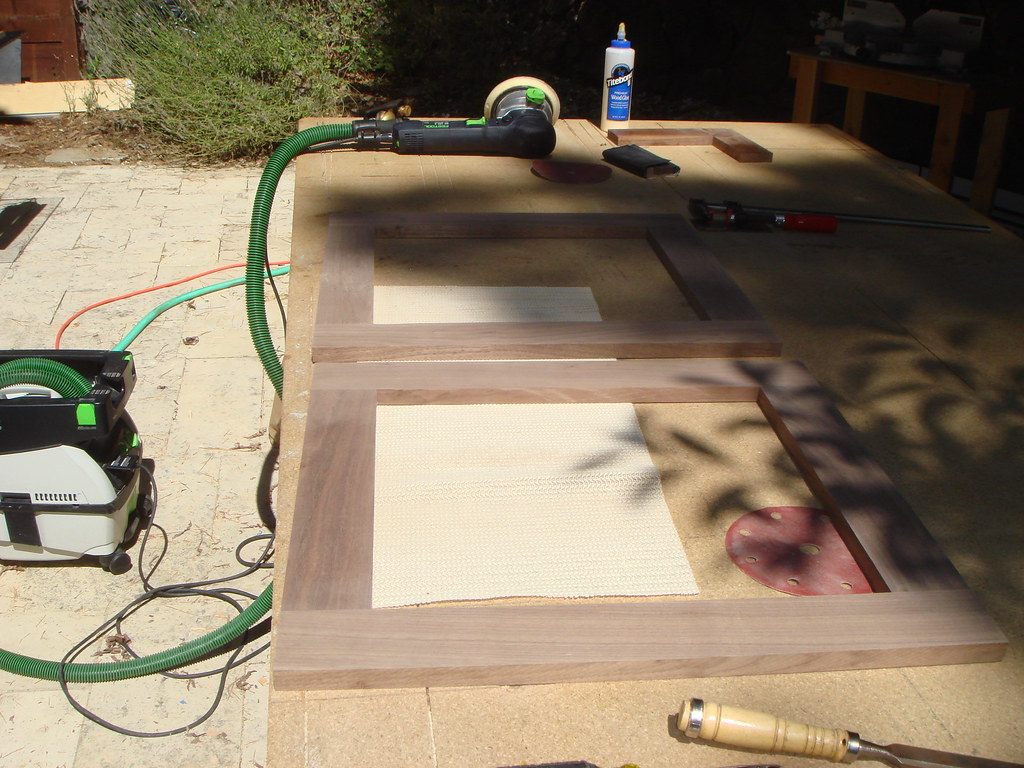
    I put a rabbet on the back side of the doors to hold frosted glass that I will be puttin in there.

    I glued up some boards for the drawer face, and picked out some pieces with sapwood to give it a nice accent. I know some people don't care for that look, but I enjoy it.


    temperature sensing auto cooling fans in the back


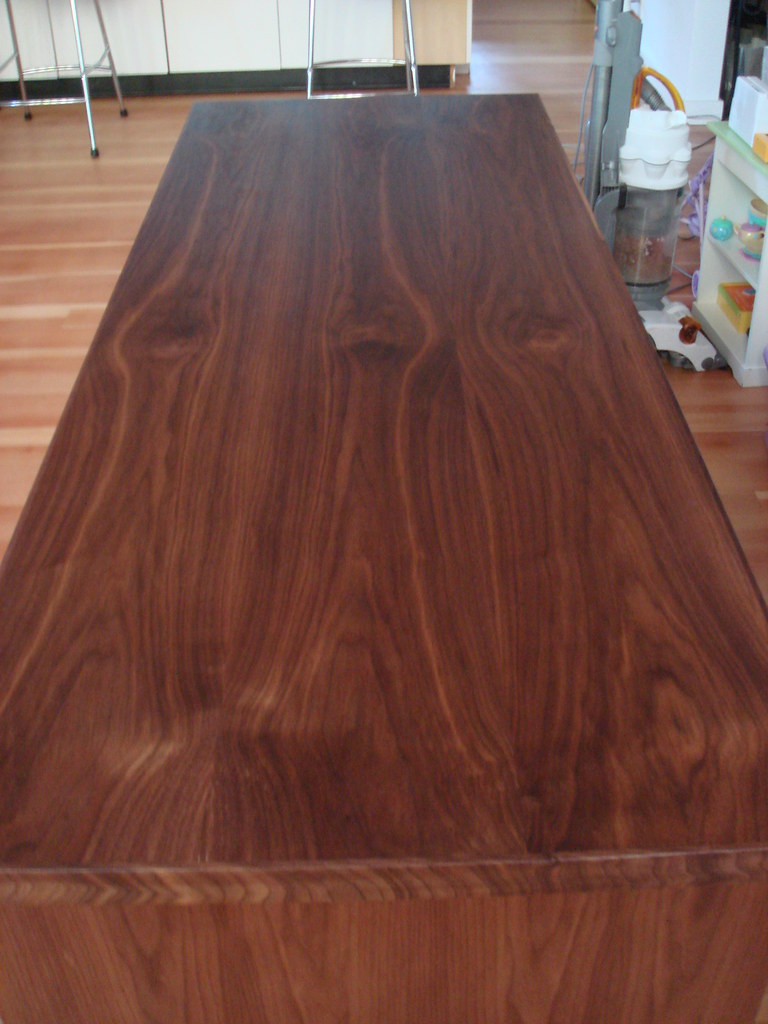
    The top is made of a walnut ply and 1/4" solid walnut edgebanding. I picked out some really nice sheets and when the oil/poly mix touched the wood the grain just popped!


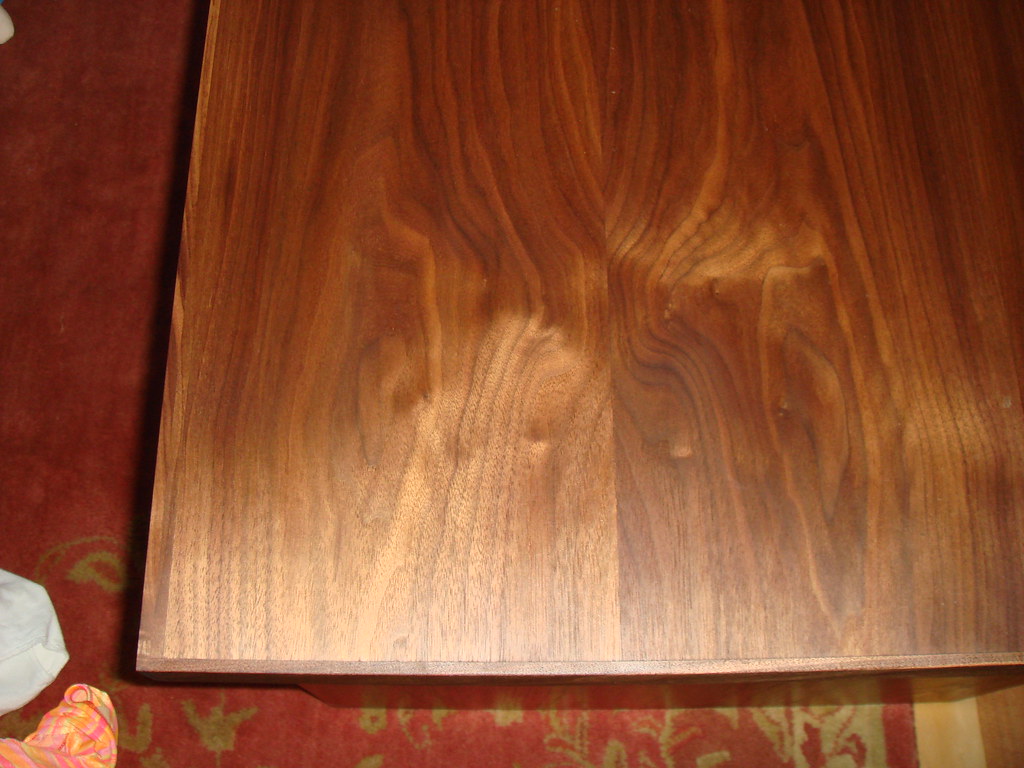
    On some of the unseen areas I just used wipe on poly and the differance is night and day without the BLO. The top has 4 coats of oil/poly and two coats of wax.

    There will be frosted glass in the doors, and we went with stainless hardware. I am not crazy about the pulls, but I think they look alright.


    It isn't 100% yet, and there are still some small tweeks but I am happy with it. Not too bad for a weeks worth of work and an outside shop.

    Thanks for looking!

  2. #2
    Vinny, that is some fantastic work - regardless of the tools available. Most "handymen" would lust over the tools you had, but for this type of project, not having a tablesaw and some of the other "customary" shop tools, is quite a handicap in my book. Others may disagree.

    In any event, I think the EC turned out great, well proportioned, and has a very clean look. Actually, I am amazed that you were able to get the quality of cuts you did with the tools you used. Makes me think twice how I sometimes take for granted what I have available to me.

  3. #3
    Join Date
    Dec 2006
    Location
    Atlanta , Ga.
    Posts
    3,970
    Very nice results Vinny. I love the pictures as I haven't been in the SF area since the late 60's. My first project was two end tables I built on a 6' x 9' apartment balcony porch in Atlanta with a jig-saw.. drill a a few other odds and ends. Keep plugging away as yes... the economy is terrible.

    I feel sorry for many of the young kids here graduating college and not finding a job which would not have been heard of 2 years ago in the Atlanta area. So.. your situation is not isolated to just your area but all over the country for the most part. Glad I'm retired really.

    Good luck...
    Sarge..

    Woodworkers' Guild of Georgia
    Laissez Les Bons Temps Rouler

  4. #4
    Join Date
    Feb 2008
    Location
    Buffalo, NY
    Posts
    1,733
    Very nicely done! I'm glad you posted the story and progress pics. Where did you get the heat sensing fans? I could use something like that in my E.C. as well as my computer desk.

    Keep up the good work, it will get better. I was layed off from my architectural firm a year and a half ago after 10 years there, so now I am self employed too. I'm doing mostly residential work (additions and a few houses) and I am finally beginning to see things pick up. I'm hoping next year will be better than ever.
    It’s only work if somebody makes you do it.
    A day can really slip by when you're deliberately avoiding what you're supposed to do.
    Duct tape is like the force. It has a light side, a dark side and it binds the universe together.

  5. #5
    Join Date
    Aug 2007
    Location
    Pretoria, South Africa
    Posts
    64

    just gorgeous

    is the plasma going on top?

  6. #6
    Join Date
    Nov 2006
    Location
    Seattle area , Duvall
    Posts
    2,103
    So first off nice work! Looks nice and clean.


    My question is, you said boxes were Birch ply, so shall I assume 3/4" an then you skinned with Walnut ply but you used Ebony Stain? Im confused.

    It sounds like the sides are double layer ply? Did you mean the finish on the inside is ebony stain and the boxes are skinned with 1/4" ply on outside?

  7. #7
    Quote Originally Posted by John Keeton View Post
    Vinny, that is some fantastic work - regardless of the tools available. Most "handymen" would lust over the tools you had, but for this type of project, not having a tablesaw and some of the other "customary" shop tools, is quite a handicap in my book. Others may disagree.
    snip
    I know they aren't typical "handyman" tools, and I am greatful I get to use them. My previous boss gave me the TS55 as a Christmas bonus! I was excited to say the least...
    I would love a shop with a table saw, but I think I might work on smaller scale stuff and try to use more hand tools. I hear they are a slippery slope as far as spending goes also!

    Re: cooling fans, I will have to dig up the link Brian. They were an upgrade option on an entertainment center I saw on the internet. It fits into their unit, and I build mine to accomodate them. The upgrade also comes with glass shelves with a hole in the middle for ventilation.

  8. #8
    Quote Originally Posted by Craig D Peltier View Post
    So first off nice work! Looks nice and clean.

    My question is, you said boxes were Birch ply, so shall I assume 3/4" an then you skinned with Walnut ply but you used Ebony Stain? Im confused.

    It sounds like the sides are double layer ply? Did you mean the finish on the inside is ebony stain and the boxes are skinned with 1/4" ply on outside?
    My explanation wasn't very clear, sorry about that.

    The inside boxes are 3/4 birch stained black. Then I put 3/4 walnut end panels on. The top is a 3/4 walnut play stacked on birch ply. 2" around the outside of the bottom layer, I glued up stips of walnut ply so you see walnut under the overhang and there is also a center piece of walnut ply on the bottom layer that you can see inside of the speaker compartment. The doors and drawer face are solid.

    The last thing to do (besides install the frosted glass) is cut out holes for the wires. I don't want to do it! I found some nice grommets, but I just can't take a forsner bit to her.

  9. #9
    Quote Originally Posted by Henk Marais View Post
    is the plasma going on top?
    If you check out the last pic, you can see it already mounted on the wall. I ran all of the wires through the wall so there won't be any seen.

  10. #10
    nice work, I noticed the color seems different in some of the photos. was that just the photos or your process to the final color.


    Howard Boehm
    Pictures of Projects can be seen by clicking on My Profile and then Clicking on Howard Boehm's Home Page.

    Tools: I would rather have them and not need them than need them and not have them.

Posting Permissions

  • You may not post new threads
  • You may not post replies
  • You may not post attachments
  • You may not edit your posts
  •