Page 1 of 2 12 LastLast
Results 1 to 15 of 22

Thread: hard maple workbench on the cheap progress

  1. #1
    Join Date
    Aug 2008
    Location
    Milwaukee, WI
    Posts
    142

    hard maple workbench on the cheap progress

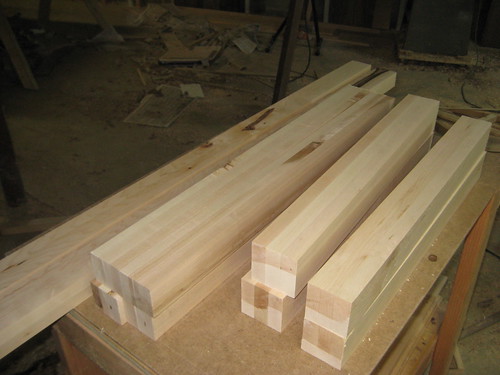
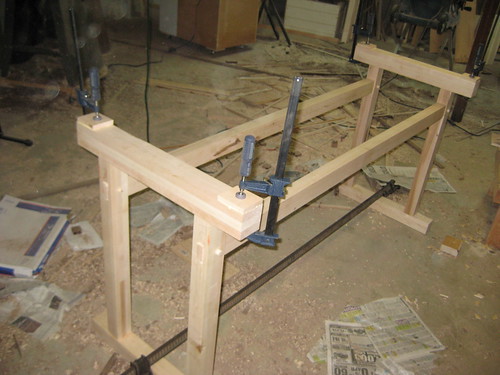
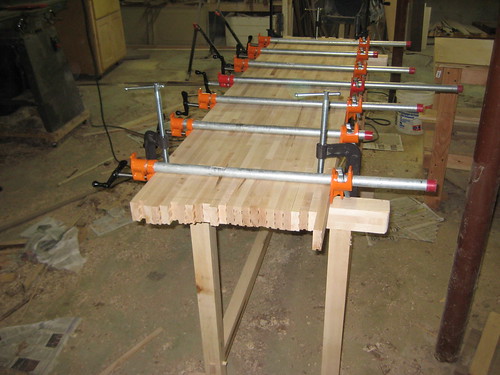
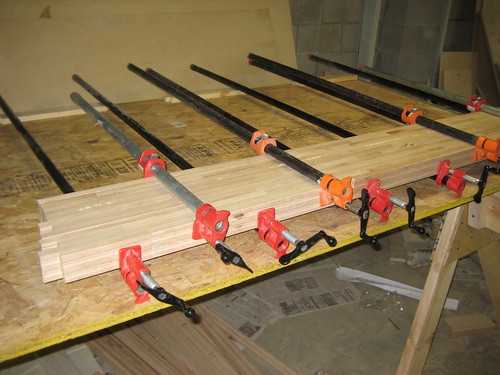
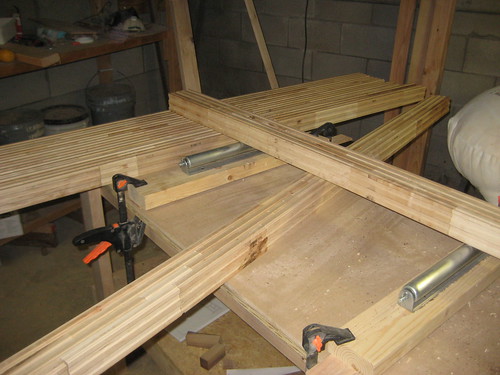
    After recent maple floor install I got bunch of low grade planks left over with knots and discolorations as well as a big pile of cutoffs which I decided to glue together and make a workbench top. I was also making my own trim so I ended up with some defective boards and shorts that I laminated into thicker stock for workbench frame.

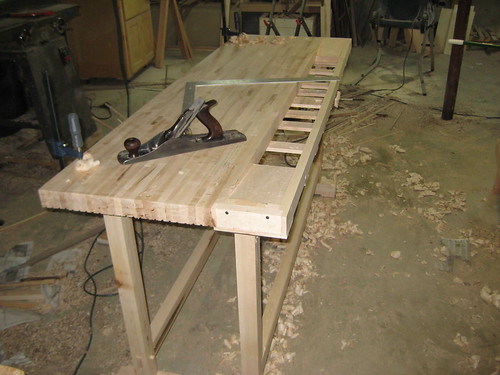
    After laminating flooring I planed away tounge and around half of grove part, it ended up being sligtly over 2 inches thick. probably will be 2" after final surface leveling.


  2. #2
    Join Date
    Aug 2008
    Location
    Milwaukee, WI
    Posts
    142
    Main frame stock, ready for mortizes. Ugliest boards are laminated inside:


    Big rails connected to legs with through mortizes without glue. so I could disassemble if needed. I made it to connect well by hammering in pegs and locking it with big tapered dowels. Leg frame mortizes are glued in. In this image it's upside down, gluing on feet pads:

  3. #3
    Join Date
    Aug 2008
    Location
    Milwaukee, WI
    Posts
    142
    Final top lamination stage, performed on brand new frame:


    Tool tray glued in to the top and hand planed down align level with main top:


    Planning to rout grove with dovetail bit in top and caps and see how well it's going to hold it without glue. If it's not going to be snag I'll try to bolt it together.

  4. #4
    Join Date
    Dec 2006
    Location
    Atlanta , Ga.
    Posts
    3,970
    Nice work Igor.. I once made a top from shorts I laminated together and I believe none was longer than 14". Everyone and I mean everyone told me it would not be stable. I had use of a finger jointer at a friend commercial shop and finger jointed the ends of the shorts. The top now resides at a friends home shop and has only had to be flattened twice in eight years so... so much for you shouldn't.

    As far as sag.. I will throw out a suggestion. I have built around 24 benches over a 38 year period. Several years ago I had an idea that will help eliminate sag in the middle. Why not laminate a piece about 3" X 3" or so to run the lenght between the two top side to side strechers on the legs at each end. You tie the long beam in at each end on the stretcher with an open topped bridle joint.

    I have used this method on the last 5 tops and it basically creates a support under the top from end to end in the center of the top. If you have say a 30" top.. you have 15" on each side of the long beam as the long beam cuts the un-supportd weight of the top in half. I call this long beam my "whale-back" support as I got the idea from the body of a whaling boat.

    If this isn't clear... let me know and I will shoot a few pictures of what I speak of...

    Nice bench.. I personally think it won't rack without the glue and if you add the "whale-back" and pin it from under the end stretchers... I know it won't rack as the WB also adds diagonal support.

    Good luck and have fun...
    Sarge..

    Woodworkers' Guild of Georgia
    Laissez Les Bons Temps Rouler

  5. #5
    Very enterprising to take the scraps and make a very nice work bench. I like Sarge's suggestion about the center whale-back support, too.

  6. #6
    Join Date
    Feb 2009
    Location
    Whitehorse, Yukon, Canada
    Posts
    1,148
    this is great, I mean people could go to a flooring shop and ask for reject wood to built a realy cheep but tough bench! A great idea... and it's "GREEN"... nothing is wasted, I like it!

  7. #7
    Igor - beautiful work! I've been looking to build a workbench and you're definitely inspiring me. I look forward to seeing the finished project!

    Sarge, as I mentioned, I'm getting ready to build a workbench and your suggestion sounds like something about which I'd like more information. Can you post here or PM me? Thanks!


    daniel
    Not all chemicals are bad. Without hydrogen or oxygen, for example, there would be no way to make water, a vital ingredient in beer.

  8. #8
    Quote Originally Posted by John Thompson View Post

    If this isn't clear... let me know and I will shoot a few pictures of what I speak of...
    I would like to see pictures

    thanks

  9. #9
    Igor, great use of materials! Bet you bought glue by the gallon, though! Sarge has a great idea on the WB, and I would strongly suggest that.

    For those looking for a source, I would suggest perhaps flooring installers as many of them do "turn key" jobs and may have more scrap than would suppliers. Also, "cabin grade" is the lowest grade of flooring (at least around here) and it can be had pretty inexpensively. Lots of knots, but it would be easy enough to cut up the pieces to eliminate knots.

    Great plan and good execution. Look forward to the final pics.

  10. #10
    Join Date
    Jan 2006
    Location
    Grand Forks, ND
    Posts
    2,336
    Great progress, very resourceful and it should make a rock steady bench.

    What are your plans for vises?

  11. #11
    Join Date
    Dec 2006
    Location
    Atlanta , Ga.
    Posts
    3,970
    Quote Originally Posted by daniel lane View Post
    Igor - beautiful work! I've been looking to build a workbench and you're definitely inspiring me. I look forward to seeing the finished project!

    Sarge, as I mentioned, I'm getting ready to build a workbench and your suggestion sounds like something about which I'd like more information. Can you post here or PM me? Thanks!


    daniel
    Sorry to not get a picture yesterday, Daniel. I visit the Creek mainly each morning before heading to my shop for the remainder of the day. This retirement thing is difficult but... someone has to do it and I'm just that someone!

    I took several pictures.. two of the "whale-back" sitting on the floor. One of the outer end to show where the bridle extends through. That exposure of the bridle joint on the end of the WB is center on the end stretcher just above my tenoning jig which I built a shelf for on that end. I took one of the WB facing each end direction.

    I didn't have any of my work-bench in my photo file so I just took a couple more to have them if needed. The WB on mine is 4" wide and 3 1/2" tall. You can build one to suit the weight of top you have. My top simply is held down by gravity as it has a hole drilled under on the four corners that fit down over a 1" dowel with the head sanded over to form a bullet head shape.

    The base is laminated Doug fir and that particular one is 10 years old. I added a new SYP top about two years ago to replace one I had basically chopped to pieces chopping DT waste. The base is all through tenons. Once that "whale-back" is added... you have a self supported box. Until you add a top on most benches you simply have a U shape until the top completes the box for stability. Using the method I use... I gaurantee any I build will not rack before you add the top or glue on the tenons for that matter.

    You probably could see the WB better if I had lifted the top off but... that takes two people to do properly so.. what you see is what you get and hopefully will give you the general idea of how I approach work-bench builds.

    BTW.. the tray underneath is a latter add-on to have a place to put a few tools I am working with at the moment and also a place to throw some scrap cut offs I might use on a project. I clean it out about once every two months as I finish a project. It has nothing to do with the "whale-back" other than the WB is the trays attachment and anchor component.

    Regards...
    Attached Images Attached Images
    Sarge..

    Woodworkers' Guild of Georgia
    Laissez Les Bons Temps Rouler

  12. #12
    Quote Originally Posted by John Thompson View Post
    Sorry to not get a picture yesterday, Daniel. I visit the Creek mainly each morning before heading to my shop for the remainder of the day. This retirement thing is difficult but... someone has to do it and I'm just that someone!
    I'm jealous and happy for you, Sarge.

    Thanks for the photos, it makes MUCH more sense to me know. I really like the idea, too, because I feel I could make the base and set a solid core door or something on top of it as a temporary surface while I work on a laminated top. Shop space is at a premium at the moment, but I'd really like to build a workbench to replace the current....thing..."bench"..whatever.


    Thanks again,

    daniel
    Not all chemicals are bad. Without hydrogen or oxygen, for example, there would be no way to make water, a vital ingredient in beer.

  13. #13
    Join Date
    Dec 2006
    Location
    Atlanta , Ga.
    Posts
    3,970
    Quote Originally Posted by daniel lane View Post
    I'm jealous and happy for you, Sarge.

    Thanks for the photos, it makes MUCH more sense to me know. I really like the idea, too, because I feel I could make the base and set a solid core door or something on top of it as a temporary surface while I work on a laminated top. Shop space is at a premium at the moment, but I'd really like to build a workbench to replace the current....thing..."bench"..whatever.


    Thanks again,

    daniel
    You're welcome, Daniel. The door you mentioned will work fine for your current needs IMO. I have two assembly talbes.. the one you see behind the WB.. a much larger one in the back shop for glue-ups but.. if I need one extremely long, I have a door standing vertical on one rear shop wall waiting to be laid on top just for that purpose. No matter what the obstacle.. a little thinking will usually get you around it to get things done.

    Good luck...
    Sarge..

    Woodworkers' Guild of Georgia
    Laissez Les Bons Temps Rouler

  14. #14
    Join Date
    Aug 2008
    Location
    Milwaukee, WI
    Posts
    142
    Quote Originally Posted by John Thompson View Post
    As far as sag.. I will throw out a suggestion. I have built around 24 benches over a 38 year period. Several years ago I had an idea that will help eliminate sag in the middle. Why not laminate a piece about 3" X 3" or so to run the lenght between the two top side to side strechers on the legs at each end. You tie the long beam in at each end on the stretcher with an open topped bridle joint.
    I was thinking about adding removable case with drawers with devider wall right inthe middle so I could add some supporting thingy in the middle of workbench.

    Quote Originally Posted by Jeff Monson View Post
    What are your plans for vises?
    Cheap workbench asks for cheap vise so I got largest that HF has, it was on sale and I had 20% off coupon.

  15. #15
    Join Date
    Dec 2006
    Location
    Atlanta , Ga.
    Posts
    3,970
    [QUOTE=Igor Nowan;1253788]I was thinking about adding removable case with drawers with devider wall right inthe middle so I could add some supporting thingy in the middle of workbench.

    That would work as any type of center support is better than no center support IMO.

    Good luck....
    Sarge..

    Woodworkers' Guild of Georgia
    Laissez Les Bons Temps Rouler

Posting Permissions

  • You may not post new threads
  • You may not post replies
  • You may not post attachments
  • You may not edit your posts
  •