Excellent work! Nice grain continuation and attention to detail


 In Memoriam
Excellent work! Nice grain continuation and attention to detail
"All great work starts with love .... then it is no longer work"
Member
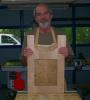
Very nice box Dean. I also did my first box recently (pics attached). Mine was made from some salvaged firewood (beech and oak) and a chunk of cocobola for inlays. I'll probably be making a few more since they really are a nice skill builder. The graininess of the picture hides the fact that I had the same realization about flat kerf blades.
The finish is a wash coat of 4:1 thinned varnish for a sealer, few coats of Watco Teak Oil finish rubbed in, and then top coated with Minwax wiping Varnish. I'm not sure if it was the best choice, but it came out pretty nicely. What finish schedule did you decide on?
[OP]
Member
Hey Dave, great work! That inlay/striping you did is something I would not dare try yet. How did you do it? I have a few ideas, but am not sure.
I'm still learning about finishes. I am thinking Danish Oil then shellac on the maple box and Danish oil and wax on the walnut box, but I'm not really sure what to do. My neighbor makes instruments and is convinced I should try French polishing, but I think I am going to play with some scrap first. Again, the whole box making thing is it is a great way to learn with small pieces and that includes finishing.
Great looking box. I also enjoy making them between larger projects. They're quick and you can get practice/learn new skills and get creative using only a small amount of material.
"A hen is only an egg's way of making another egg".
Samuel Butler
 Member
You have it "going" in the miters on that second box Dave. As I learned from Ed S... minor things can be the difference and I am glad he told me how he did his in advance. I'm looking forward to another shot at it as box making is indeed fun IMO..
Good stuff you got working there...
Sarge..
Woodworkers' Guild of Georgia
Laissez Les Bons Temps Rouler
Member
Dean, I started the inlay by finding a piece of red oak scrap that was about 3/4" thick. I ripped a thin strip from the side of it using my table saw. Ended up with a strip about 3/32" thick. I grabbed the block of cocobola that I had laying around and ripped a few strips of it on the table saw as well. I sliced the cocobola into 1/8" wide slices on the bandsaw. Next I took the box over to the router and routed a channel 3/32" deepand wide enough to fit the oak and cocobola strips side-by-side in the center of the top and sides. I used the size of the strips that I ripped to get the final width of the channel - I learned a while ago on this board to route channels after you have already have the inlay material cut. This is one of those "easier to remove wood than add it" things.
Anyway, once I had the channel routed, the oak was laid down so that the side grain of the original board is showing. The cocobola was slid along side the oak and trimmed as needed. A little yellow glue, some wax paper, and a heavy block of walnut kept everything tight until it dried.
The trim around the top was more interesting. I messed up when I routed the top and was left with about 1/16" gap all around. I took some of the cocobola strips and slide them in on their side to fill the gap. Luckily it is pretty brittle wood so it was easy to pare away the excess with a chisel. I kept cutting slices of cocobola until I had the inlay finished. Then is used a really light application of yellow glue to hold it altogether. The hardest part was keeping the cocobola from splintering. Overall it came out pretty nice - you can't see some of the smaller defects in the pics but, I assure you, they are there.
I wasn't planning on doing all of the inlays this time either, but it was worth it. Grab a block of some hard dark wood, slice it on the table saw, and try your hand at it. It is pretty easy to do and worth playing with.
Member
Congratulations! After I get a few other projects off my list my plan for the winter is small skill builders like boxes and some lathe work.
Boxes are great skill builders! Being small, they are easy to examine close up. That means you need some degree of precision in your assembly (machine and handtool tune-up time!). Being small they don't take large, copious amounts of wood (good for using up scrap or just an excuse to get a small piece of an exotic to experiment). Being small, they are (in many cases) good candidates for practicing hand skills (smoothing, chiseling, you name it). Just about any kind of woodworking joint (dovetail, rabbit, miter, mitered-dovetail, etc,) can be used in a box so lots of good marking a layout practice. Being small, they are good to practice different finishing techniques. You can practice letting in hinges or mortising for locks.
And the list of great things about boxes goes on and on!
Build more boxes!
Don't sweat the petty things and don't pet the sweaty things.
Member
Good work Dean, like others have said, these small boxes can really develop the skills and attention to detail. I'va made and posted a number of boxes myself and just love doing them.
My only comment is that whoever sold you that maple as "bird's eye" should be dragged out back and beaten with it. There is almost no bird'seye figure in that maple that I can see.
Great work none the less.
Ryan
Remember this when you work with wood:
"I am careful not to confuse excellence with perfection. Excellence, I can reach for; perfection is God's business. "
Michael J. Fox
[OP]
Member
Good point Ryan. From that board only a small part has birds eye figure. I bought it at Woodcraft, from the small board section. I have the sticker and it does say birdseye, but I suppose it really is more of maple with some figure?
 Posting Permissions

 Reply With Quote
