Page 7 of 17 FirstFirst ... 34567891011 ... LastLast
Results 91 to 105 of 253

Thread: Maple Thinline Telecaster

  1. #91
    Quote Originally Posted by John Keeton View Post
    Mark, that is some very critical and very precise work! And, that body is going to really, really look phenomenal when it is finished. I don't recall any comment on the dye/stain that you are going to use, if any. What are your thoughts? That maple sure deserves some special treatment!
    Thanks John.

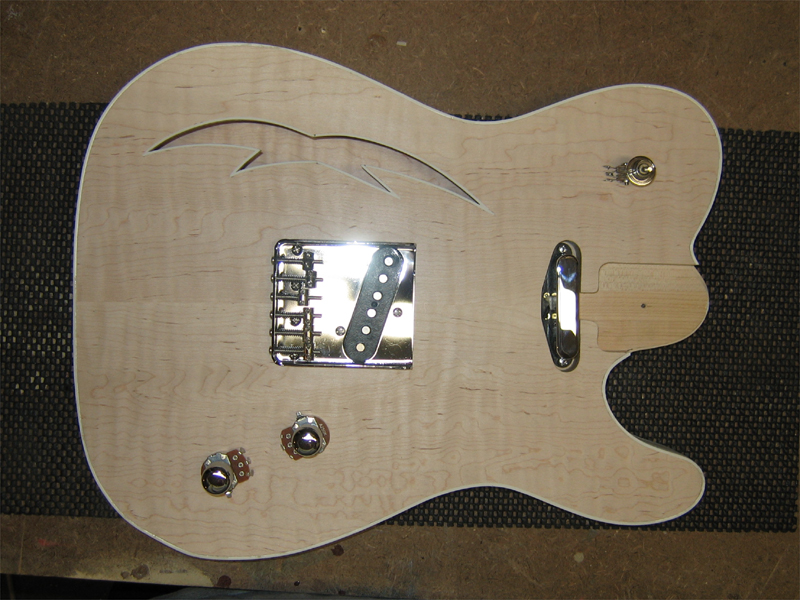
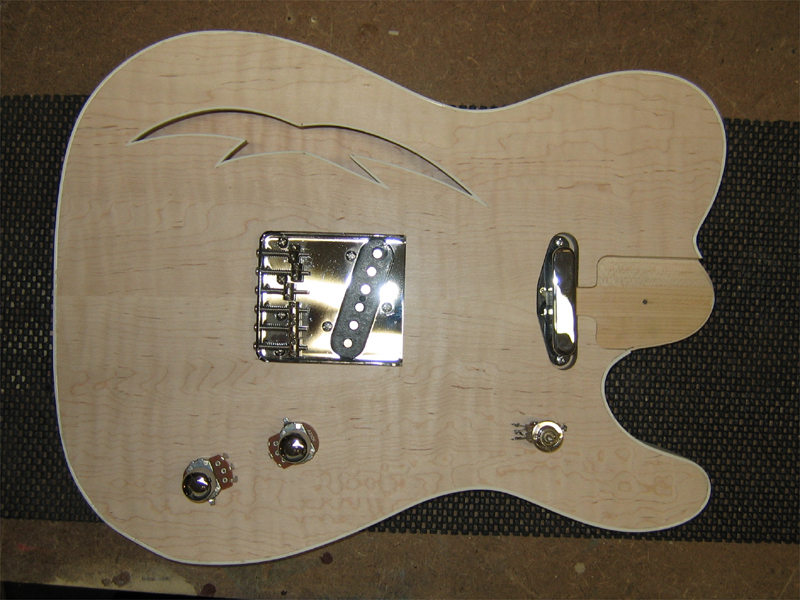
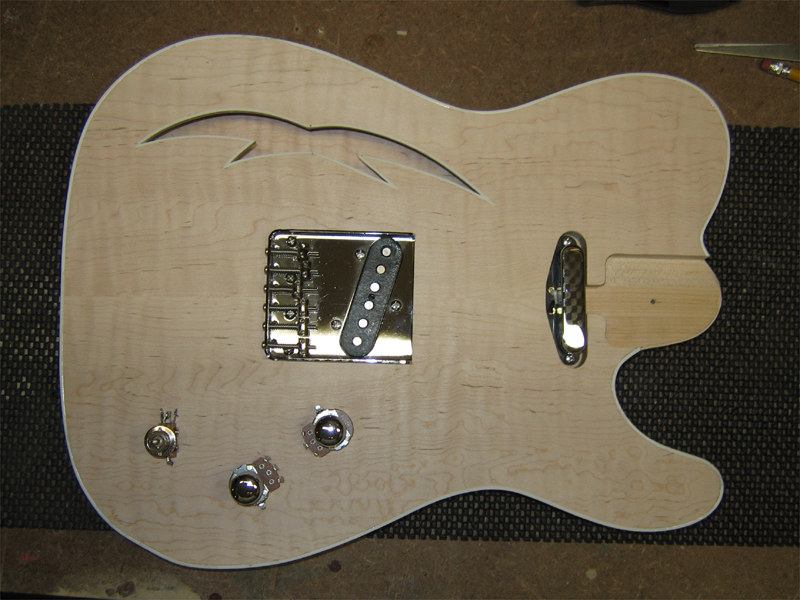
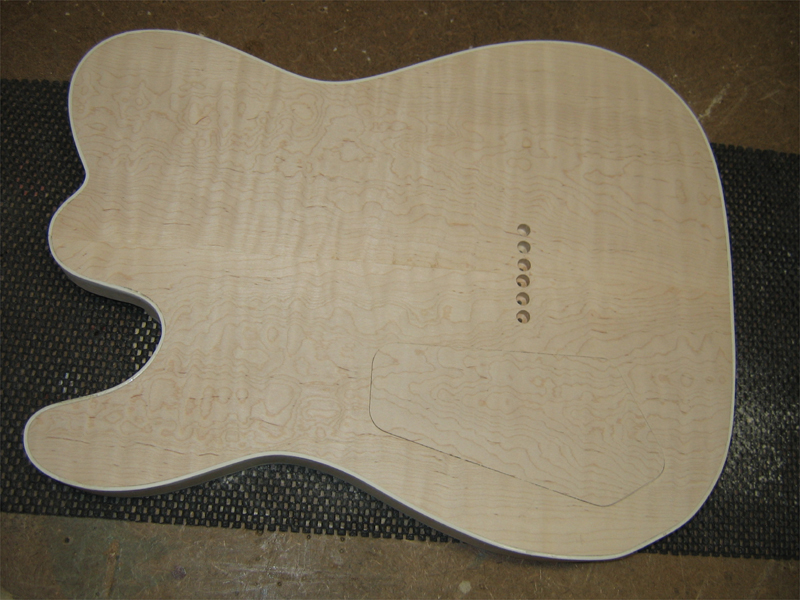
    I'm still undecided on the finish. I'm leaning toward either a deep transparent red or slight amber stain with nitro lacquer clear coats. I'm a little concered about the red since I'm not using a pickguard, which traditionally would be white or white pearloid. There might not be enough contrast in just the white bindings. The amber would be rich but subtle in contrast.

    These are the things that keep me awake at night.

    Peace,
    Mark
    "Thought that is no longer limited brings experience that is no longer limited" Marianne Williamson.

  2. #92
    Join Date
    Aug 2004
    Location
    Baltimore, Md
    Posts
    1,785
    Mark,

    Where do you get your templates ?


    Keith
    "The element of competition has never worried me, because from the start, I suppose I realized wood contains so much inspiration and beauty and rhythm that if used properly it would result in an individual and unique object." - James Krenov


    What you do speaks so loud, I cannot hear what you say. -R. W. Emerson

  3. #93
    Quote Originally Posted by Keith Christopher View Post
    Mark,

    Where do you get your templates ?


    Keith
    HI Keith.

    You can get the standard Tele templates here. There's a link in the Latest News section.

    http://www.ronkirn.com

    There's another seller on eBay but his turnaround time for CNC or Laser cut is 4 to 6 weeks.

    Peace,
    Mark
    "Thought that is no longer limited brings experience that is no longer limited" Marianne Williamson.

  4. Good Q... Looks like a pretty standard Telecaster though, minus the changes for the neck mount.

    I'd love to do a Les Paul and play around with some styling on it.. Maybe some day, when I don't have higher priority household projects going on.

    Say, Mark... Any recommendations on a vendor for hardware? Pickups, plates, necks and whatnot.. Especially necks.. I'll pass on attempting to do those for right now..

    ooops... Delayed reply.. Ah well..
    Last edited by Scott Hildenbrand; 12-03-2009 at 12:33 AM.

  5. #95
    Quote Originally Posted by Scott Hildenbrand View Post

    Say, Mark... Any recommendations on a vendor for hardware? Pickups, plates, necks and whatnot.. Especially necks.. I'll pass on attempting to do those for right now..

    ooops... Delayed reply.. Ah well..
    Hi Scott. There are a couple that I have purchased from...but many others out there.

    Luthiers Mercantile

    http://www.lmii.com/

    Stewart McDonald - they sell very nice, Fender licensed necks for both Tele and Strat. Plus all the tools you need to build one when you're ready to.

    http://www.stewmac.com

    eBay is also a good source for all you mentioned. A little knowledge about brand and quality is required here, though.

    http://www.ebay.com

    Peace,
    Mark
    "Thought that is no longer limited brings experience that is no longer limited" Marianne Williamson.

  6. #96
    Join Date
    Aug 2004
    Location
    Baltimore, Md
    Posts
    1,785
    When this is complete, the moderators should move this item to the articles and reviews section. Great stuff.
    "The element of competition has never worried me, because from the start, I suppose I realized wood contains so much inspiration and beauty and rhythm that if used properly it would result in an individual and unique object." - James Krenov


    What you do speaks so loud, I cannot hear what you say. -R. W. Emerson

  7. #97
    Join Date
    Dec 2006
    Location
    Tucson
    Posts
    5,001
    Blog Entries
    1
    This has been a fantastic project to follow. Great job.
    What you listen to is your business....what you hear is ours.

  8. #98
    Quote Originally Posted by Keith Christopher
    When this is complete, the moderators should move this item to the articles and reviews section. Great stuff.
    Quote Originally Posted by Bill Wyko
    This has been a fantastic project to follow. Great job.
    Thanks guys. I've had a bit of a slow down on the build due to shop cleaning and Christmas decorating. I'll be back on point tomorrow with some progress and updates for you.

    Peace,
    Mark
    "Thought that is no longer limited brings experience that is no longer limited" Marianne Williamson.

  9. #99
    Join Date
    Jan 2008
    Location
    Warren, MI
    Posts
    252

    great project!

    Thanks for sharing. Looking great!

  10. #100
    Join Date
    Aug 2006
    Location
    Saint Helens, OR
    Posts
    2,463
    Have to say this is one awesome post. Thanks for sharing and taking the time to photo the steps.

    You make it look easy.
    Measure twice, cut three times, start over. Repeat as necessary.

  11. #101

    More Pics 12-06-09

    I finally got back to work on the build today. I spent most o the weekend working on Christmas decorations.

    First project today was to get the neck pickup (PU) mounted. I wanted the PU mounted directly into the wood and not hanging from a bezel. So, as I've done before, I decided to use brass inserts. They have heavy, coarse threads on the outside and fine threads on the inside. I drilled the holes deep enough for the insert and then took it deeper in the center, with a smaller drill bit, for screw clearance...this created a shoulder for the insert to rest on.


    I found in testing that the slotted tops of the inserts are very delicate and while I was able to get them into a test drill in an alder scrap, they weren't going into the maple without a fight...I kept snapping the tops off. After backing 2 of them out with needle nose vise grips, I decide on a different approach. I used one of the inserts as a jam nut on a PU mounting screw and ran a second insert onto the end of the screw. As I screwed it into the hole, the jam nut kept pressure on the insert until it was seated, then I just backed out the screw.


    With a bit of rubber sleeve on the screw between the PU and the insert we have a solidly mounted, height adjustable PU.


    You can see the single point of entry for the wiring into the control cavity.

    "Thought that is no longer limited brings experience that is no longer limited" Marianne Williamson.

  12. #102

    More Pics...

    While I had the PUs in place, I wanted to look at some possibilities for the controls. Being a chambered body,I have some options here. I like the switch up in the upper horn, but it would be a nightmare to get it wired.


    The lower horn would be a bit easier but...


    I really like having everything in the same area...just personal preference. Plus this layout compliments the shape of the vent.

    "Thought that is no longer limited brings experience that is no longer limited" Marianne Williamson.

  13. #103

    More Pics...

    One of the things I really love about my Shopsmith Mark V is it's ability to do horizontal boring...made the output jack bore very easy.


    "Thought that is no longer limited brings experience that is no longer limited" Marianne Williamson.

  14. #104

    More Pics...

    Time for the control cover. I have a sheet of white material on the way but I wanted to take a pass at making one from matching flame maple. I traced it out...


    ...roughed it out on the band saw...


    ...and placed it on a simple jig for routing. It an MDF template screwed to the table top with a strip of maple as a spacer. To avoid tear out and splitting, I routed carefully, making sure to never run the bit into end grain...starting in the middle of the side grain run and working my way around each corner.


    It's a nice fit and the grain and color match up better than I expected. It needs to be blocked to thickness and touched up around the edges. Actually, I expected a good match...it's from the same piece of wood as the top and back...but this is beyond what I had hoped for. I may go with this instead of white plastic.

    "Thought that is no longer limited brings experience that is no longer limited" Marianne Williamson.

  15. #105

    More Pics...

    Back to the neck.

    I drilled the tunner holes. First I layed out for the holes then started them with a small diameter, center point bit. From there I drilled them thru on the drill press. Then opened them up to the finished size.


    Then it was time for frets. The usual here, I over radiused the fret wire, cut it to length and tapped it into place.


    I then seated the frets by pressing them into the slots. This was an extra step to ensure the ends were down and properly seated.

    "Thought that is no longer limited brings experience that is no longer limited" Marianne Williamson.

Posting Permissions

  • You may not post new threads
  • You may not post replies
  • You may not post attachments
  • You may not edit your posts
  •