Hi Dave,
Beautiful work -- I enjoyed the step-by-step picks and I look forward to seeing more. You are truly talented and thanks for sharing!
Scot


 Member
Hi Dave,
Beautiful work -- I enjoyed the step-by-step picks and I look forward to seeing more. You are truly talented and thanks for sharing!
Scot
 Contributor
OK, that's it, I'm quitting woodworking. If my LOML saw that, I'd be in so much trouble because I've been at it so long and don't come close. WOW. We've recently lost some greats, but with talent like this, there's hope. Thanks for sharing.
 [OP]
Member
[OP]
Member
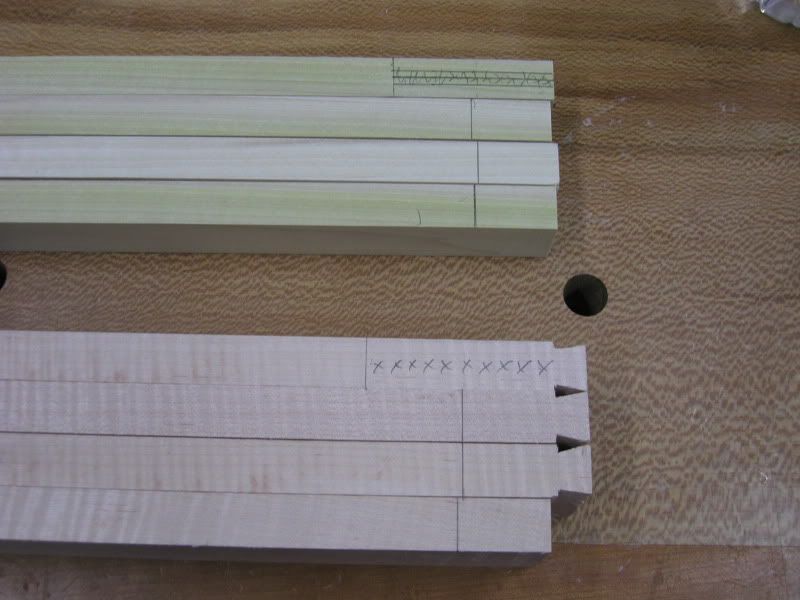
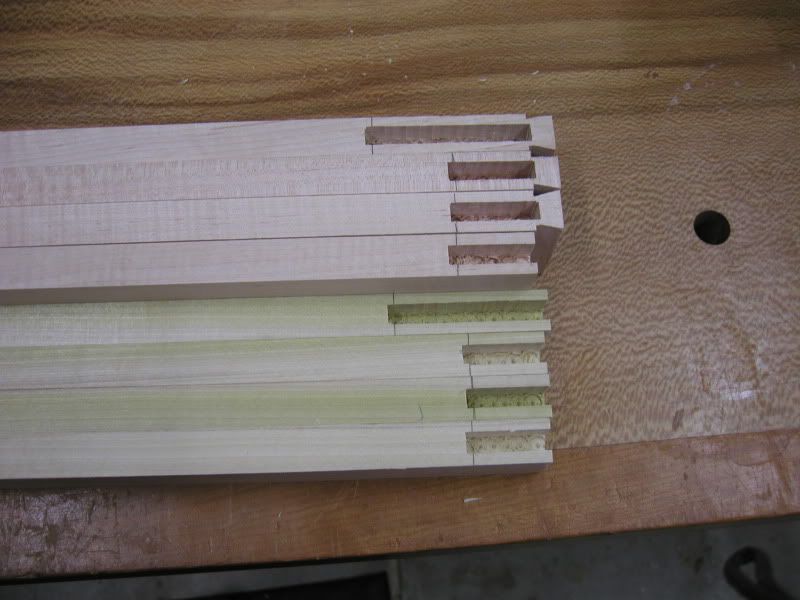
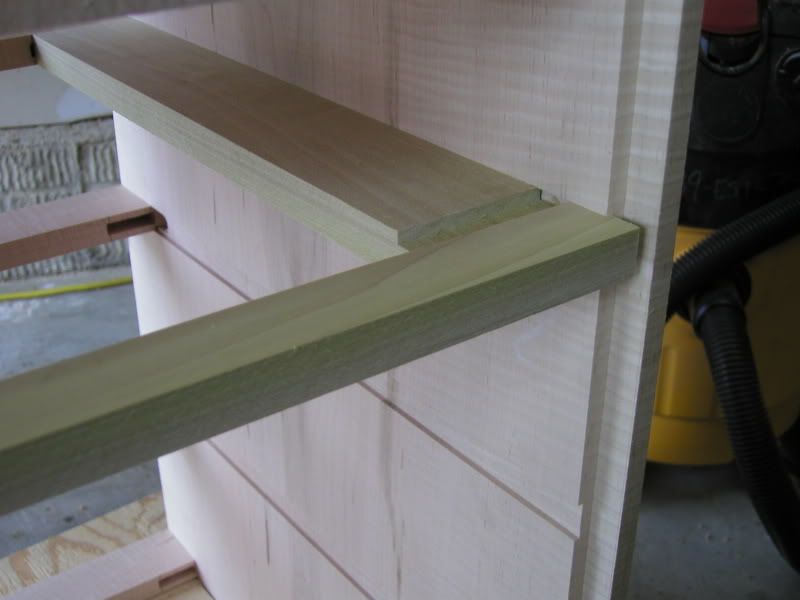
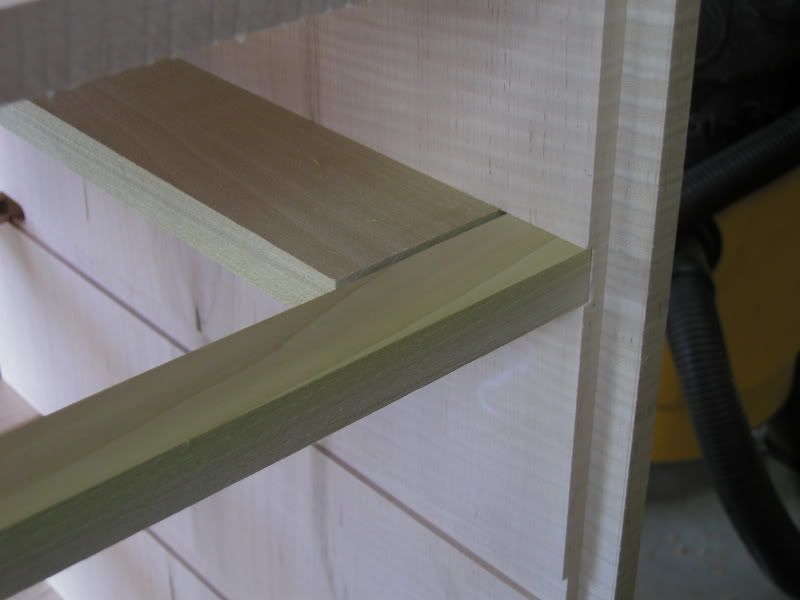
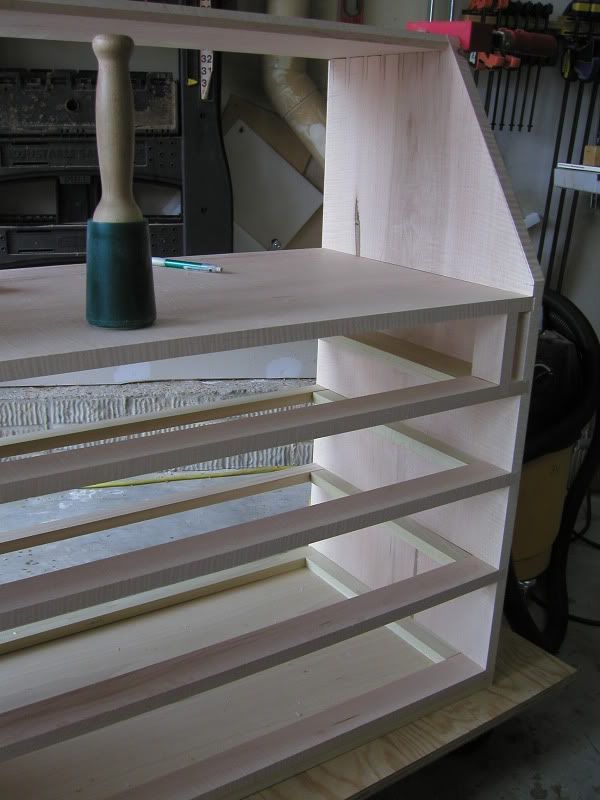
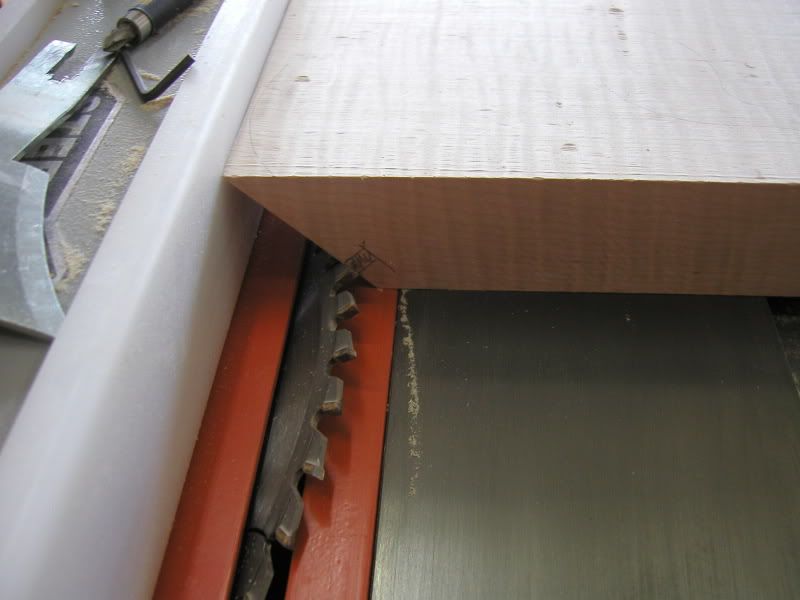
Now it is time to lay out and cut the mortise and tenon joints for your drawer runners. The runners are not attached to the side of the case and are just held in place by the 1/8 deep dados and frame. You will need to leave a little extra space at the back of the case for expansion and contraction when you fit the M&T joint together.
Cut the dados first.
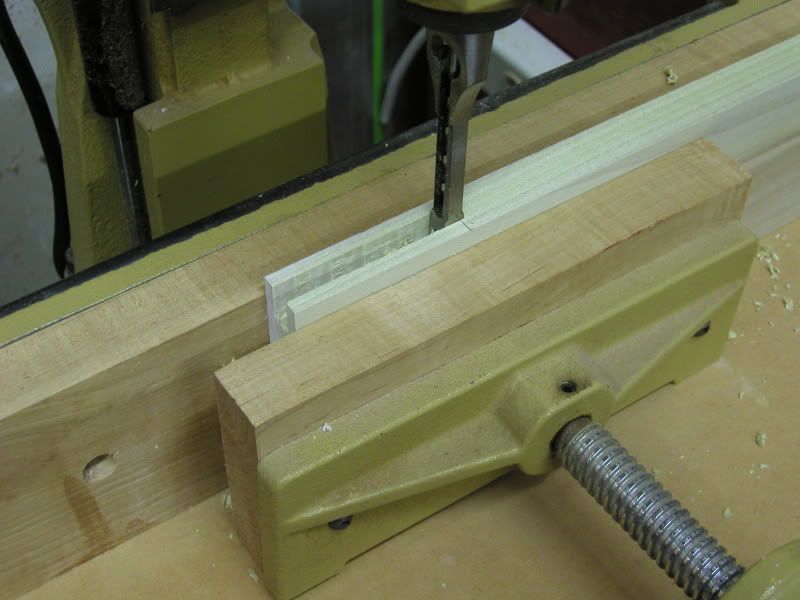
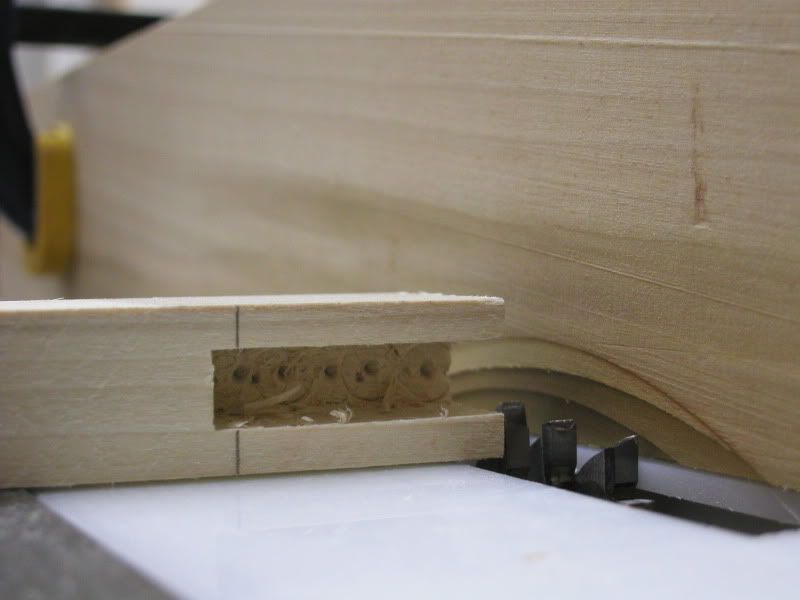
Next I cut my tenons using a dado blade and my mortised pieces to give me my rough size and dial it in from there.
All the drawer runners are in Notice the extra space left at the back of the case. this tenon isn't seated yet and is just seperated to show the amount of gap.
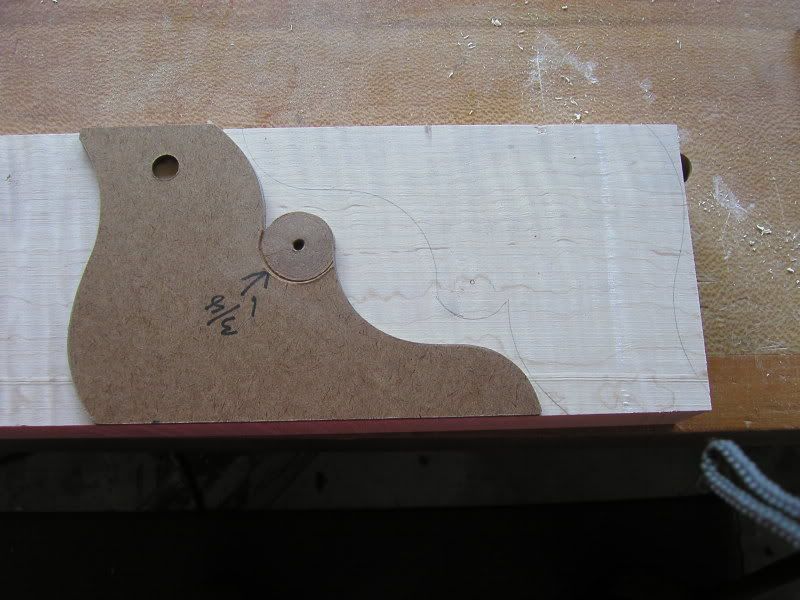
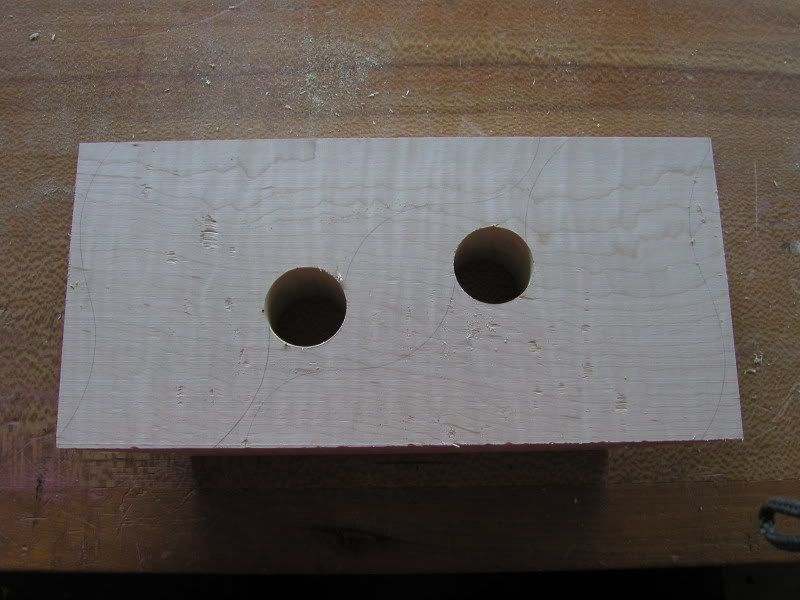
The last thing I will hit this time will be the feet. These are cut from 8/4 stock. Start by laying out the feet and cutting the miters. I prefer to cut the miters while the stock is still square since it is easier. Something to keep in mind is you will need two right and two left feet when you are cutting the miters. The rear feet dont get miters so it isnt really a concern with them. You will also need to cut the dado for a spline. I do this by just two passes with a standard kerf blade at a 45 degree angle.
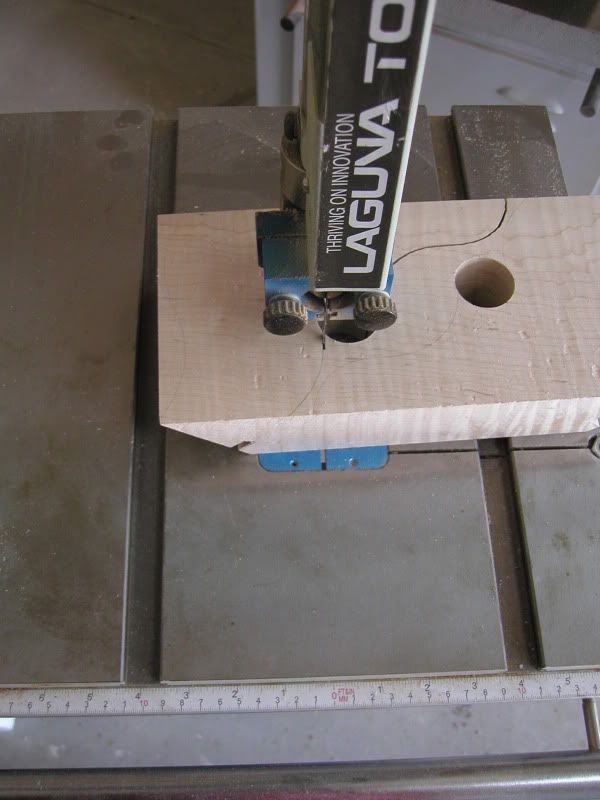
Once that is done you will be ready to start cutting the feet. I start by using a forstner bit to cut the tight radius hole and then move to the bandsaw.
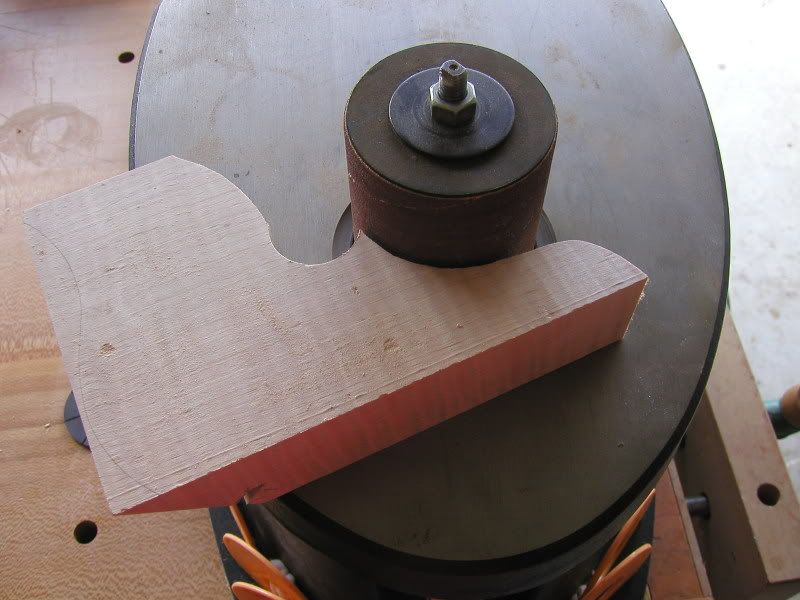
Once the feet are cut to rough shape I finish shaping them with a combination of rasps and a spindle sander. Once this shaping is complete it is time to glue them up.
Diamanwoodcrafters
[OP]
Member
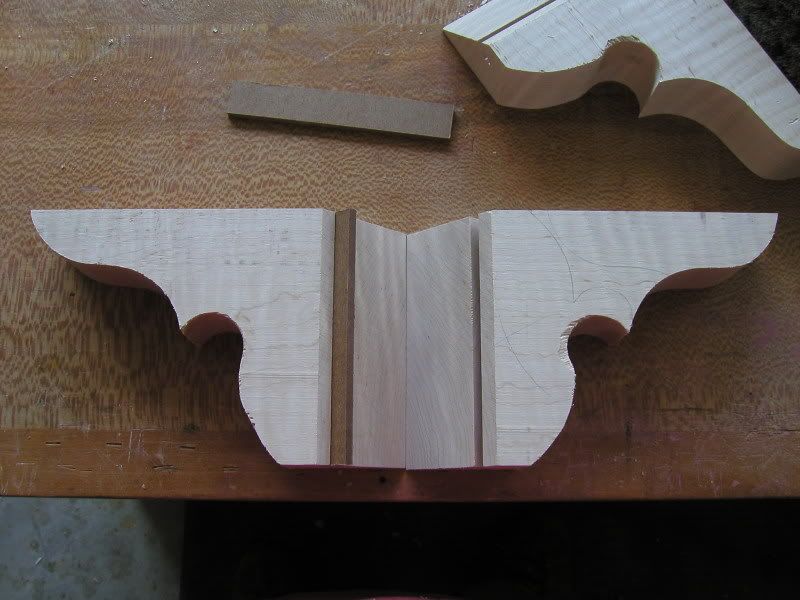
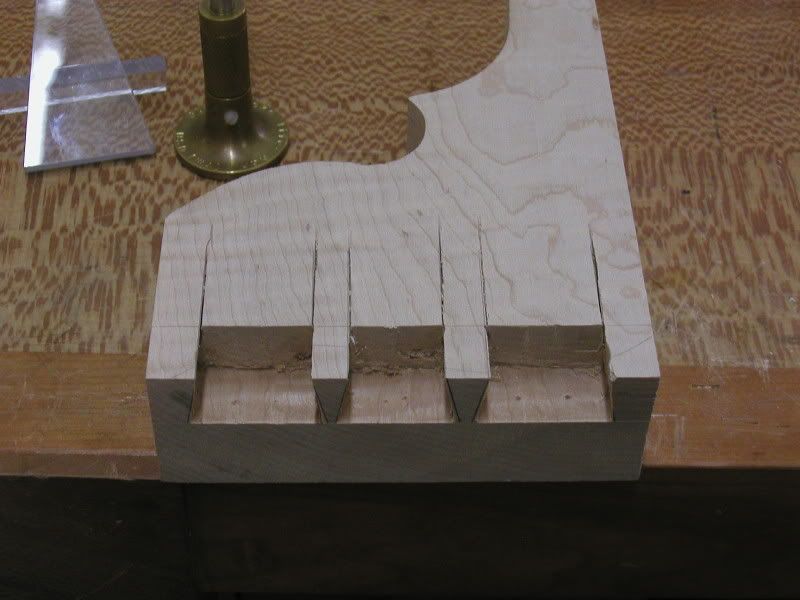
You will also need to make the back feet. They are jointed using half blind dovetails.
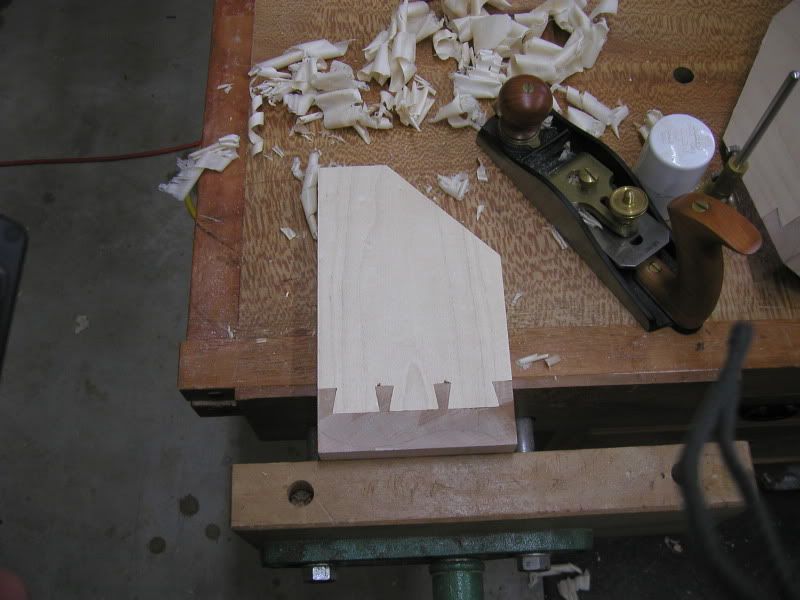
Trim them flush with a sharp plane.
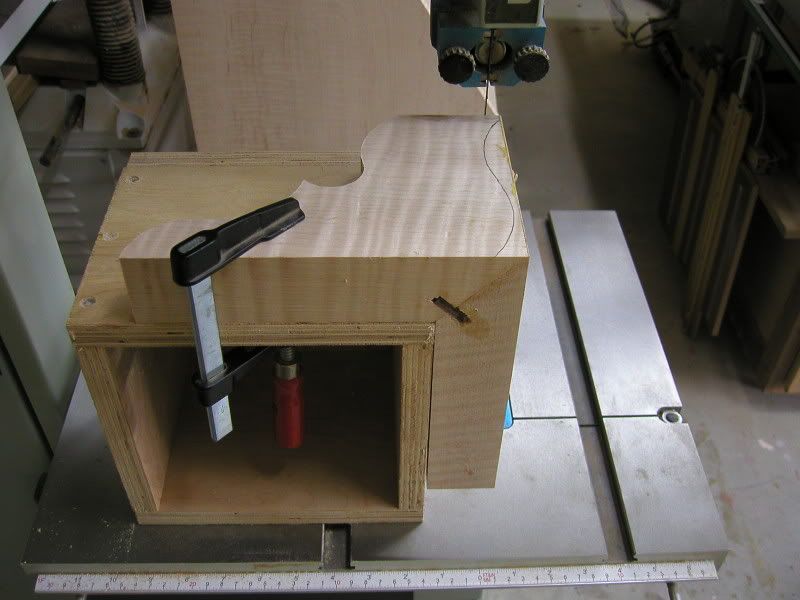
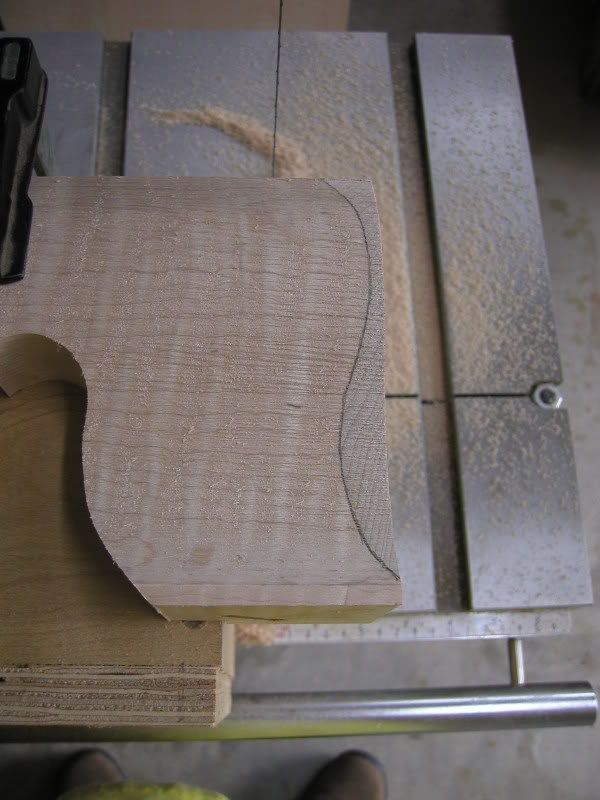
Once dry I move back to the bandsaw and attach the feet to a small hollow box and scroll the ogee shape out. You will need a saw with a decent resaw capacity. If you dont have one there are other ways to make the feet but I think this is the easiest.
You will not need to mark the profile for the second cut as it will be evident.
After the feet are roughed out they will need to be finish shaped using a combination of planes rasps and scrapers. Try to avoid using sand paper if you can. If you do use sand paper use it last as sand paper and plane irons are not friends.
That's it for today. Tomorrow I will start on the base, attaching the feet and the lid.
Diamanwoodcrafters
 Member
Beautiful post and gorgeous piece!
Loved the progress pics. Welcome to the forum!
Member
Dave could you let us know what water dye brand and color name you used for the base color on the kneehole?
dan
Contributor
Dave,
Nice work.. Never worked with Tiger Maple, how does it work compared to Cherry or Walnut?
 Contributor

Dave,
GREAT into! Love the piece can't wait until it's done.
"The element of competition has never worried me, because from the start, I suppose I realized wood contains so much inspiration and beauty and rhythm that if used properly it would result in an individual and unique object." - James Krenov
What you do speaks so loud, I cannot hear what you say. -R. W. Emerson
 Member
Looking forward to seeing the end product.. nice pieces on your web-site.
Sarge..
Woodworkers' Guild of Georgia
Laissez Les Bons Temps Rouler
 Posting Permissions

 Reply With Quote