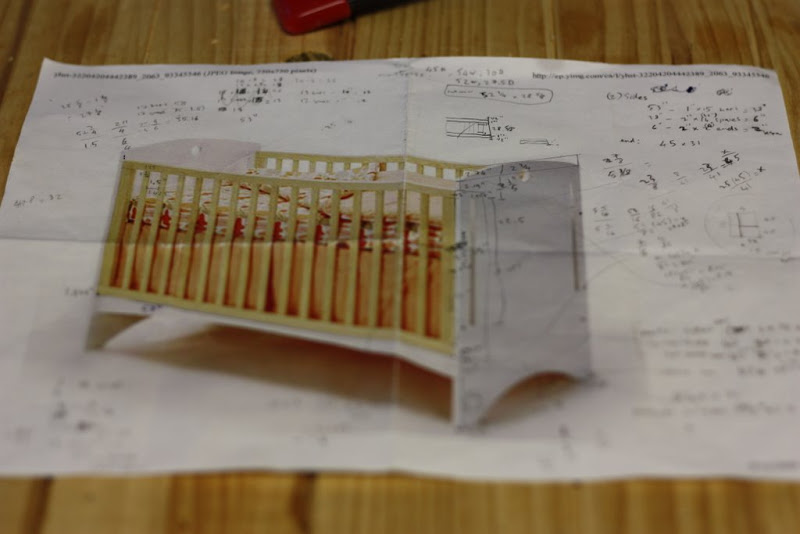
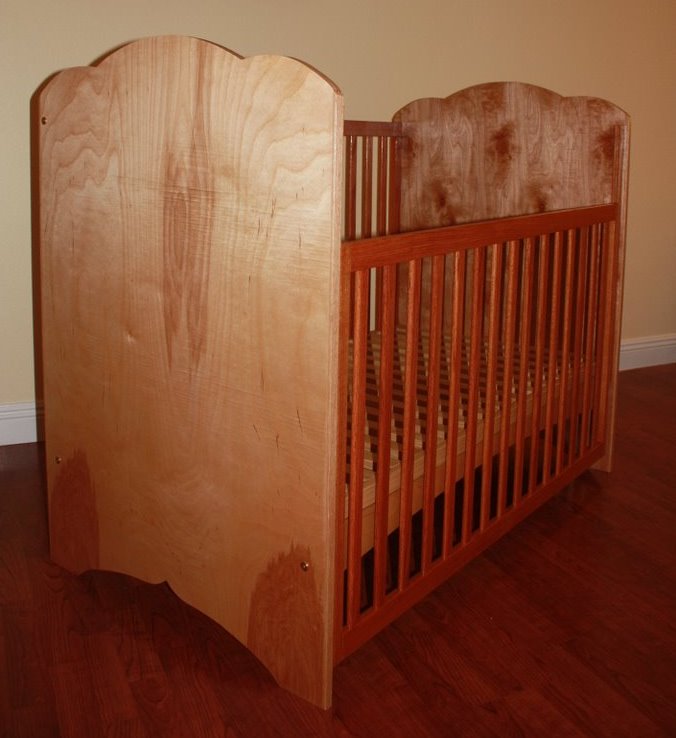
As I was expecting a baby late December. I started to look at "gearing up" the baby room around May. Not sure where I get the idea that it would be cool to build a crib for my first baby. I began to look for crib plans but found that there weren't many available and they didn't look very appealing. Then I found this. I figured it's better to follow some design for a first project.
Showed it to my wife and it passed the WAF with flying color. I got the green light to start. I figured that there are 5 parts, should take at most couple weeks. Well it probably did take couple weeks working on the crib itself, but 6 months to finished due to "shop detours". The first 3/4 of the crib took 6 months, the last 1/4 took a few hours for 4 days while the baby is in the hospital because Santa came early this year. I started with with a circular saw and guided rails, shop vac and a makeshift cutting table and ended with mostly a basic functional workshop with router, planes, chisels, saws, tons of clamps, etc. Most of which I haven't really used on the crib project itself
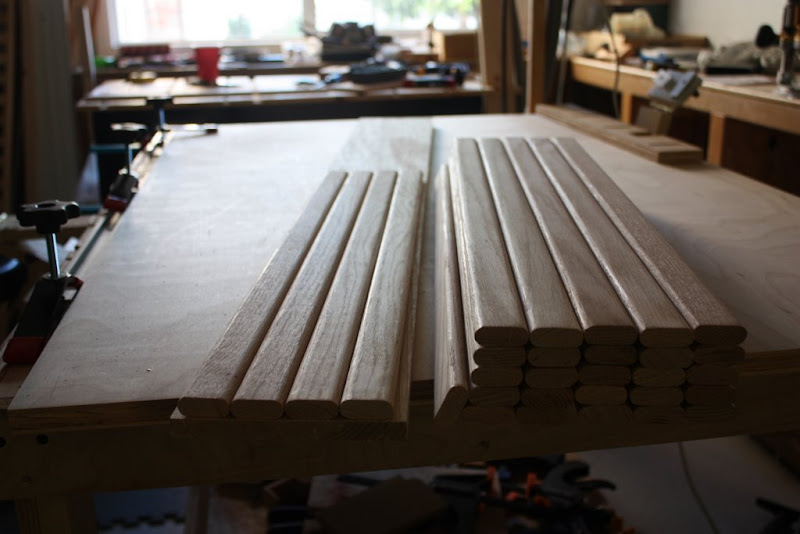
Wood consisted of 1 sheet BORG birch for panels, .5x6x36 oak ripped for rails, 1x4x8' pine boards ripped to pieces for bed support.
Power tools involved in the making
guided circular saw
router + homemade router table
sander
jig saw
drill
First, needed to work out the dimensions. Fractional algebra came in handy to figure out the approximate size of pieces from the image.
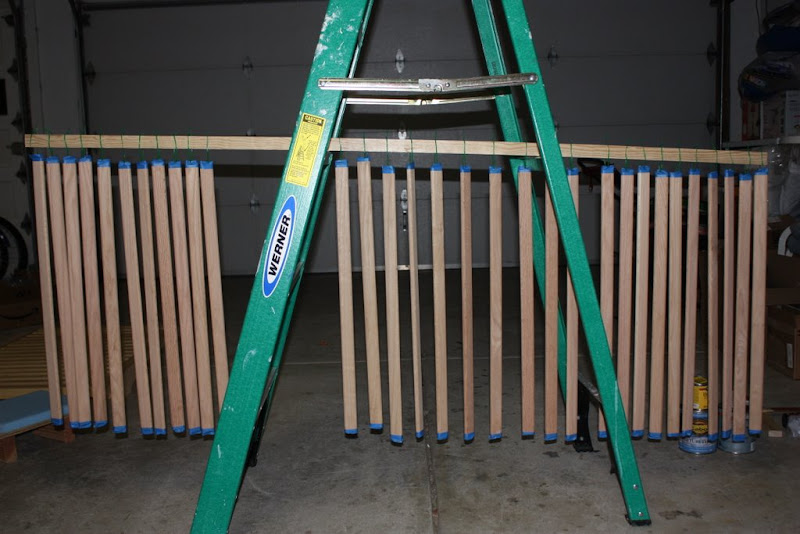
Ripped the 6x36 into 1 1/4 rails as HD didn't have any other 1/2" thick with long enough length. Just enough width for 4 rails per board
Round over rails with multi profile bit with a homemade jig. Had to make some hardboard fence to cover up the huge bit. Worked out pretty well
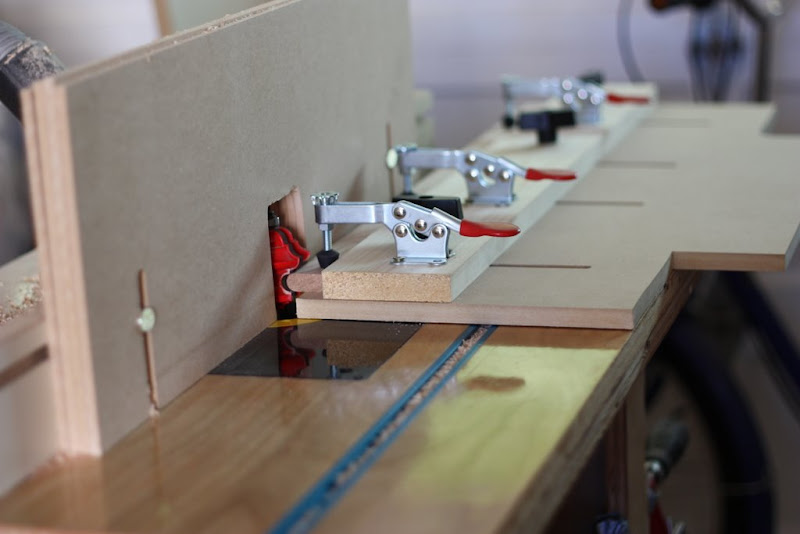
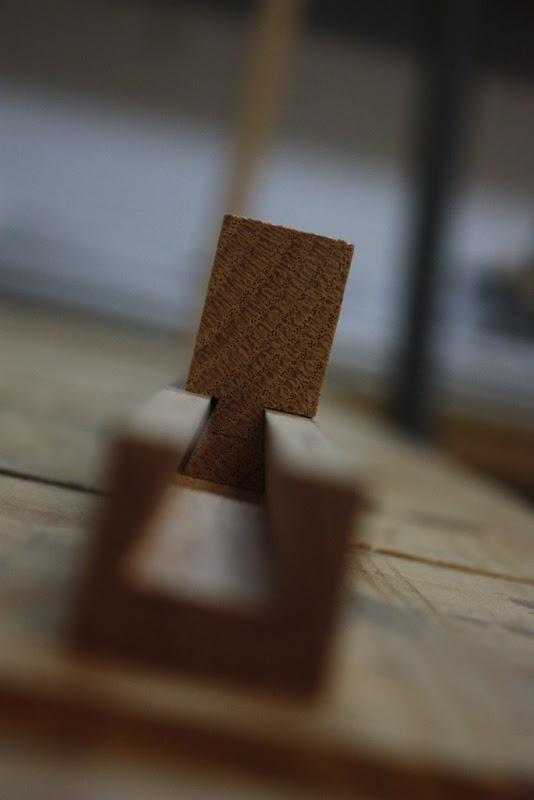
Making mortises for long rails. The garage smelled burnt wood for almost a week from all the mortises. I should have done multiple passes but that would take too long for all the slots, plunged for 1/4" and just go at it one pass for each hole. The bit whines and got pretty hot after a few mortises
Cleanup saw marks
Making pocket holes for mattress support bars after ripping to width from 1x4x8' pine
No glue mess


 Reply With Quote


 , and you did a super job on the construction. The ultimate consumer appears very "satisfied" with the arrangements!