Page 5 of 6 FirstFirst 123456 LastLast
Results 61 to 75 of 85

Thread: New Build - EVH Wolfgang

  1. #61
    Join Date
    Aug 2004
    Location
    Baltimore, Md
    Posts
    1,785
    Mark that router station and rub arm are GENIUS. I am so stealing that idea !


    As always looks AWESOME ! Can't wait to see it done.

    As an update I finished 7 of the 9 projects needing completion before beginning my '59. I will post some pics of it when I begin. Probably not as sexy as your construction but we'll see how it goes.


    You've certainly inspired me.
    "The element of competition has never worried me, because from the start, I suppose I realized wood contains so much inspiration and beauty and rhythm that if used properly it would result in an individual and unique object." - James Krenov


    What you do speaks so loud, I cannot hear what you say. -R. W. Emerson

  2. #62
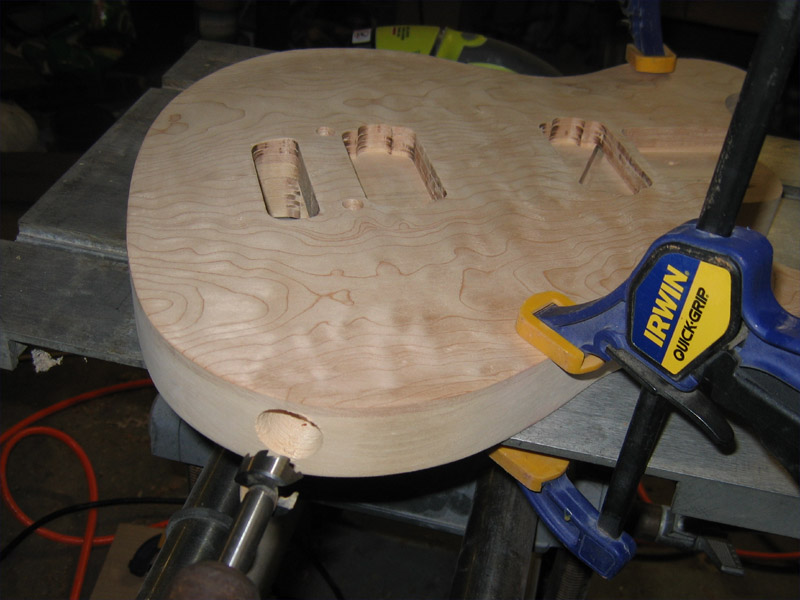
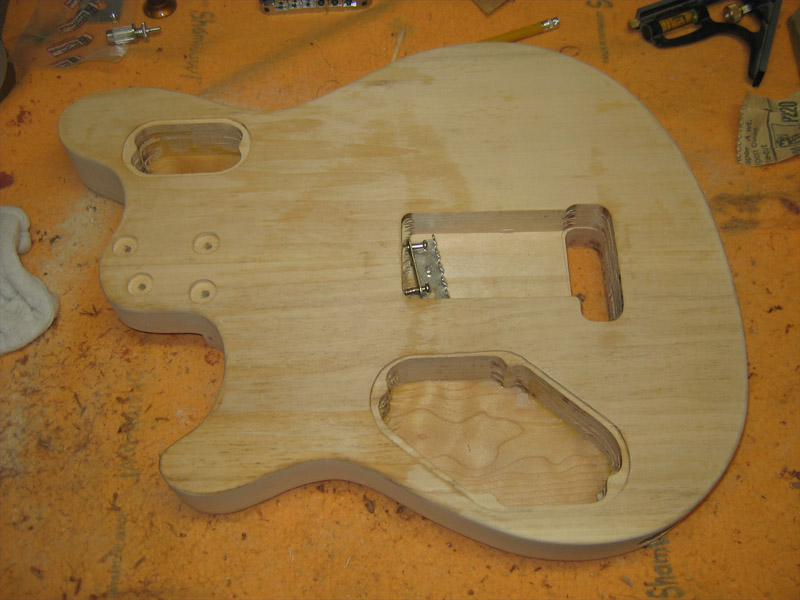
    The last bit of machining to do on this one is the output bore. Easy enough on my Shopsmith.


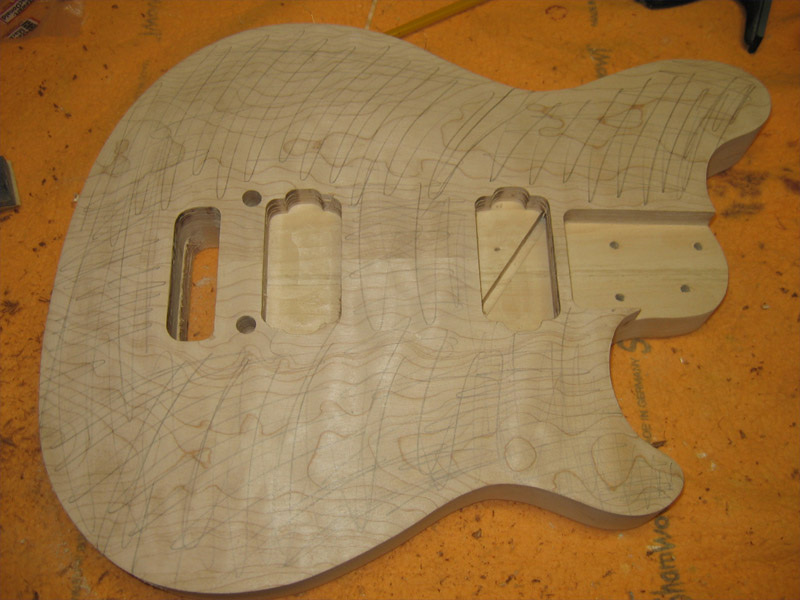
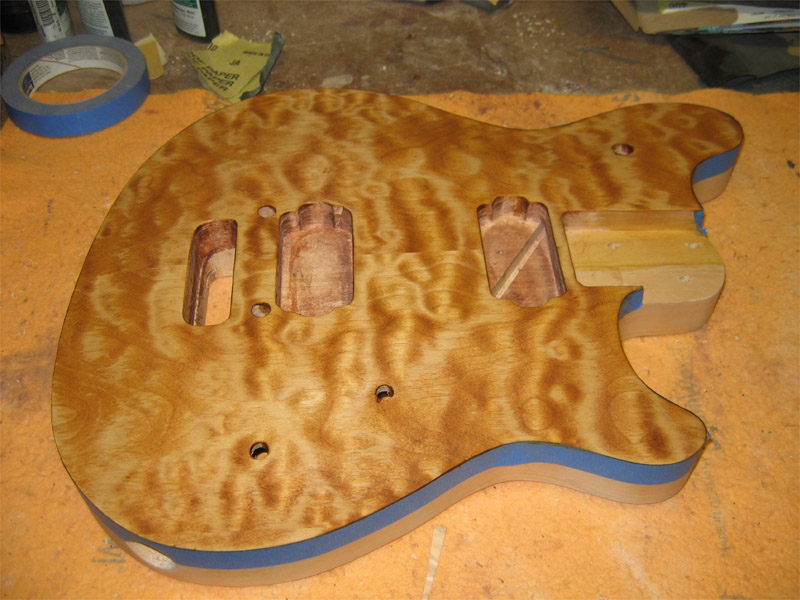
    I turned my attention to final blocking the top. I made very light pencil marks over the top before blocking with a stiff rubber block and 120 grit.


    After a quick blocking, there are still a few marks in the upper bout, the butt end and the upper horn...might not be able to see them in the pic.


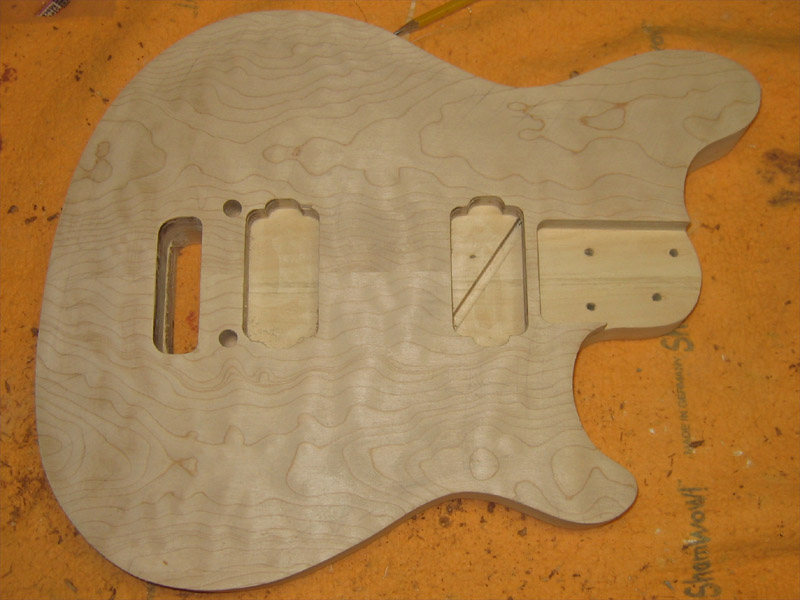
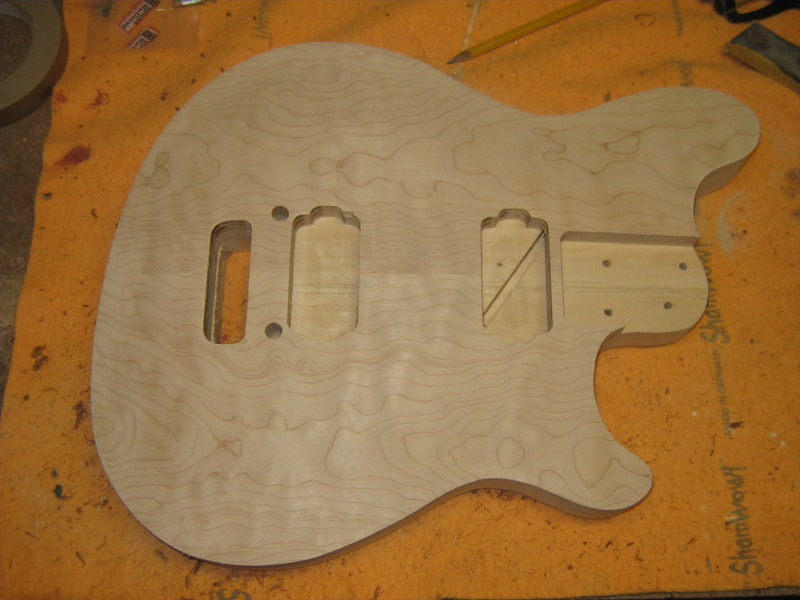
    A little more attention in those trouble spots with 120 then I blocked it with 220 grit. It's very close to being ready for finish.


    The back had a few dings and rubs from being moved around the shop. A hot iron and a damp rag took care of them. I'll have to set it a side to dry for a few hours before final sanding.

    "Thought that is no longer limited brings experience that is no longer limited" Marianne Williamson.

  3. #63
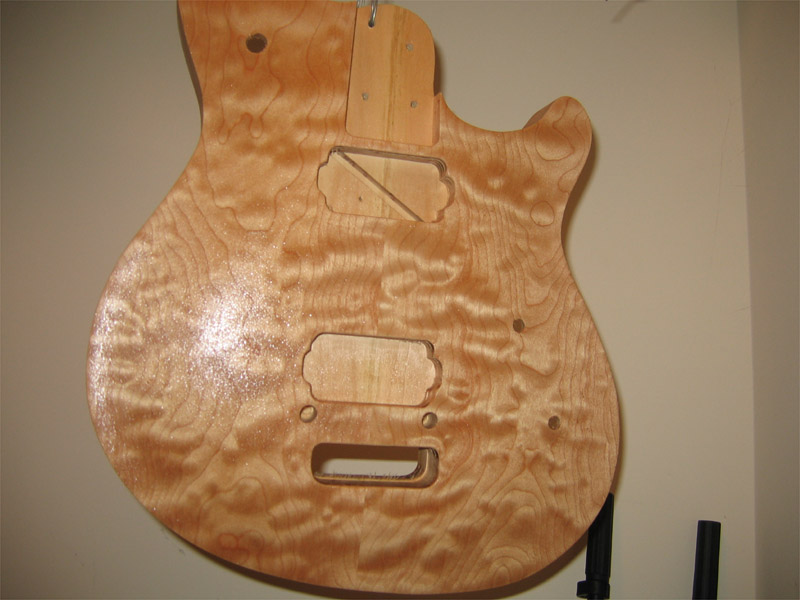
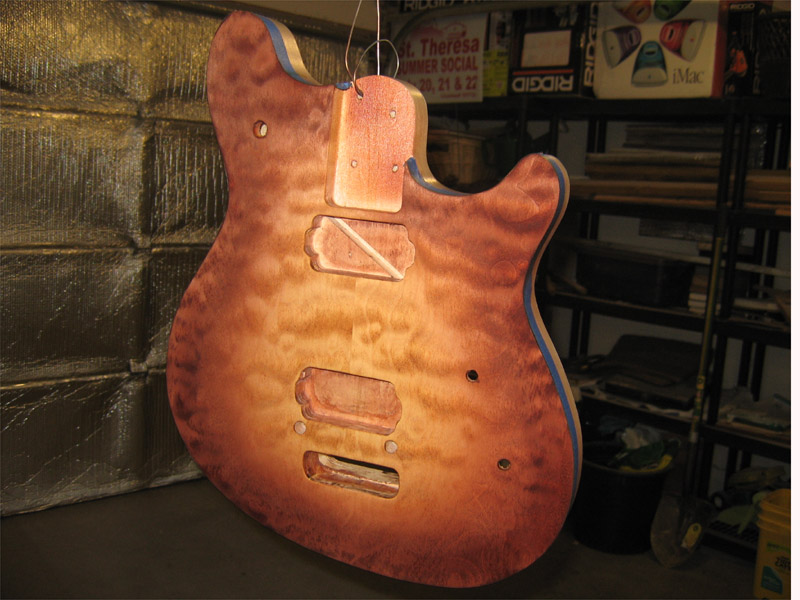
    I got going on the finish. I first started with a couple of coats of sealer. I was real curios to see what the figure would look like with just clear on it. It's nice but not deep enough.


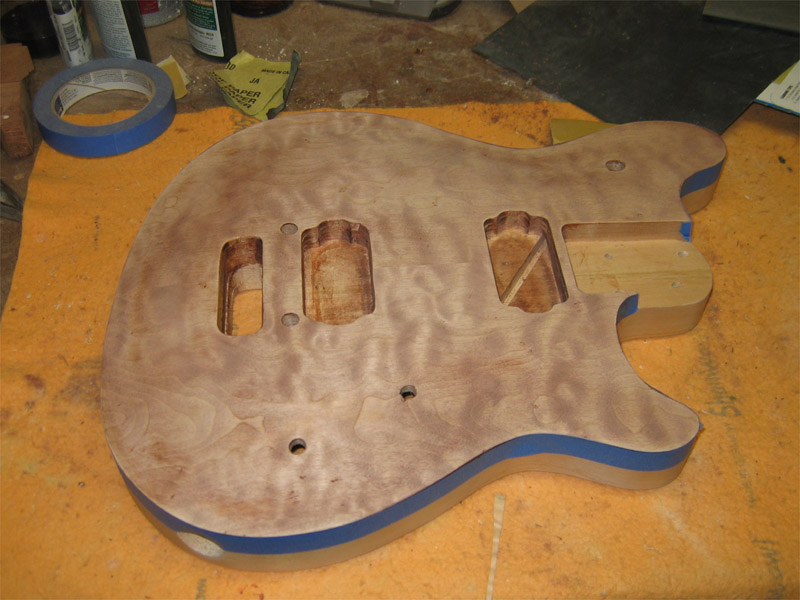
    So, I sanded it back and applied some brown mahogany TranTint dye in denatured alcohol (DA).


    Then sanded it back


    Here it is with honey amber TransTint applied...a much deeper look.


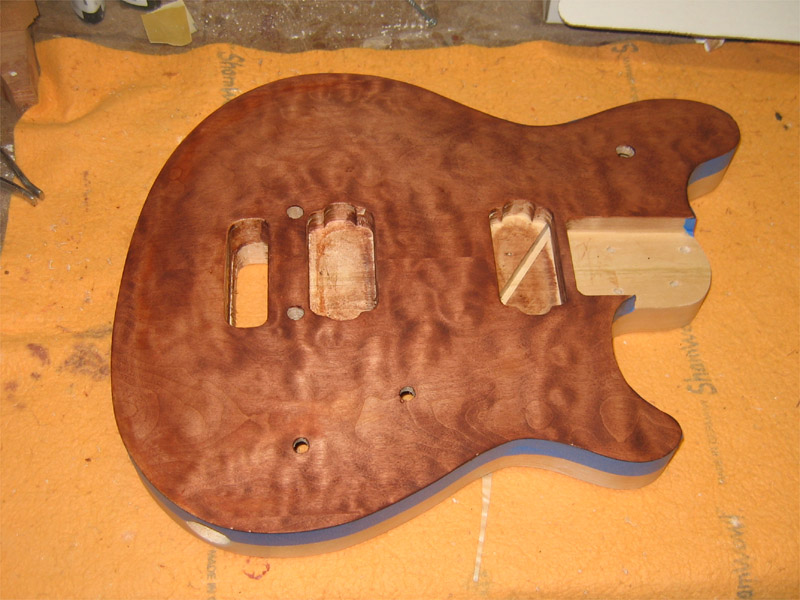
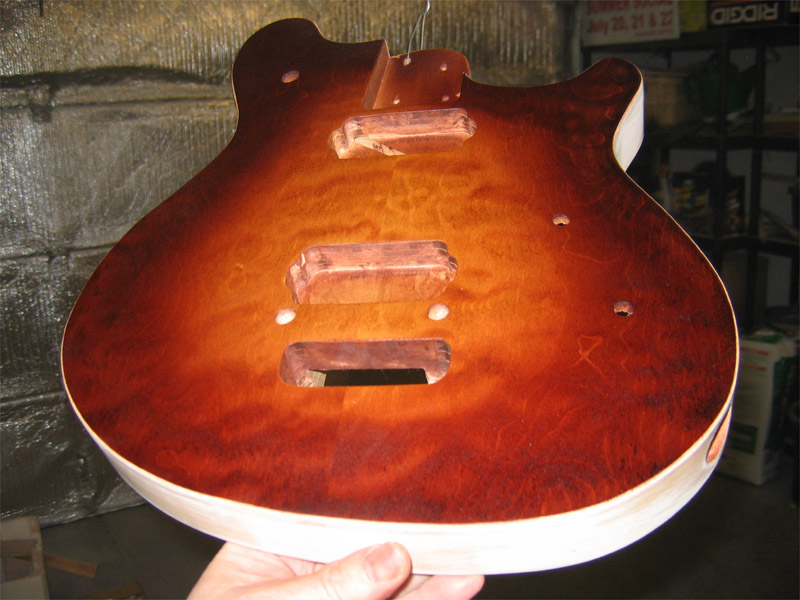
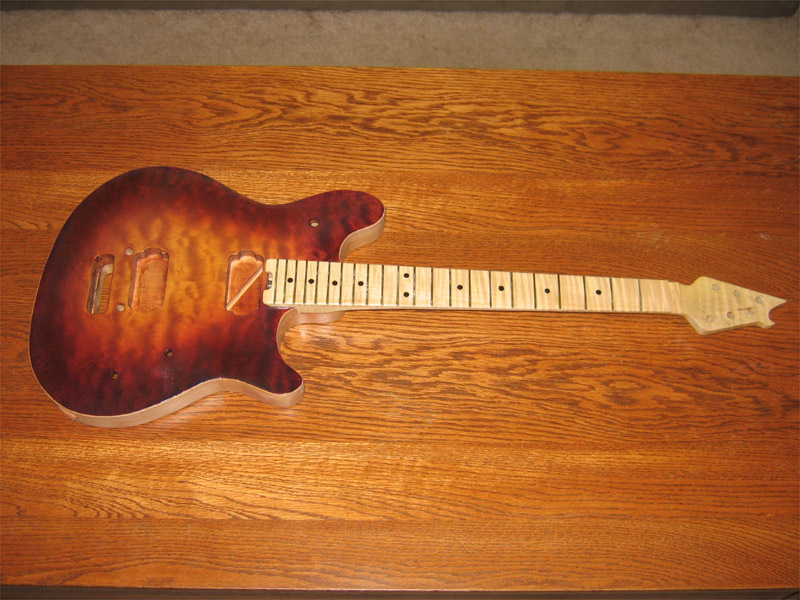
    This is the first step of the burst. I wanted something different. The bursts on the Wolfgang are very thin on the outer edge...I wanted more drama to draw the eye to the center of the guitar. More like the big bursts on semi-hollow bodies.

    After spraying 2 coats of sealer, and using brown mahogany with a touch or red TransTint dye in DA, I was able to spray the burst very quickly. The DA melts right into the sealer and instantly fixes the color. There's no need to let it flash between rounds on the burst. I sprayed this second dtage from start to finish without walking away from the guitar.

    "Thought that is no longer limited brings experience that is no longer limited" Marianne Williamson.

  4. #64
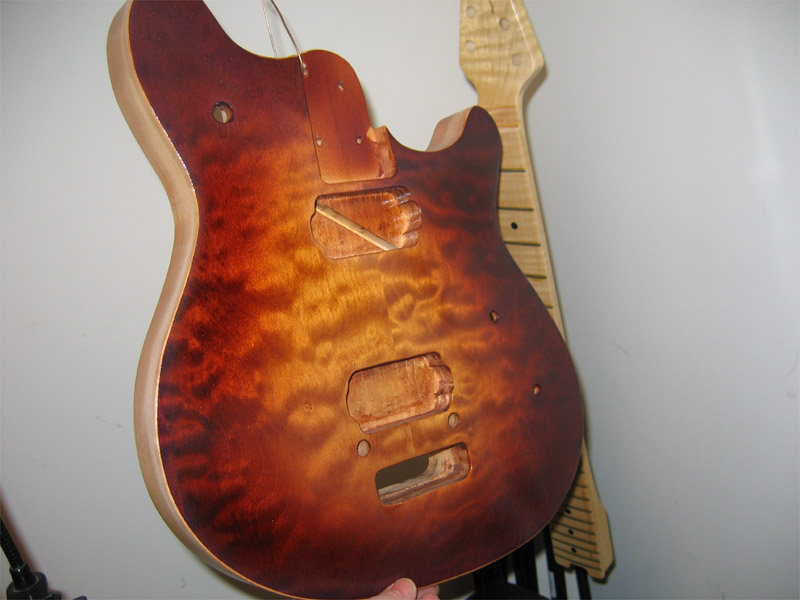
    Here I've added the third stage of the burst... a mix of brown mahogany with a touch of black TransTint around the very edge.


    I followed that with several coats of sealer with honey amber TransTint. This brought the grain back nicely. I also sprayed the honey amber mix on the neck to give the grain a bit of a pop.


    I'll get the sides and back done tonight hopefully.


    Peace,
    Mark
    "Thought that is no longer limited brings experience that is no longer limited" Marianne Williamson.

  5. #65
    AND ALL THAT ON A SHOPSMITH and a ROUTER! OH, and a planer... and some chisels!!

    WEll done.

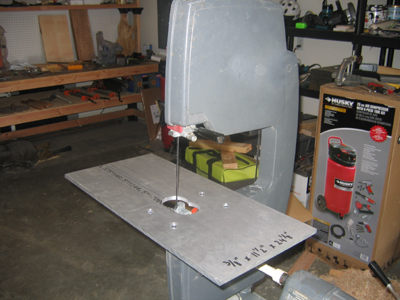
    1st - where did you get that table for your SS bandsaw? Nice and smooth!

    2nd - I bought some TransTints this past week! Let me say that I am SOLD on Dyes!!! Won't be looking at stains much anymore. I was trying to color a piece of maple black - after 3 coats of stain and a whole day lost, I still didn't have it. Bought some Generals Ebony DyeStain - 15 second and 1st try! Dang! My analogy is like using crayons as opposed to markers. Markers win. Color just soaked right in.

    In the TransTints, I also bough Honey Amber and Dark Walnut. Will you please devulge your formula for using Honey Amber. I created a 1/2 dixie cup of DNA and 8 drops of Honey Amber, and it was literally Lemon Yellow on the maple... Apparently I have some learning to do. What will I use it for - I saw you using it so I will try to study what you did.

    Maybe I should start a thread in the finishing section for this, so I don't hijack yours.

  6. #66
    Quote Originally Posted by Dennis Lopeman View Post
    AND ALL THAT ON A SHOPSMITH and a ROUTER! OH, and a planer... and some chisels!!

    WEll done.
    Hi Dennis. Thanks!

    1st - where did you get that table for your SS bandsaw? Nice and smooth!
    It's custom table I made to open up the resaw capability of the saw. It's made from 3/8" aluminum plate. The saw will now do 6.75" resaw vs the factory 6.00".


    You can see the whole process here...about 2/3 down the page.

    Band Saw Mods


    2nd - I bought some TransTints this past week! Let me say that I am SOLD on Dyes!!! Won't be looking at stains much anymore. I was trying to color a piece of maple black - after 3 coats of stain and a whole day lost, I still didn't have it. Bought some Generals Ebony DyeStain - 15 second and 1st try! Dang! My analogy is like using crayons as opposed to markers. Markers win. Color just soaked right in.
    Yeah, I've always had better luck with dyes. They tend to stay closer to the surface so you don't have absorbtion problems that can cause blotches on woods that don't take stain evenly.

    In the TransTints, I also bough Honey Amber and Dark Walnut. Will you please devulge your formula for using Honey Amber. I created a 1/2 dixie cup of DNA and 8 drops of Honey Amber, and it was literally Lemon Yellow on the maple... Apparently I have some learning to do. What will I use it for - I saw you using it so I will try to study what you did.
    I don't have a formula really. I just sort of wing it. The amber mix I used on this guitar was 1 ounce of DNA and about 8 drops of amber. The thing about dyes is they build color. The shot of the guitar after the amber had around 10 passes of dye on it. They seldom show full color with just a pass or two.
    Last edited by Mark Crenshaw; 05-10-2010 at 1:49 PM.
    "Thought that is no longer limited brings experience that is no longer limited" Marianne Williamson.

  7. #67
    WOW - Awesome - Thx for you SS webpage mods! You did it right - buying a used one... I suppose you sunk a little money in it, too, with the fixes and mods...

    One more question and I will stop hijacking your thread..

    What speed do you set the SS at to cut and drill ALuminum? Does the regular wood bandsaw blade cut it ok?

    ok - 2 questions!

  8. #68
    Quote Originally Posted by Dennis Lopeman View Post
    WOW - Awesome - Thx for you SS webpage mods! You did it right - buying a used one... I suppose you sunk a little money in it, too, with the fixes and mods...

    One more question and I will stop hijacking your thread..

    What speed do you set the SS at to cut and drill ALuminum? Does the regular wood bandsaw blade cut it ok?

    ok - 2 questions!
    No problem. I would keep it pretty slow around C or D setting for drilling. No higher than C for the bandsaw. I used a bi-metal hole saw and a fine toothed blade on the bandsaw. You can find the specs on the Shopsmith website...it's listed as the combination blade.

    Mark
    "Thought that is no longer limited brings experience that is no longer limited" Marianne Williamson.

  9. #69
    Join Date
    Mar 2003
    Location
    SE PA - Central Bucks County
    Posts
    65,901
    This gets an official "Oh MY!!!!" with that burst in the finish! Wowsa! This is going to end up being a real head-turning axe...and then you'll blow them away with what I anticipate will be an outstanding sound, too. LOL
    --

    The most expensive tool is the one you buy "cheaply" and often...

  10. #70
    Mark - you know what you need (if you don't already have)? Some Scrapers! I just got some last weekend at WoodCraft - like $15... they are really helpful. I've only used the rectangular one but it's great. There are some curved ones, too. I would think they would be a must for any carvers... and they're cheap! You could get crazy and spend $$$ on the upper end ones, but you seem like a MUAR kinda guy and I can certain get the most out of these!

    (MUAR = Maximum Use of Available Resources)

  11. #71
    Oh yeah - almost forgot you are a ShopSmith owner, too! Duh! You just showed me your SS refurb pages on your site!

    I had some time ago bought the Conical Sander "Disc" for the SS... well, let me say that thing ROCKS! Swirl free! It's a little tricky getting it perfectly square (they say 4 degree, mine was more 3 degrees). Anyway, once I was good to go, it did great. There were still some groove lines that look sort of like a belt sander line... but about 5 strokes of some 220 in my hand and they were gone! So - a worthy investment. I also use it to put an angled bevel on my box top. I suppose you would use a table saw, but then would have to sand out the blade marks.

  12. #72
    +1 on the more eye candy. It looks great. Did you have any problems with chipout while running it through the planer?

  13. #73
    Quote Originally Posted by Dennis Lopeman View Post
    Mark - you know what you need (if you don't already have)? Some Scrapers! I just got some last weekend at WoodCraft - like $15... they are really helpful. I've only used the rectangular one but it's great. There are some curved ones, too. I would think they would be a must for any carvers... and they're cheap! You could get crazy and spend $$$ on the upper end ones, but you seem like a MUAR kinda guy and I can certain get the most out of these!

    (MUAR = Maximum Use of Available Resources)
    Hi Dennis. I use a french curve scraper that I've had for a year or so...it's part of my regular tool set for carving. I do need to get some flat ones for the neck and fretboard though.

    Peace,
    Mark
    "Thought that is no longer limited brings experience that is no longer limited" Marianne Williamson.

  14. #74
    Quote Originally Posted by Dennis Lopeman View Post
    Oh yeah - almost forgot you are a ShopSmith owner, too! Duh! You just showed me your SS refurb pages on your site!

    I had some time ago bought the Conical Sander "Disc" for the SS... well, let me say that thing ROCKS! Swirl free! It's a little tricky getting it perfectly square (they say 4 degree, mine was more 3 degrees). Anyway, once I was good to go, it did great. There were still some groove lines that look sort of like a belt sander line... but about 5 strokes of some 220 in my hand and they were gone! So - a worthy investment. I also use it to put an angled bevel on my box top. I suppose you would use a table saw, but then would have to sand out the blade marks.
    I haven't had need for a disc sander...the one that came with my Shopsmith is still sitting in the plastic tub it arrived in. I could see using it if I was doing more joints and miters. Probably won't spend the money on a conical until I need it though.

    Peace,
    Mark
    "Thought that is no longer limited brings experience that is no longer limited" Marianne Williamson.

  15. #75
    Quote Originally Posted by Mark Tokheim View Post
    +1 on the more eye candy. It looks great. Did you have any problems with chipout while running it through the planer?
    Hey Mark. Thanks!

    I had problems with the first quilted maple top I did. But I learned from that one and this one went much smoother.

    I try to go very easy with figured maple in general and quilted especially. I try to determine the grain direction and send the board in so the knives "lay it down" as they pass over. If I can't do this visually, I take a couple of very light test passes to examine the cut before I do any real planing. It usually "fuzzes" the surface enough to show me the grain direction...which I then mark on the edge of the board.

    Peace,
    Mark
    "Thought that is no longer limited brings experience that is no longer limited" Marianne Williamson.

Posting Permissions

  • You may not post new threads
  • You may not post replies
  • You may not post attachments
  • You may not edit your posts
  •