Results 1 to 9 of 9

Thread: Simple Crochet Lamp Table...

  1. #1
    Join Date
    Dec 2006
    Location
    Atlanta , Ga.
    Posts
    3,970

    Simple Crochet Lamp Table...

    My wife was working off a tiny table which in essence is her multi-purpose work-bench. Her chair sits at a diagonal to a fire-place hearth which leaves a gap for the table of a osoceles trapezoid. The table must have light.. room for a box of tissues.. letters for bills to be paid and mailed.. a portable phone.. TV changers.. crochet needles and of course a cup of coffee. Doesn't leave much space.

    Her table runneth over to say the least as evidenced in the first picture of the one that is being replaced. A faulty move and the tissue box and letters end up on the floor which I have seen happen many times. So... how to use the limited space to gain a few more square inches in an attempt to serve all her needs in such a limited and odd shaped area?

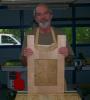
    QSWO... quad-linear legs with QS fleck on all four sides.. ebony pins in bottom shelves to pin non through tenons. The bottom shelves and legs are made of left overs that I culled in other projects. The top is primo I selected as when the bottom shelves are full of pattern books on the bottom and scans of yarn in the middle little will be seen of the bottom. I kept the base retangular but did an osoceles trapezoid on the top to gain a few square inches.

    A plain straight-forward design as I wanted to keep it simple as the majority will be covered as it see's heavy use. I made a few do-dads for the TV changer thingy's and letters to avoid the many spills that have happened. There is a drop hole to make sure the tissue box doesn't slide off again. Not a difficult or fancy build but.. one that was well needed. Very well needed IMO.....
    Attached Images Attached Images
    Sarge..

    Woodworkers' Guild of Georgia
    Laissez Les Bons Temps Rouler

  2. #2
    Join Date
    Jan 2006
    Location
    Mt. Pleasant, MI
    Posts
    2,924
    I do so like QSWO.

    All my furniture projects are likely to be from that from here out. Beautiful and generally easy to work with.

    Nice job indeed.

    Joe
    JC Custom WoodWorks

    For best results, try not to do anything stupid.

    "So this is how liberty dies...with thunderous applause." - Padmé Amidala "Star Wars III: The Revenge of the Sith"

  3. #3
    Join Date
    Jun 2004
    Location
    KC, MO
    Posts
    2,041
    Nice tight joinery and some beautiful QSWO makes for beautiful table - love those ebony pins too!

  4. #4
    Join Date
    May 2004
    Location
    Tyler, Texas
    Posts
    2,041
    Nice table, John. To quote Frank Lloyd Wright, "form and function are one." You represented both very well with the table.
    Cody


    Logmaster LM-1 sawmill, 30 hp Kioti tractor w/ FEL, Stihl 290 chainsaw, 300 bf cap. Solar Kiln

  5. #5
    Join Date
    Mar 2005
    Location
    New Lenox, Illinois
    Posts
    709
    John,

    Very nice design!!! I need one just like it. How did you finsh the piece? I like the color and how you popped the ray flakes.
    If you can't fix it with a hammer, you have an electrical problem.

  6. #6
    Join Date
    Dec 2006
    Location
    Atlanta , Ga.
    Posts
    3,970
    Thanks Joe.. Roy.. Cody and Ken....

    Joe.. correct on easy to work.. you don't have to spend a lot of time in pursuit of grain match.. very stable after glue ups and white oak takes stain as well as anything I've found.

    Ken.. my finish schedule is really pretty simple as QSWO makes it so by taking stain so well. On this one I wanted to go a shade darker than the computer desk-hutch.. printer-shredder table and fish tank table I just finished for the computer room.

    I used Mini-wax mahogany on it to match a mission coffee table I did a couple of years ago in our TV room. I still have a flat screen TV stand due up next and it will get the same finish. Simply added and wiped off the gel stain.. waited to gas off.. a coat of 70% pure-30% satin poly wiped. Very light sand with 1000 Abra-lon to take off nibs.. then 3 coats of the same cut to 50%-50% with same very light sand between coats 2-3 and skipping on the final coat.

    Waited two weeks for the finish to gas off and cure.. then waxed with 0000 Liberon steel wool and Liberon Black Bison Medium Oak wax which waxes and rubs out all in one step. Allow the wax to harden for a week and ready for use. So.. nothing special to get the fleck to pop as strong fleck has a mind of it's own as long as you don't basically coat it so dark it has trouble seeking the surface.

    At one time I hated poly but found the key is to fill with a cut but heavier coat and then add very diluted layers but not too many or you get the plastic look. Once the pores are filled and nibbed off. the remaining coats simply fill anything left and the top coat can be very thin. Being patient and allowing to fully cure before waxing I think is critical as my coffee table takes heavy abuse from neieces.. nephews and not a scratch or water mark. Water is another arena while oak excels in...

    Again.. thanks guys!
    Sarge..

    Woodworkers' Guild of Georgia
    Laissez Les Bons Temps Rouler

  7. #7
    Join Date
    Mar 2007
    Location
    Stony Plain, Alberta
    Posts
    2,702
    Sweet little table John. It's right up my alley with the QSWO.
    Nice clean simple design with tight joinery.
    Doesn't get much better than that to me..

  8. #8
    Classic Sarge quality in design, well conceived, and well executed!! You get big brownie points for this one, and maybe the wife will let you take it easy for a couple of days!

    As always, the quad legs are a very nice touch on your work.

  9. #9
    Join Date
    Dec 2006
    Location
    Atlanta , Ga.
    Posts
    3,970
    Thanks Gary and John...

    Well John... a few days off consist to prepping the yard as "spring has sprung" in Georgia. The pollen has been increasing but it is getting ready to fully unload with a vengeance with several days of mid 80 temps. I have already gotten the fallen sticks from limbs up and the dang sweet-gum balls are all gone at this point. The back already needs cutting and that gets done today.

    Dropped some tomato plants down yesterday and am going to try something I was told that frankly surprised me personally. I planted two of them directly in a bale of wheat straw. Sounds weird to this ole boy but I know a retired guy who does 200 bales with tomato plants a year for re-sale. He gets excellent tomatoes and yeilds out of those wheat straw bales. He gave me his fertilizing formula so what's the risk?

    Wheat straw bales.. never heard of it before... Go figure!
    Sarge..

    Woodworkers' Guild of Georgia
    Laissez Les Bons Temps Rouler

Posting Permissions

  • You may not post new threads
  • You may not post replies
  • You may not post attachments
  • You may not edit your posts
  •