Results 1 to 12 of 12

Thread: Making a through-mortice

  1. #1
    Join Date
    Dec 2008
    Location
    Lititz, PA
    Posts
    208

    Making a through-mortice

    I have a two-part question I was hoping some of you may be able to help with.

    First off, I'm not a true neander - my apologies upfront - I dimension by machine and finish with planes.

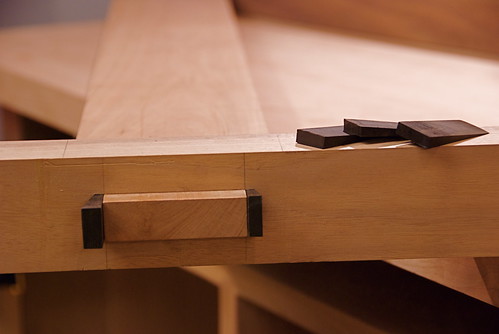
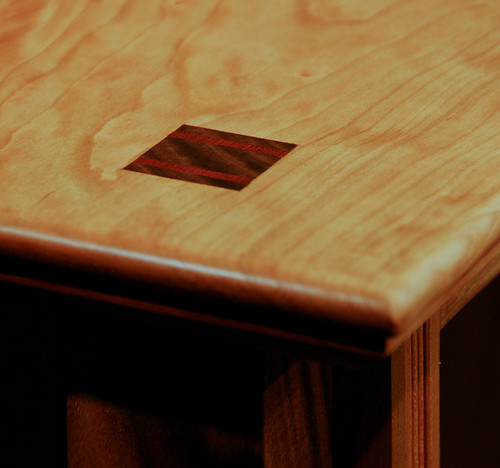
    So, I'm making a set of Krenov sawhorses and am cutting wedged through mortices on the sides. (My first time on this joint as I'm a newbie.)

    Question 1) What is the best way to chisel through? Just keep chiseling away at it? Is there a method I'm missing? I'm using the same technique I would on a normal mortice...chisel down in a bit, working close and moving away, come back through and "pare" away the chips. I'm probably not describing very well, but I've seen this technique suggested by Becksvoort (sp?).

    Question 2) My LN 3/8" mortice chisel has now suffered a couple chipped edges from hammering in and prying a bit back and forth. Is this normal? Kind of annoying to have to stop and sharpen back past the chipped edge...maybe this is just how it goes.

    Any input from the wise sages of the creek is much appreciated! Thanks!

  2. #2
    You're probably light years ahead of me in the Neander world, but here's my 2cents:

    You shouldn't have to do much 'prying'. A sharp chisel should be able to slice sides and bottoms without much effort.

    I reserve hogging for a drill bit - in your case, you can use a bit brace to do it, no?

  3. #3
    Join Date
    Sep 2007
    Location
    Longview WA
    Posts
    27,488
    Blog Entries
    1
    If the joint is marked out carefully, you should be able to cut a little from one side and then finish from the other to avoid blow outs.

    If the chisel is new, you may have to sharpen a few times to get to the "good steel."

    I have a 3/8" James Swan that was this way for the first few sharpenings.

    It could also be technique. As Shawn said, when the chisel is whacked, the chips pretty much break loose. There shouldn't be much need to do a lot of levering.

    jim
    "A pessimist sees the difficulty in every opportunity; an optimist sees the opportunity in every difficulty."
    - Sir Winston Churchill (1874-1965)

  4. #4
    if i were doing this i would mark out the mortise with a mortising gauge on both sides of the joint (making sure to reference off of the same face) and if it were me i would drill out the waste from both sides (maybe even on my drill press...sorry guys) then clean up the joint with a chisel.

    i can't speak to the chipping issue...

    good luck, i am about to make myself a pair of those as well.

    cheers,
    m

  5. #5
    Join Date
    Nov 2009
    Location
    Ellsworth, Maine
    Posts
    1,810
    if i were doing this i would mark out the mortise with a mortising gauge on both sides of the joint (making sure to reference off of the same face)
    I would absolutely mark the mortise on both sides. And you def do NOT want to chop all the way through the mortise from the one side. I would go just a tad over half way through on one side and then attack from the other side. This will prevent any blow out caused from breaking through the outside of the wood from the inside, not good practise. And you def want to mark the mortise with a knife or marking gauge with a decent cutting tip on it to also help break out.

    I agree also that you shouldn't need to pry the chips out especialy on a through mortise. Keep chopping from different angles and this will knock the chips loose. There is no bottom to the mortise therefore no need to pry for a flat bottom. Even then you shouldn't have to pry so much to chip the edges of your chisel. Good luck and keep at it as this is a good little project to get you familiar with some simple but common joinery.

  6. #6
    I'll throw a couple cents worth in here. As others have said, chopping halfway and then coming from the other side is the way to go. I'll add that you want to start with the joint side, finishing up from the 'through' side as that's the side you need to worry about the most when it comes to keeping the edges crisp.

    I'll also suggest avoiding drilling out mortises. In my opinion, with the exception of very large mortises (eg - a workbench leg) drilling in advance makes it more difficult to chop the mortise cleanly and squarely. The flat sides of the mortising chisel are there for a reason and trying to navigate a bunch of round holes in what you want to become a square hole is counter-productive.

    As others have said, you shouldn't need to apply a lot of levering pressure and I suspect that any chipping is occurring when you're pounding in any case. As Jim said, sometimes a new chisel will chip on you as the basic grind seems to soften the edge metal.

    Cheers --- Larry

  7. #7
    My 2 cents also: The "show" side of the mortise is, as Larry said, the one you have to worry about. Even though the wedged tenon will spread out, that side has to be cut with the greatest "crispness" you can muster. It only works for me if I draw the outline with deep and very clean cuts. Cutting sharp lines along the grain can be almost impossible, depending on the wood. Looking back on my work, I've confined this joint to poplar, maple, and cherry for that very reason.

  8. #8
    Join Date
    Mar 2009
    Location
    Chevy Chase, Maryland
    Posts
    2,484
    Everyone else has pretty well covered it, but I would add, that not only is the show side the main part to take extra time on, if you are wedging, the ends of the show side are forgiving as the wedge compresses the tenon into any slight imperfections. So bottom line, pay most attenttion to getting the long edges of the show side right. And ALWAYS pare your tenon to fit your mortise, and not vice versa.


    A pics from fitting the wedges - I put them in kerfs, but in this shot was just sizing them by testing them on the ends.

    Here's another through tenon I did where the walnut legs came through the table top and are wedged with bloodwood:


    Non-woodworkers always think it's inlay!

  9. #9
    Join Date
    Dec 2008
    Location
    Lititz, PA
    Posts
    208
    Thanks, guys. All very good information. I had been using the doweling jig drill method on standard (not through) mortices i've done in the past and that seemed to work out fairly well. This is where I picked up Becksvoort's (I think it was him) method of drilling then prying with the chisel to clean up and square the sides. It worked fairly well.

    On the through-mortices I was chiseling all the way through. I placed a scrap piece below my work piece in attempt to keep it from blowing out. I seemed to work out okay, but not great. I'll definately be marking from both sides in the future and going half way from each side.

    I would have drilled out most of the waste, but I don't have a drill-press and the board is too wide for my doweling jig option.

    Hopefully I'll get into the "good" metal on my chisel soon - its been used a few time before, so it hasn't been through more than a dozen honings at this point. I was all ready to use this as an excuse to buy a japanese mortice chisel - I still might.


    Sean: Beautiful pictures - light years ahead of my current skill-set and ability! That's a nice wedged joint. For my sawhorses, I'm using the style that is in your table-top. I made one saw curf and then drilled a pilot hole at the bottom of the curf to keep the piece from splitting - only wish i had remembered that first before i put a hairline crack in one of the cross-members. Oh well, some glue and a clamp and the crack went away.
    Last edited by JohnMorgan of Lititz; 04-27-2010 at 10:01 AM.

  10. #10
    Join Date
    Feb 2004
    Location
    Marietta GA
    Posts
    1,120

    Be sure to check...

    Hello John,

    Be sure to check the mortice chisel angel is set to the correct amount for the exact material you are cutting. I think the LN's come at 30 degrees and you should have a 35 degree micro bevel.

    The rule I follow is via a comment made by David Charlesworth in his chisel sharpening video.

    If you are chopping and getting a turned edge or chipping, then the angle of the chisel is not steep enough for the material you are working with.

    I think ebony and possibly cocobolo would require a 40 to 45 degree angle to last through a through mortice cutting. I usually use my drill press and an end mill for such wood.

    Purple heart may need the same as will lignum viate.

    But for red oak, poplar, cherry, ash type hardwoods the 35 degree micro bevel should do the trick.

    I highly recommend not to use any chisel for much prying strokes. I use japanese bottom chisels for that. A good mortice chisel will let you get away with more levering strokes but it's better to use the tool just for chopping. IMO.

    Good luck !

  11. #11
    Join Date
    Dec 2008
    Location
    Lititz, PA
    Posts
    208
    Good info. Thanks! I had thought about that - I was morticing through Ash, so not really too soft. I think I will re-hone at 35*.


    Quote Originally Posted by Terry Beadle View Post
    Hello John,

    Be sure to check the mortice chisel angel is set to the correct amount for the exact material you are cutting. I think the LN's come at 30 degrees and you should have a 35 degree micro bevel.

    The rule I follow is via a comment made by David Charlesworth in his chisel sharpening video.

    If you are chopping and getting a turned edge or chipping, then the angle of the chisel is not steep enough for the material you are working with.

    I think ebony and possibly cocobolo would require a 40 to 45 degree angle to last through a through mortice cutting. I usually use my drill press and an end mill for such wood.

    Purple heart may need the same as will lignum viate.

    But for red oak, poplar, cherry, ash type hardwoods the 35 degree micro bevel should do the trick.

    I highly recommend not to use any chisel for much prying strokes. I use japanese bottom chisels for that. A good mortice chisel will let you get away with more levering strokes but it's better to use the tool just for chopping. IMO.

    Good luck !

  12. #12

    technique

    Look at Bob's site:

    http://logancabinetshoppe.weebly.com...le-part-3.html

    He gives an excellent demo on mortise chopping. Do it from both sides and you get a through mortise.

    My tip: try to make perfect V chips. If the second chisel placement is too far away from the first one, or too perpendicular, you won't meet the bottom of that first chop. You won't cut that perfect V chip that almost pops right out. So then you have to pry with real force. No fun. Too close or too low an angle and you lose efficiency.

    You could do the math to find angle and distance options. But you'll see it faster with a chisel in your hand. And those mortises aren't going to chop themselves.

    Disclaimer: This is my first contribution. I really don't know what I'm talking about. Stick with Bob and the rest. They know lots.

Posting Permissions

  • You may not post new threads
  • You may not post replies
  • You may not post attachments
  • You may not edit your posts
  •